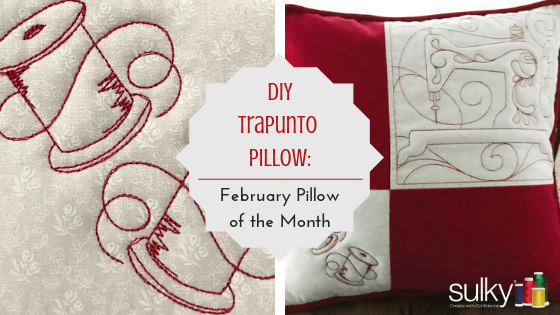
Pillow of the Month: How to Make a Trapunto Pillow
Pillow of the Month: Trapunto Pillow
by Pamela Cox
Continuing on our Pillow of the Month series, we’ll learn how to make a trapunto pillow using two methods. Trapunto is a hand-stitching technique in which designated areas within an embroidered pattern are stuffed, producing raised areas.
The Trapunto effect is easily mimicked using an embroidery machine. Special collections digitized to copy a Trapunto 3-D effect are available on many embroidery sites. However, when learning how to make a Trapunto pillow, you may be surprised to find suitable designs already in your personal design library.
Line designs, especially those with large open spaces, work well imitating Trapunto when stitched over a layer of batting.
Line designs that first outline the principal element in the overall design produce more of a traditional Trapunto effect by focusing your attention on that specific area.
Let’s begin stitching to find out how to make a trapunto pillow using two techniques to discover your preferred method.
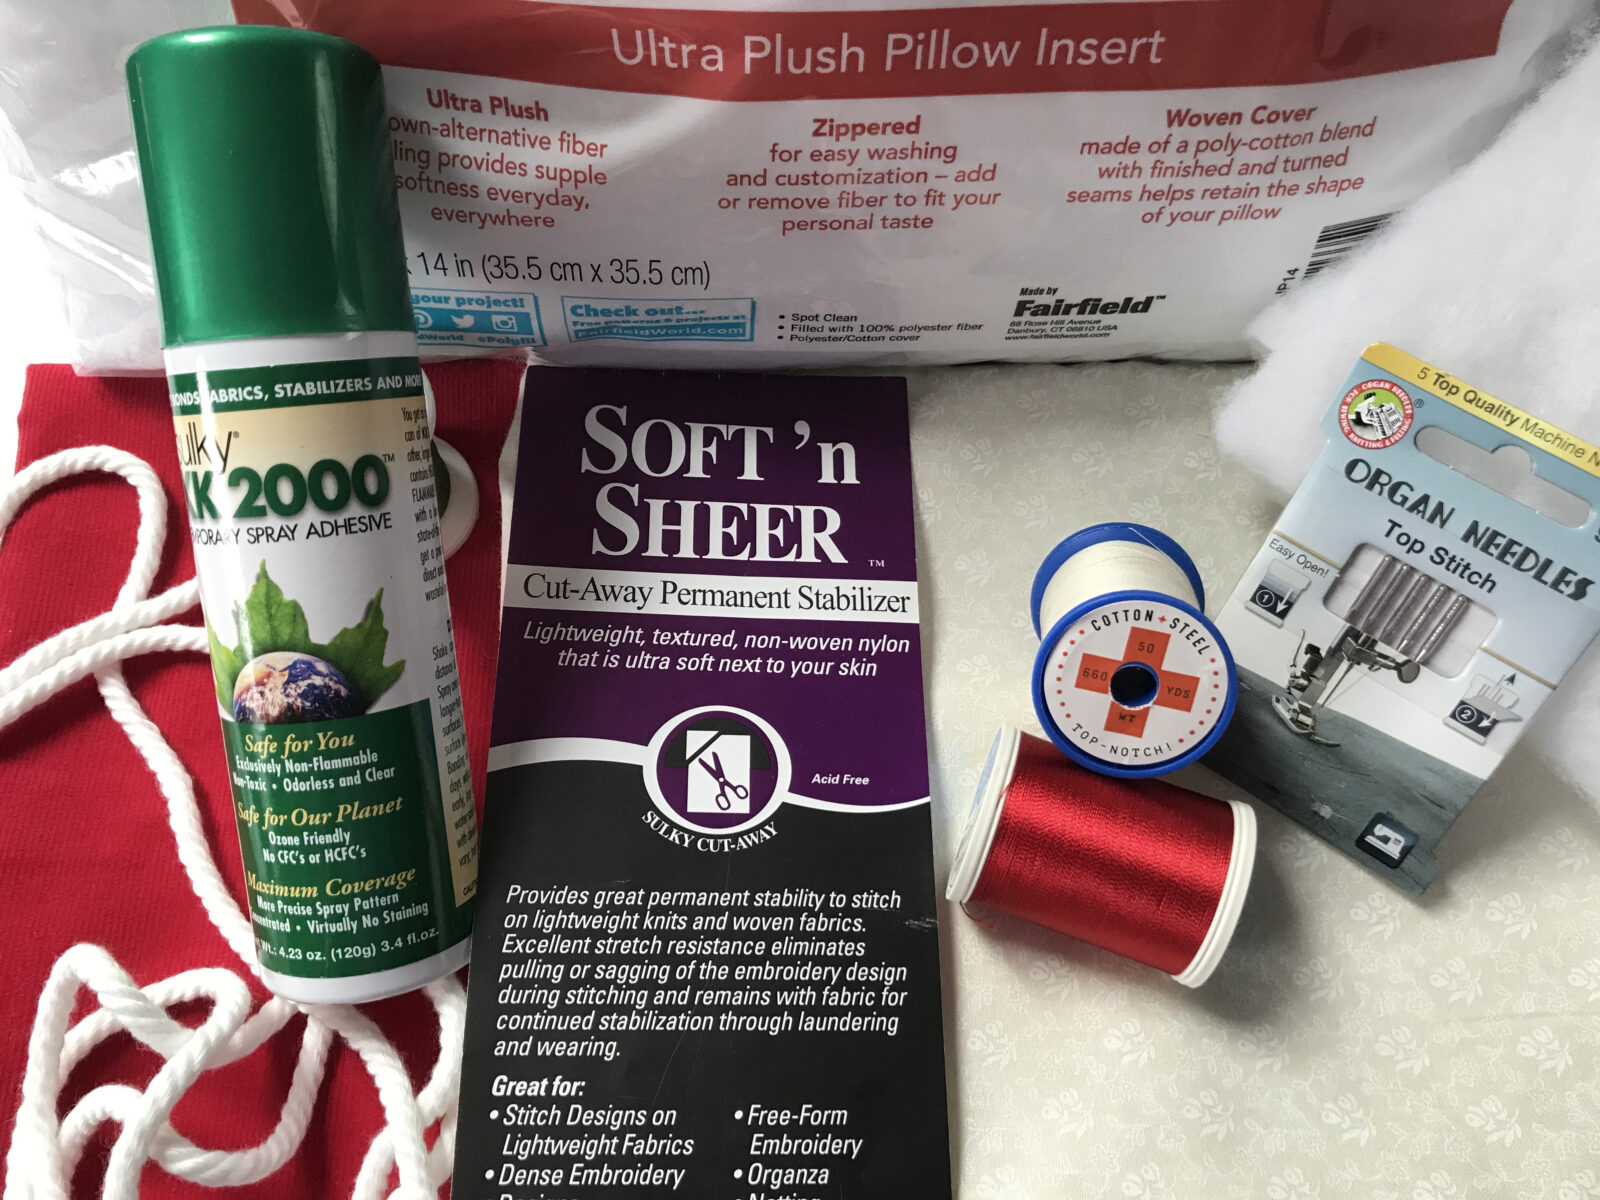
Supplies:
Sulky® Thread:
40 wt. Rayon – embroidery
PolyLite™ (a 60 wt. polyester thread) – bobbin to match top thread
Cotton + Steel (a 50 wt. cotton thread) – construction
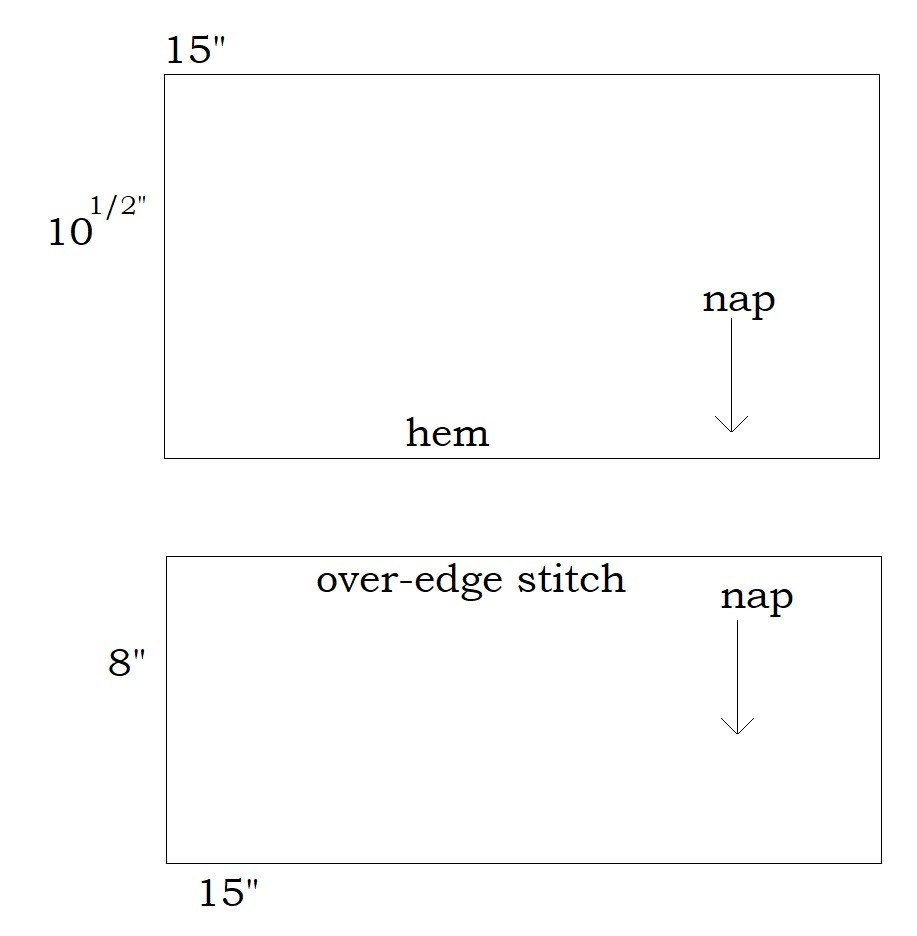
Sulky Soft ’n Sheer™ Stabilizer
Sulky KK 2000™ Temporary Spray Adhesive
¾ yd Pinwale Corduroy – pillow & piping
Cotton Fat Quarter – white on white print for embroidery squares
3 – 8¾” squares of Polyester batting
2 yd ¼” cording
14” square Pillow Form
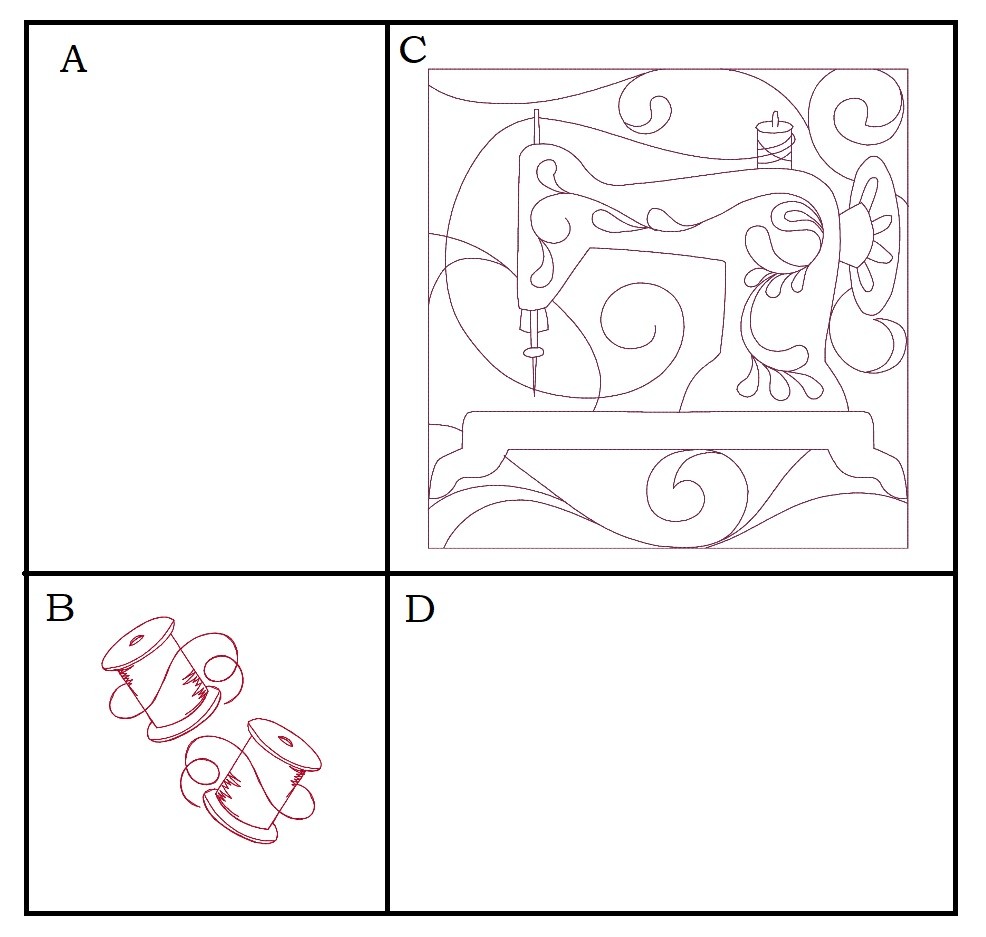
Embroidery Library Designs: M17738 and E6344 – available at www.emblibrary.com
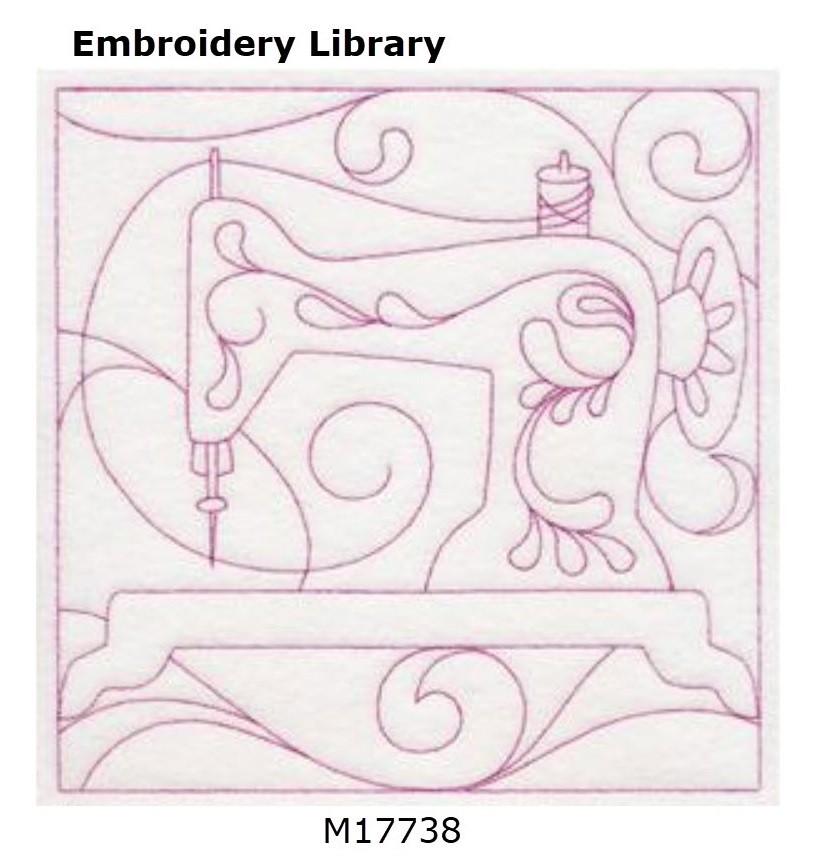
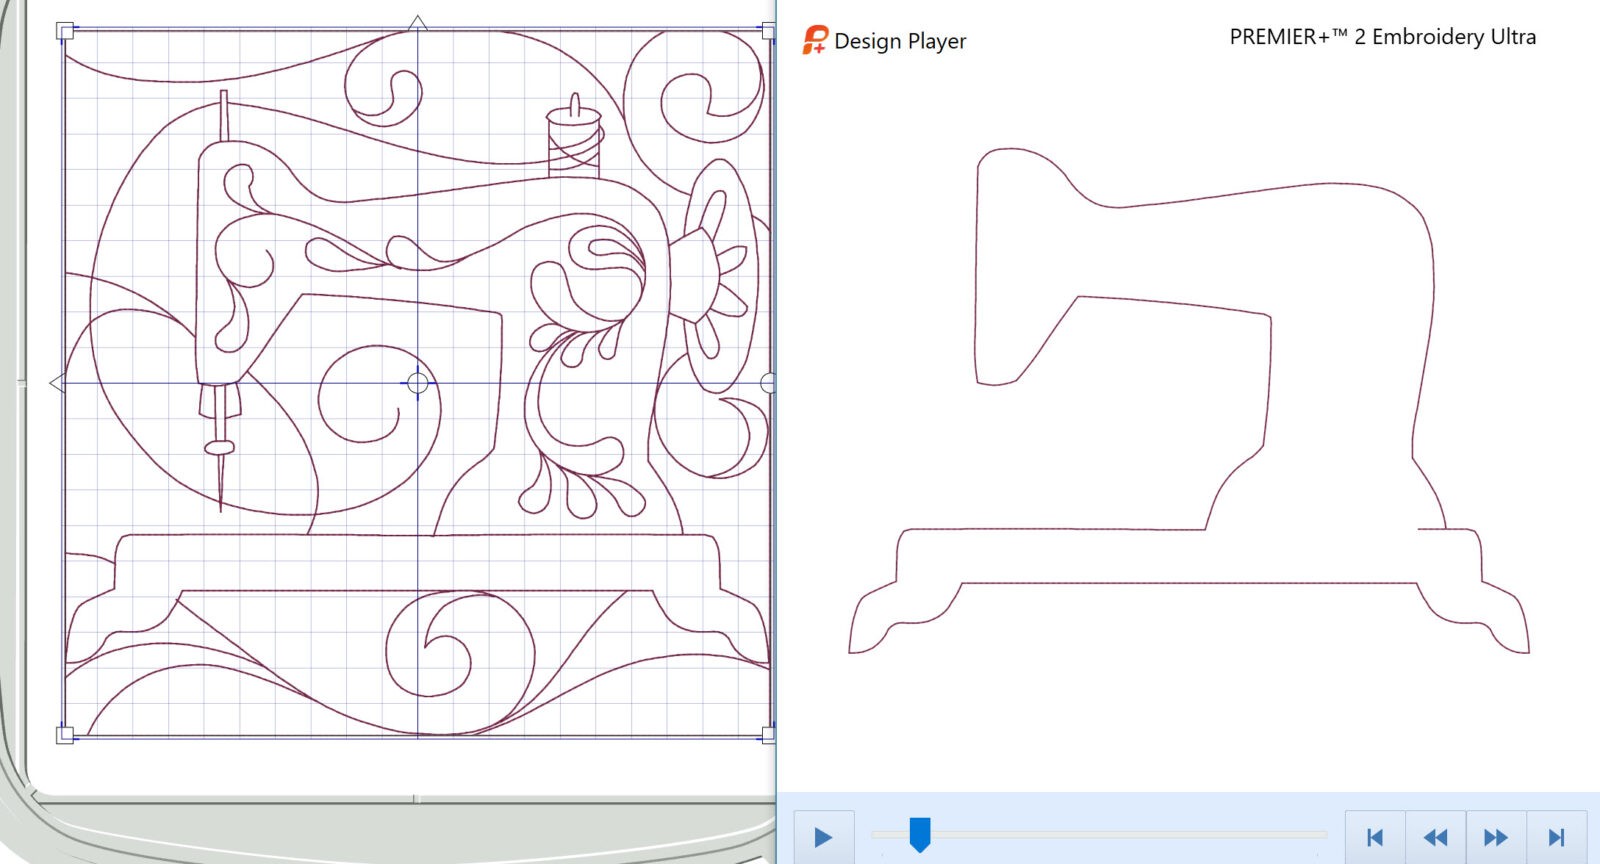
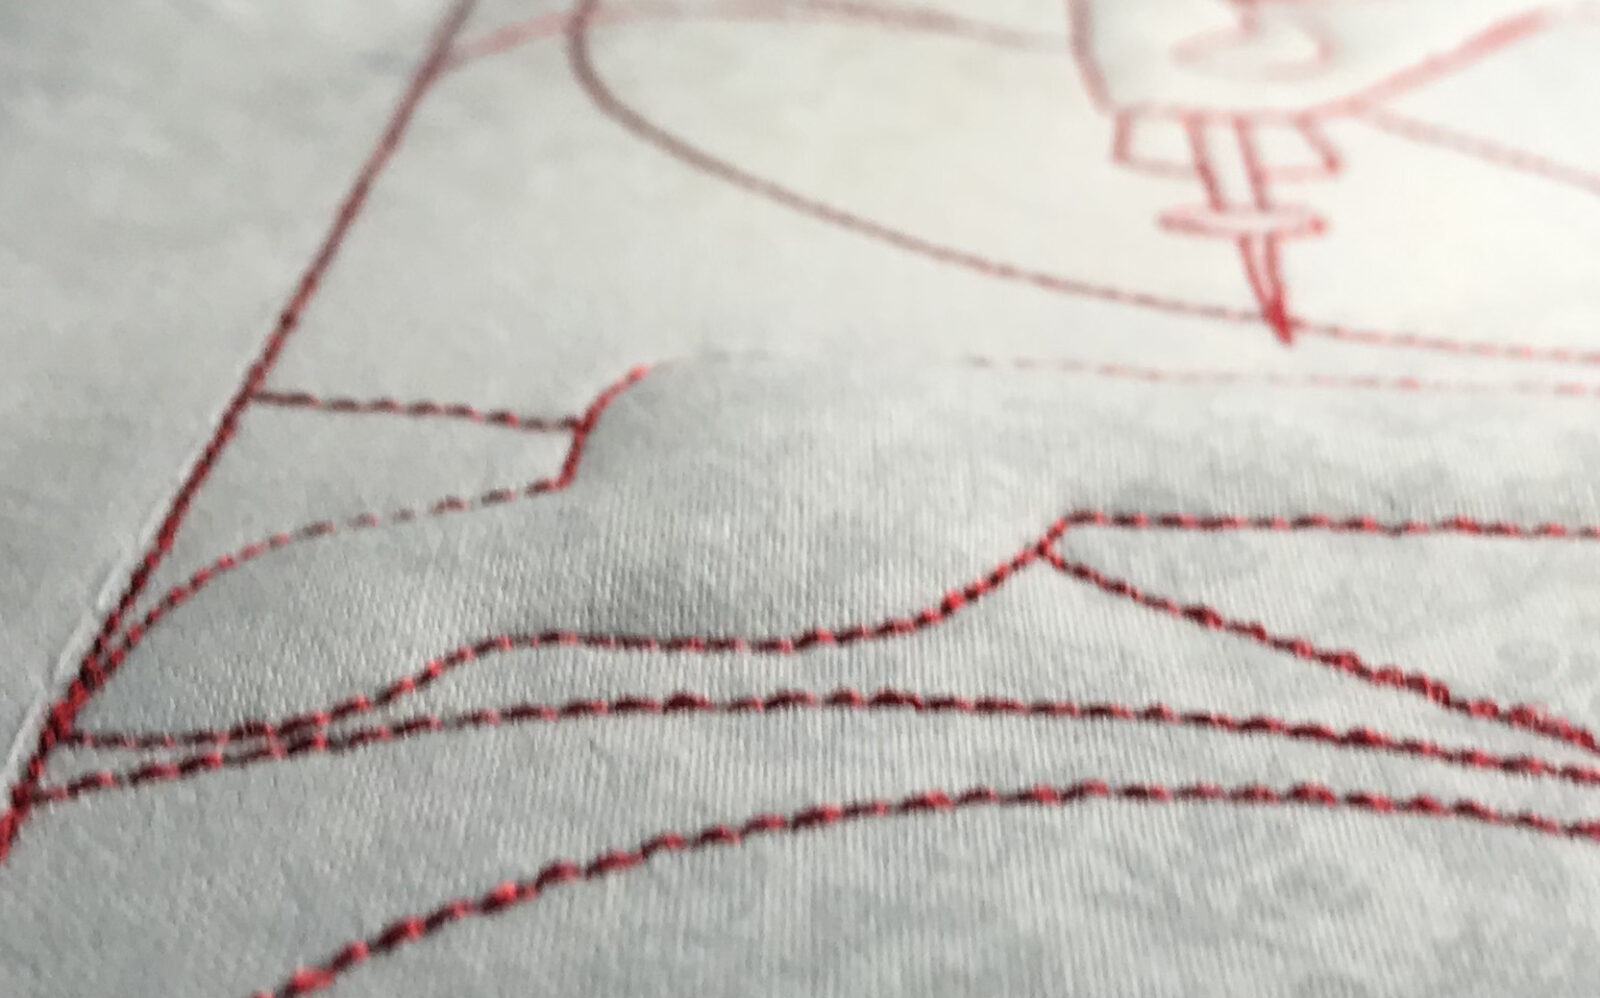
My software editing program indicated the outline of the sewing machine stitched first followed by all the flourishes.
Embroider these stitches first on just the batting so you can stop the machine, trim the excess batting beyond the stitches and create a “stuffed area.”
Step 1: How to Make a Trapunto Pillow: Large Block
Cut an 11” square from the cotton fat quarter
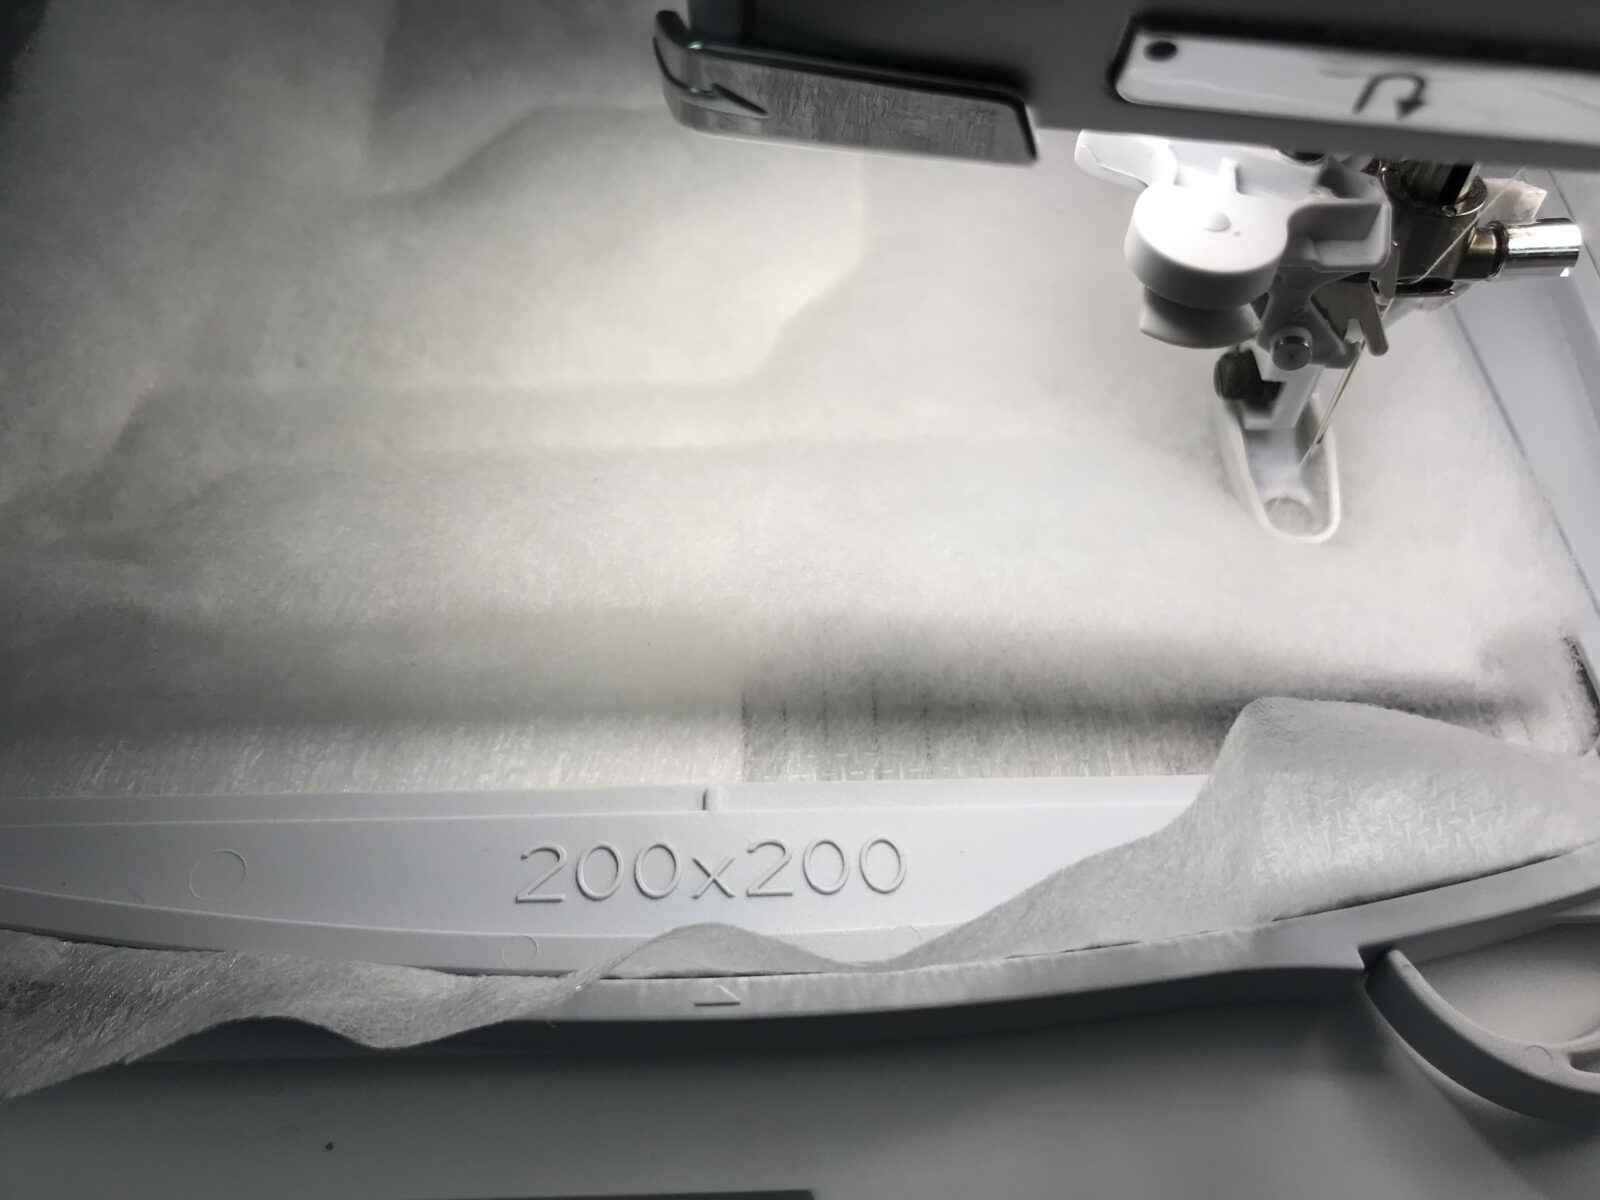
Securely hoop Soft ’n Sheer, making it “tight as a drum.”
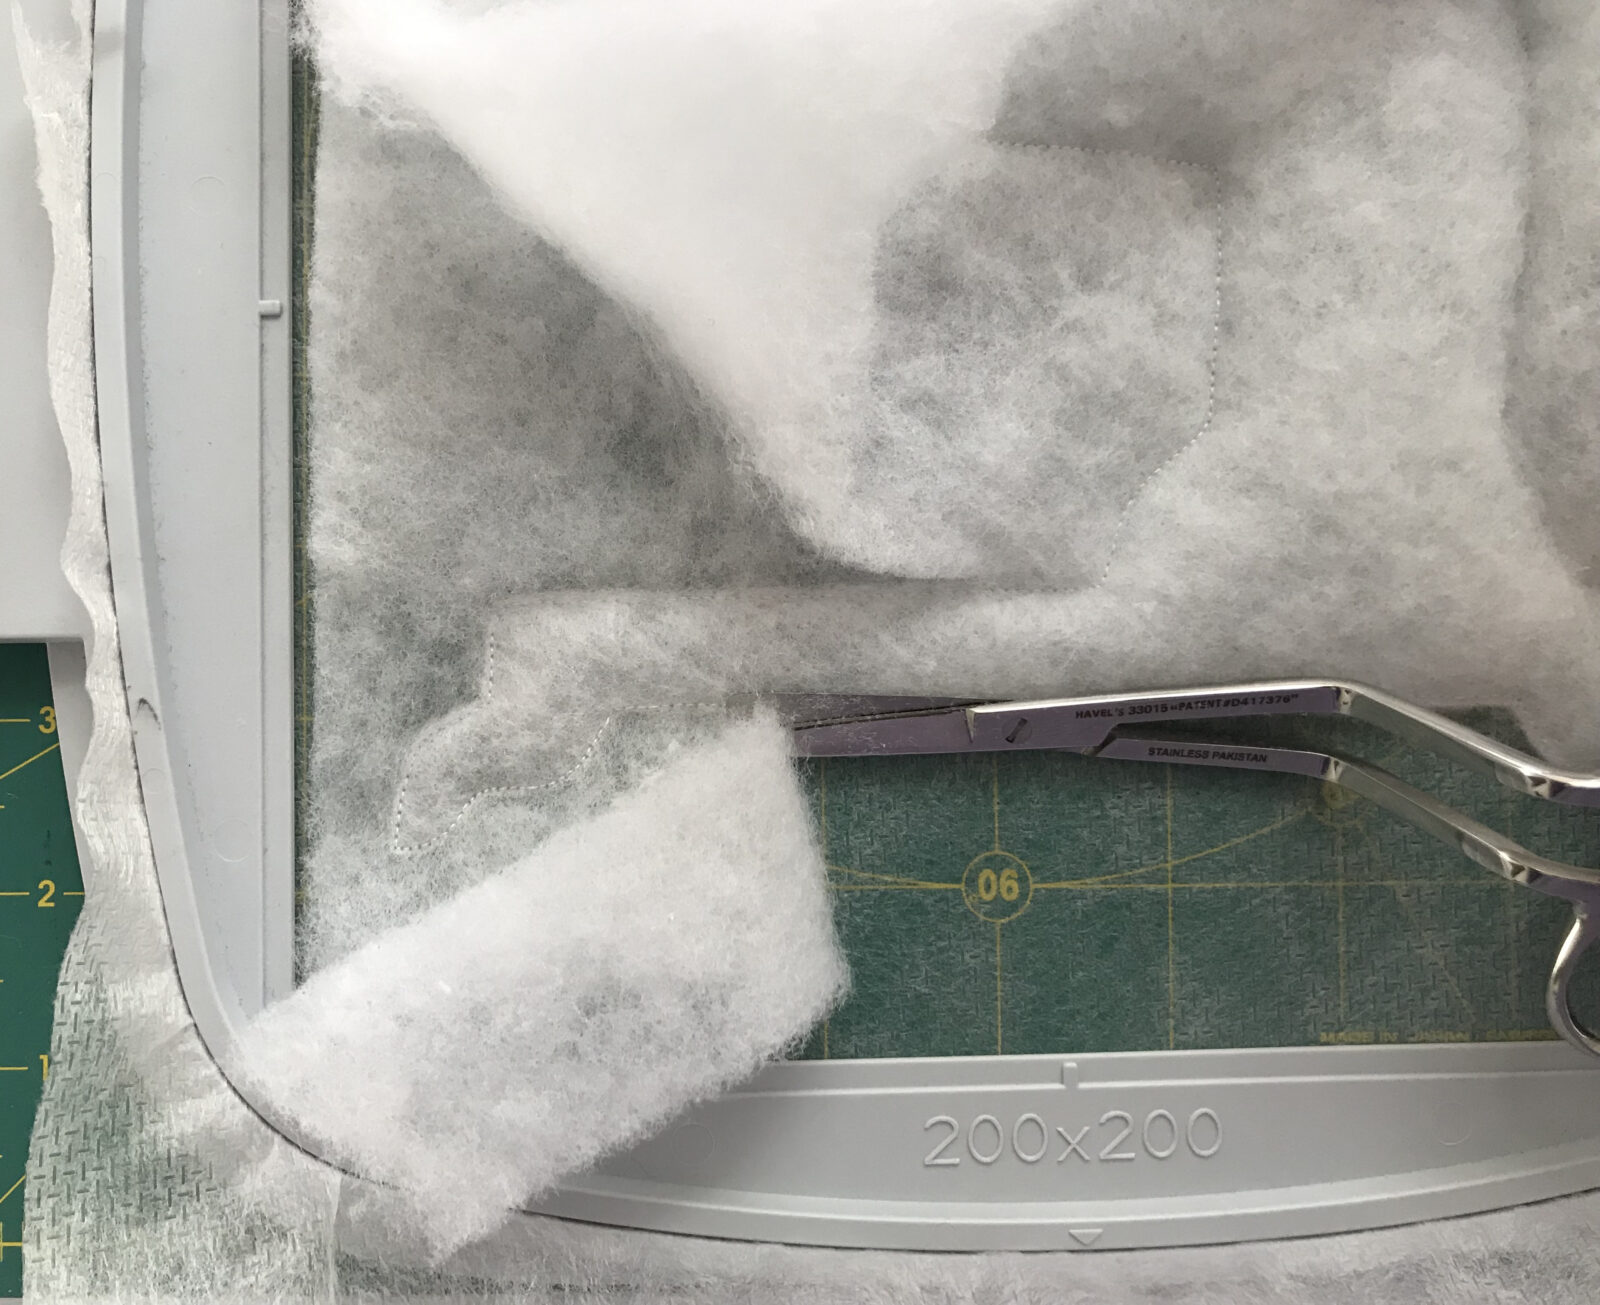
Lightly spray the back side of two batting pieces with KK 2000. Layer both pieces on top of each other. Place the layers on top of the stabilizer, keeping the batting just inside the hoop’s bottom frame.
Thread the embroidery machine with white Cotton + Steel thread.
Carefully place the hoop in the arm of the embroidery machine, underneath the pressure foot. Slow the speed of the machine down at least by half. Hold the batting layers in place, flattening them during the initial stitching process.
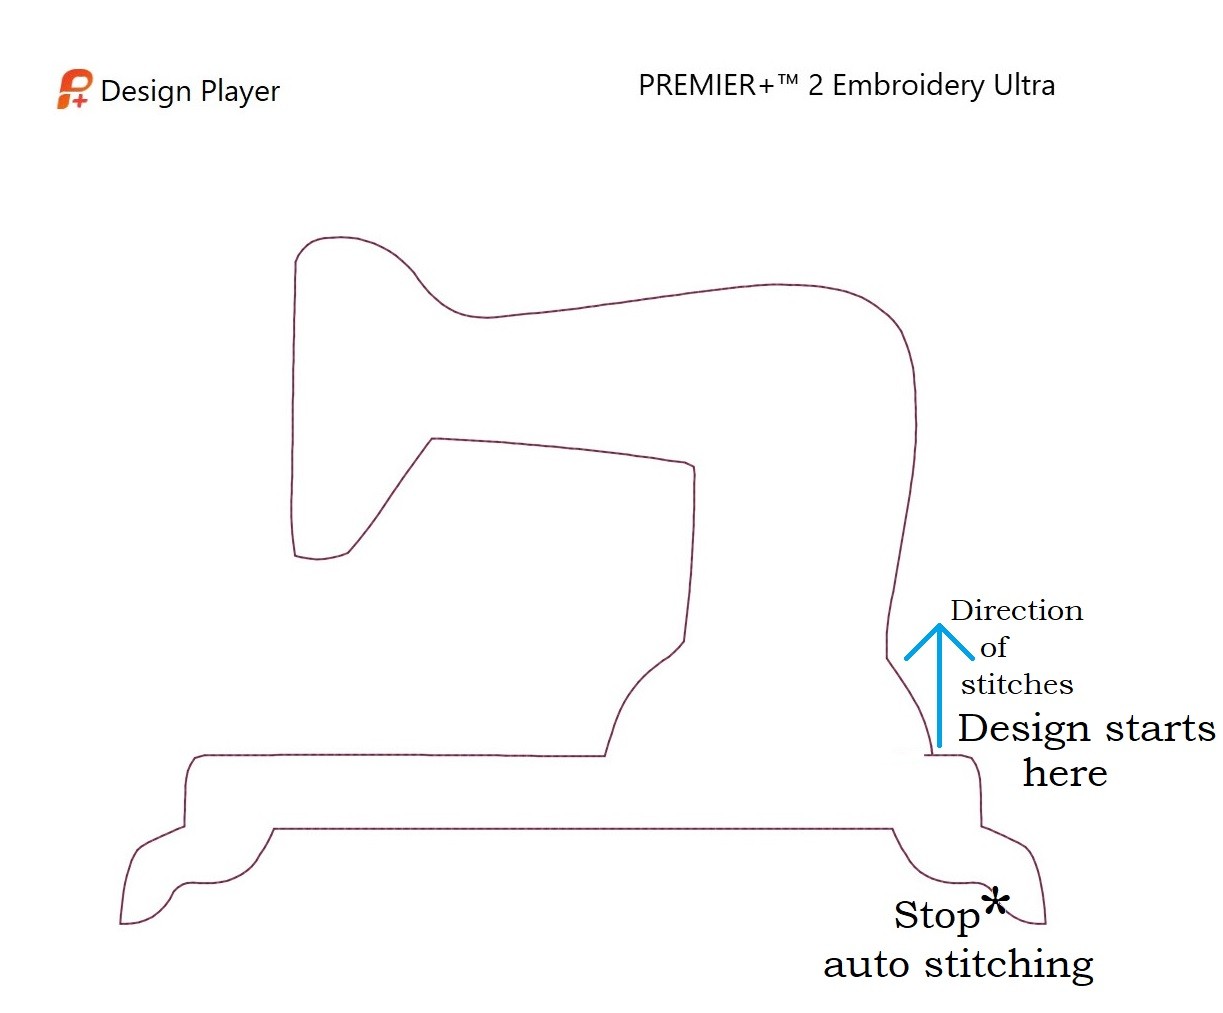
When nearing the end of the antique sewing machine outline, stop the embroidery machine. Switch over to using the foot-controlled pedal to finish the last few stitches of the outline.
Remove the hoop from the machine and cut excess batting one layer at a time, leaving just the sewing machine shape.
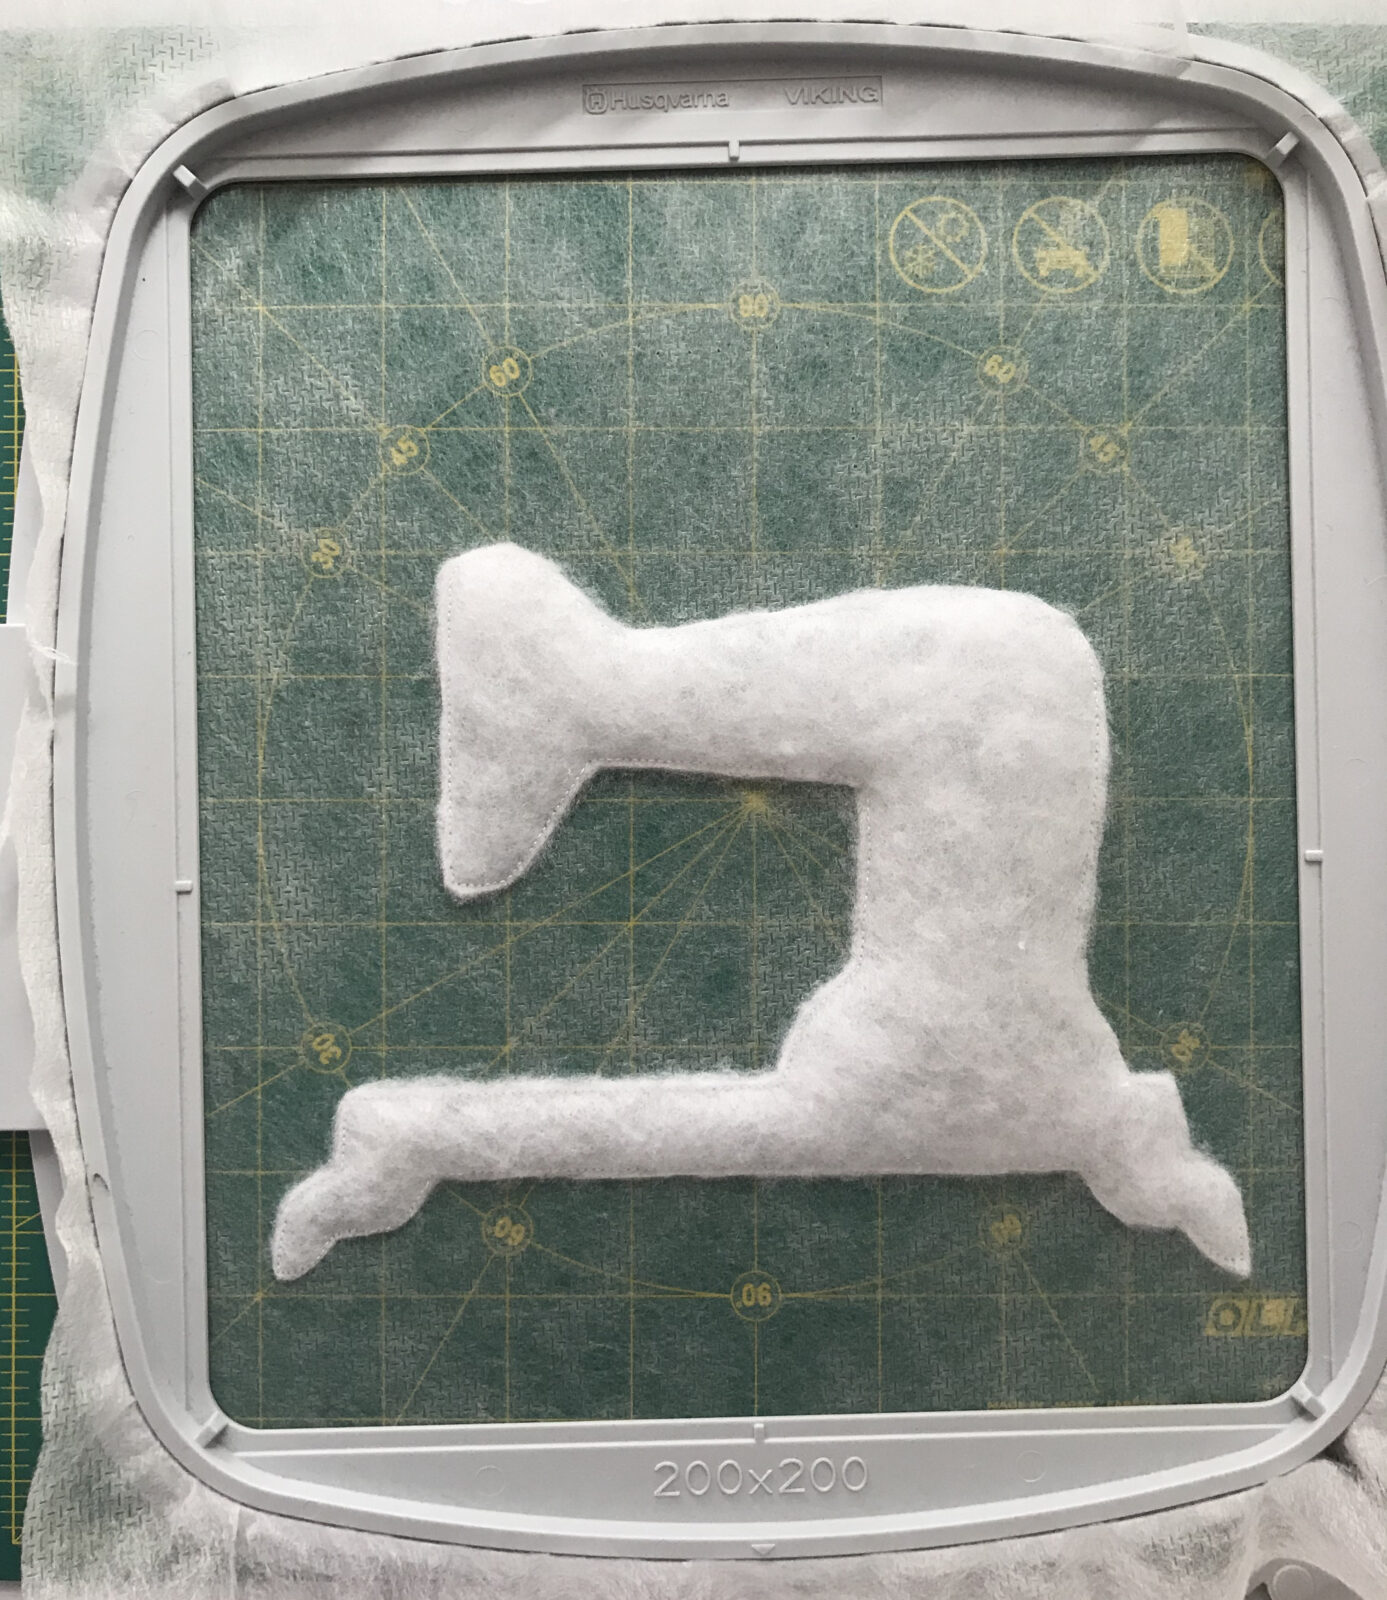
Lightly spray the wrong side of the fabric with KK 2000. Center it in the hoop, firmly pressing it on top of batting and stabilizer. There will be a “bump” underneath the fabric.
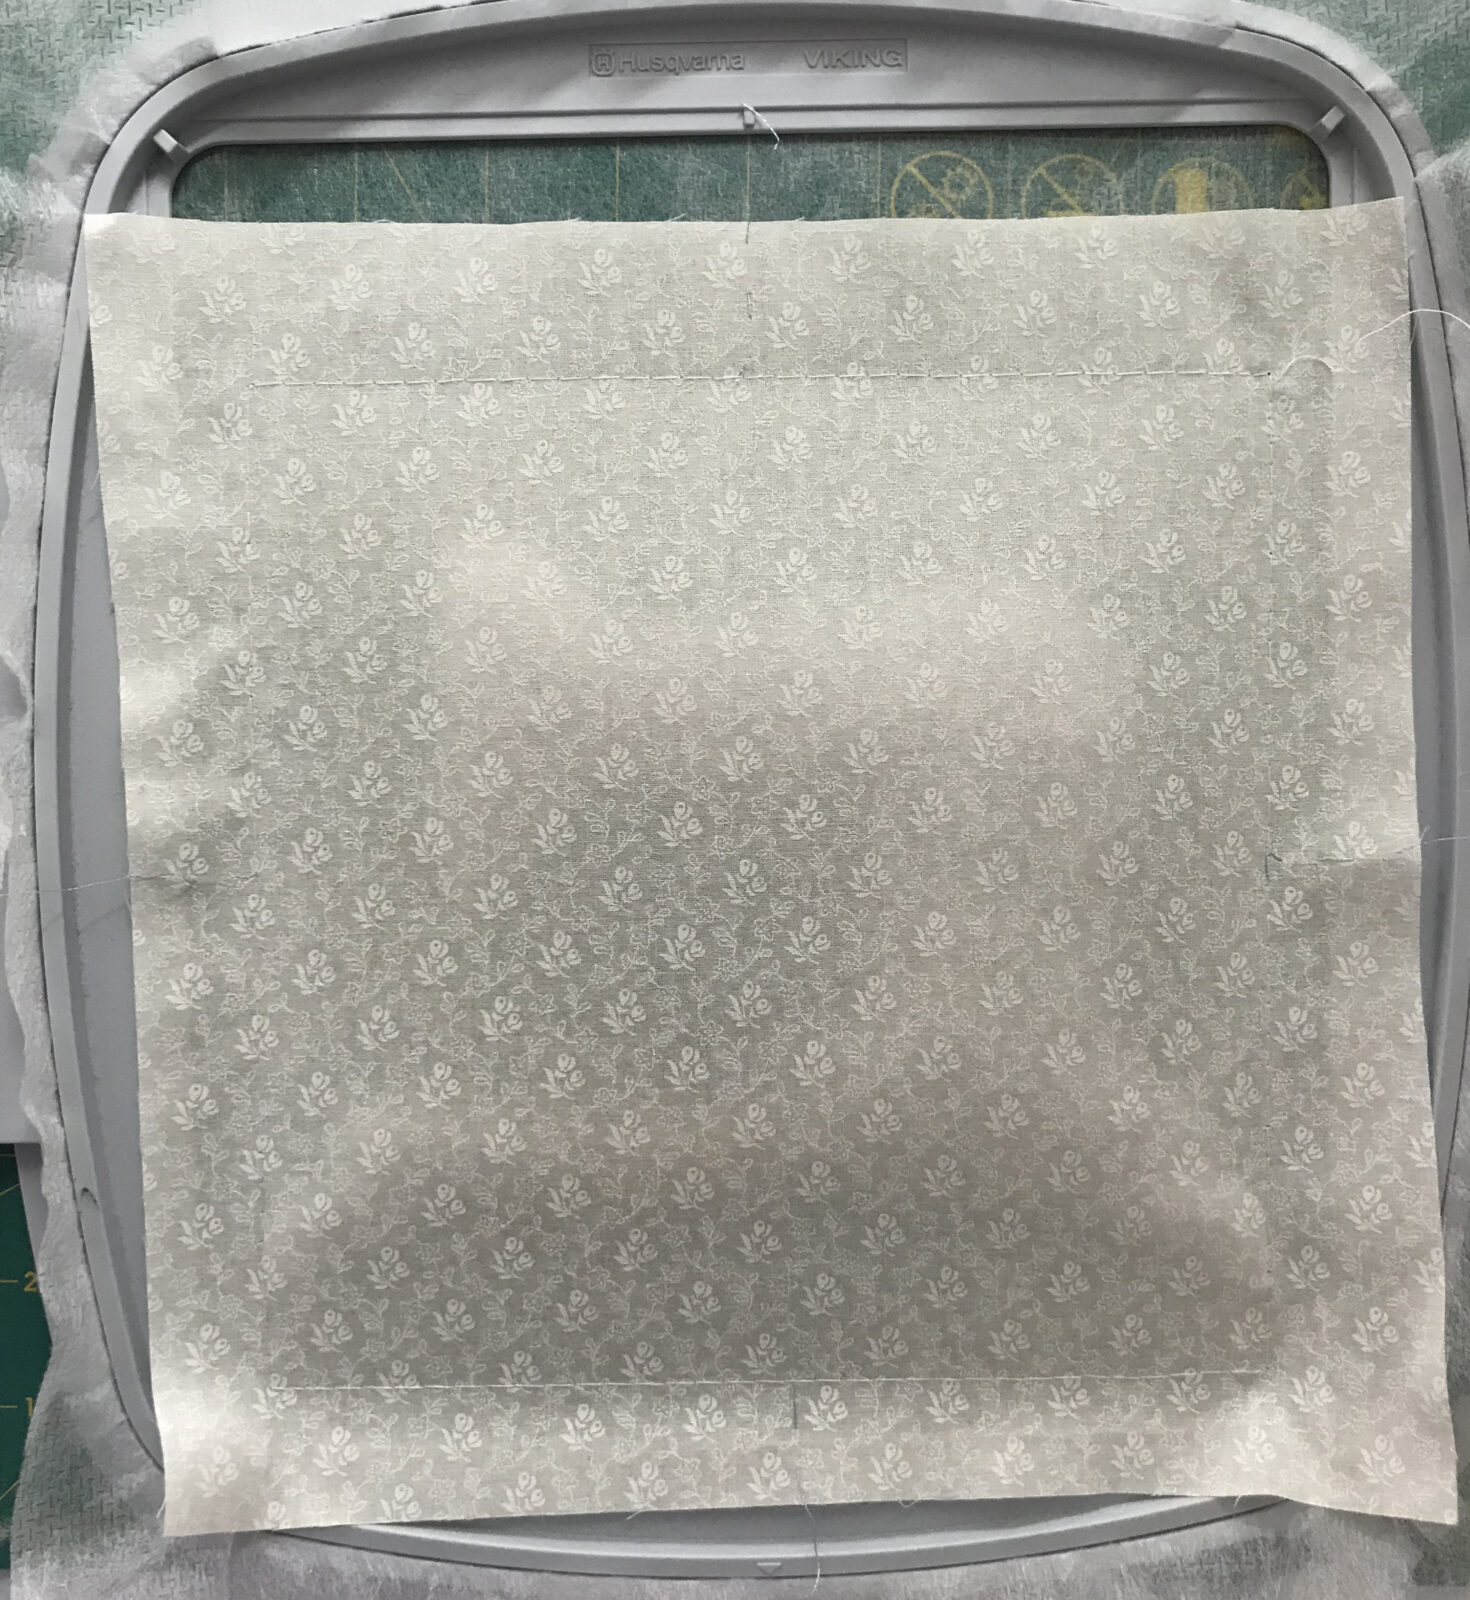
Baste the fabric to the stabilizer using the foot pedal. This will allow better control in keeping the fabric smooth and wrinkle-free as it’s tacked down.
Thread the machine with 40-wt. rayon and use matching PolyLite in the bobbin. Set the embroidery machine back to the first stitch of the design. Embroider the antique sewing machine block in its entirety on the fabric.
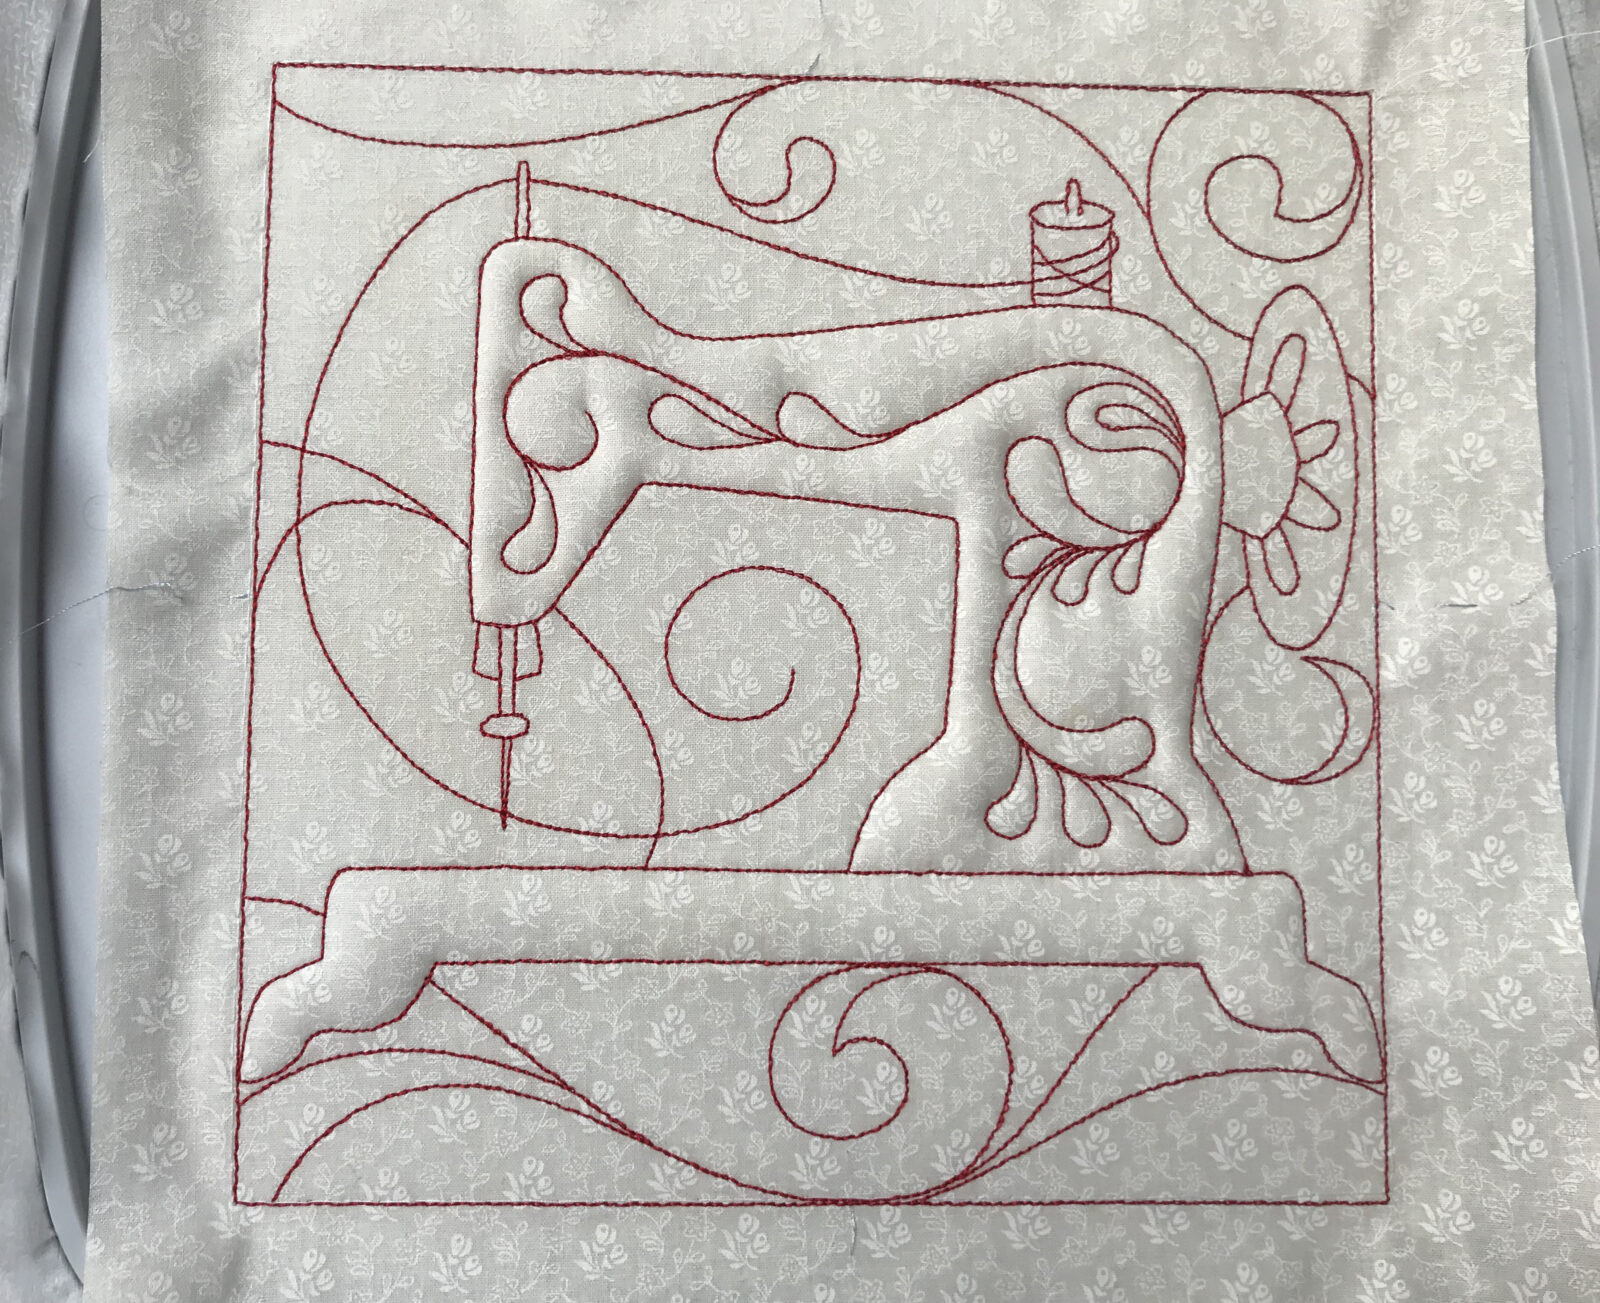
Remove the fabric sandwich from the hoop. Leave the stabilizer behind the entire square. Do not cut away any excess. Because of its sheerness and strength, Sulky Soft ’n Sheer Stabilizer will protect the batting, but never be noticed.
Re-cut to a 9½” square by first measuring ½” down from the design’s lower edge. Cut the fabric.
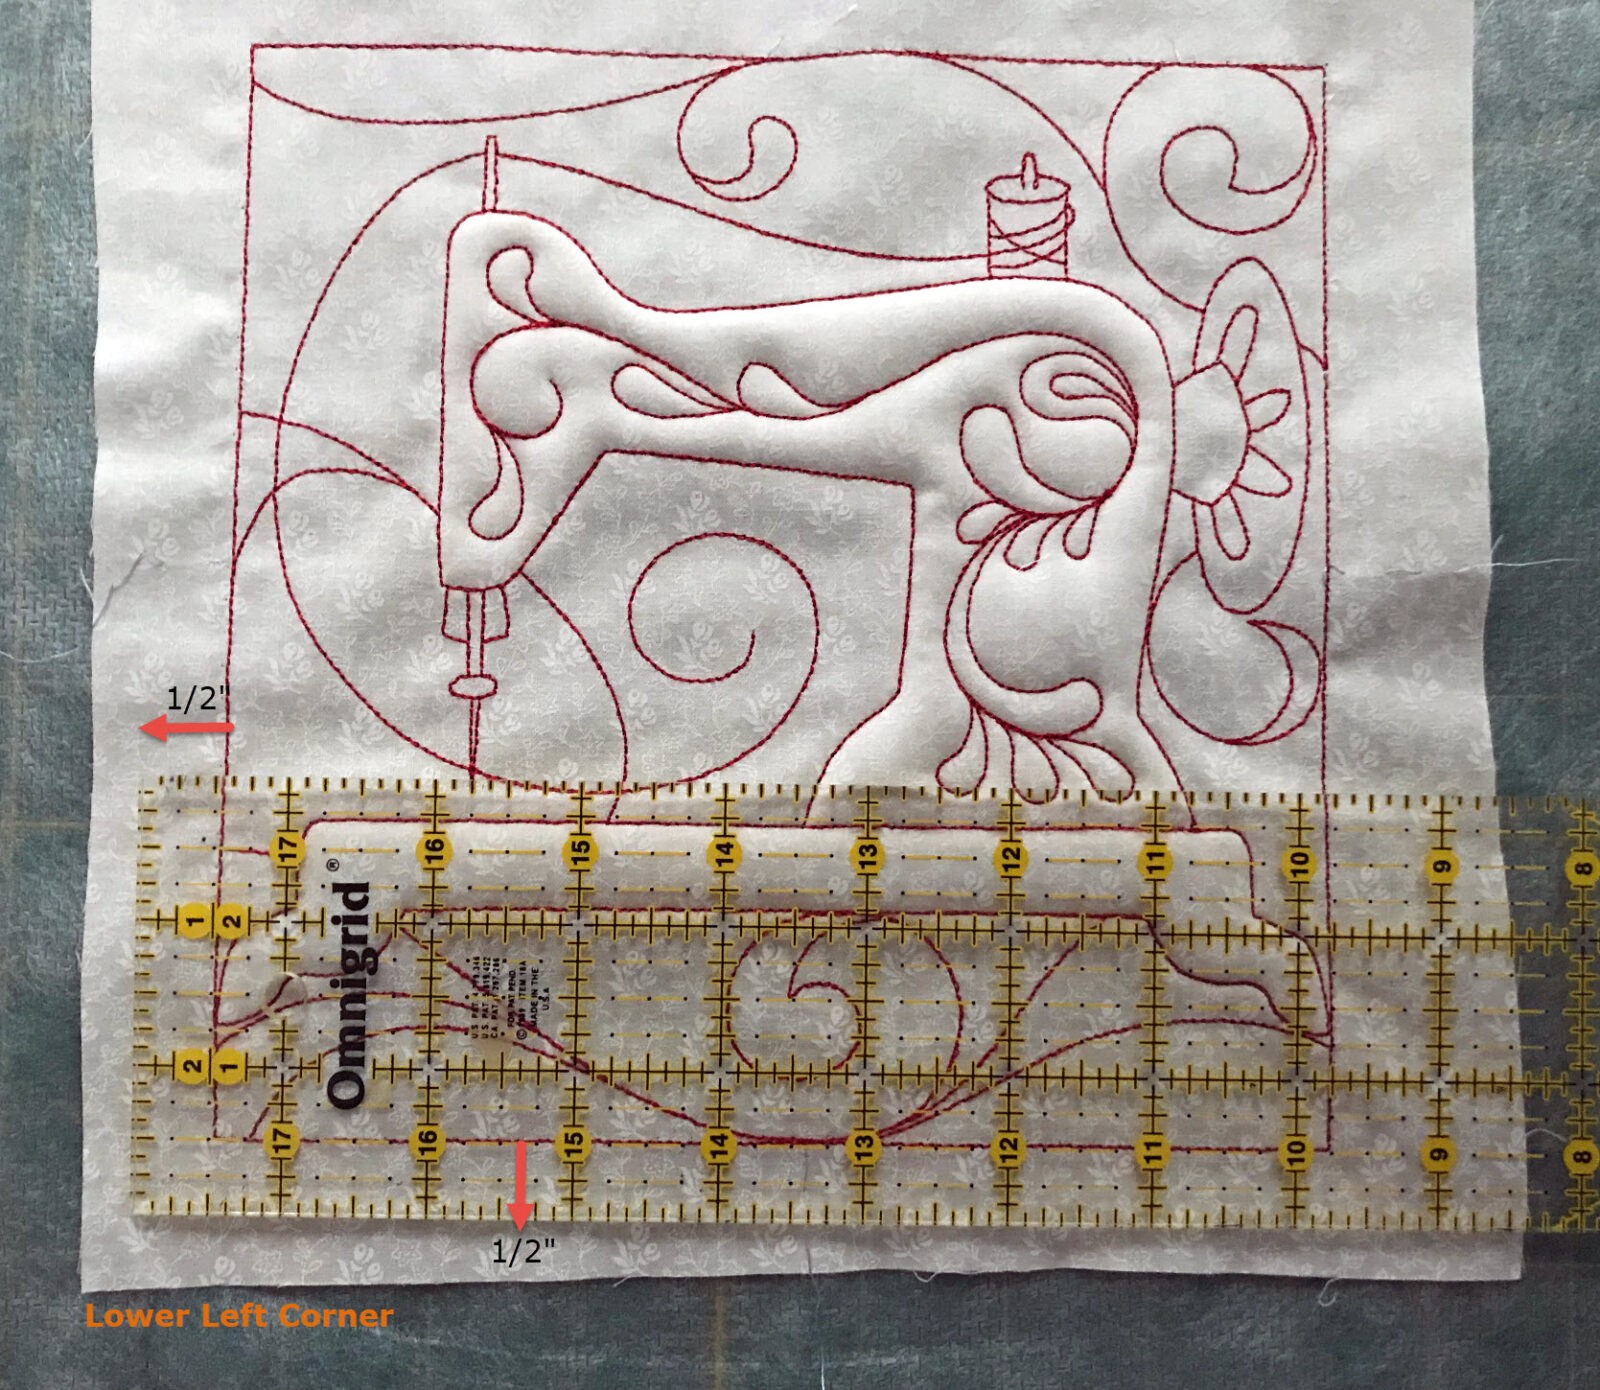 Repeat measuring ½” from the left side of the design frame.
Using these two cut edges, measure over and up 9½” to square cut the entire block to size.
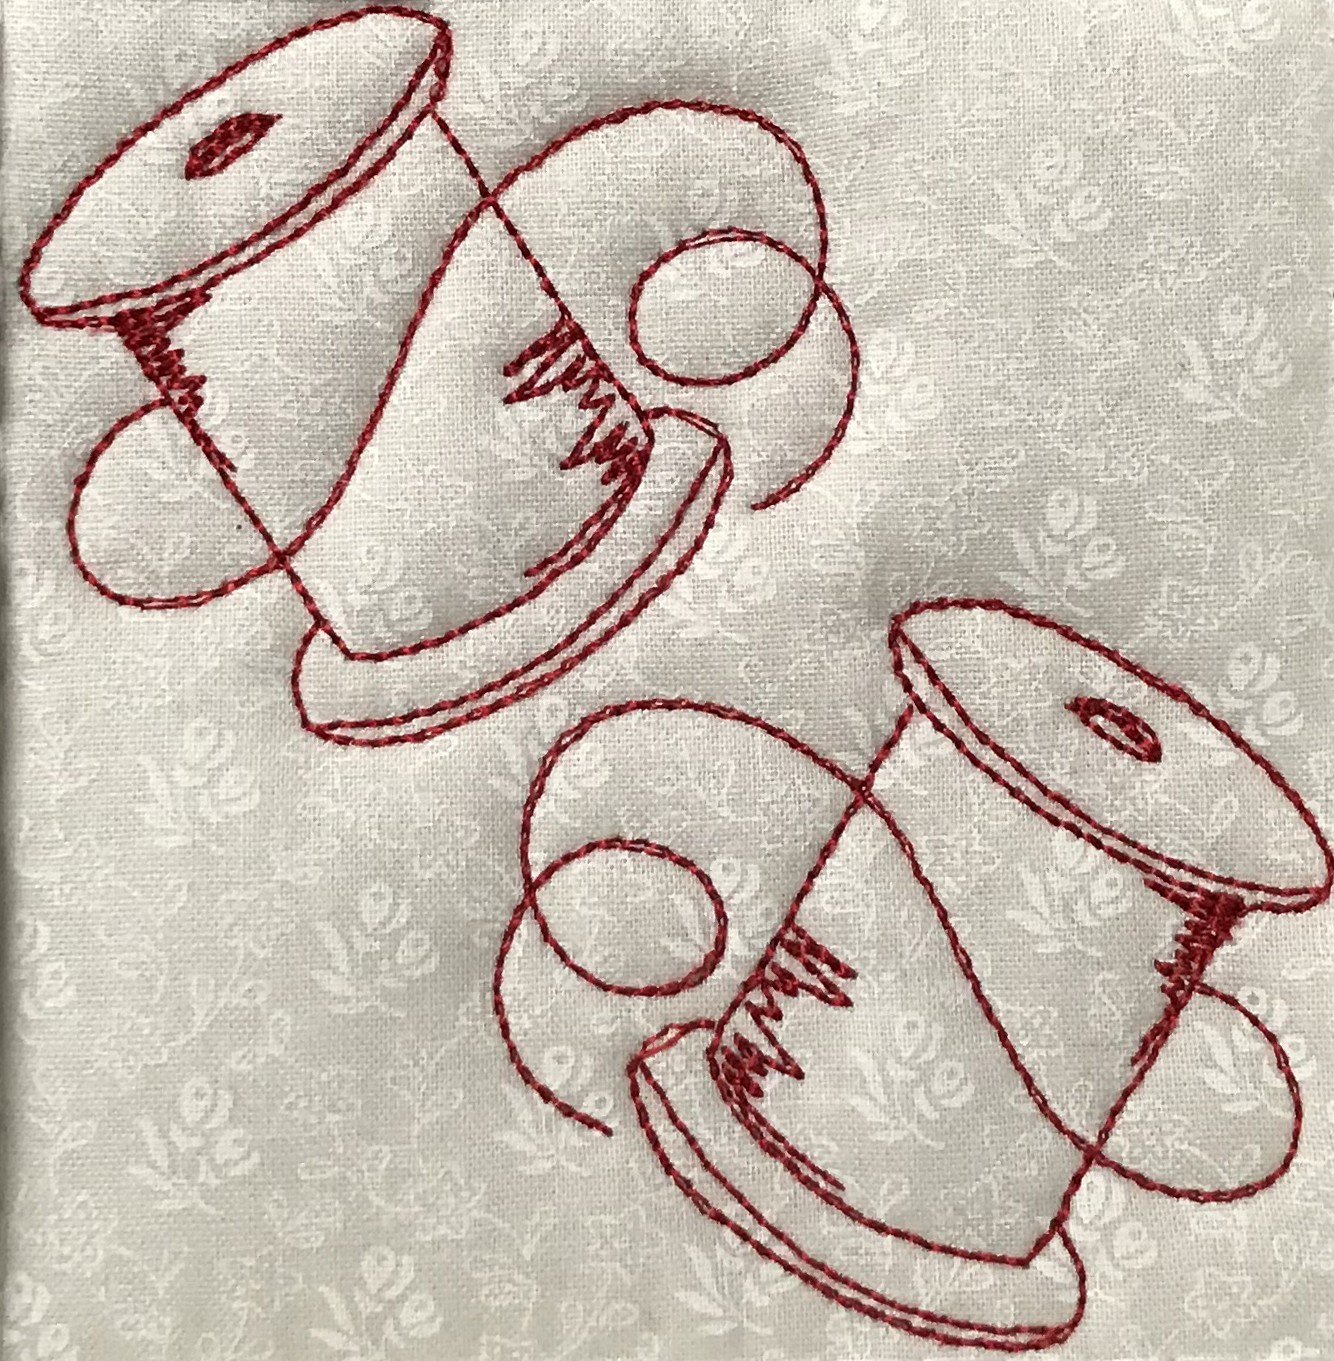
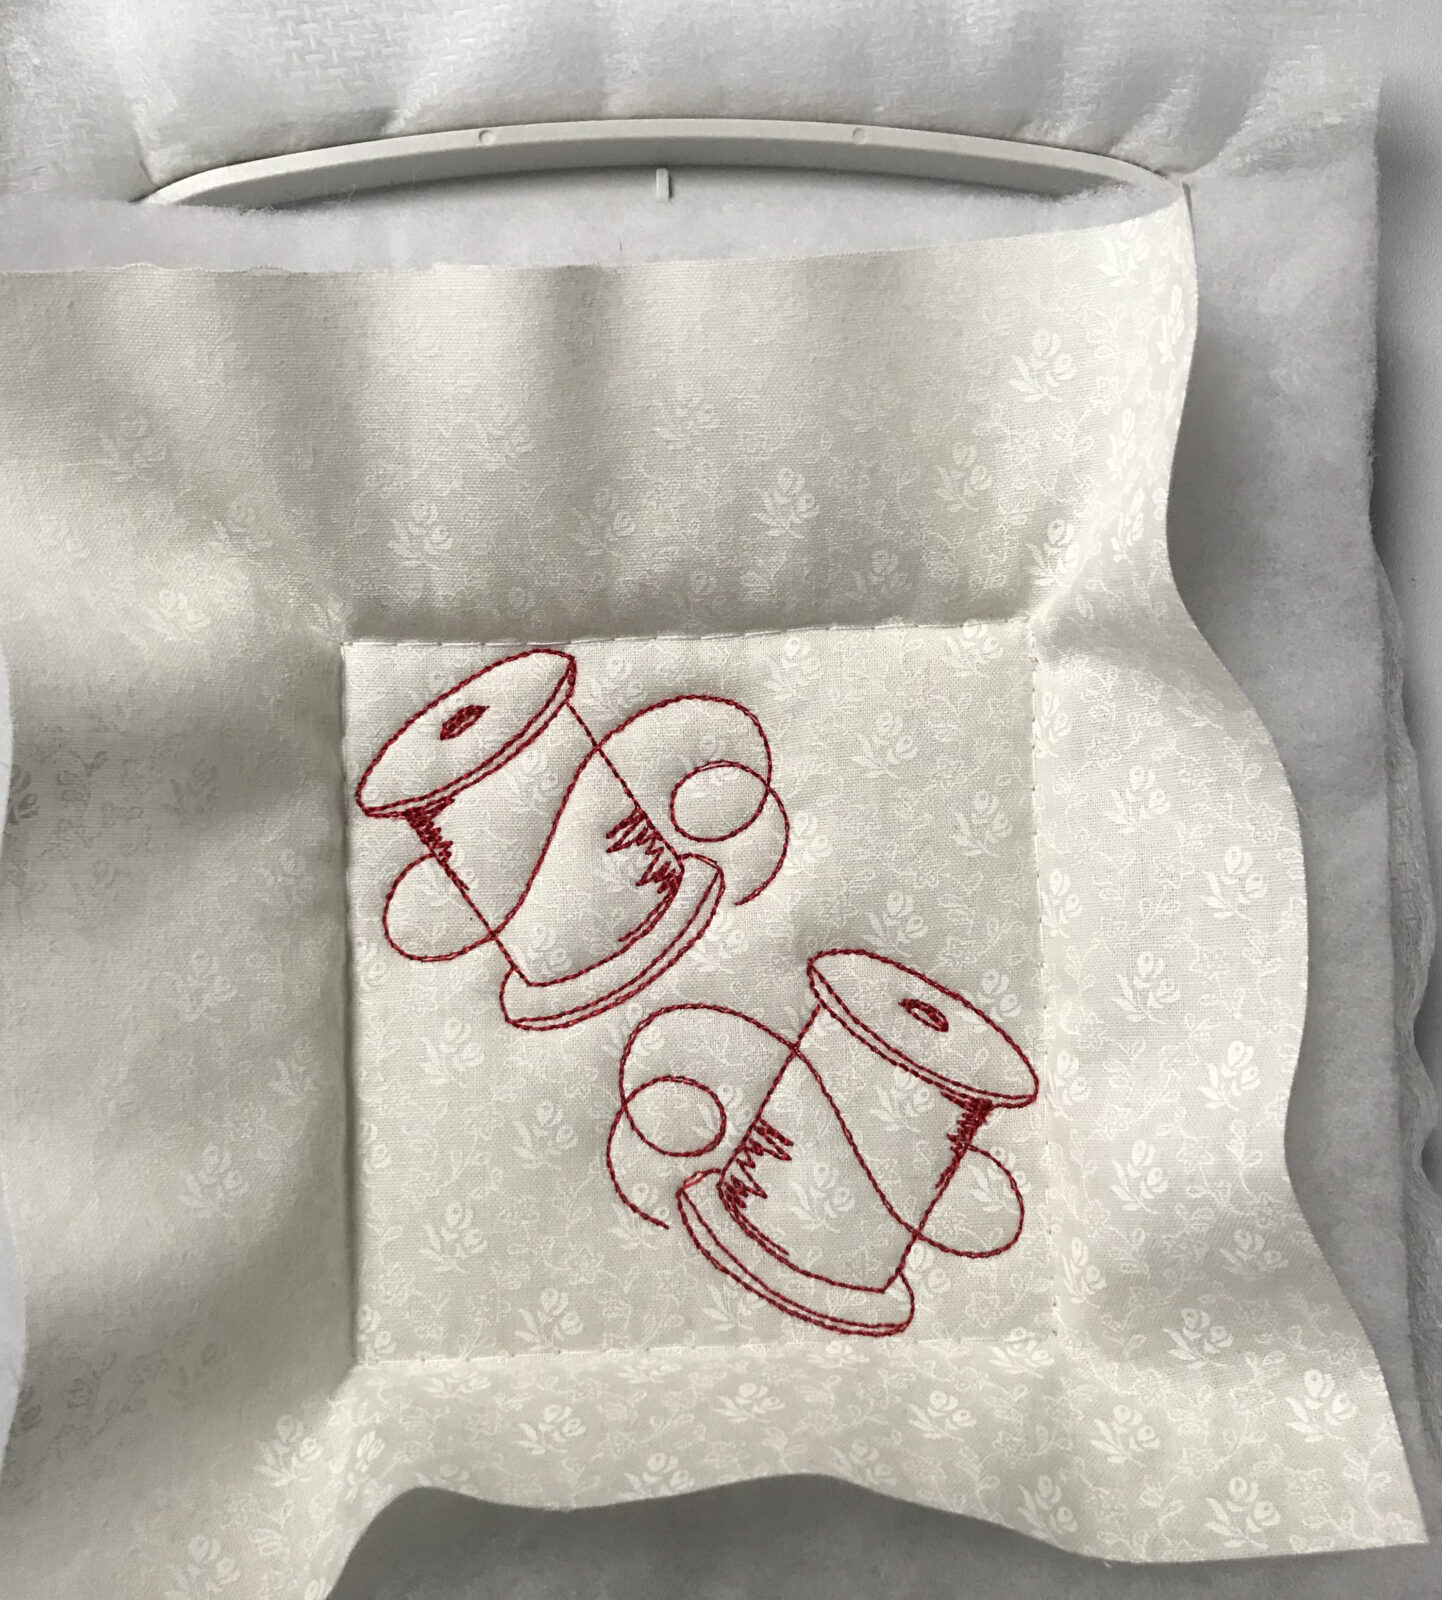
Step 2. How to Make a Trapunto Pillow: Embroider the Small Block
In a software editing program, or directly in the embroidery machine, bring the design into a 100mm square work space. Bring in a second spool design, flipping it horizontally. Arrange the two elements to fit into the given space.

The two spools look great just as they are, or you may want to invoke your own sense of creativity and move them around a bit in the given space. I chose to rotate the spools just a bit. If your combination fits within a 100mm square, it will work. So have some fun!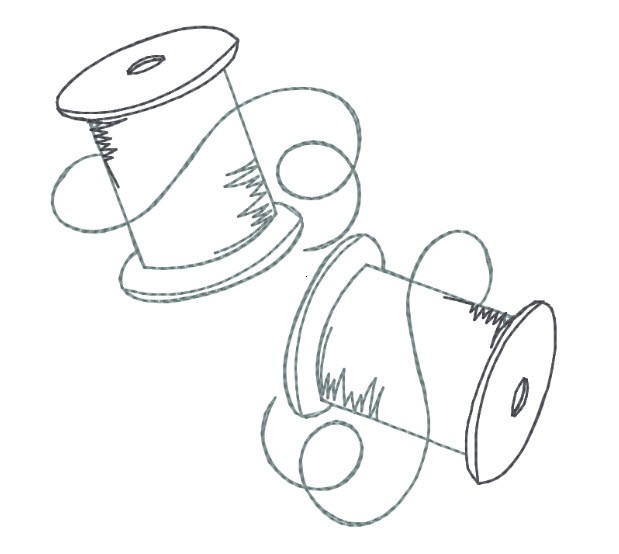
Cut an 8” square from the cotton fat quarter.
Securely hoop Soft ’n Sheer, making it as “tight as a drum”.
Lightly spray the back side of the remaining batting piece with KK 2000. Center it over the stabilizer and press into place.
Lightly spray the wrong side of the cotton fabric with KK 2000. Center the square in the hoop and press on top of batting. Baste the fabric to the stabilizer using the foot pedal. This will allow better control in keeping the fabric smooth and wrinkle-free.
Embroider the design
Some embroidery machines may require a slight adjustment of bobbin tension.
 Do not remove excess stabilizer nor the basting box, which will hold the fabric sandwich together during construction.
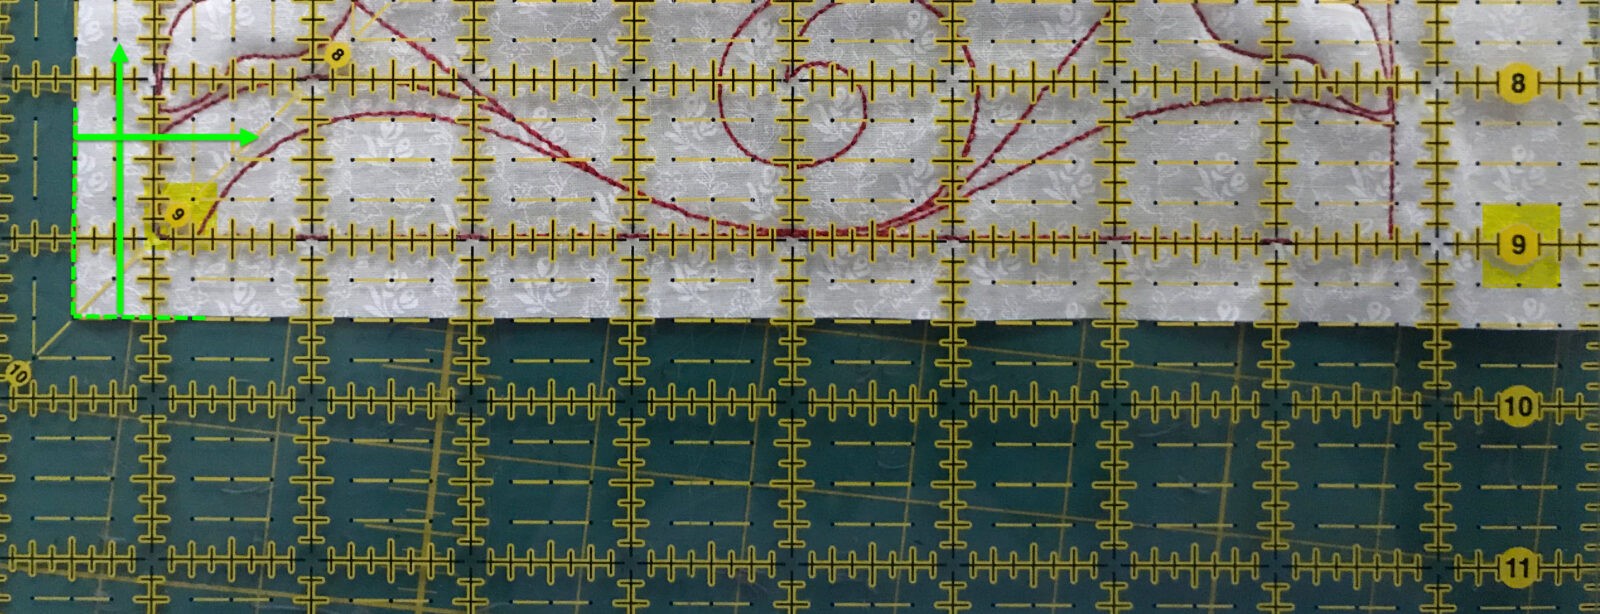
 Re-cut to a 6” square by first measuring ¾” above the basting box and cut the fabric.
Measure ¾” out from the right side of the basting box and cut the fabric.
Using these two cut edges, measure over and down 6” to square cut the entire block to size.
Step 3. How to Make a Trapunto Pillow: Cut Fabric
Fold the fabric to establish a bias grain. Cut 2” wide bias strips to total a length of 60” (Cut the longest strips possible).
Cut two blocks for pillow front:
A – 9½” H x 6” W
D – 6” H x 9½” W
Cut a 10½” H x 15” W rectangle for the top of the pillow back.
Cut a 8” H x 15” W rectangle for the bottom of the pillow back.
Step 4. How to Make a Trapunto Pillow: Stitch Front together using a ¼” seam allowance.
Press seams towards the darker fabric. Avoid pressing batting flat by just catching the seam edge with the iron.
- Stitch Block A to B.
- Stitch Block C to D.
- Stitch block A/B to C/D. Press this seam towards C/D
Step 5. How to Make a Trapunto Pillow: Make Piping
Stitch the lengths of bias strips together. Place right sides together at a 90° angle. Check that the corduroy wales will face in the same direction when the strip is opened. Stitch the seam at a 45° angle (diagonal line).
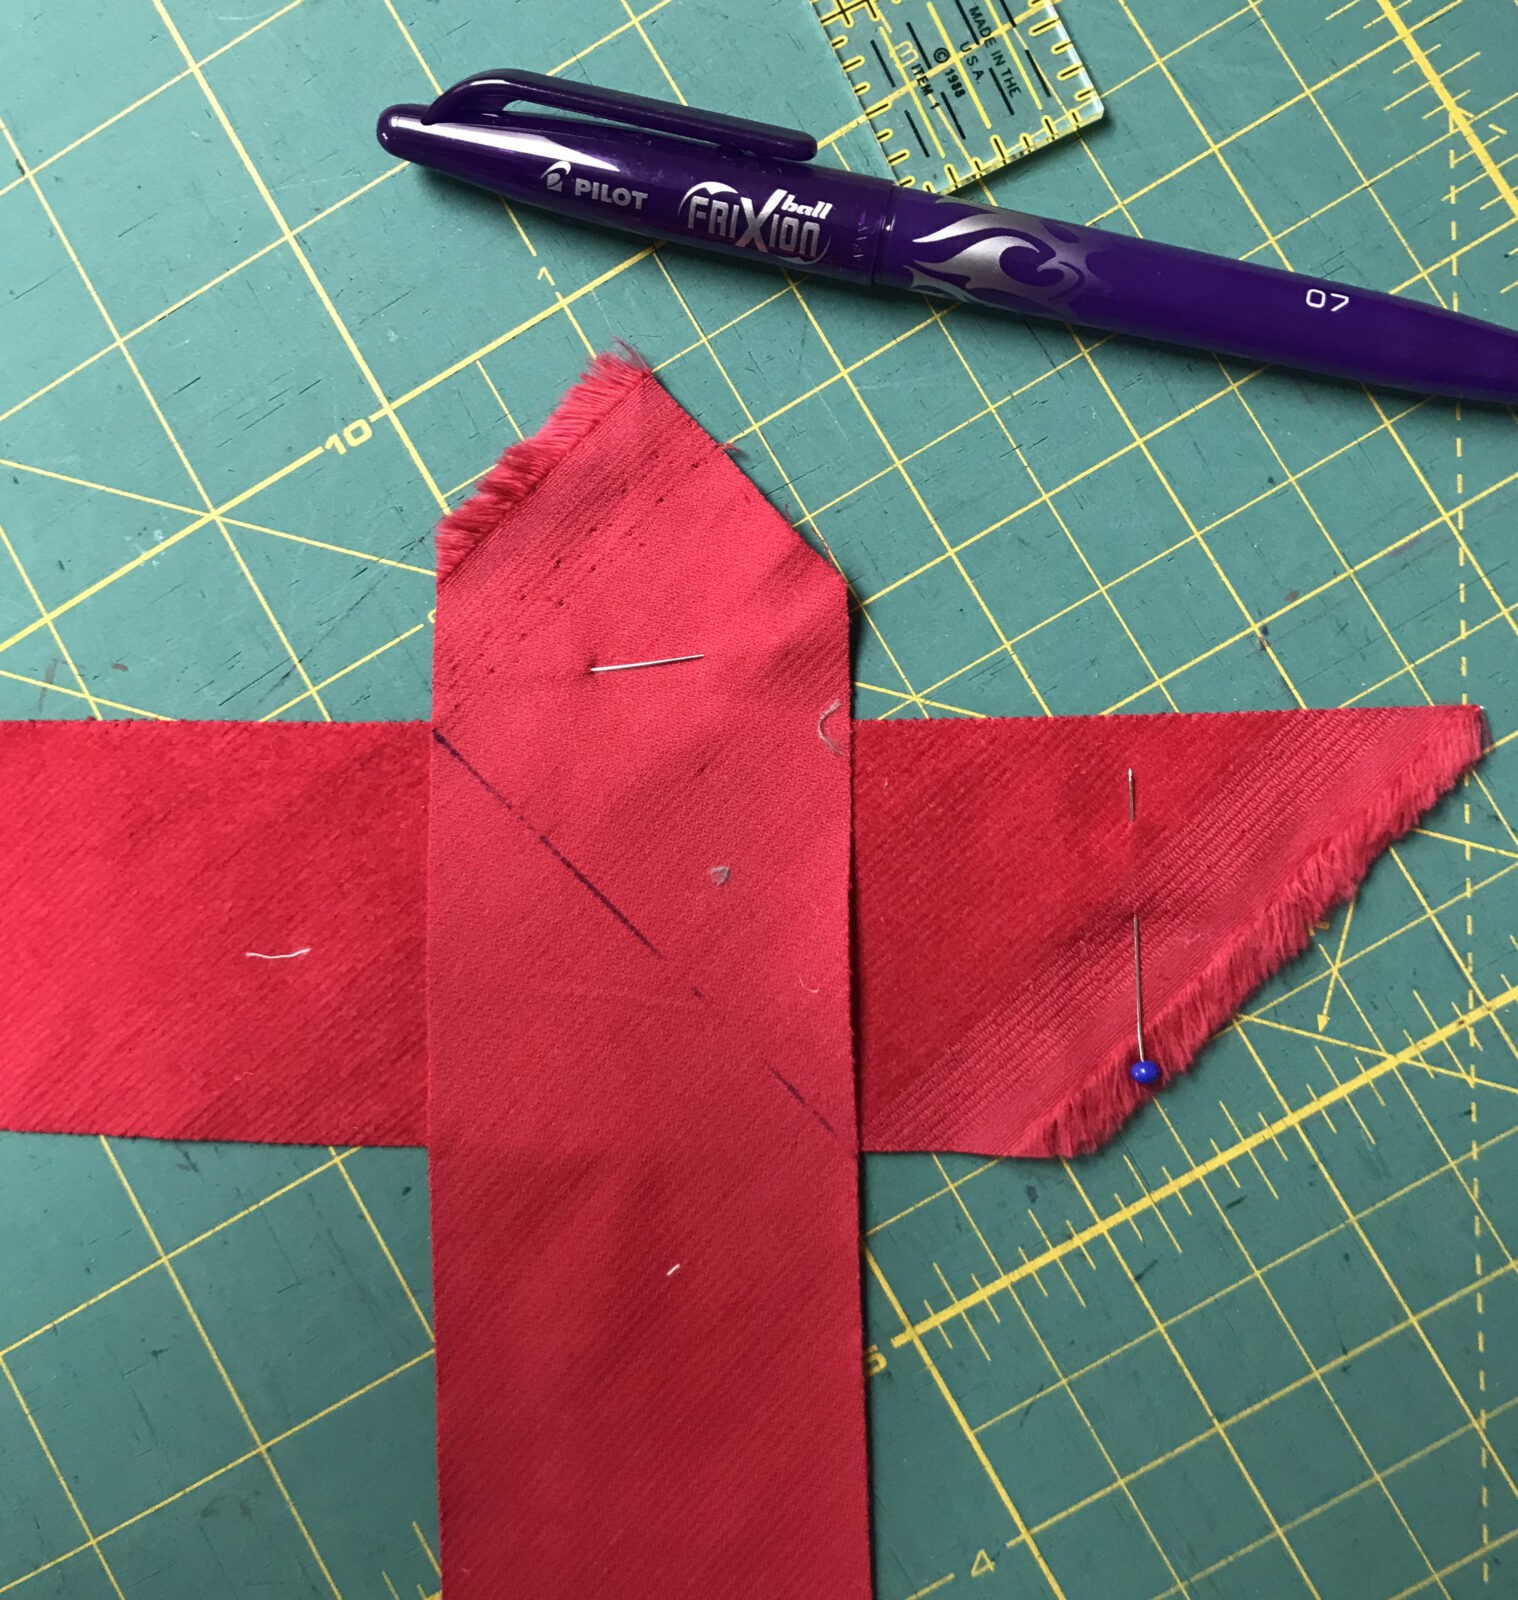
Fold fabric in half covering the cord. Begin stitching 3” from the end. Fold to create a ¼” hem.
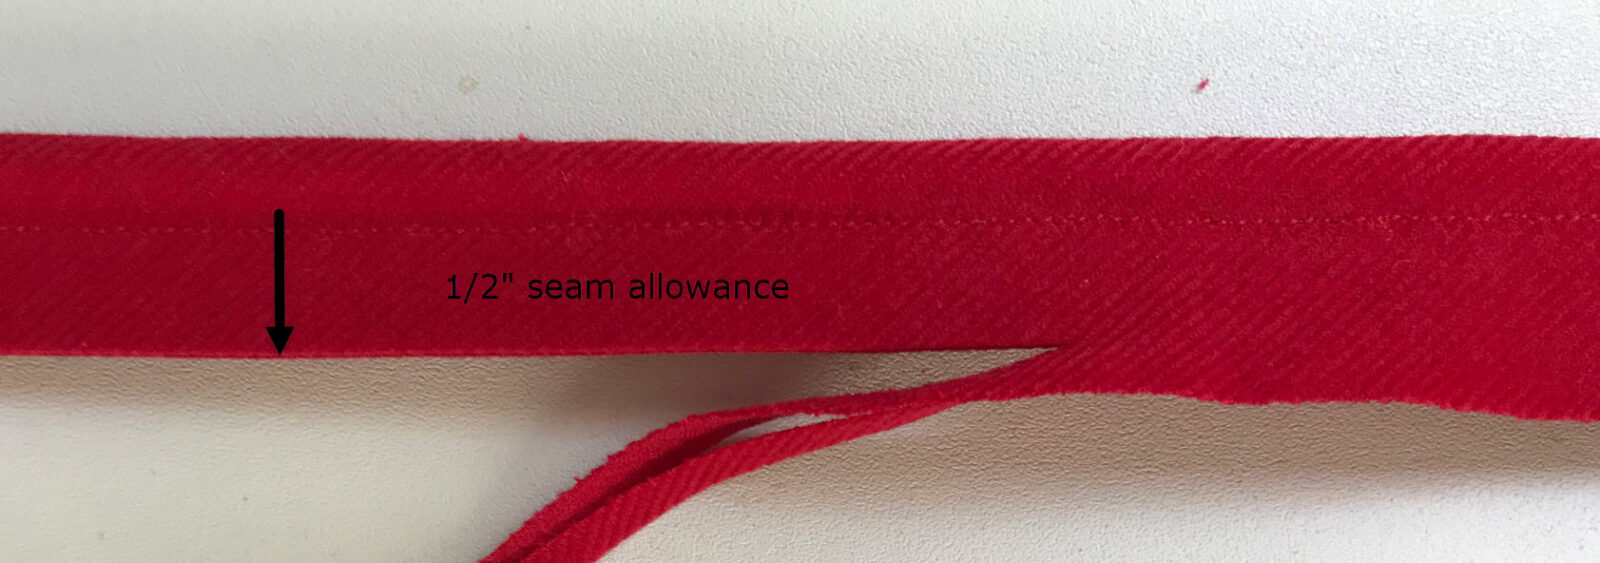 Re-cut the seam allowance to a uniformed ½” width.
Step 6. How to Make a Trapunto Pillow: Add Piping
Begin on a straight edge in one of the corduroy blocks. Check that the joining seam of the bias strips will not hit a corner. Leave the 3” beginning tail free. As a corner nears, clip the bias strip’s seam allowance up to but not through the stitching. Stitch straight off the pillow.
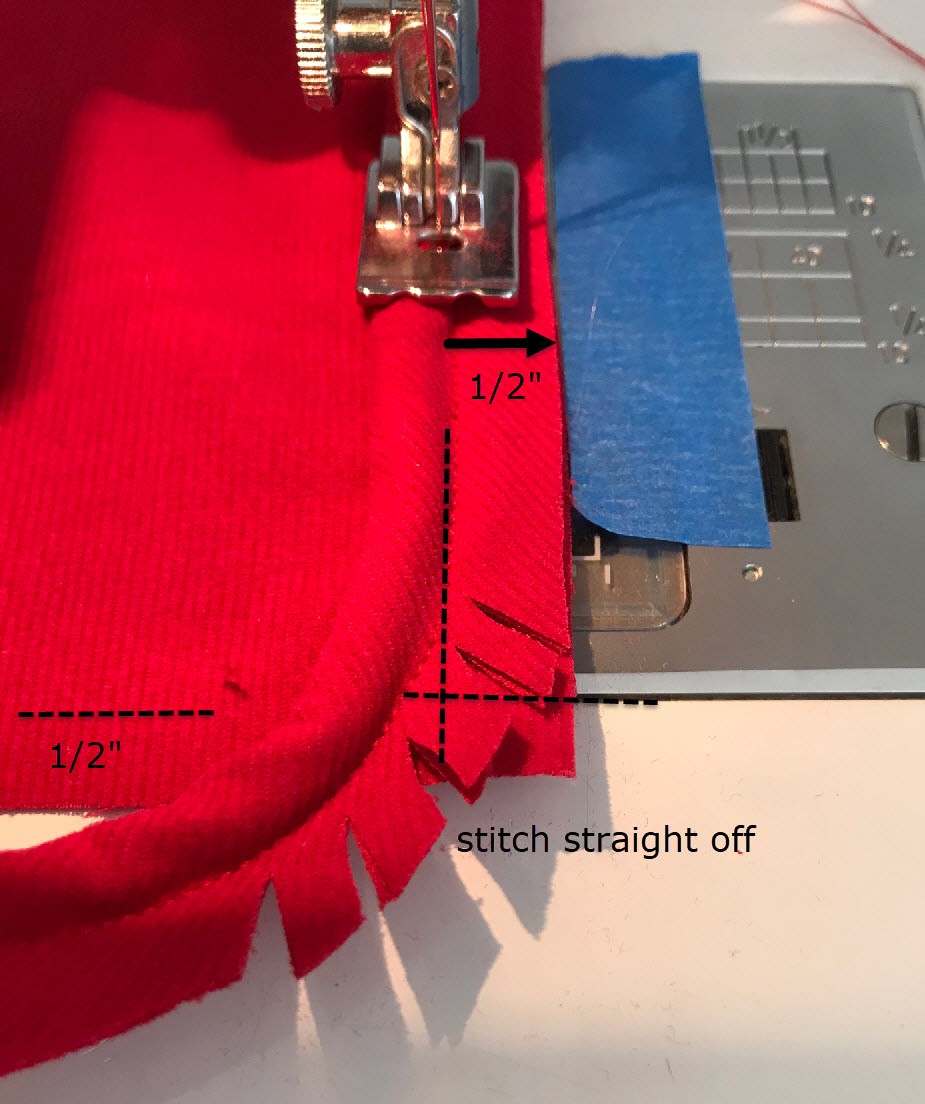 Bend the cording around the corner and continue stitching starting at the top edge of the pillow front. Repeat the same process around all four corners. End the stitching about 3” away from the starting point.
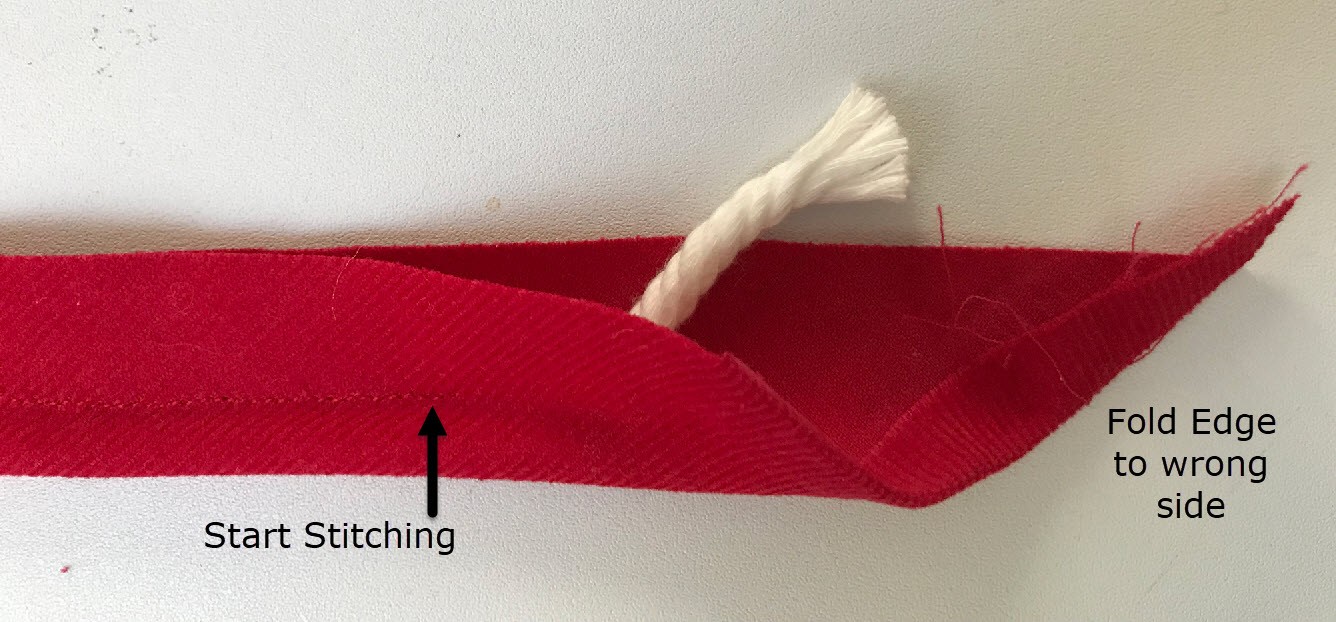
Cut the cord away inside the starting piece back to the beginning of the stitching. Tuck the ending cord inside and cut the ending cord so the cord ends butt up against each other.
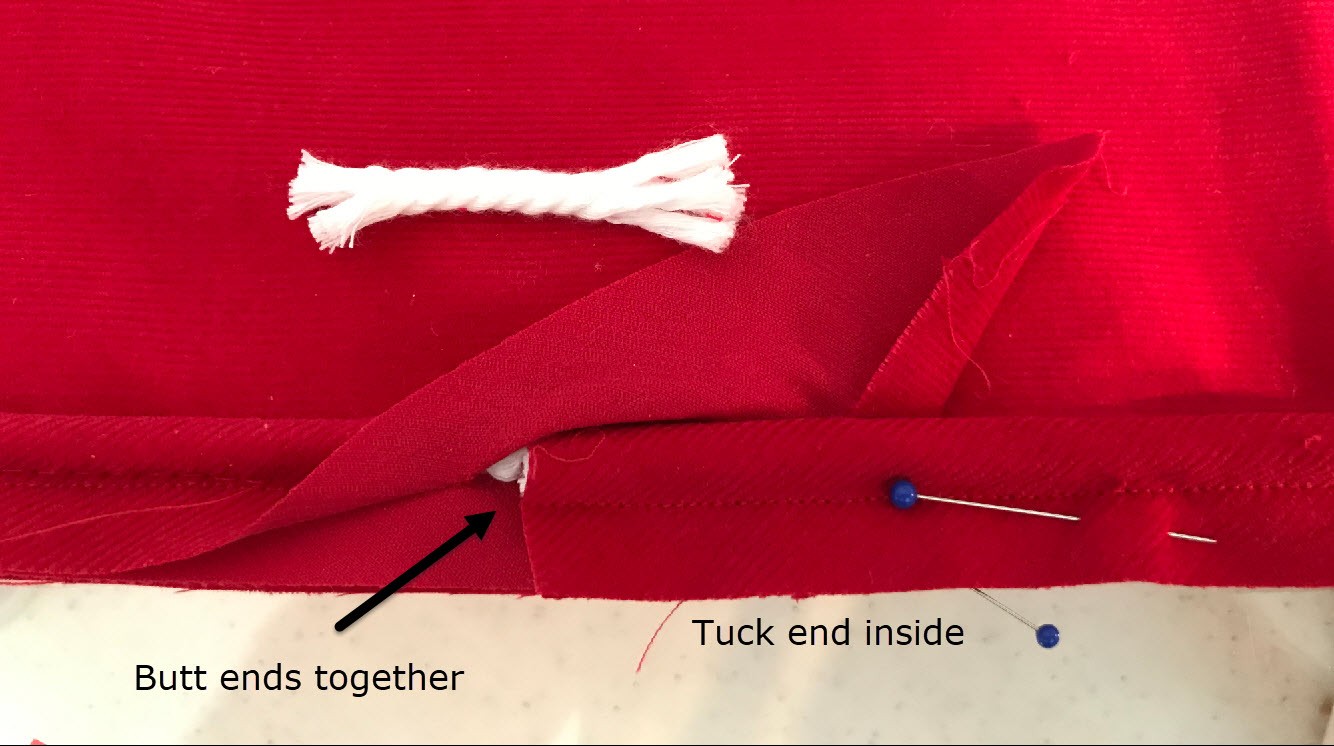 Finish stitching.
Step 7. How to Make a Trapunto Pillow: Prepare the Back 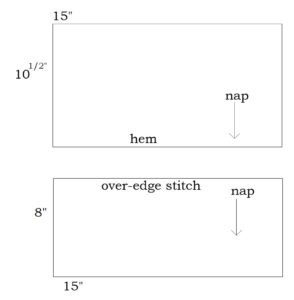
Hem the top-panel lower edge.
Finish the upper edge of the lower panel using an over-edge stitch.
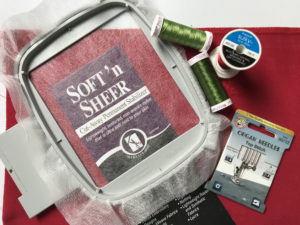
Step 8. How to Make a Trapunto Pillow: Embroider a Tag
 Supplies:

KK 2000 Temporary Spray Adhesive
Sulky Thread:
40 wt. Rayon – frame and hearts
PolyLite – words
Free tag designs – download here.
The design is offered as “Made with Love by” with an open space to add a name .
 It is also offered simply as a frame for any embroidered message.

Secure Sulky Soft ’n Sheer Stabilizer directly in the hoop.
Lightly spray the back panel with KK 2000 Temporary Adhesive. Press it firmly to the stabilizer matching the tag’s placement center to hoop center. I chose to embroider the lower left corner of the pillow using the placement measurements shown. But the tag would look equally good in many other locations including centered on the top back panel hemline.
 Embroider the design. Cut any jump threads. Remove excess stabilizer.
Step 9. How to Make a Trapunto Pillow: Finish
With right sides together, stitch the top back panel to the pillow front using ½” seams. Stitch as close to cording as possible. It’s easier to stitch straight off each side as opposed to trying to turn the corner.
Stitch the lower panel in place. It will overlap the top panel.
Trim corners diagonally. Turn right side out. Tug on cording to pull corners out.
Remove basting box in the smaller Trapunto square.
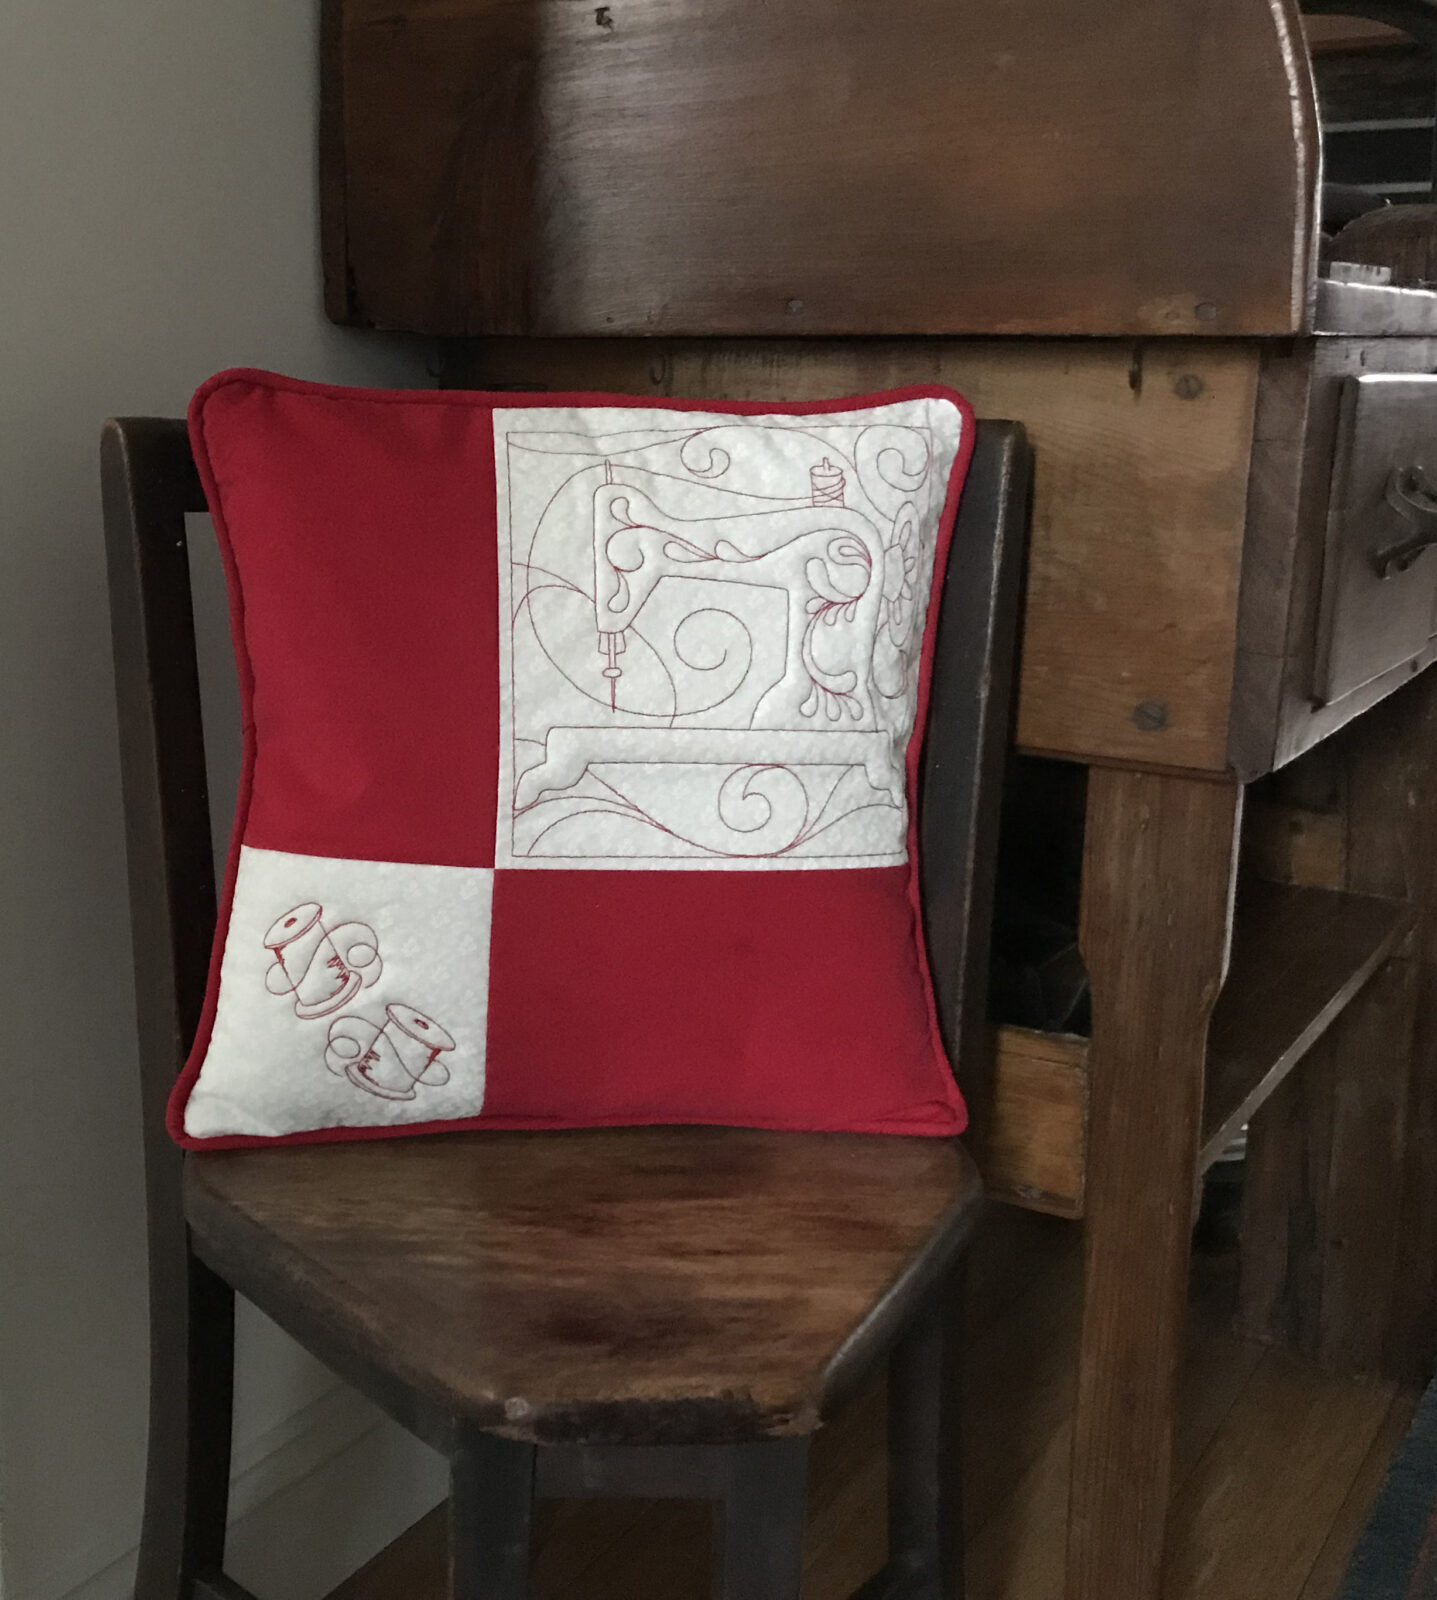
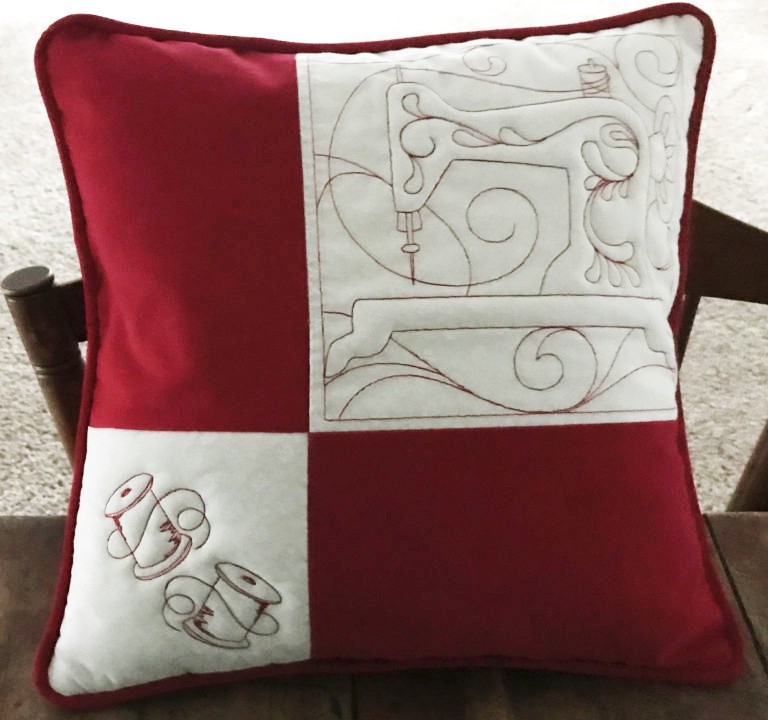
Now that you’ve learned how to make a Trapunto pillow using two methods, you can decide which one is your favorite. With the cover on a form, it’s easy to appreciate the different Trapunto effects demonstrated in the two embroidered squares.


One Comment
gracefulembroidery
Excellent tutorial Pamela. Thank you, I already have ideas forming in my mind now for something special.
Just love how much the machine stands out.