
May the Fourth be With You + Reflective Embroidery
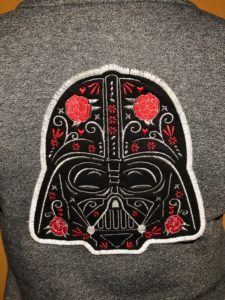
On this “Star Wars Day,” I thought I’d bring you a tutorial on reflective embroidery. Our new CRY® reflective thread is a super cool product that’s great for designs like the Darth Vader featured here.

What IS reflective embroidery thread?
The thread does not glow, but rather reflects light, so it’s also great for adding a monogram to a jacket or topstitching on running shorts–for anytime you’re out exercising in the dark; camping and want your children to be easily seen; walking with your dog after sundown (add an embroidered collar or topstitching on a leash!).
If you want to get technical: “Thousands of microscopic glass beads encase the reflective thread that consists of a polyamide core and a polymer coating, ensuring the adhesion of the reflecting glass beads on the thread.” Phew!
How to Sew with Reflective Embroidery Thread
As this unique thread has actual glass reflective beads, I recommend the following tips for reflective embroidery:
- In your design, decrease density by approximately 30% – while at the same time – increase the underlay. You likely need software to do this. If it’s not possible, increase the design by 20% or the highest your machine allows.
- Use elongated stitches whenever possible.
- Decrease the sewing speed.
I also recommend to use the thread sparingly for reflective embroidery. The design I chose had more than 35,000 stitches. I only used the reflective thread for the outline and the light line-art stitching on the flower details. I did NOT use it in the bobbin–no sense in wasting it there! I used a black bobbin for the entire design and Poly Deco thread for the red roses and flowers.
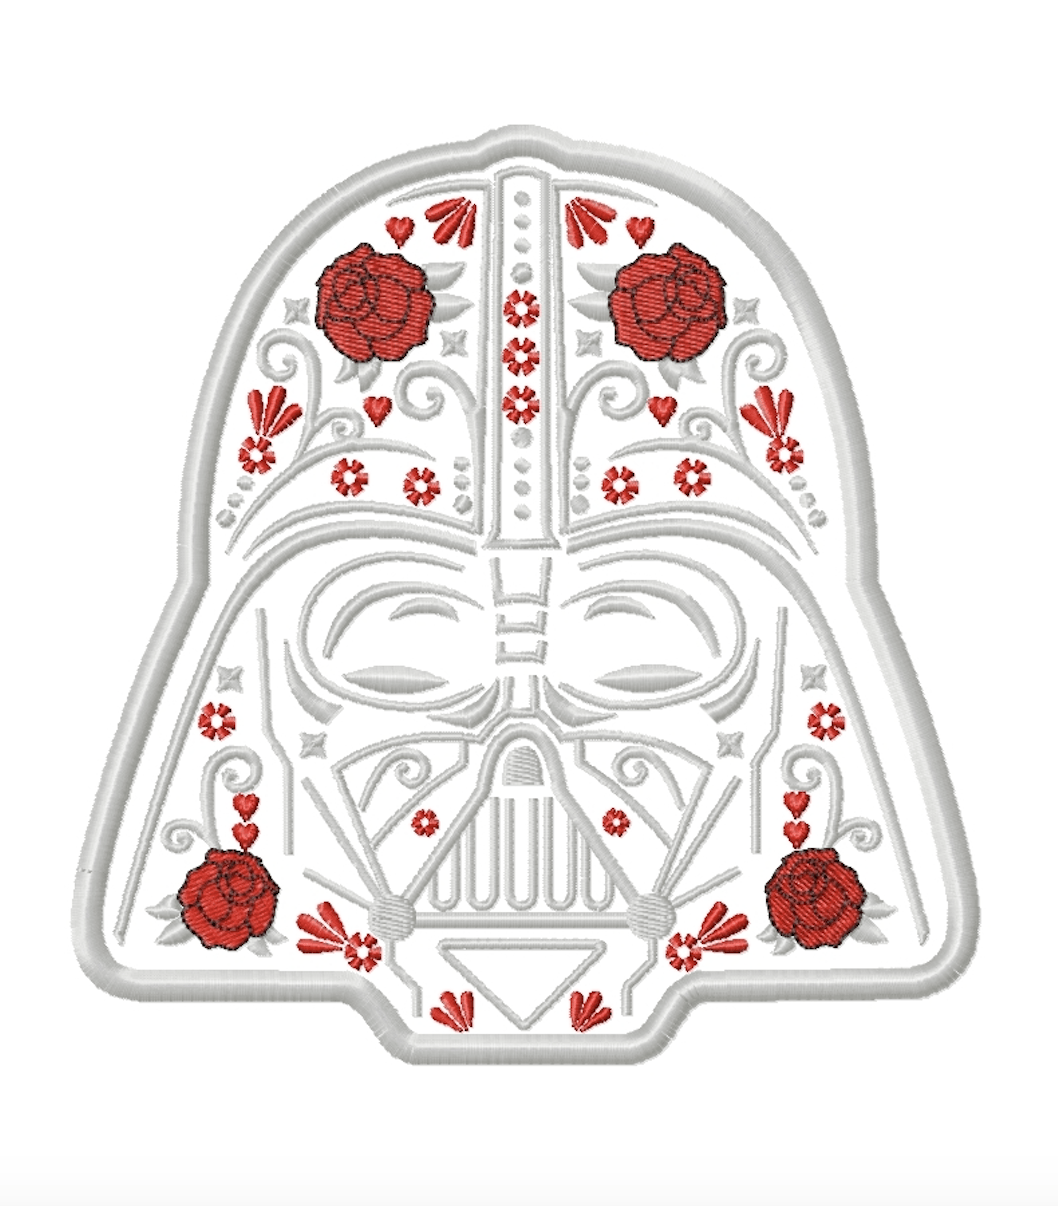
The featured design is from TimeStitchShop on Etsy and is called: The Dark Side Applique Embroidery Design. It comes in three sizes. I chose the largest, 7″ size for my son’s sweatshirt.
Reflective Embroidery Applique
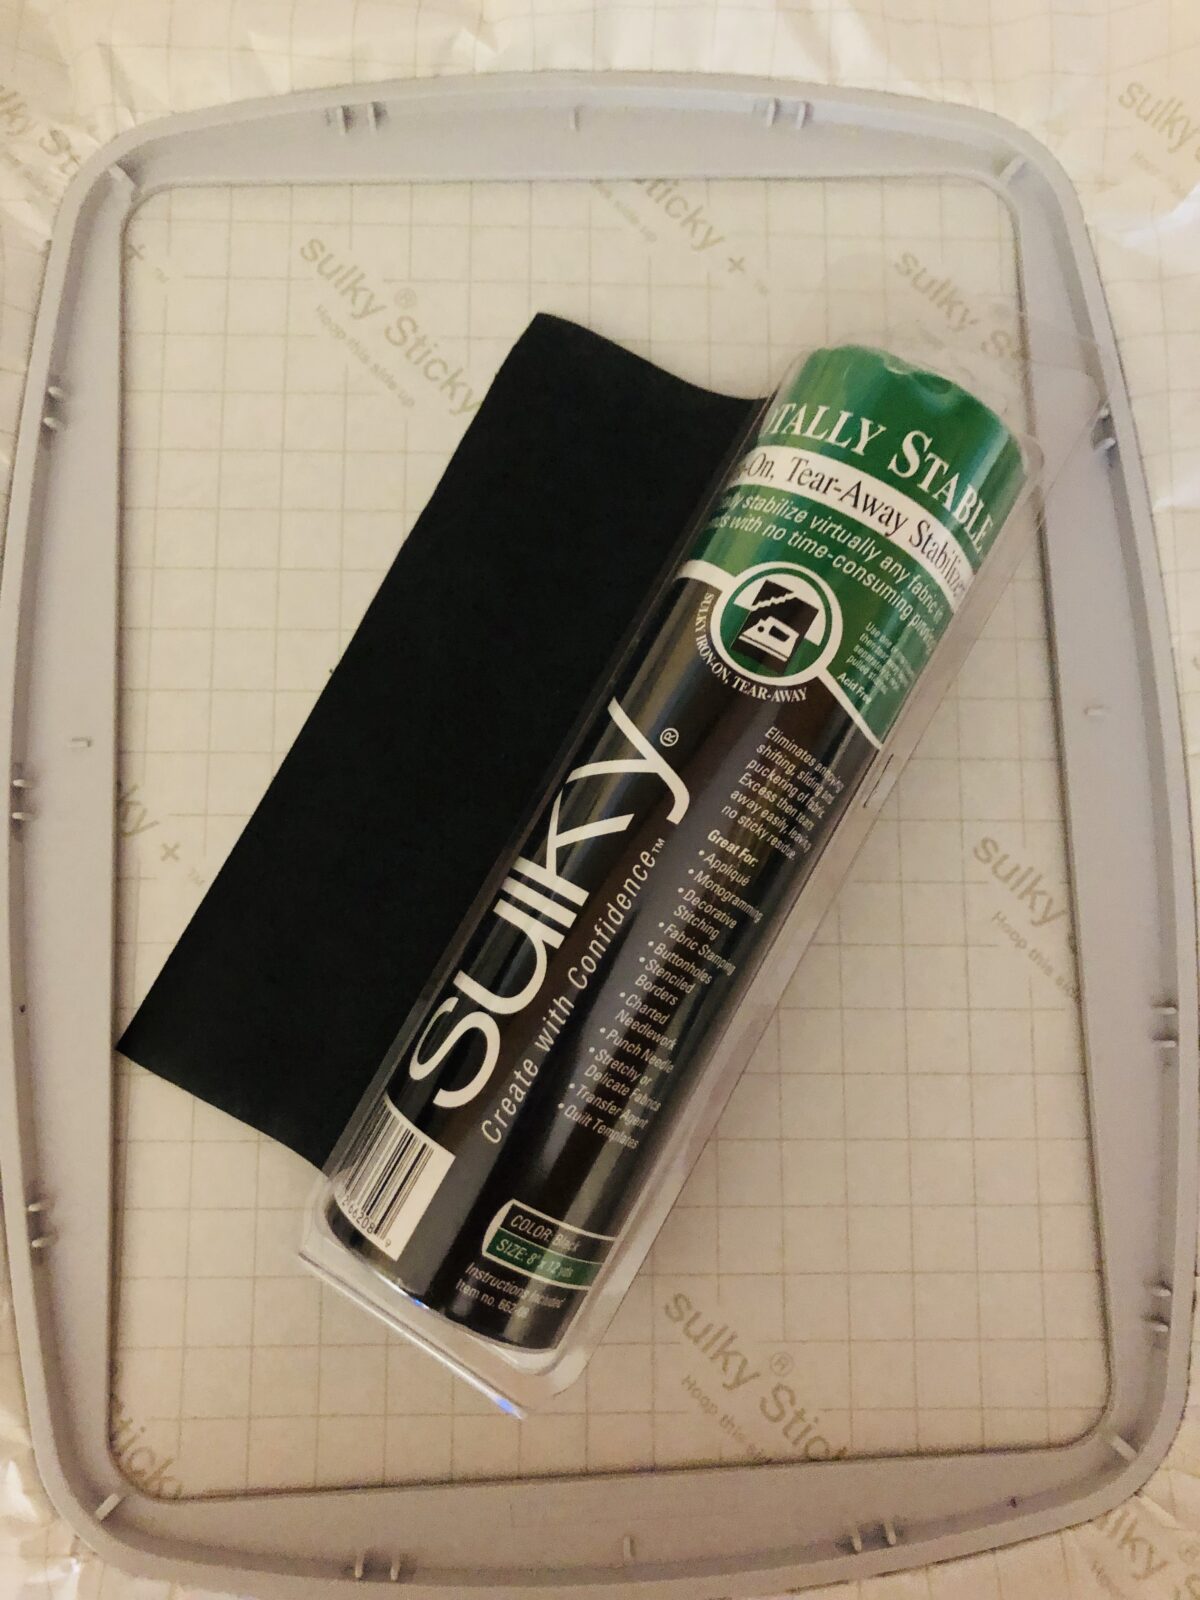
To stabilize the knit I used for the reflective embroidery, I first hooped a layer of Sulky Sticky Plus. Then I fused a layer of black Sulky Totally Stable stabilizer to the knit wrong side before placing it onto the Sticky Plus in the hoop.
You can certainly place your sweatshirt onto the Sulky Sticky Plus and embroidery the design directly onto the sweatshirt. I wanted a different color knit than what my sweatshirt was made of, so I made a free-standing appliqué and sewed it to the sweatshirt afterwards.
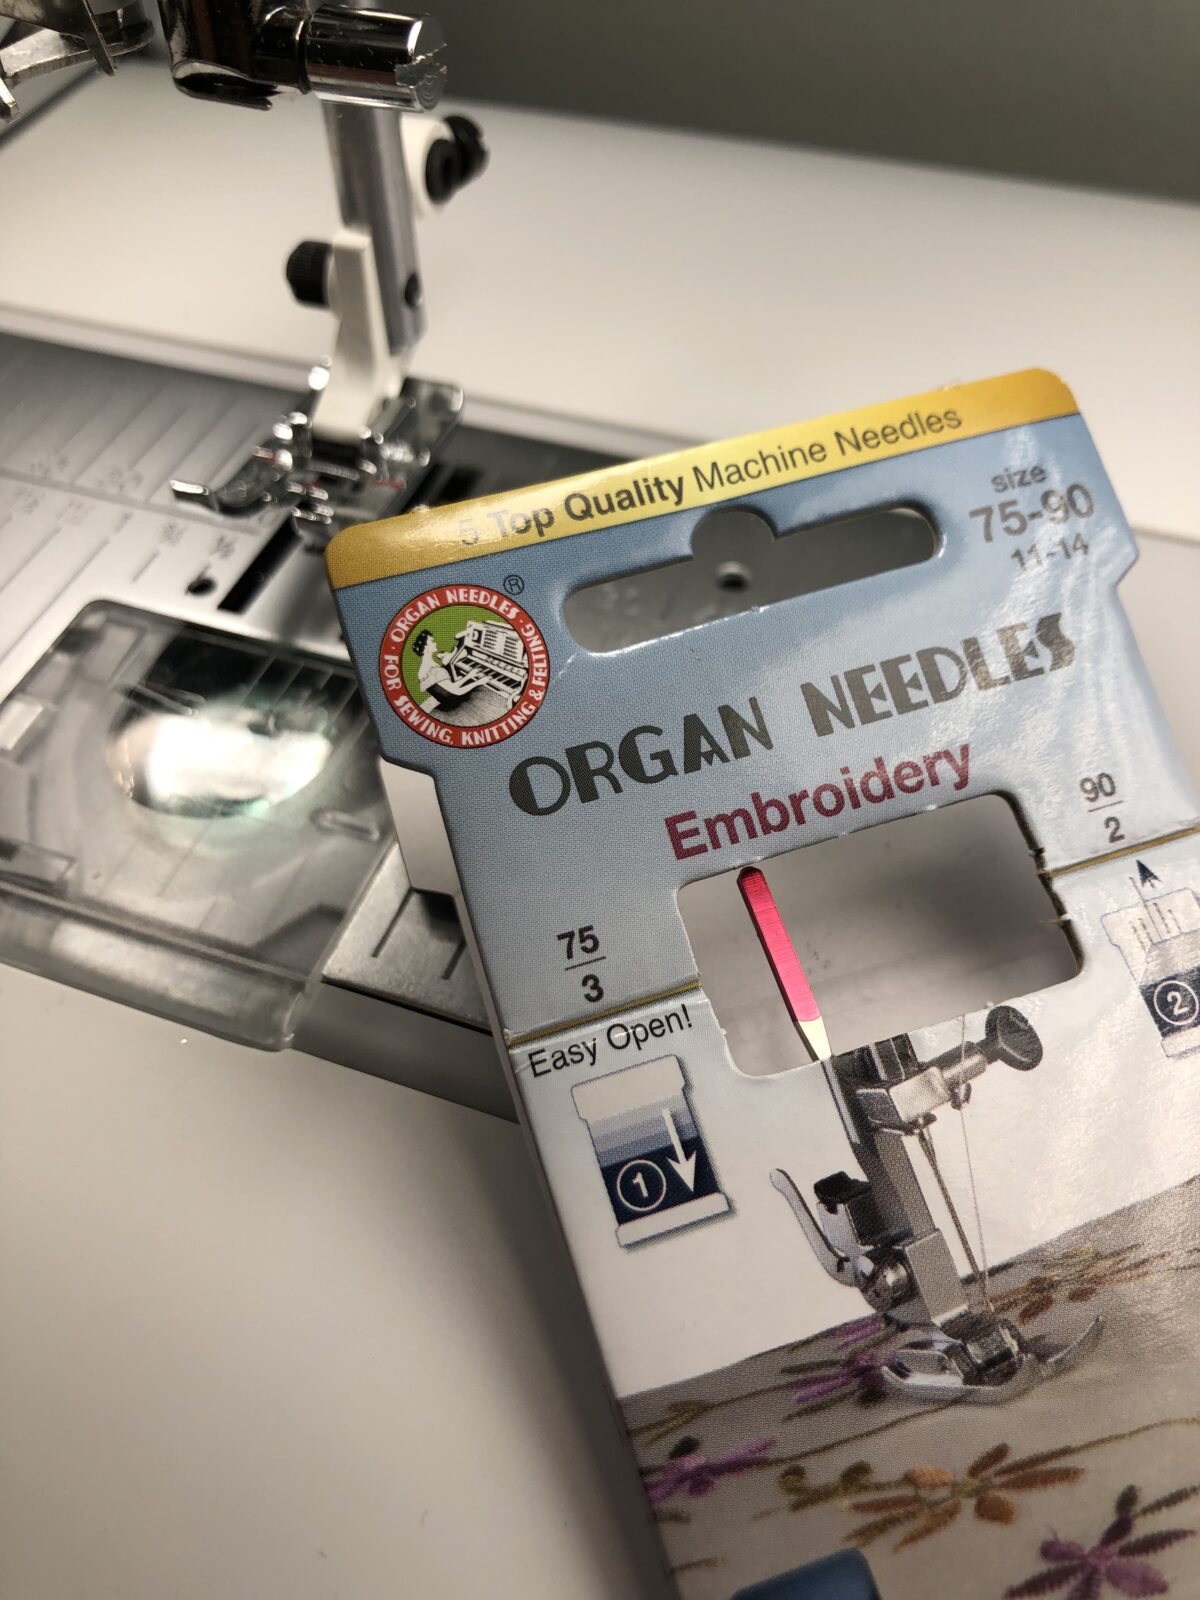
I used a 90/14 Organ embroidery needle for the reflective embroidery.
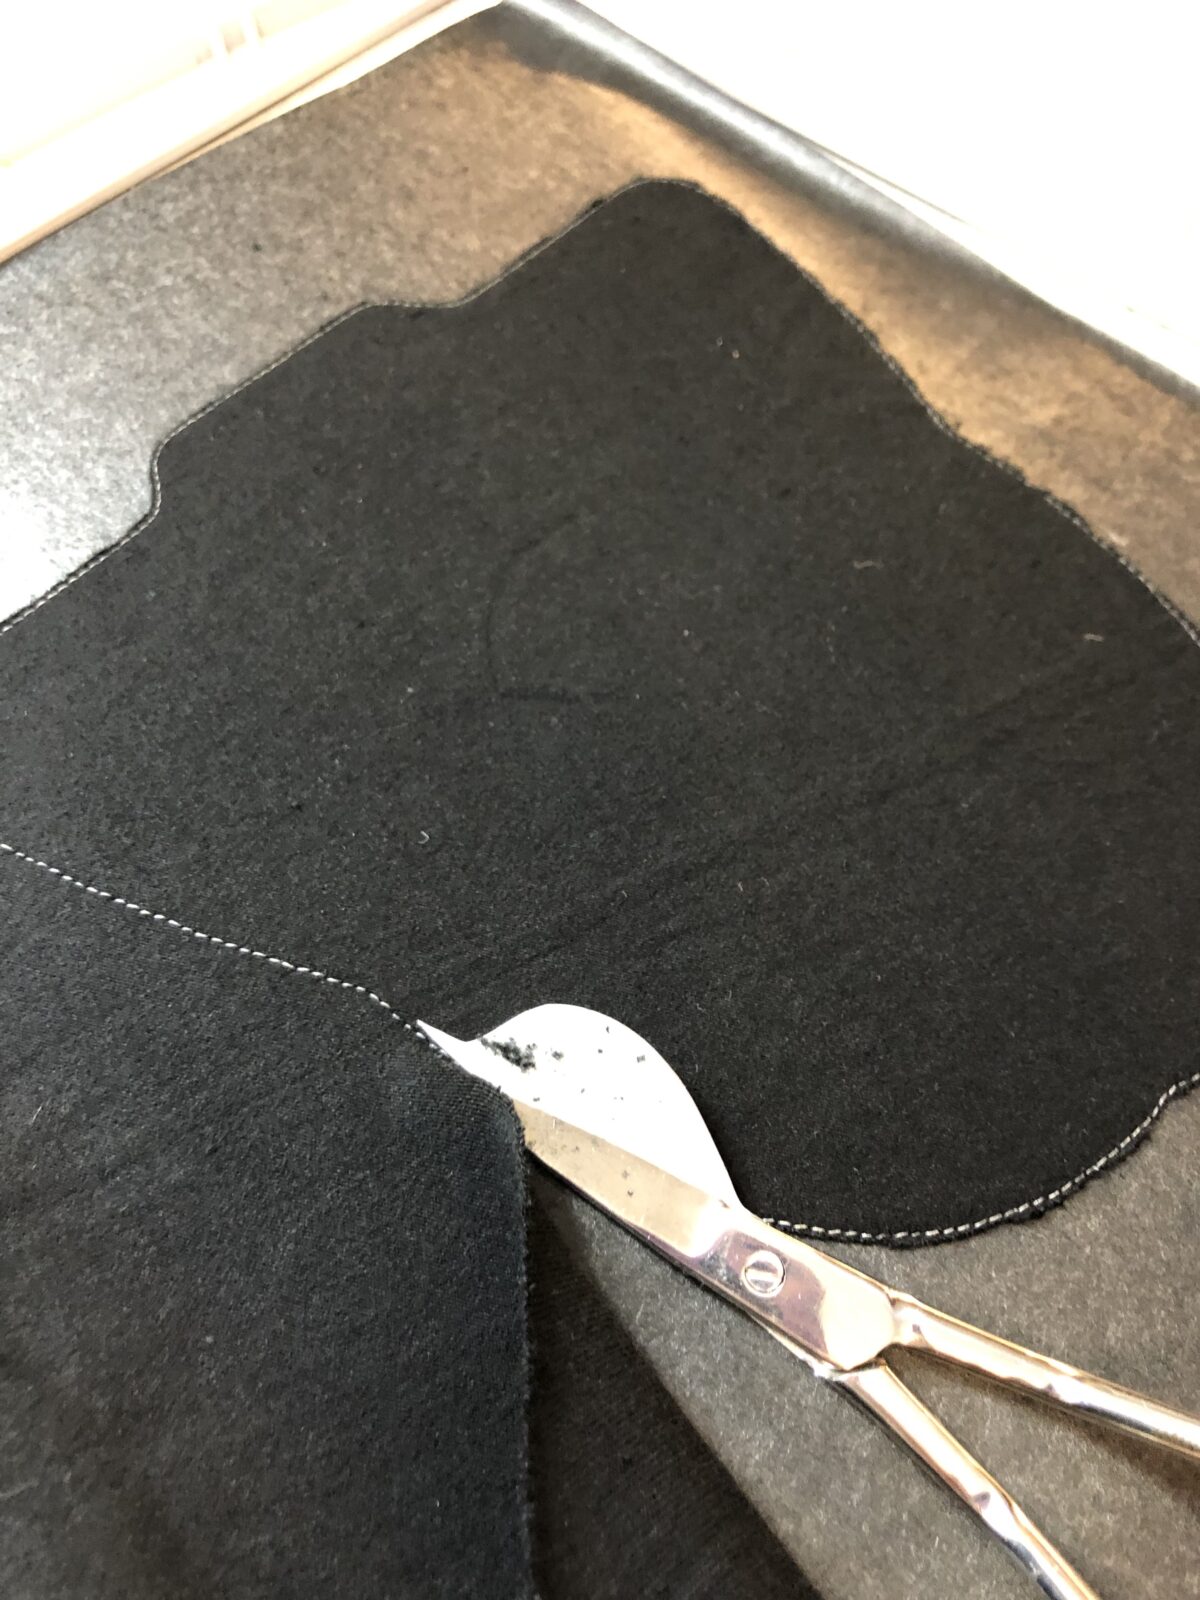
After the first thread color, use appliqué scissors to trim the fabric just beyond the stitching, getting as close as you can without accidentally cutting it.
Use the CRY reflective thread only for the outline satin stitch, with black bobbin thread in the bobbin.
Finishing the Reflective Embroidery Applique
Proceed with the rest of the embroidery instruction.
Place the finished appliqué onto a sweatshirt back where desired. Use KK 2000 Temporary Spray Adhesive to secure the appliqué.

Load the machine with Smoke invisible thread in the needle and bobbin (Wind the bobbin only partway.).
Switch to sewing mode and sew the appliqué to the sweatshirt, stitching just inside of the CRY thread outline.

It’s difficult to take a photo in the dark to see the reflective embroidery, but it really does have a cool effect!
Try it for yourself, and May the Fourth be with you!

Ellen March
I am the Director of Content for Sulky of America. The former Editor in Chief of Sew News and Creative Machine Embroidery magazines, I hosted Sew it All TV on PBS for nine seasons. I've appeared on It's Sew Easy on PBS, DIY Network's Uncommon Threads, Hallmark's Marie Osmond Show, MacPhee Workshop and more! Come sew with me!


5 Comments
Brenda @ Songbird Designs
So cool!! I’ll have to give this a try sometime!
Judy C.
Really nice work. Lots of uses for this type of thread, especially the ones you suggested. Of course would be helpful and fun on Halloween costumes.
Karen
I couldn’t find that design or the store on Etsy!
Ellen March
Thank you for bringing that to our attention. It appears it no longer exists on Etsy. Here is a great substitute! https://www.etsy.com/listing/609819079/darth-vader-applique-embroidery-design?ref=reviews