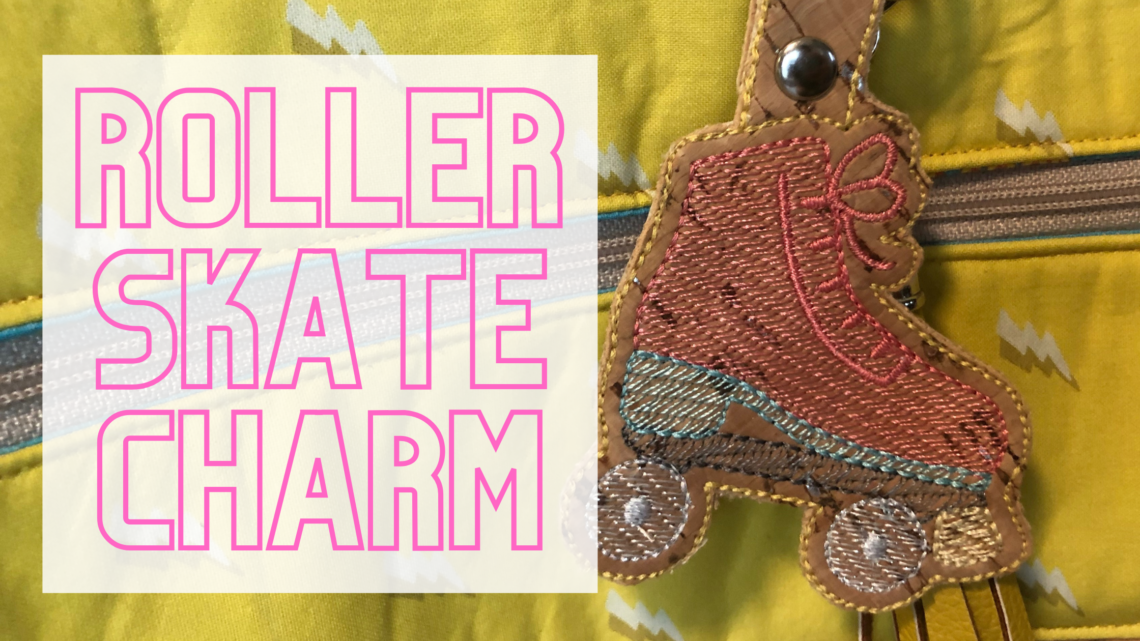
Roller Skate Charm In the Hoop
Roller Skate Charm
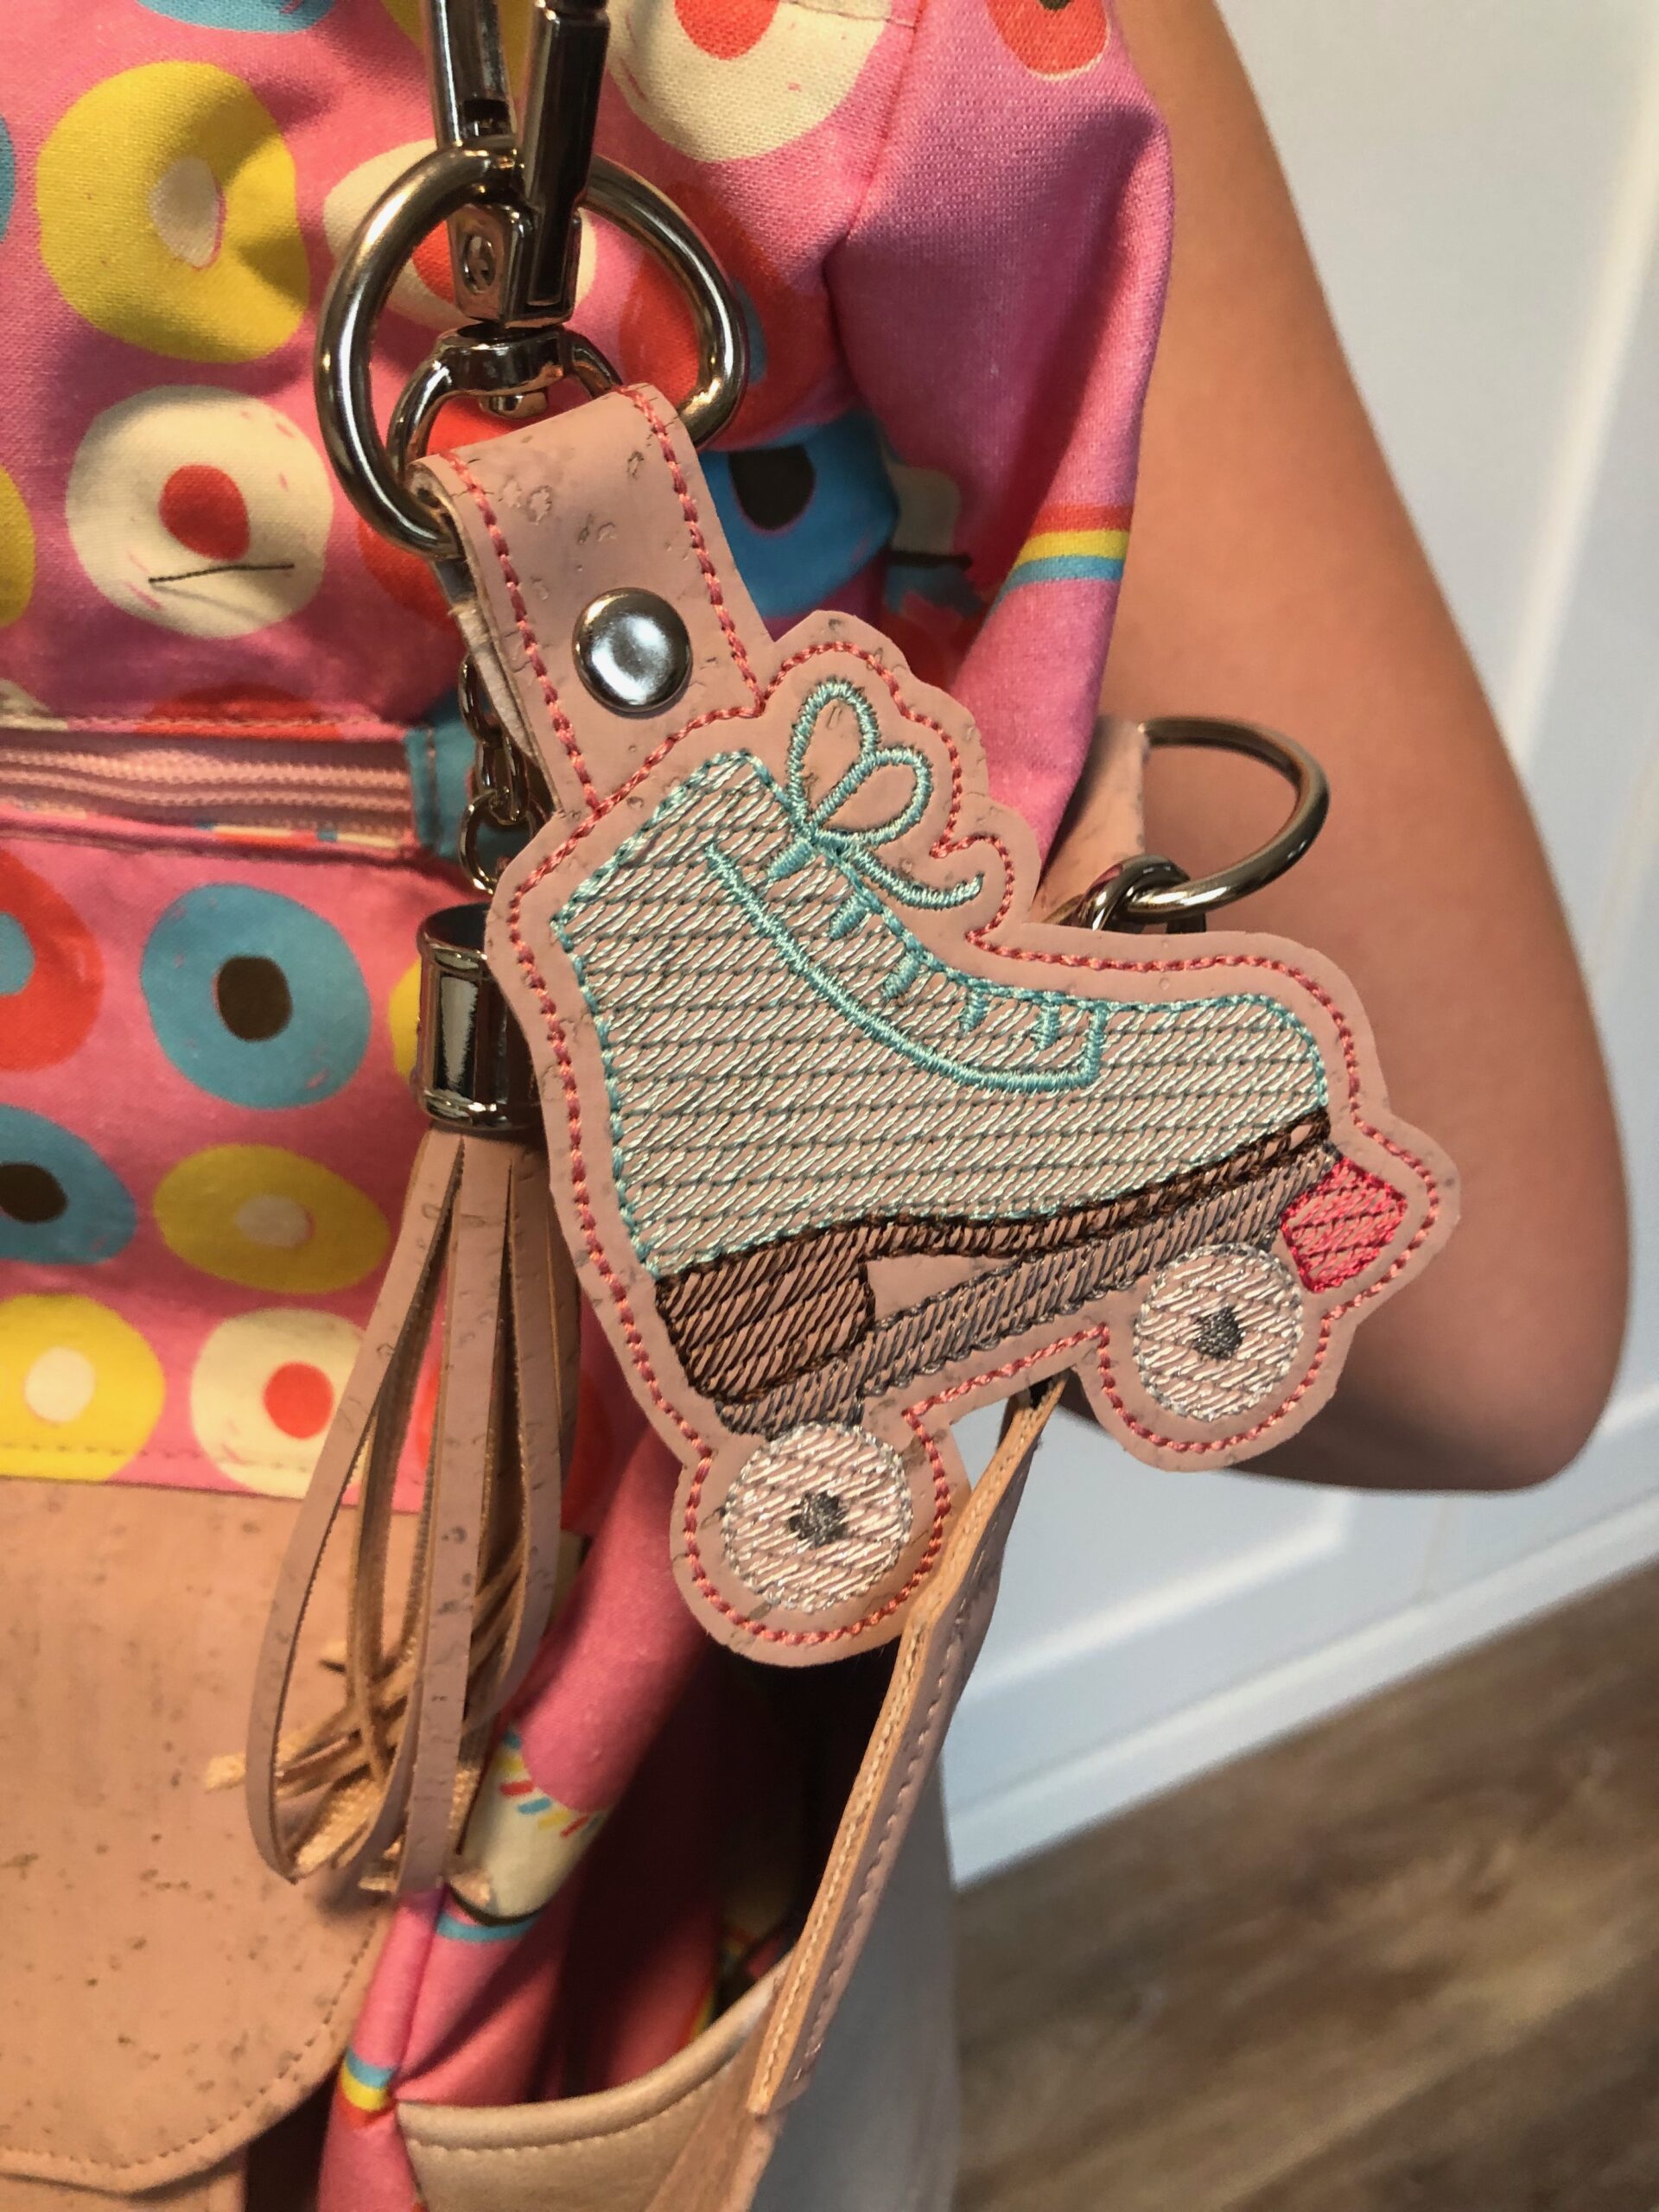
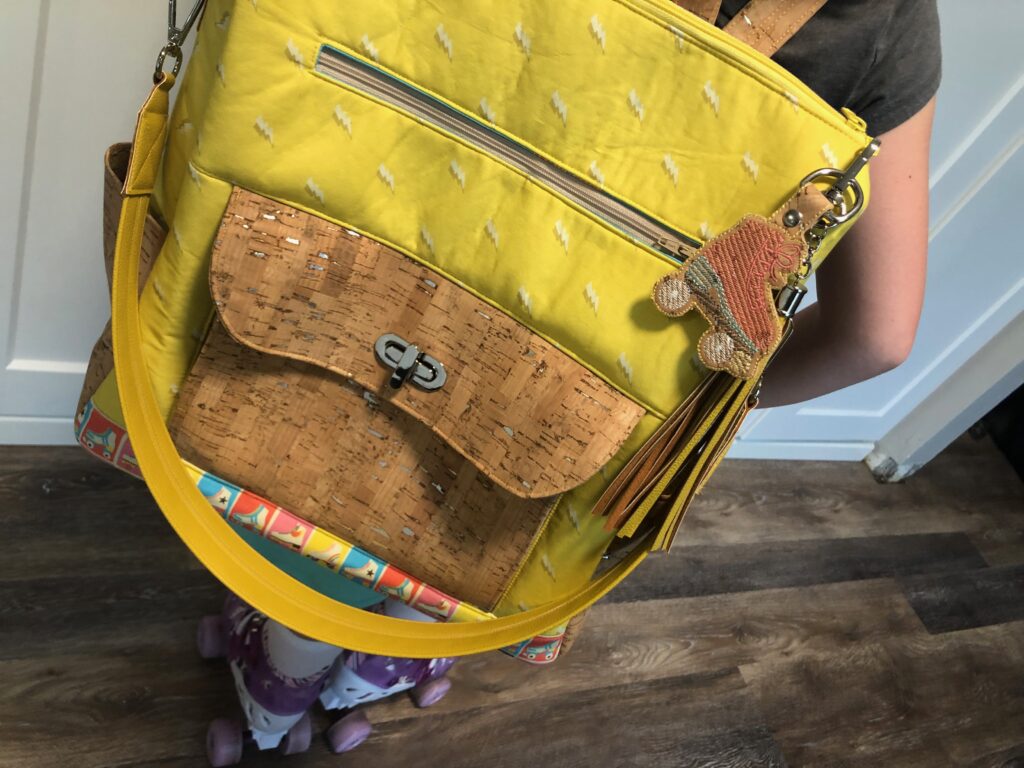
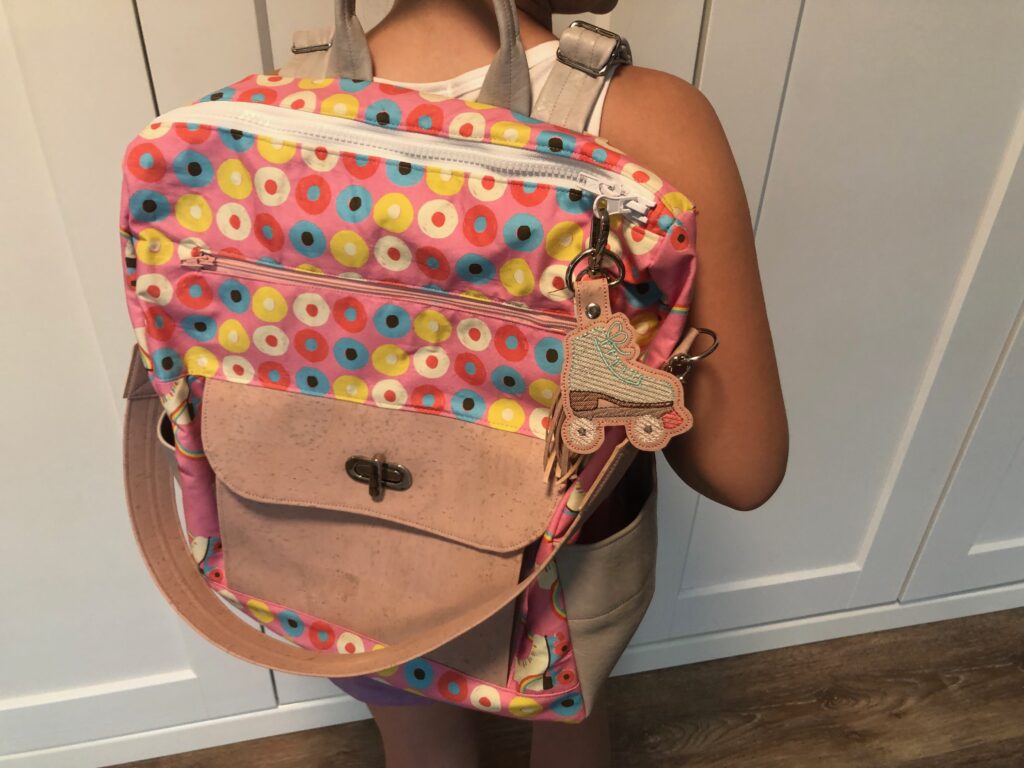
A roller skate charm is a cute addition to any summery bag or backpack. Whether you are a roller skater or know a roller skater, you’ll love a retro roller skate charm that acts as a decorative bag accent, key ring or luggage tag. A roller skate charm is nostalgic and fun, plus it makes a great quick gift. There are lots of roller skate charm in-the-hoop designs to choose from, available from different sellers online. Do a quick search and browse the offerings to locate one that’s perfect for your bag pattern, premade or homemade tassel, or gift recipient. For even more fun, add a tassel using a swivel tassel clip, which does double-duty as a keyring.
CHARM DETAILS
The featured Roller Skate ITH embroidery design from Cherry Bomb Shoppe comes with files for an eyelet hole or keyfob application. For the featured roller skate charm, a D-ring was used and secured with a rivet. The design chart directs you to use a snap application for the keyfob version, so do that if preferred.
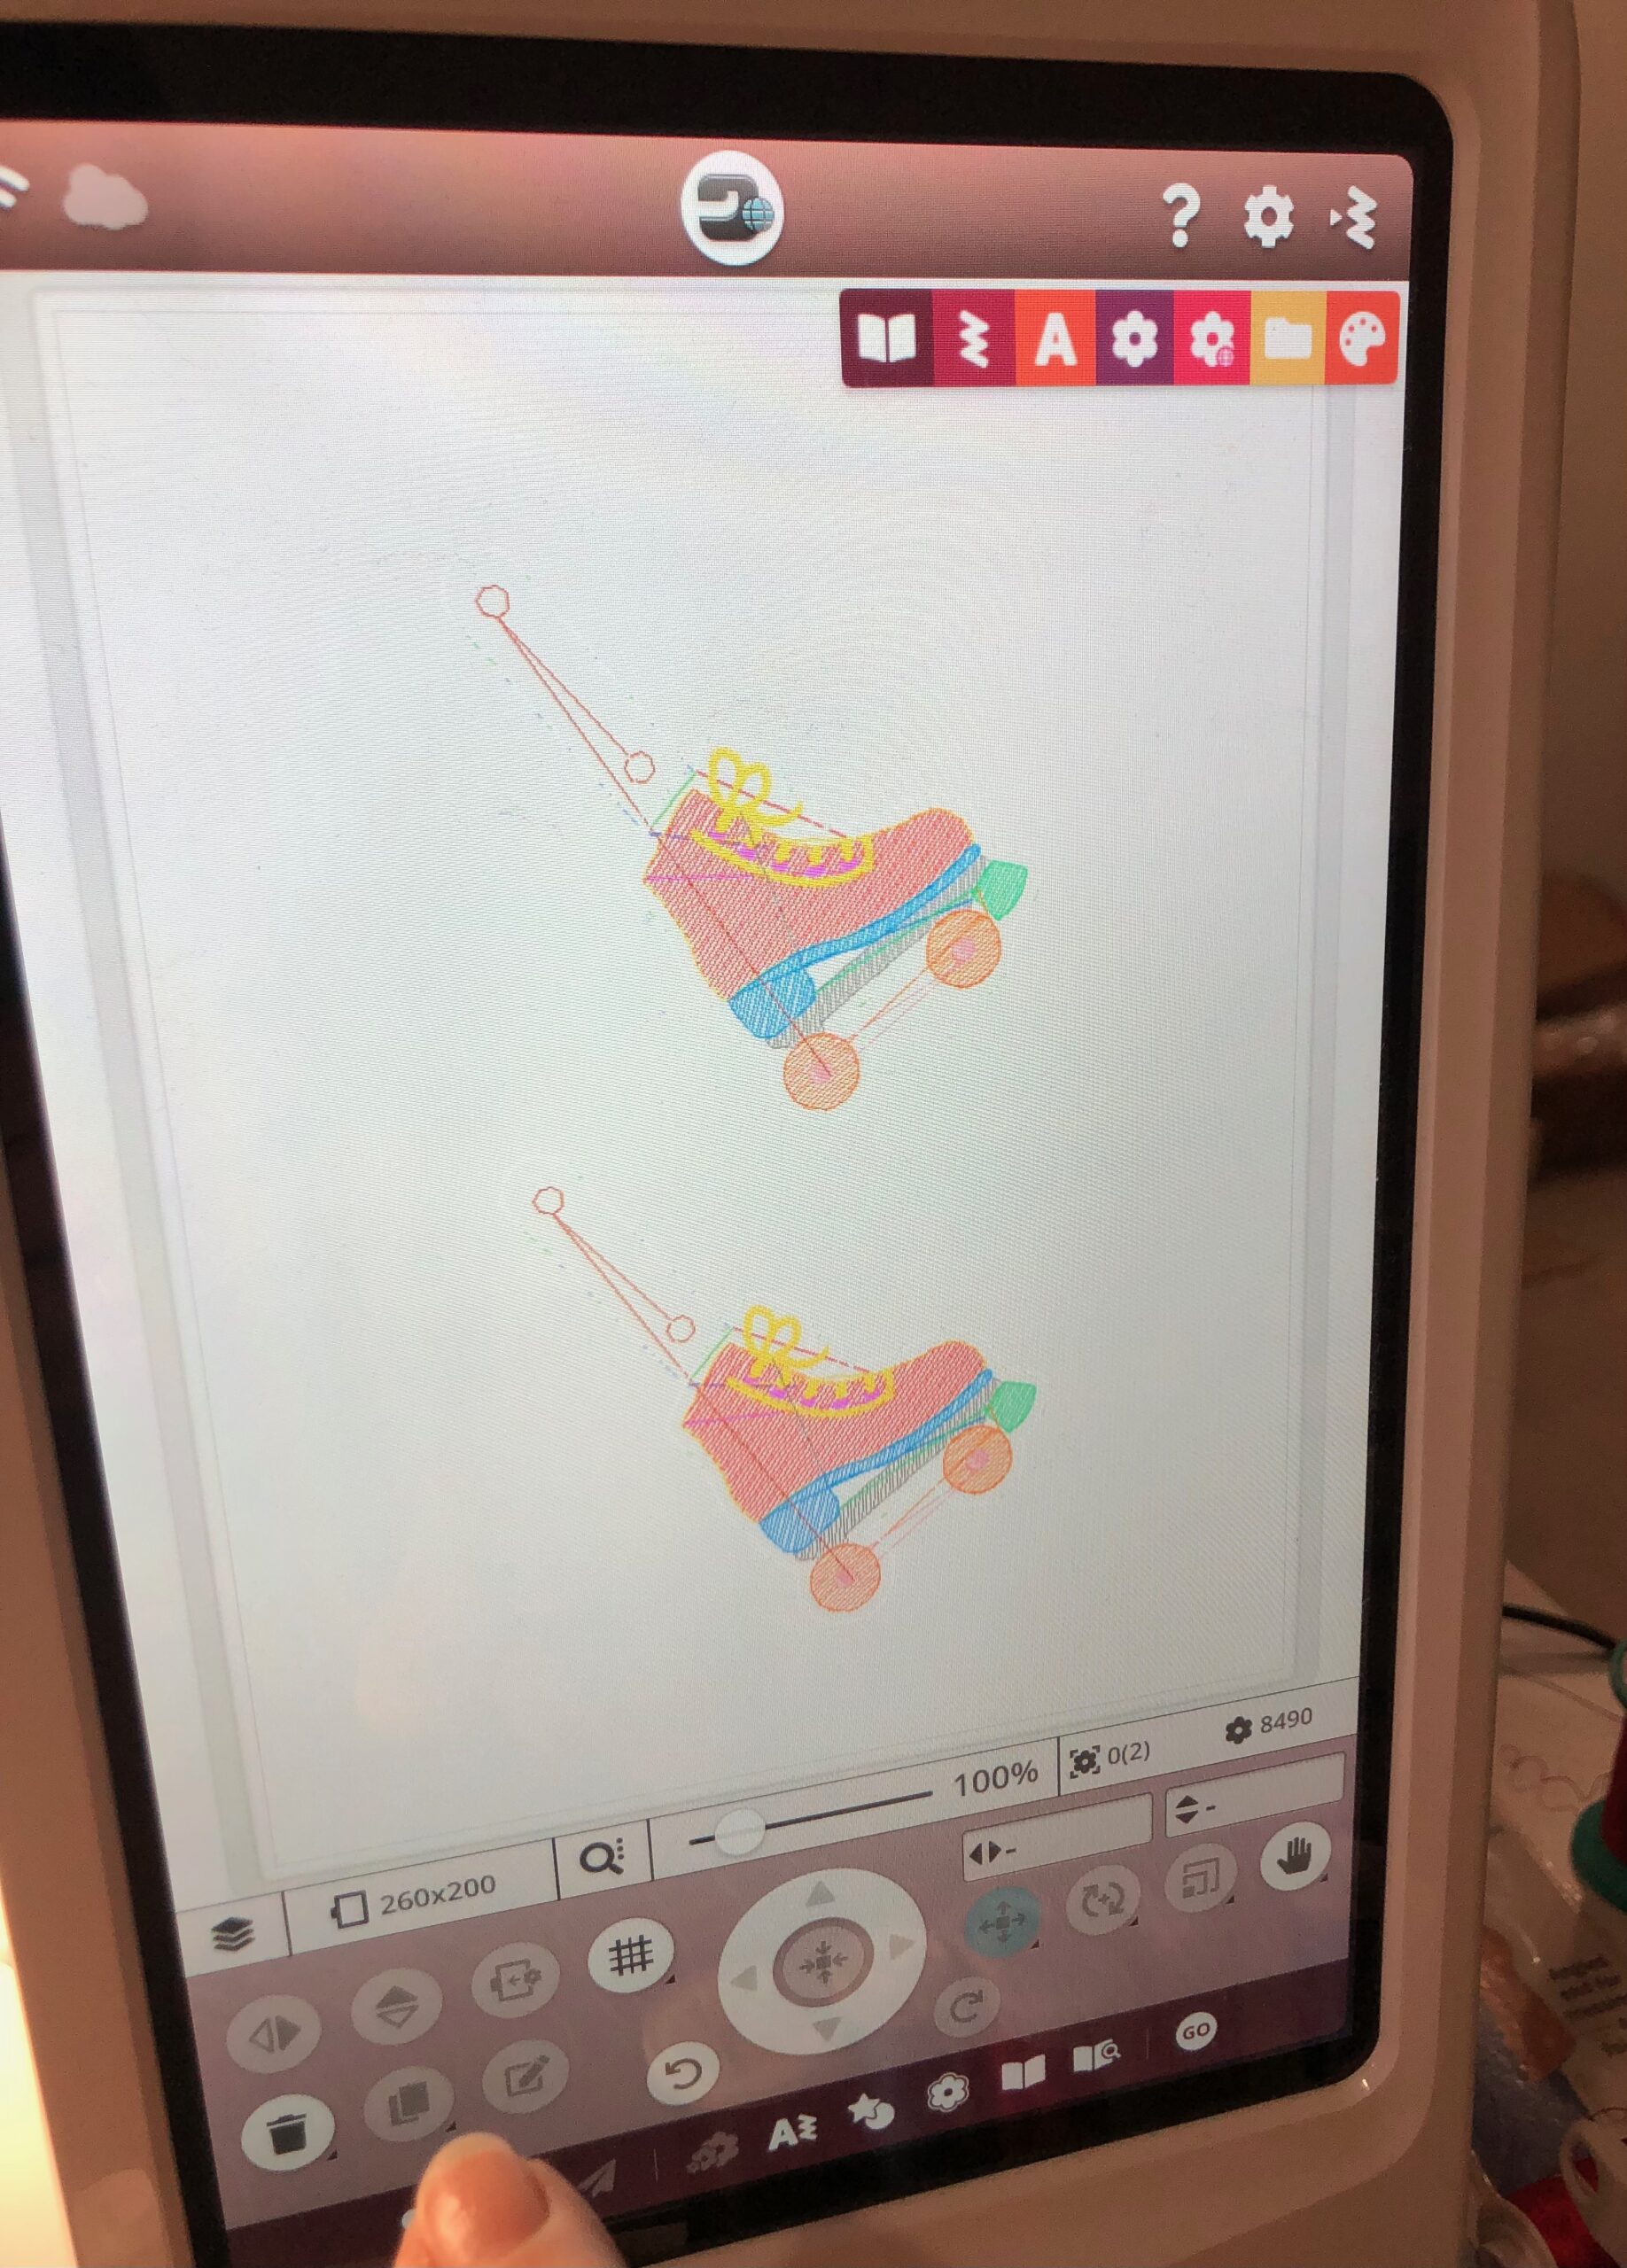
The design also comes as a single stitchout (for one charm) in a 4×4 hoop, a double stitchout (for two charms) in a 5×7 hoop, and a 6×10 size that fits five charms in one hooping. So it’s easy to create multiples to give as gifts. They would make great roller skate party favors!
Unfortunately this shop is no longer taking orders for designs! But here are some suitable design substitutes:
- ITH Roller Skates Key Fob by InTheHoopBySher
- Roller Kates In The Hoop Embroidery Key Fob by DigiBluePumpkinLLC
- Embroidered Old School Roller Skate Design by Lynn Oma Designs
The following tips and instructions are still applicable to the design alternates listed above.
DESIGN TIPS
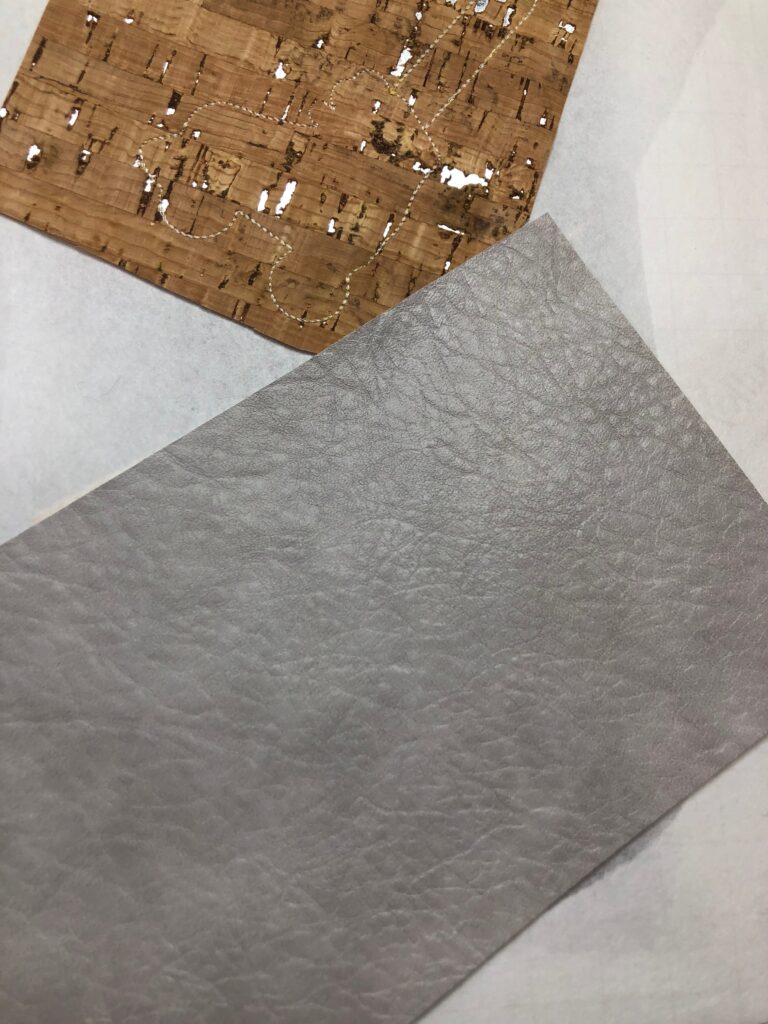
Try using cork fabric or faux leather as the base for this charm. Since the stitch fill is rather open and sketchy, the design won’t cause puckering or buckling with these heavier weight, sometimes stretchy, fabrics. Plus, the heavier base gives great structure to the charm.
Use Sulky Poly Deco™ Thread for the embroidery to provide a strong yet shiny result. And, use Sulky 60 wt. Bobbin Thread for best results.
HOW TO EMBROIDER THE ROLLER SKATE CHARM
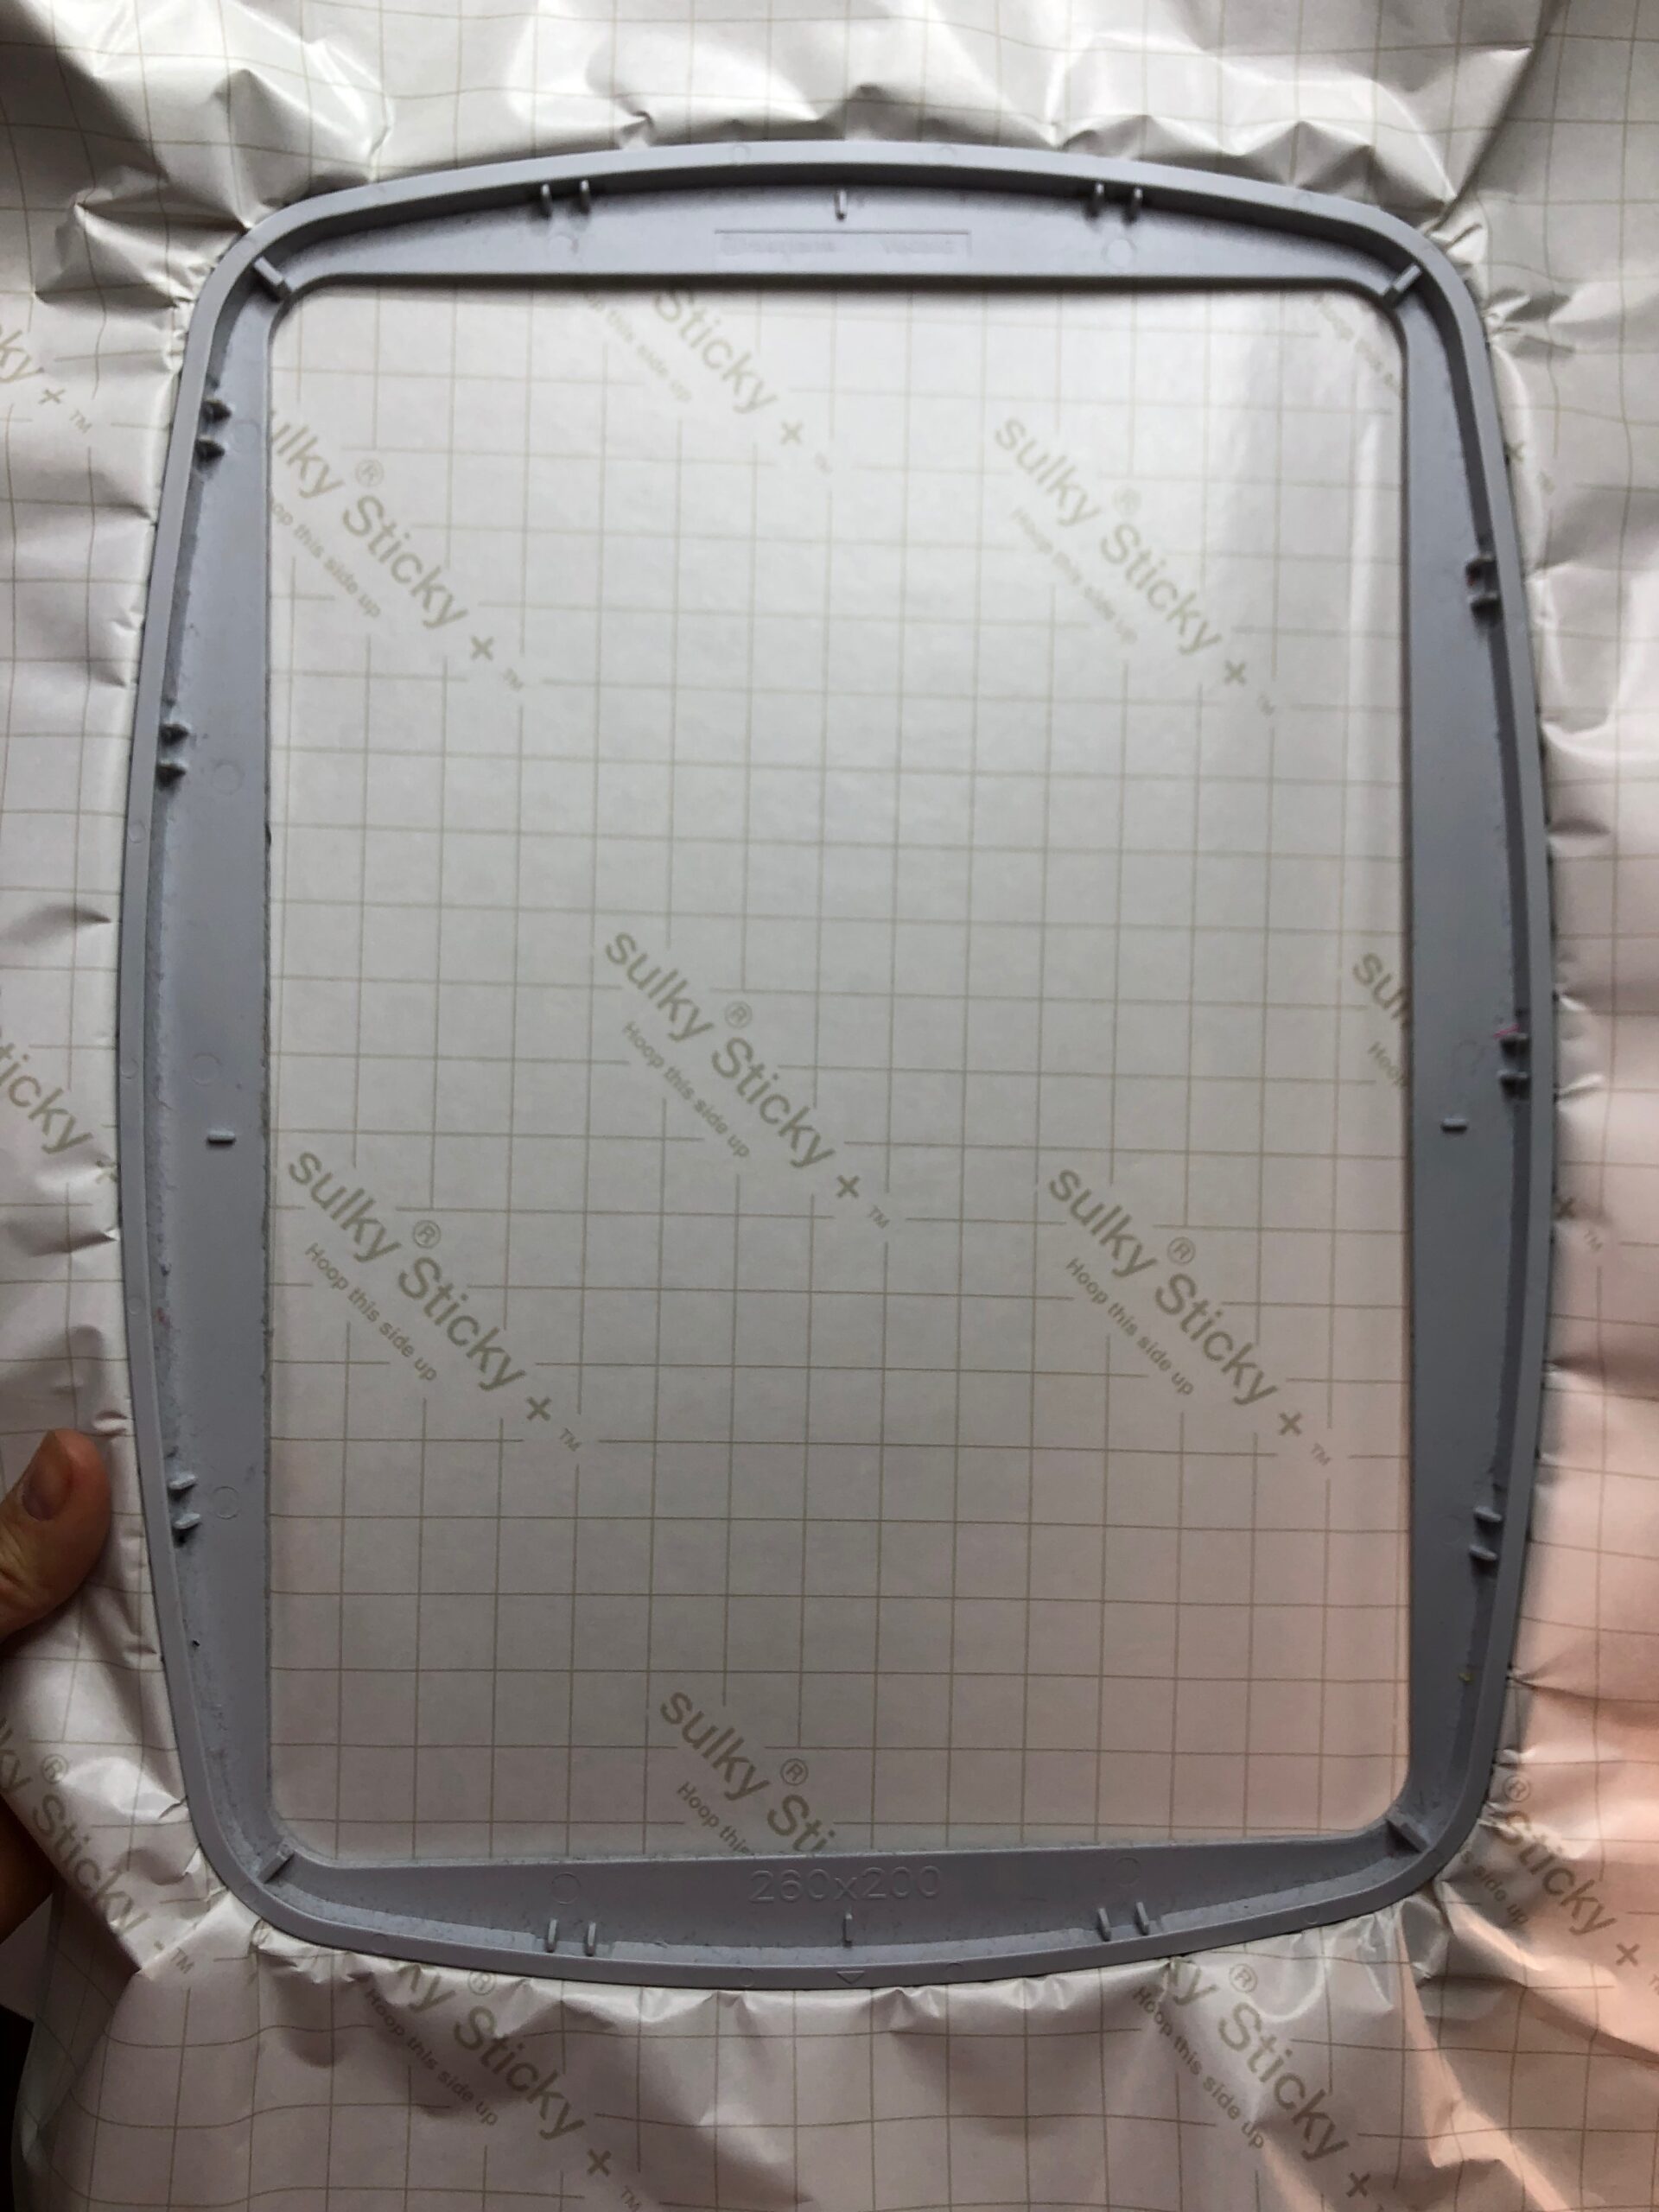
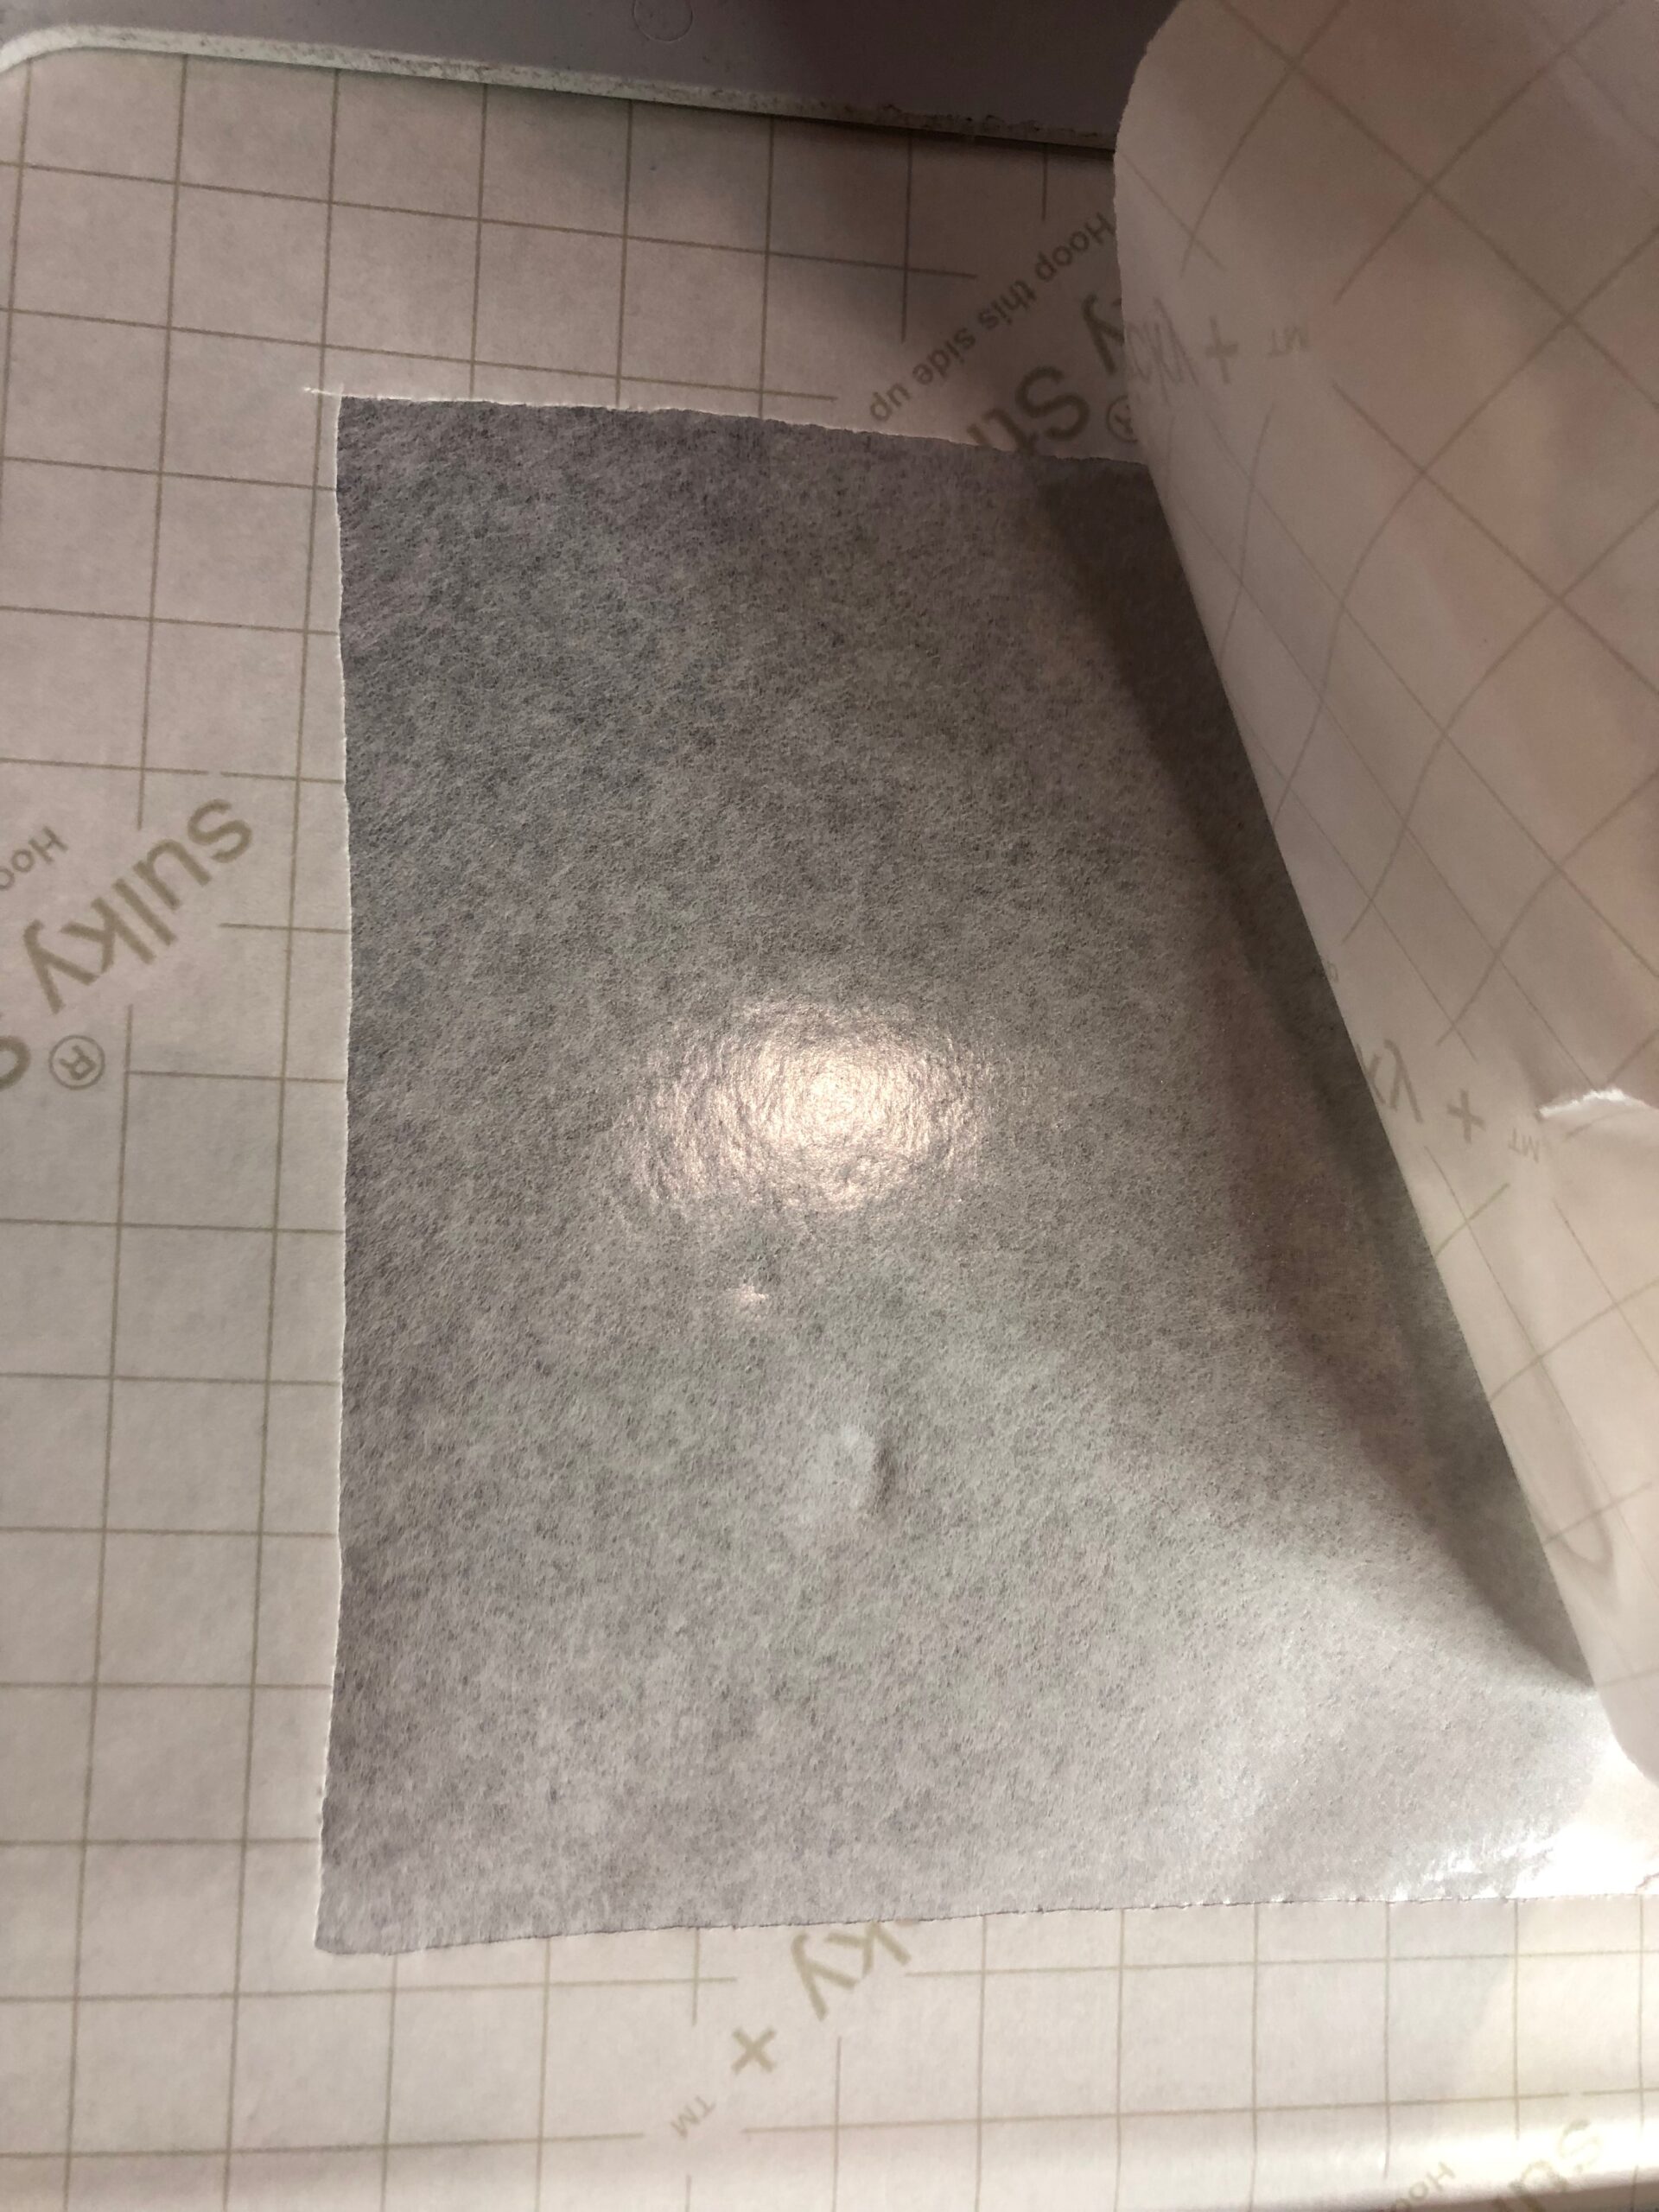
After loading the design into the machine, hoop a piece of Sulky Sticky+™ with the paper side facing up.
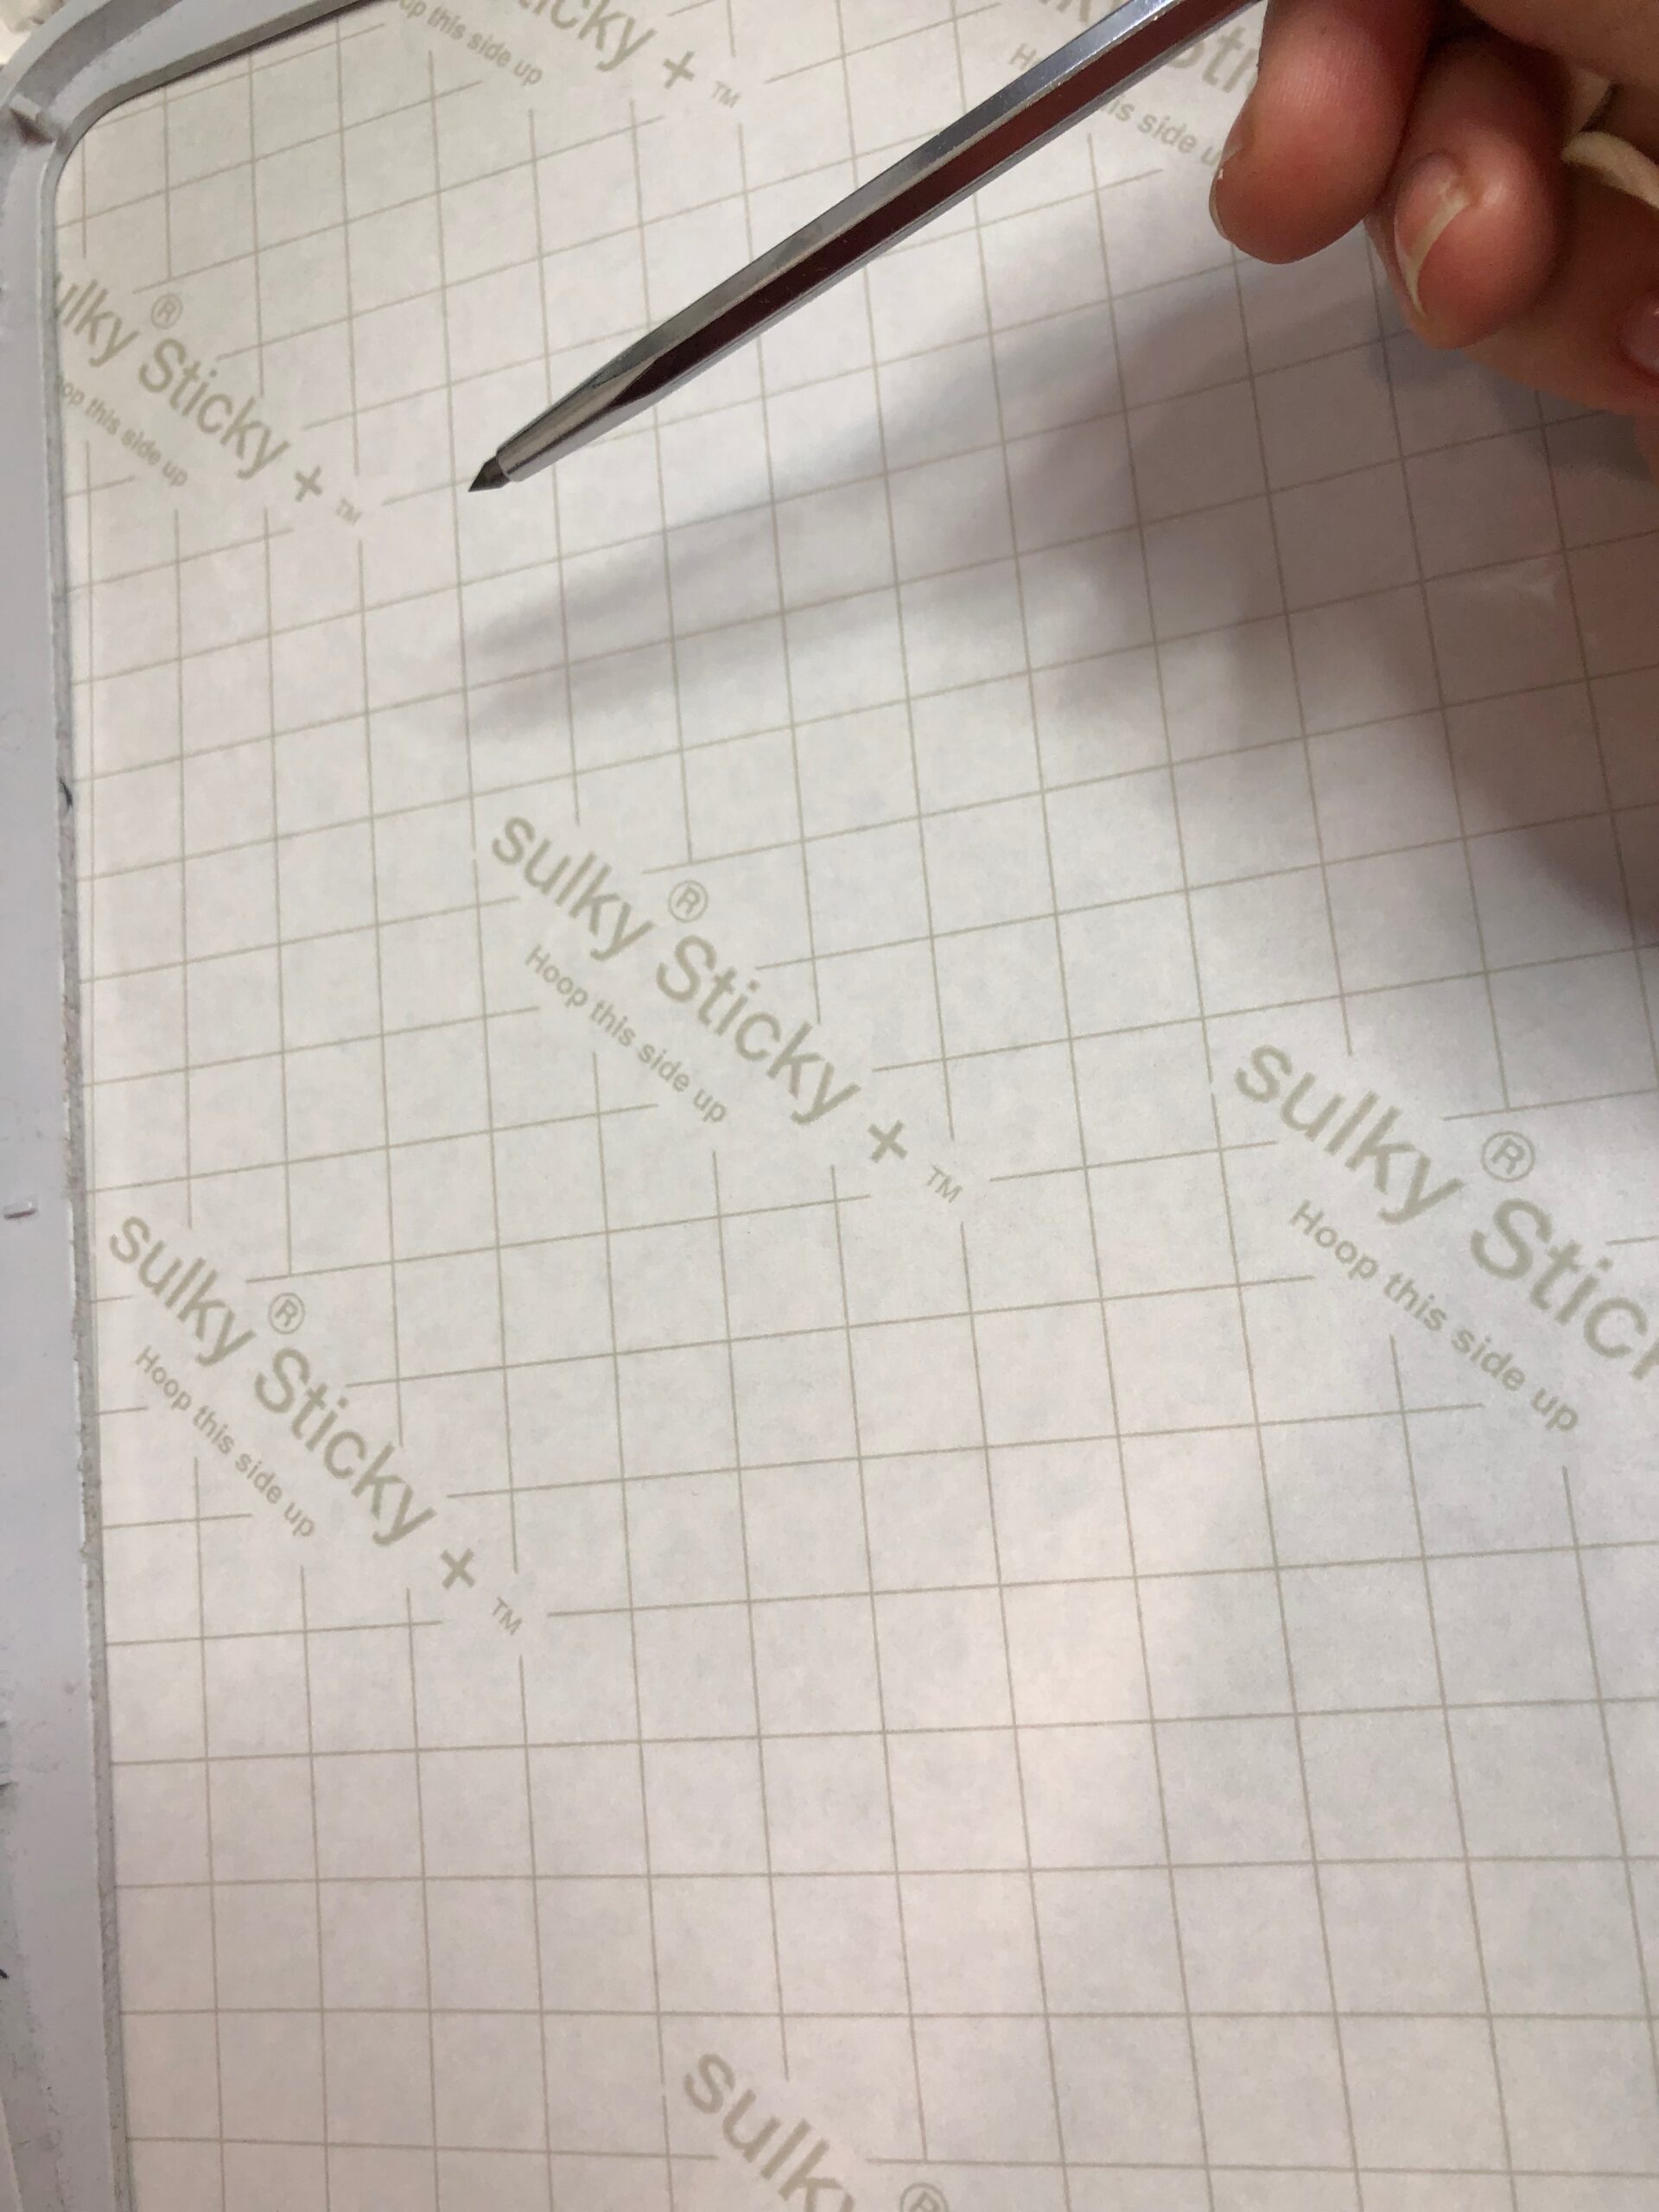
Next, score the paper inside the inner hoop ring using a Sticky+ Slitting Pen.
Then, tear away the paper backing along the scored lines to reveal the adhesive.
Place the cork fabric or faux leather (if using) over the adhesive with the right side facing up.
TIP: Sulky Felty™ is also a great choice for a freestanding charm. The 100% polyester felt is manufactured to accept a lot of needle penetrations and thread, so a denser design with more stitch fill works great with Felty.
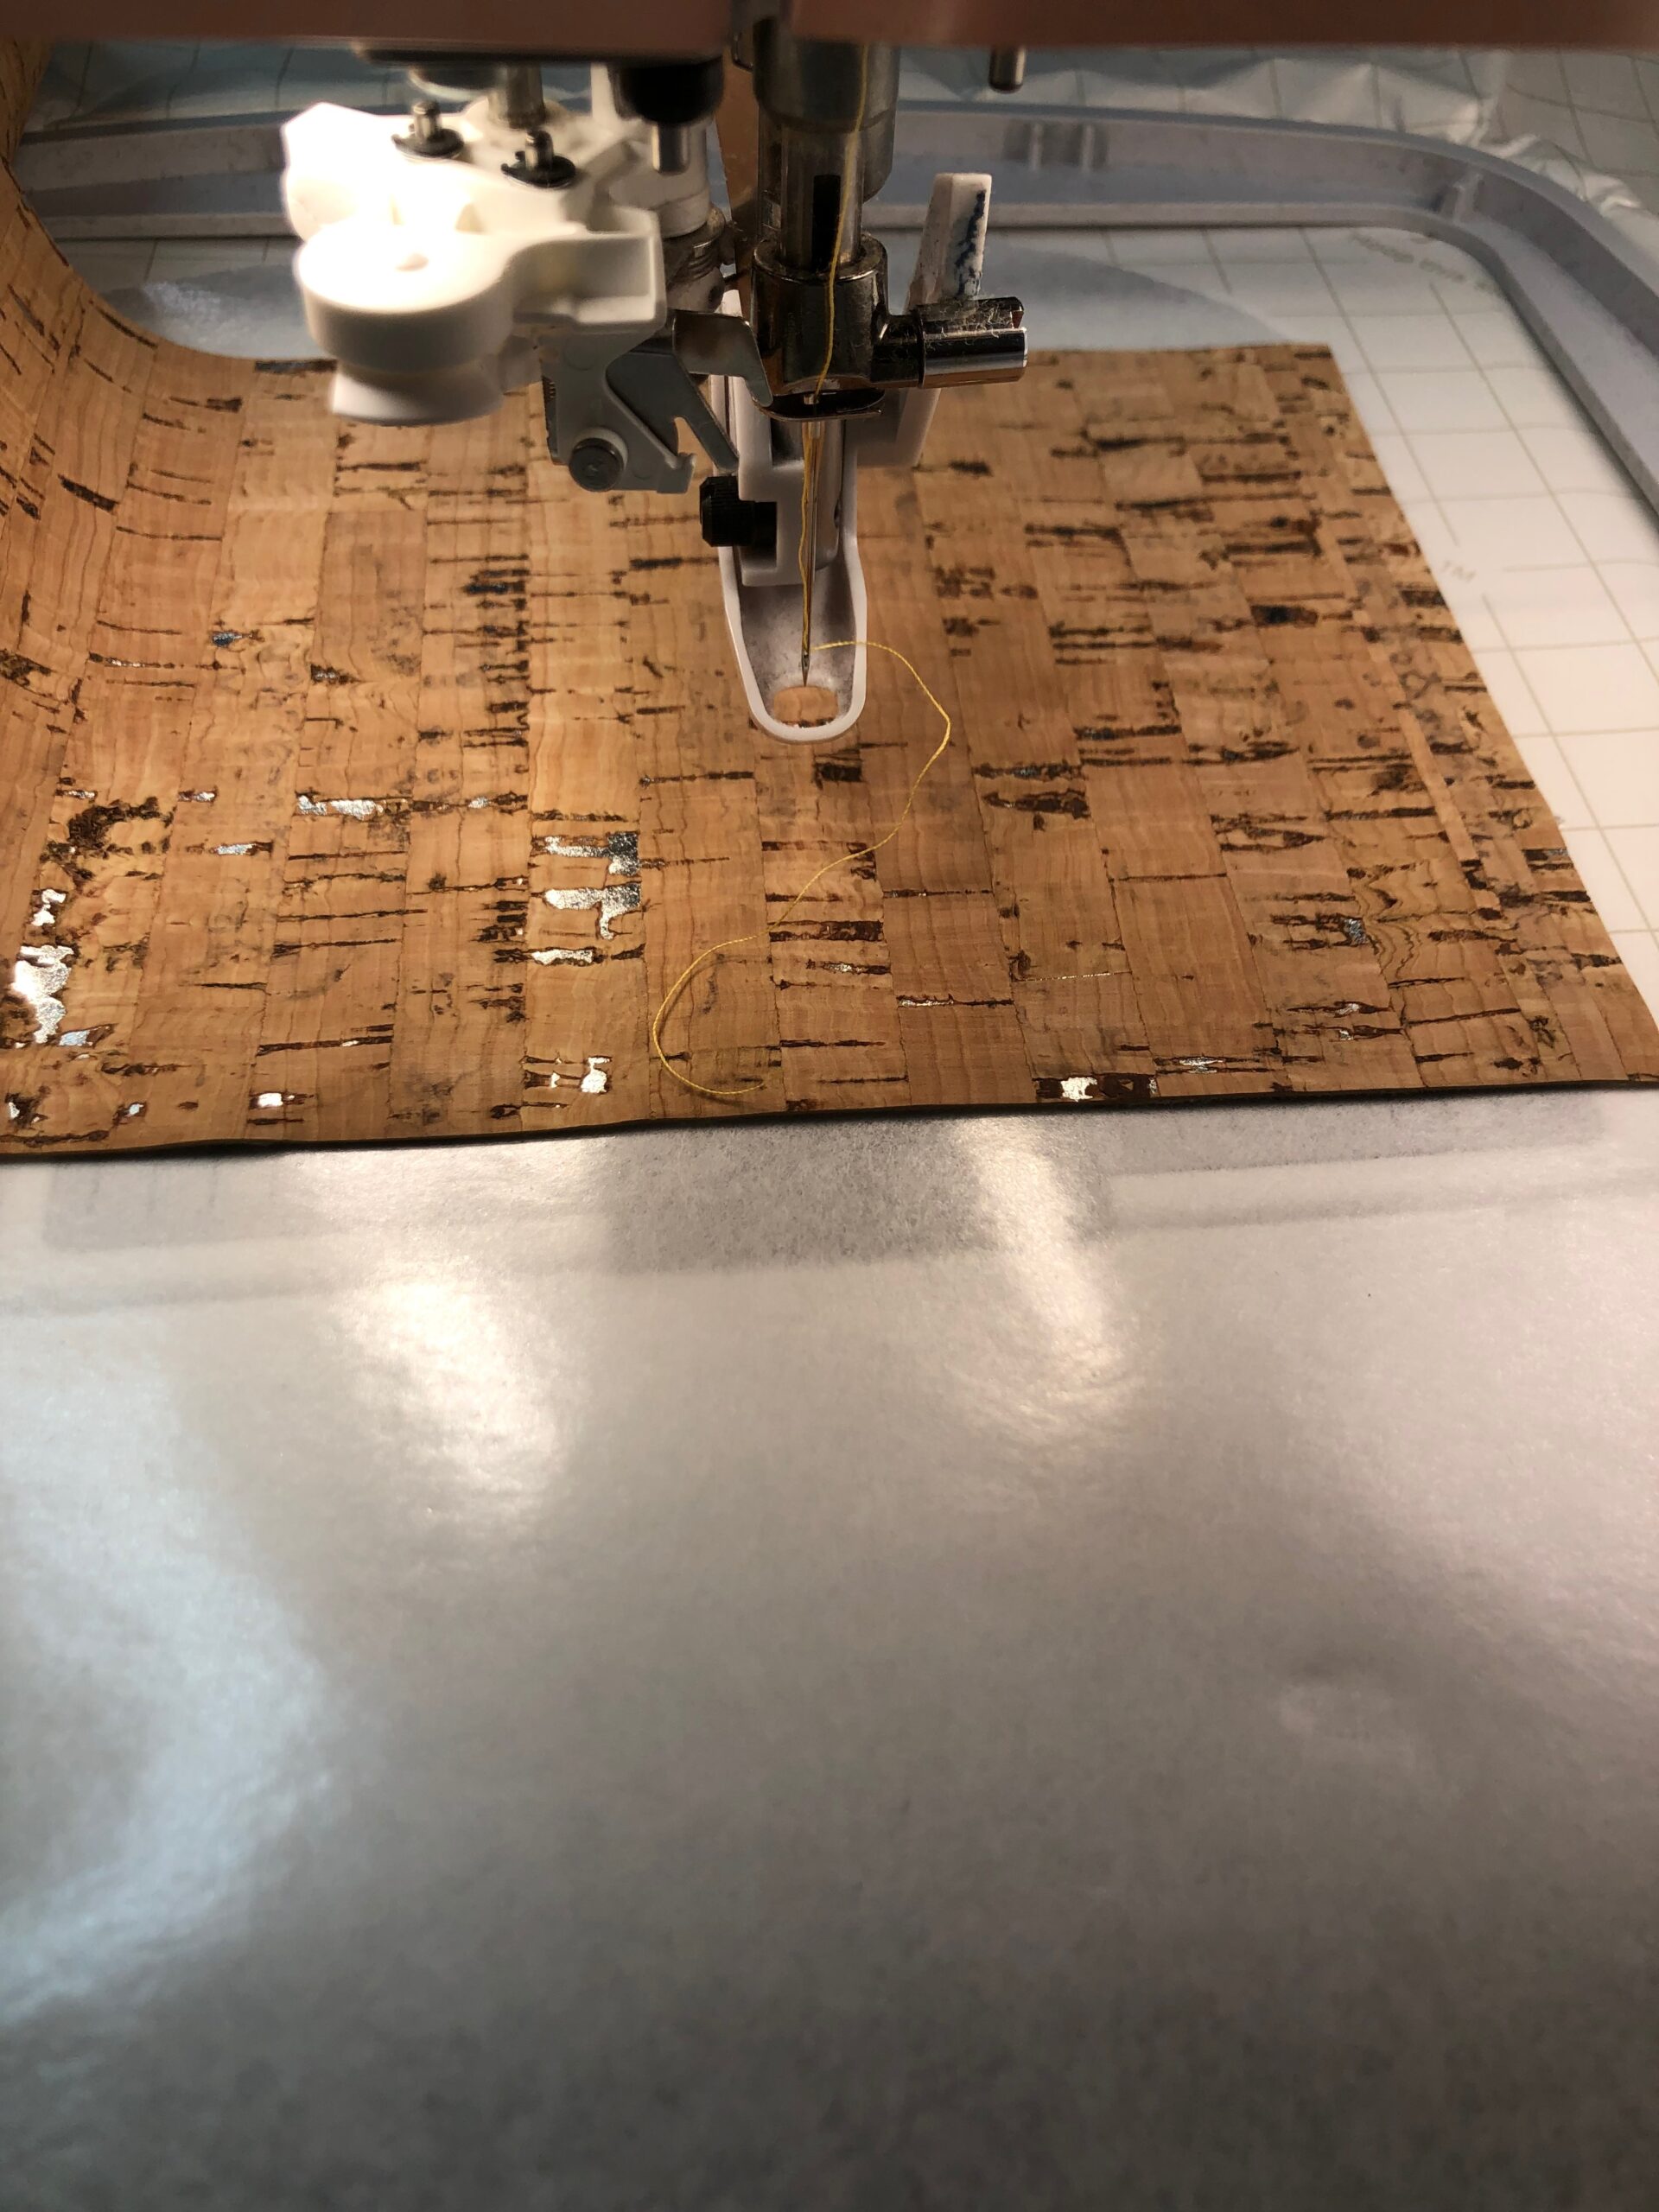
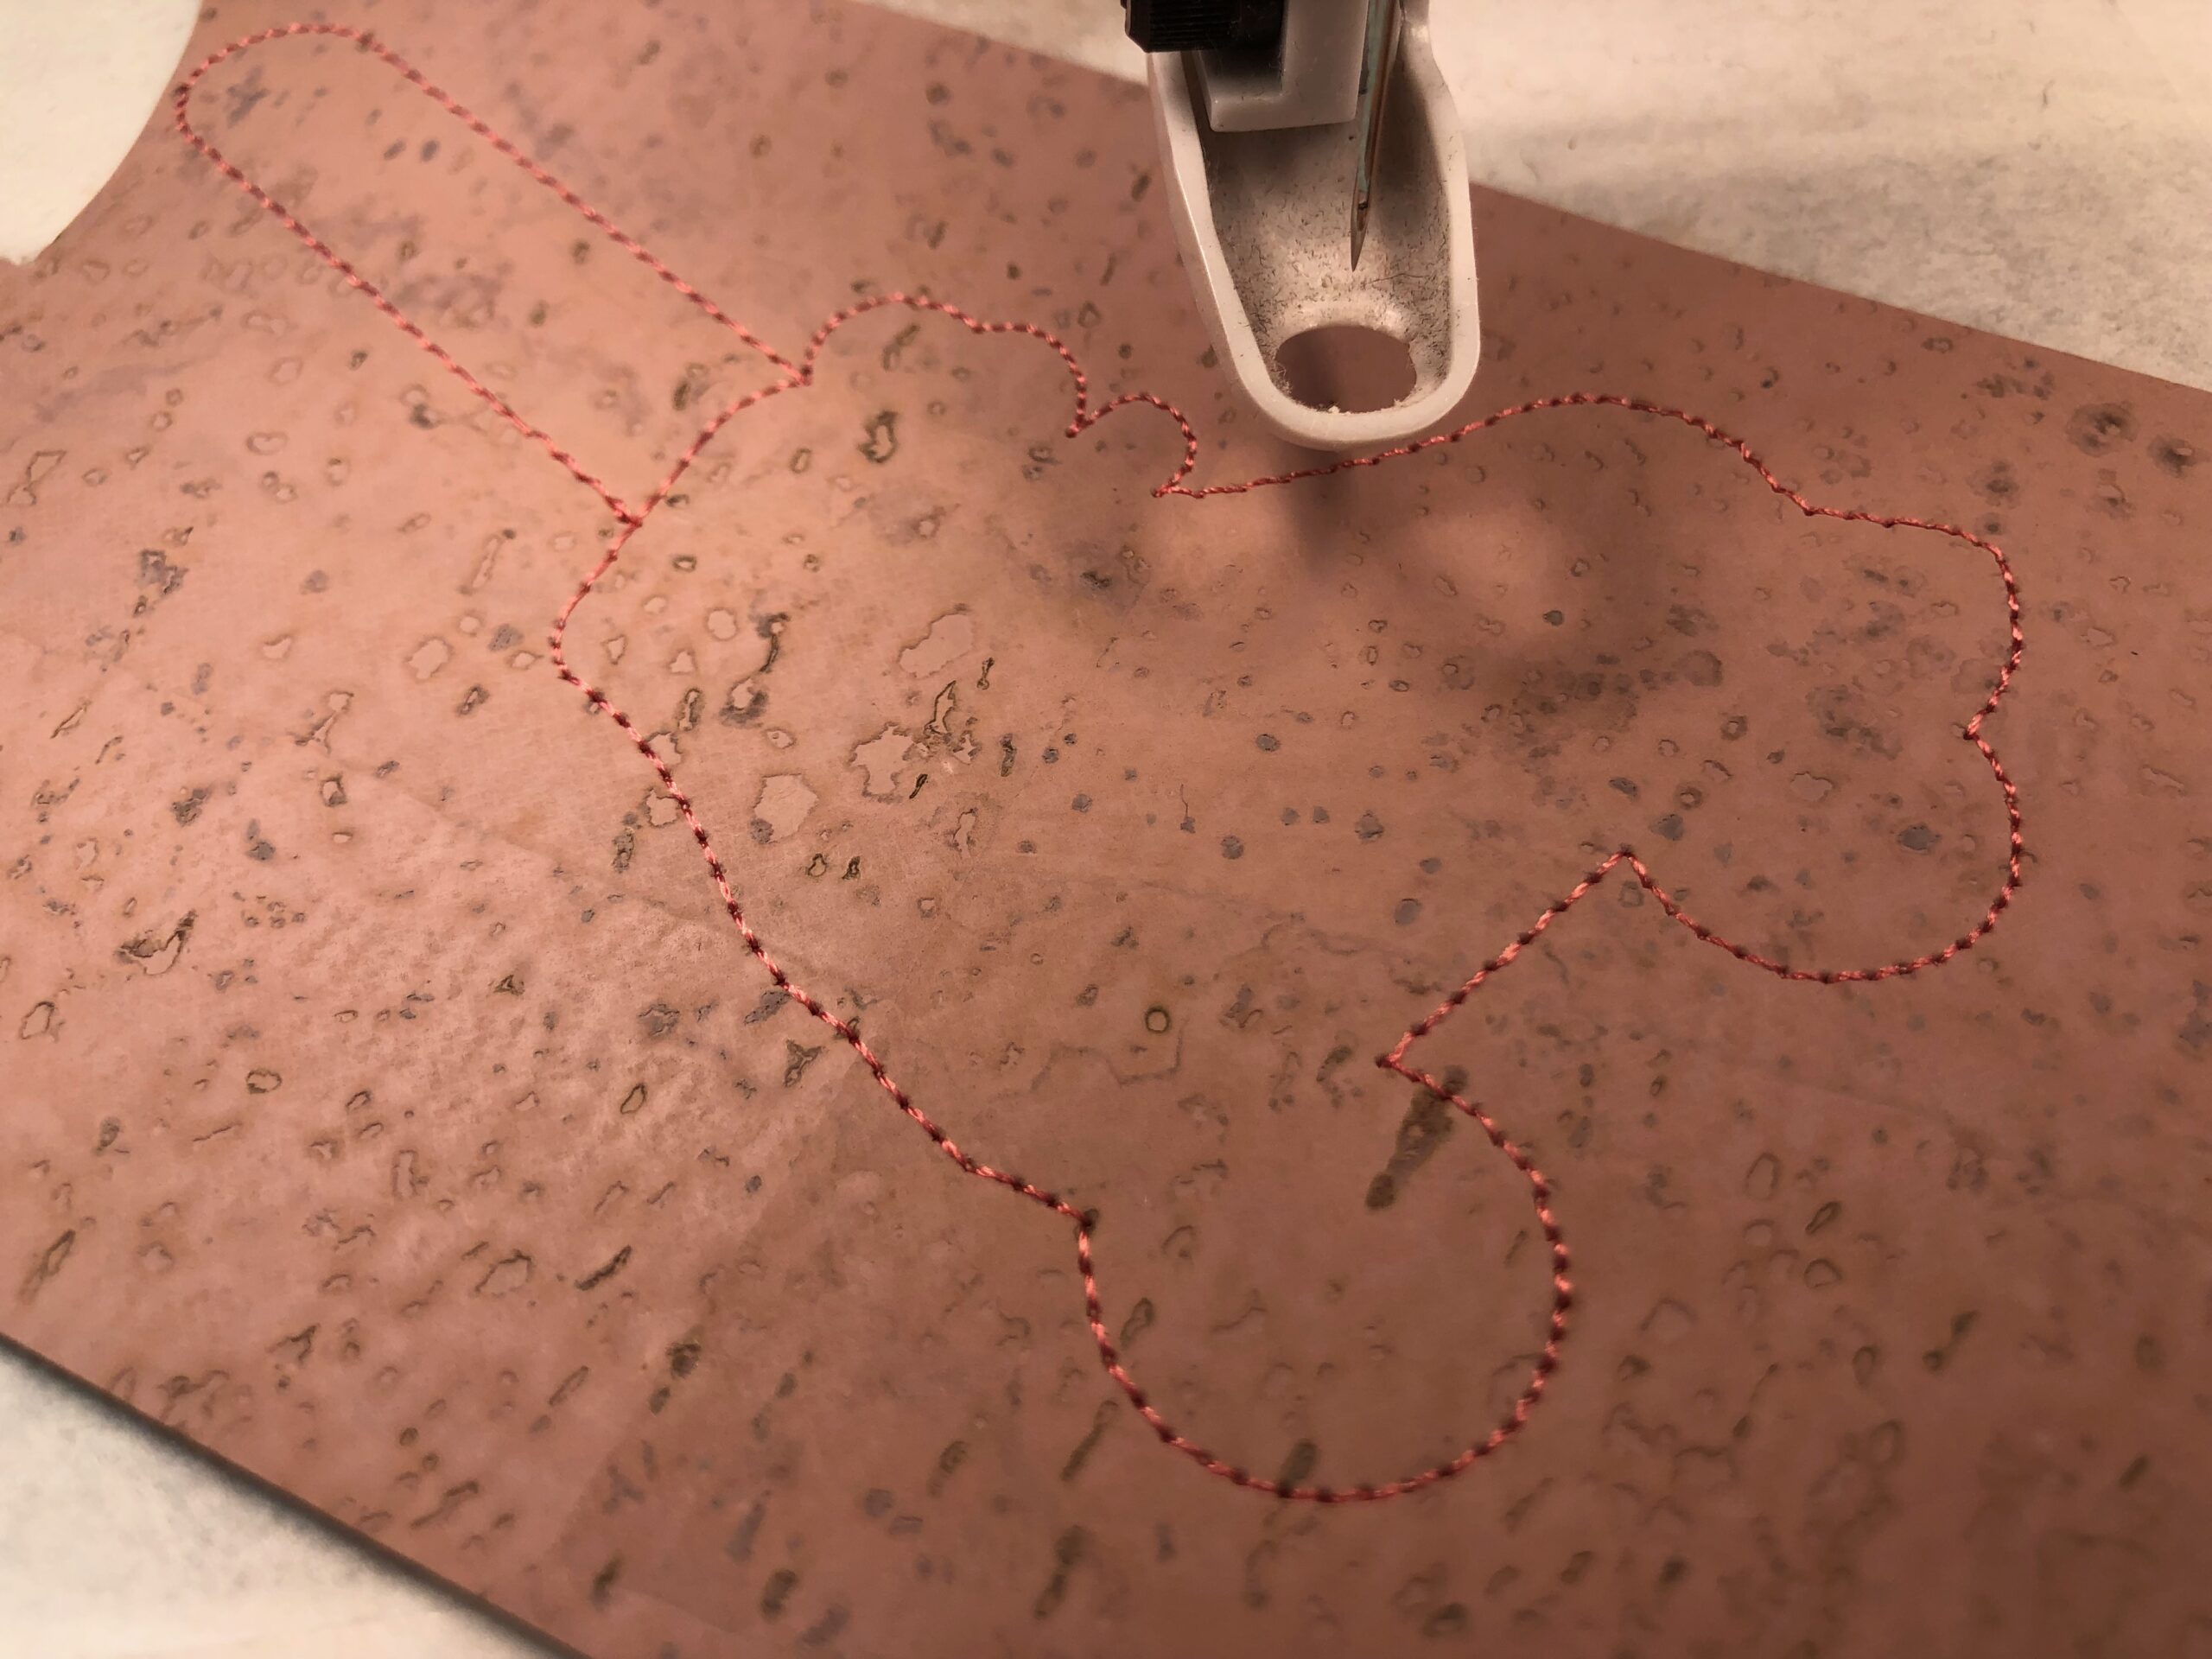
Begin the design. Do not trim the fabric after the tacking stitch directive, as the front and back fabrics are trimmed together once embroidery is complete.
Don’t be afraid to swap the thread colors to match the bag you’ll display the charm on, or the recipient’s preference.
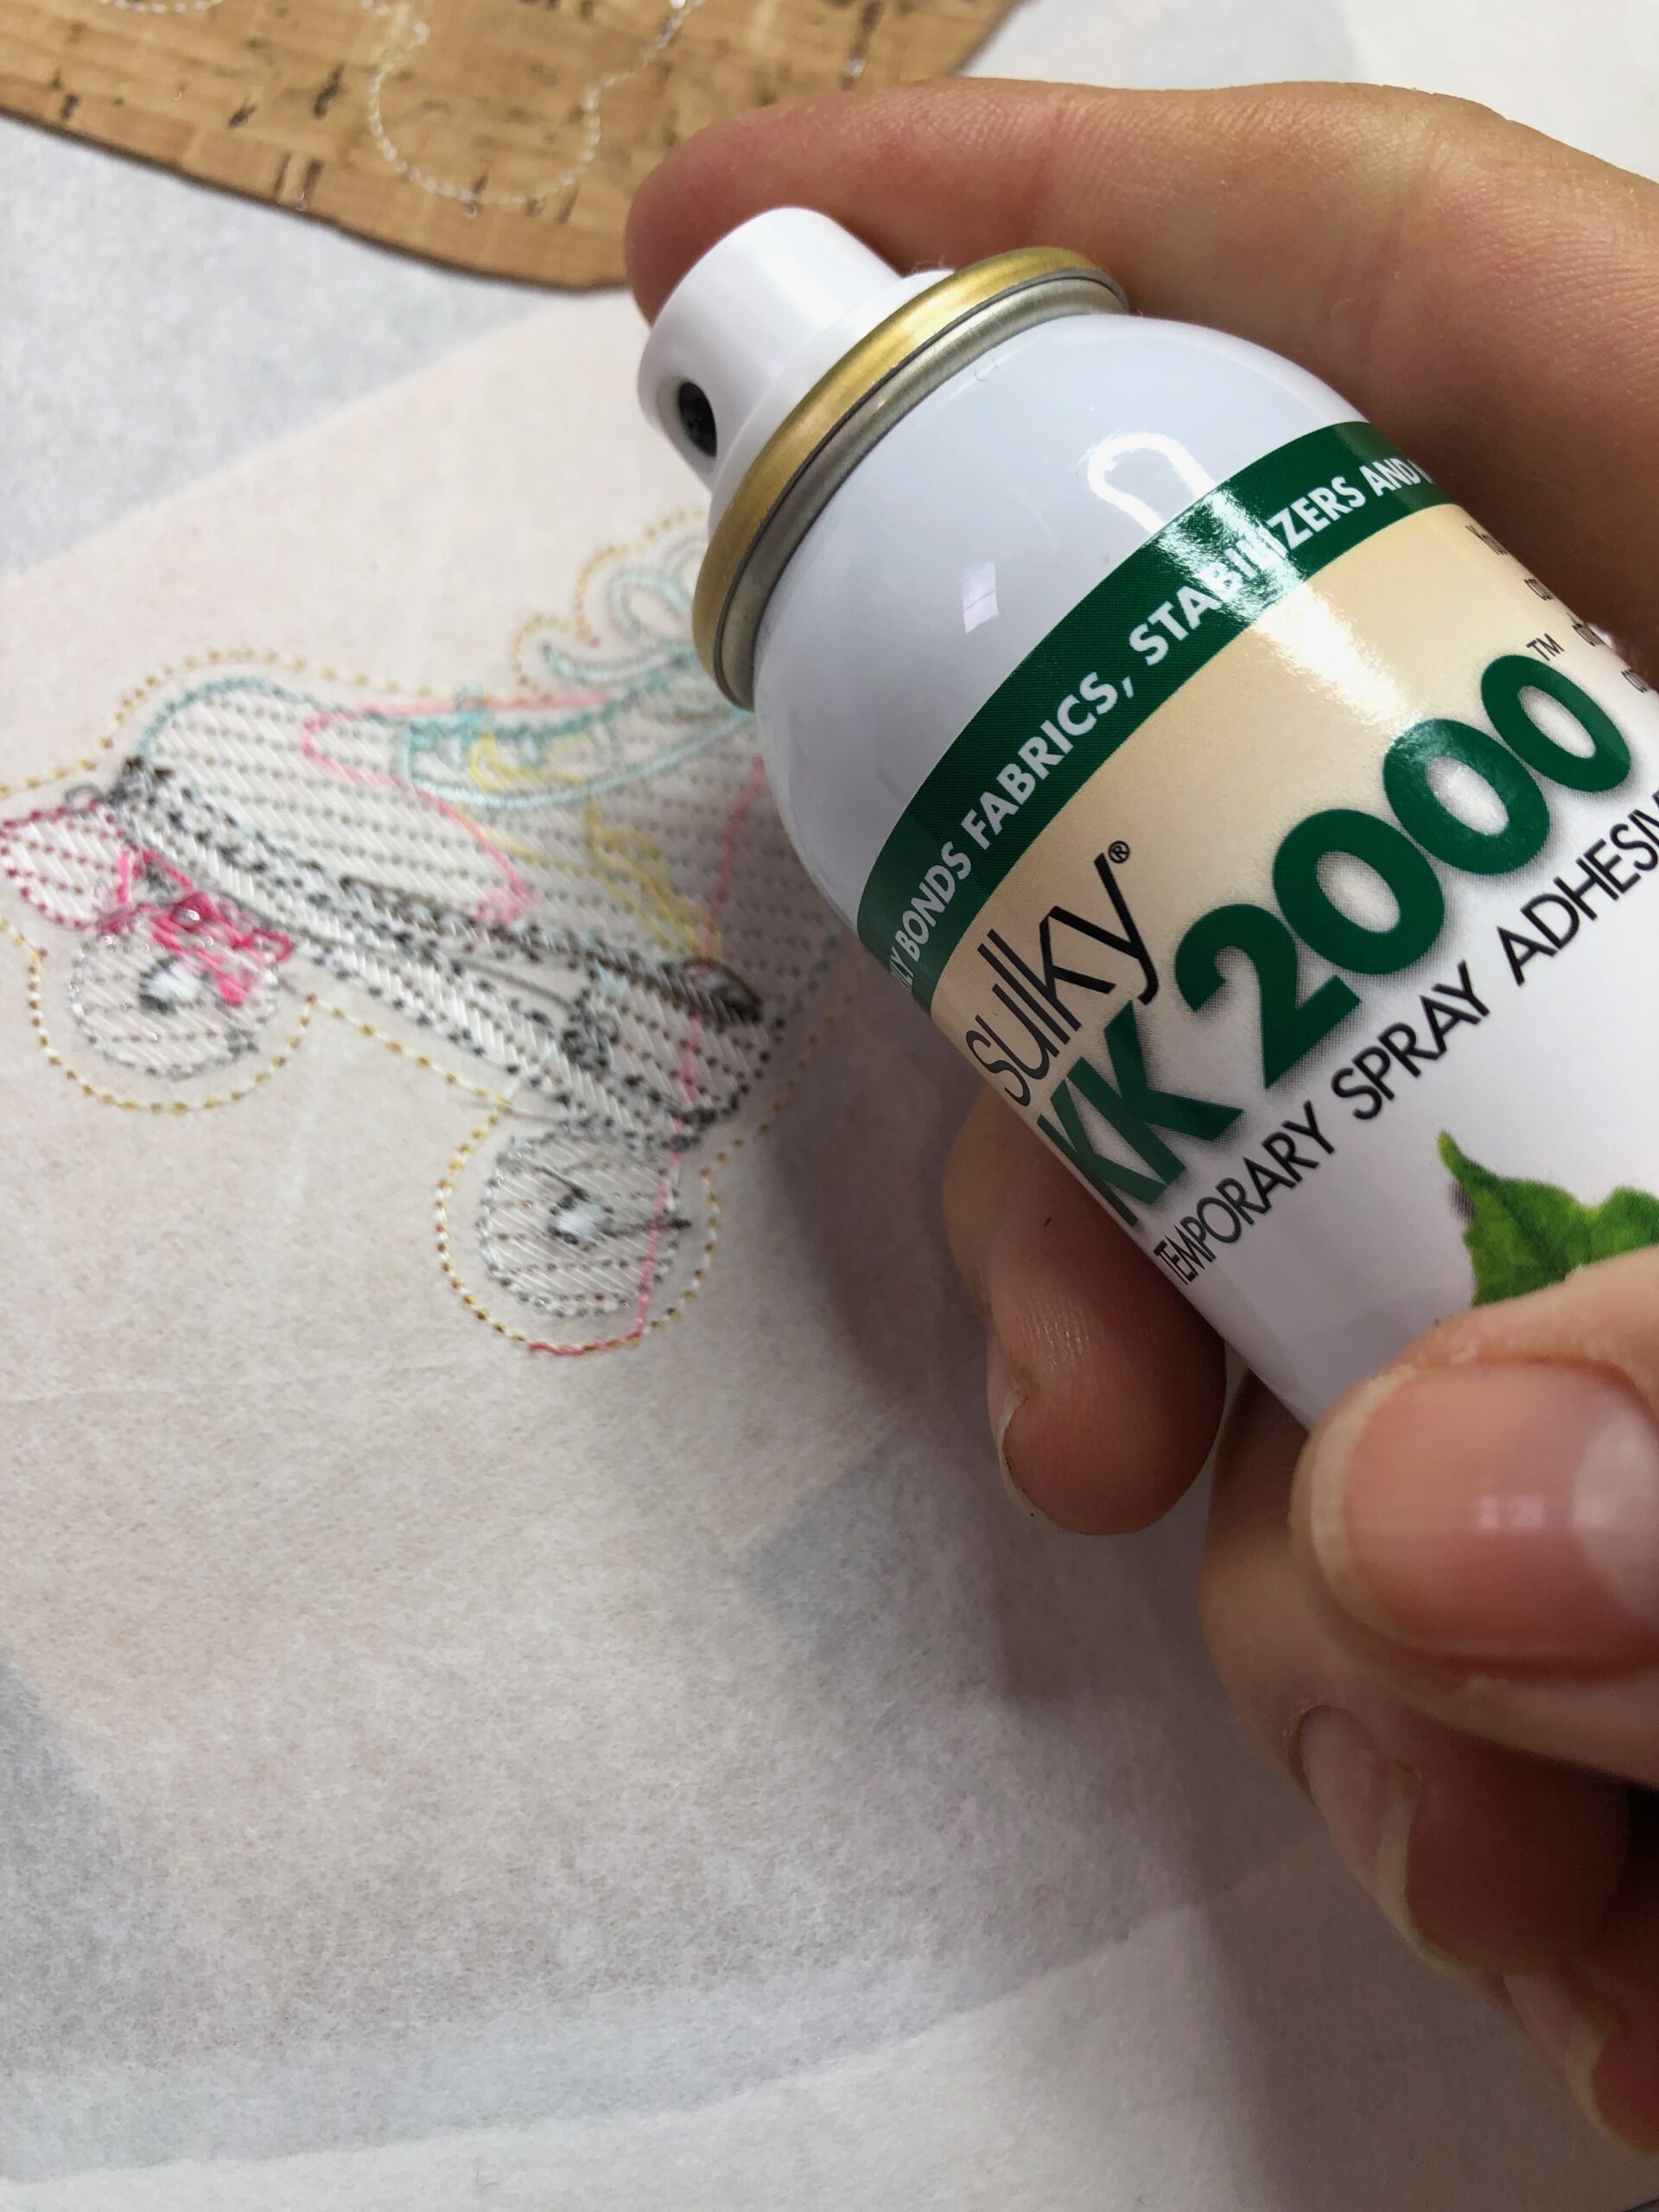
To attach the charm backing fabric, turn over the hoop when directed, and then spray the stabilizer with Sulky Kk 2000™ Temporary Spray Adhesive. This ensures the fabric won’t shift during the last stitchout step.
If desired, use different fabrics for the front and backing of the roller skate charm. Dive into your stash to find fun color combos. Make sure to use a similar fabric weight for both pieces. Scraps work great for these as long as they’re large enough to provide a slight border when trimming the charm after embroidery is complete.
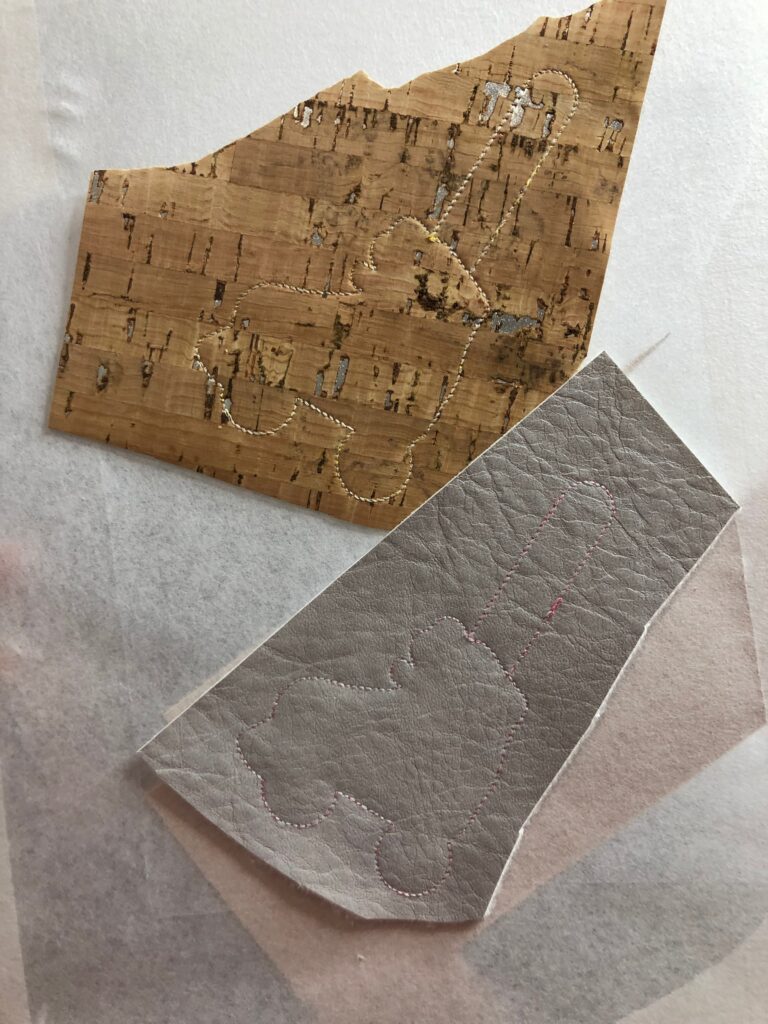
Remove the stabilizer from the hoop. Trim each charm through all layers, getting close to the outer stitching line without slicing through it.

ADDING CHARM HARDWARE
If stitching the eyelet version, there’s a circle stitched for the eyelet placement. Install an eyelet through all layers, following the manufacturer’s instructions.
If using the keyfob version, a snap placement is provided. For the featured charms, the snap placement was used as a rivet placement tool instead. The hardware is your choice! Here’s how to add the rivet:
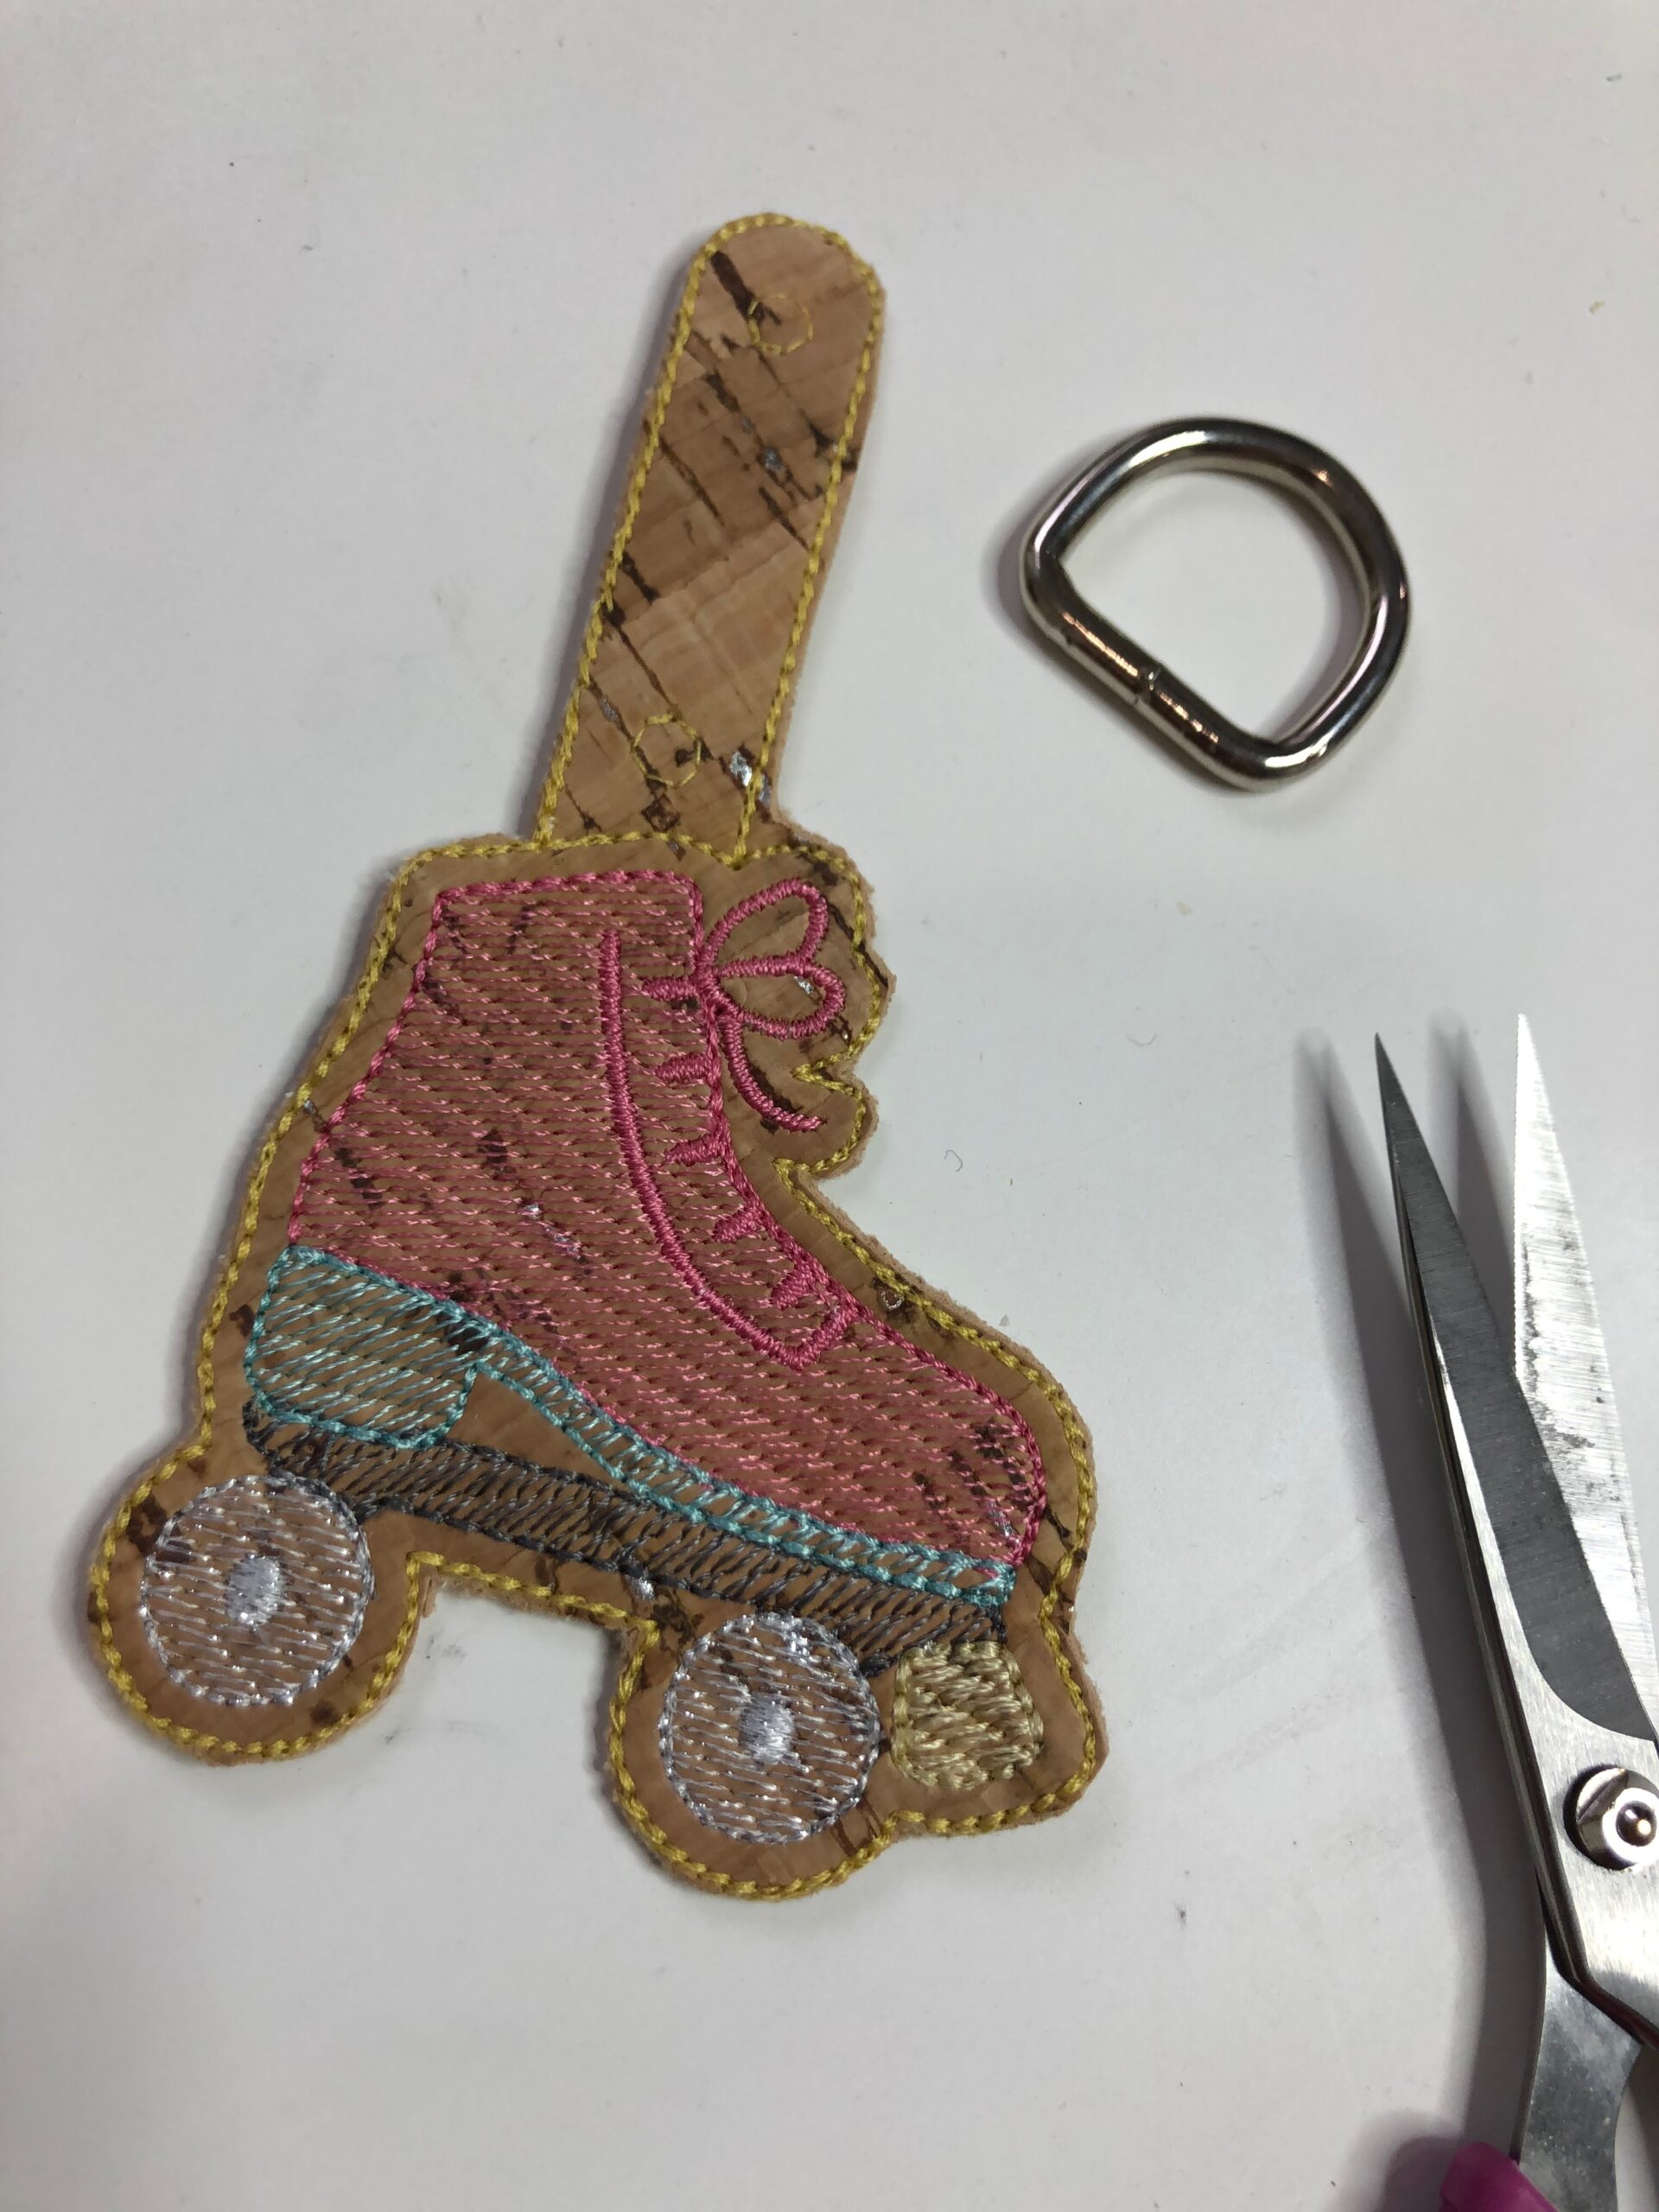
Find a D-ring and/or D-Ring/Swivel Clip combo that fits the charm flap width.
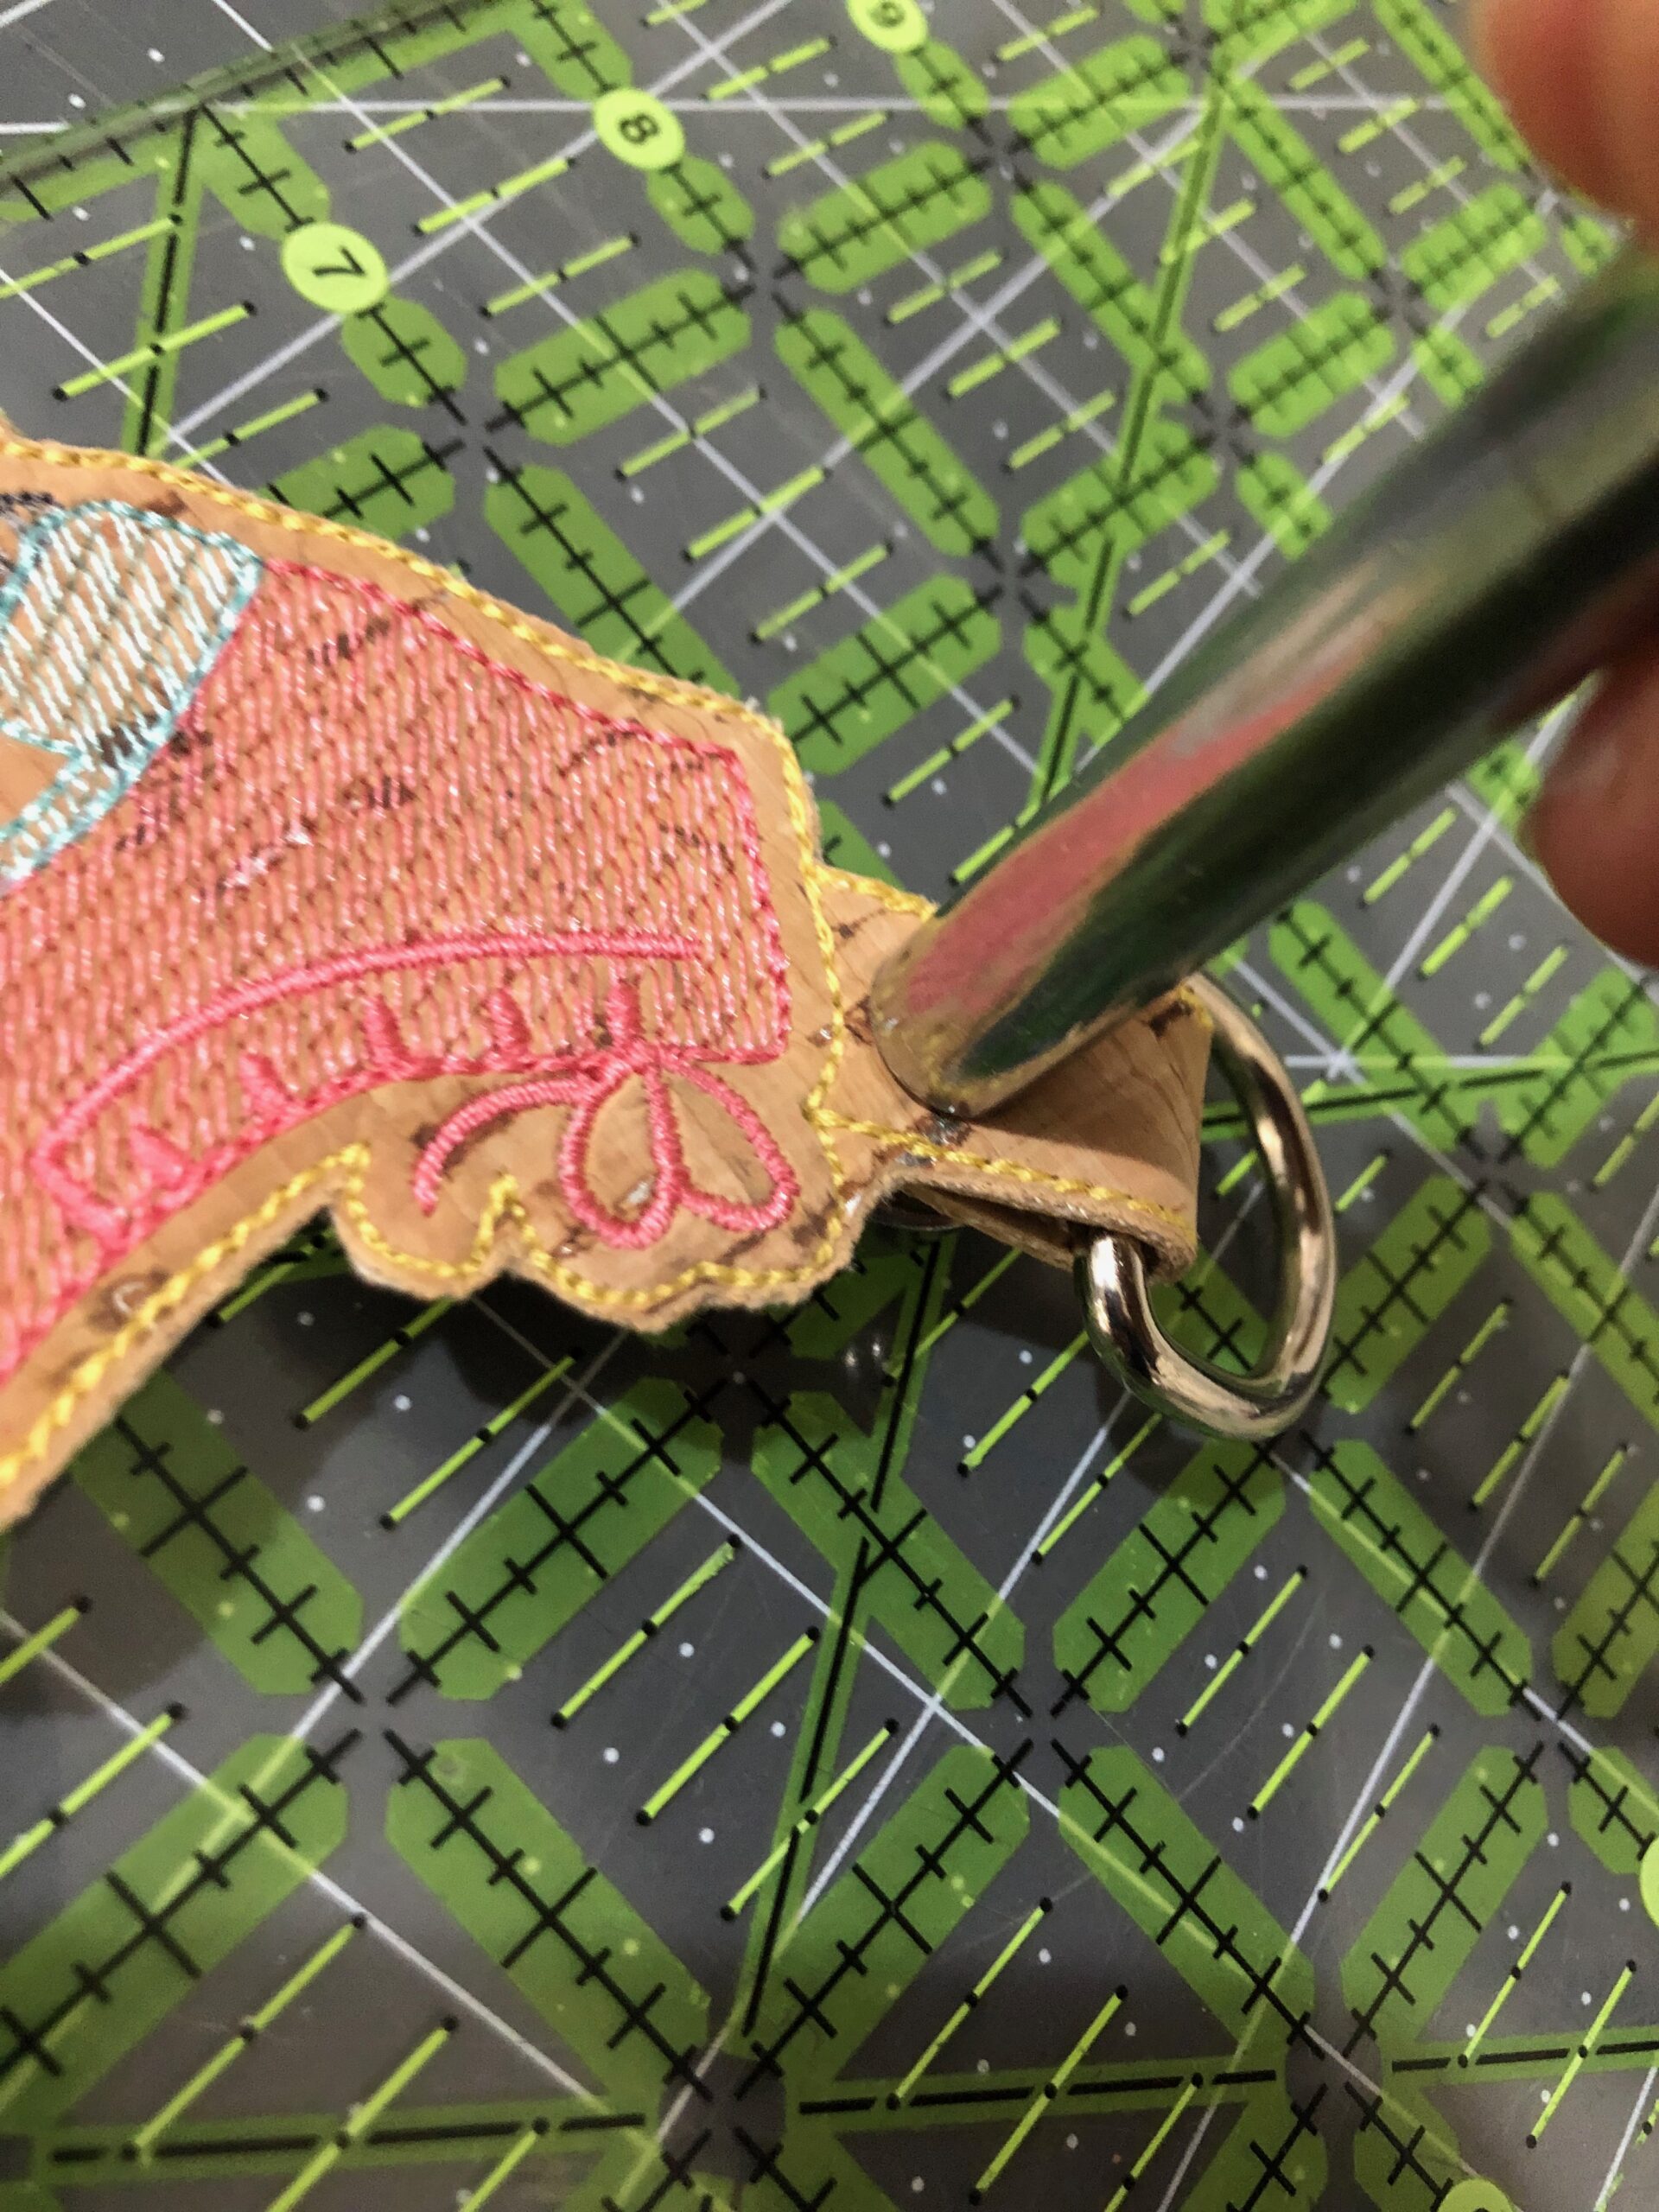
A Rotary Punch tool is helpful for setting rivets (and certain snaps and eyelets, too!), not not required. An awl or very sharp, small scissors also works to punch a hole through both layers inside the hole stitches. Make sure to have a rivet setting tool as well, which sometimes comes with rivets as well.
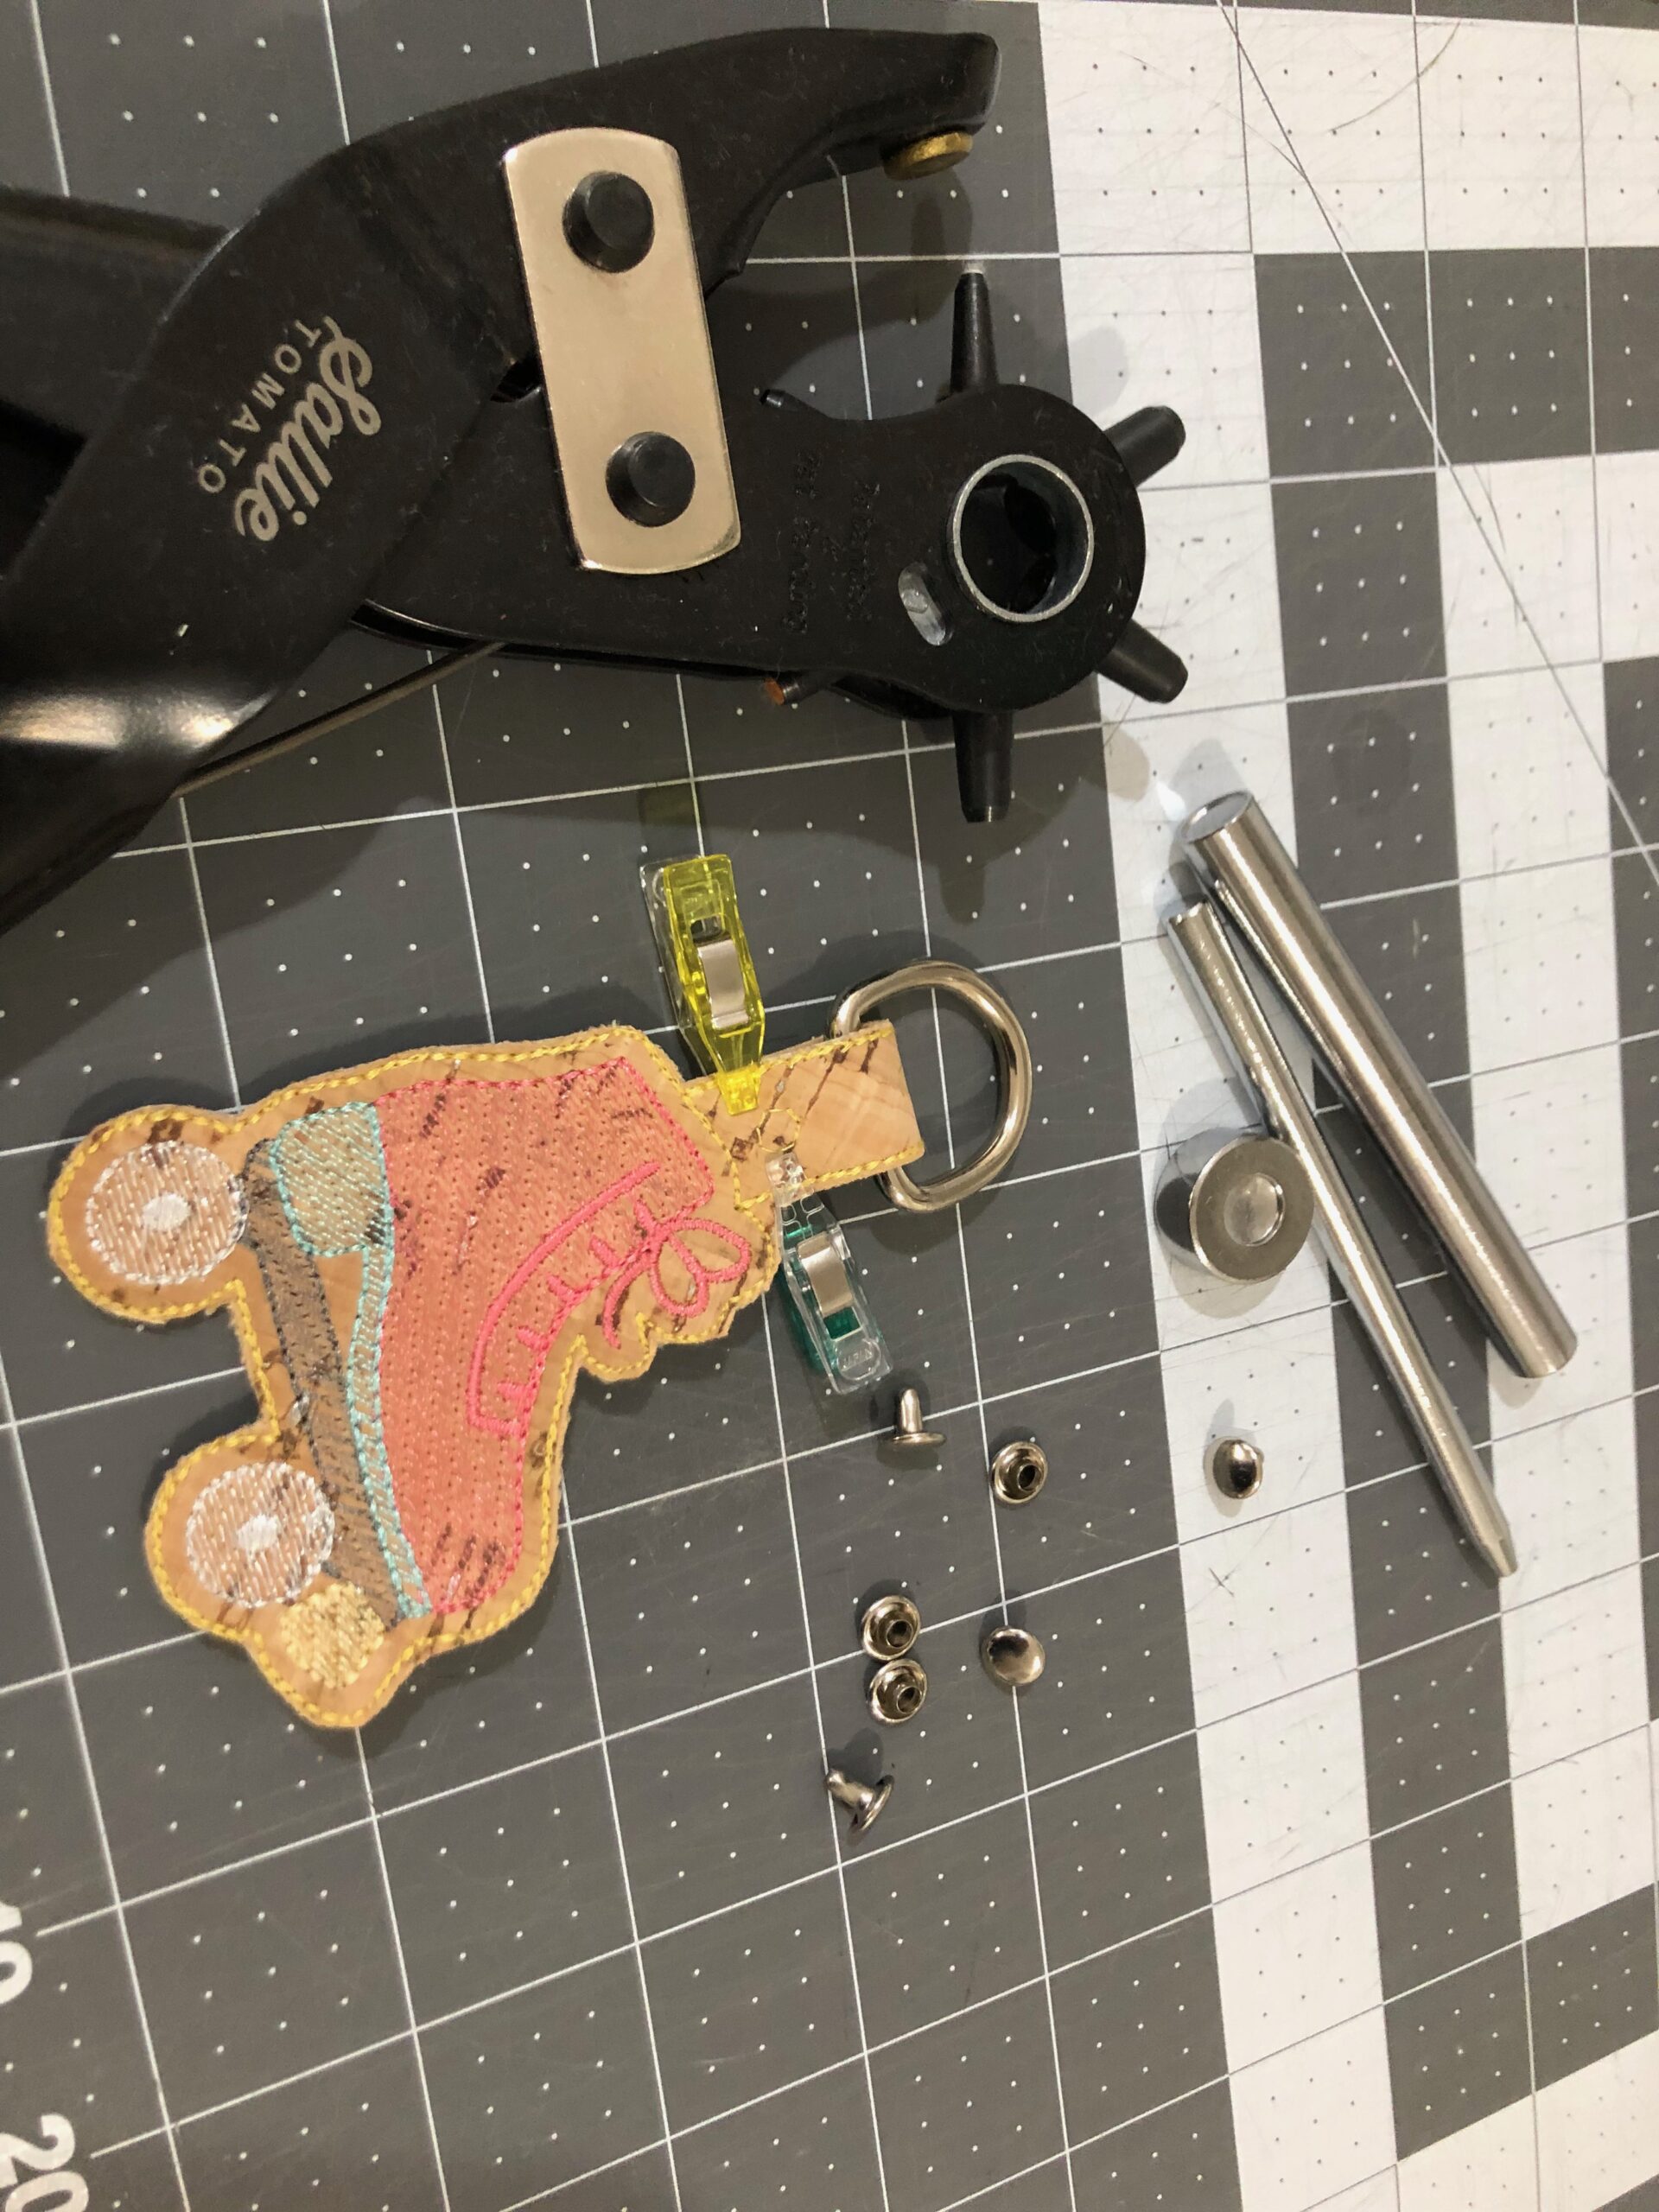
First, fold the flap around the D-ring, and then match the hole stitches. Use Wonder Clips to hold the flap in place.

Punch a hole through all layers inside the hole stitches, using your preferred tool.

Then, place the male rivet piece through the hole. Make sure the rivet size is adequate to go through the fabric thickness. A Medium Rivet was used for the featured charms.
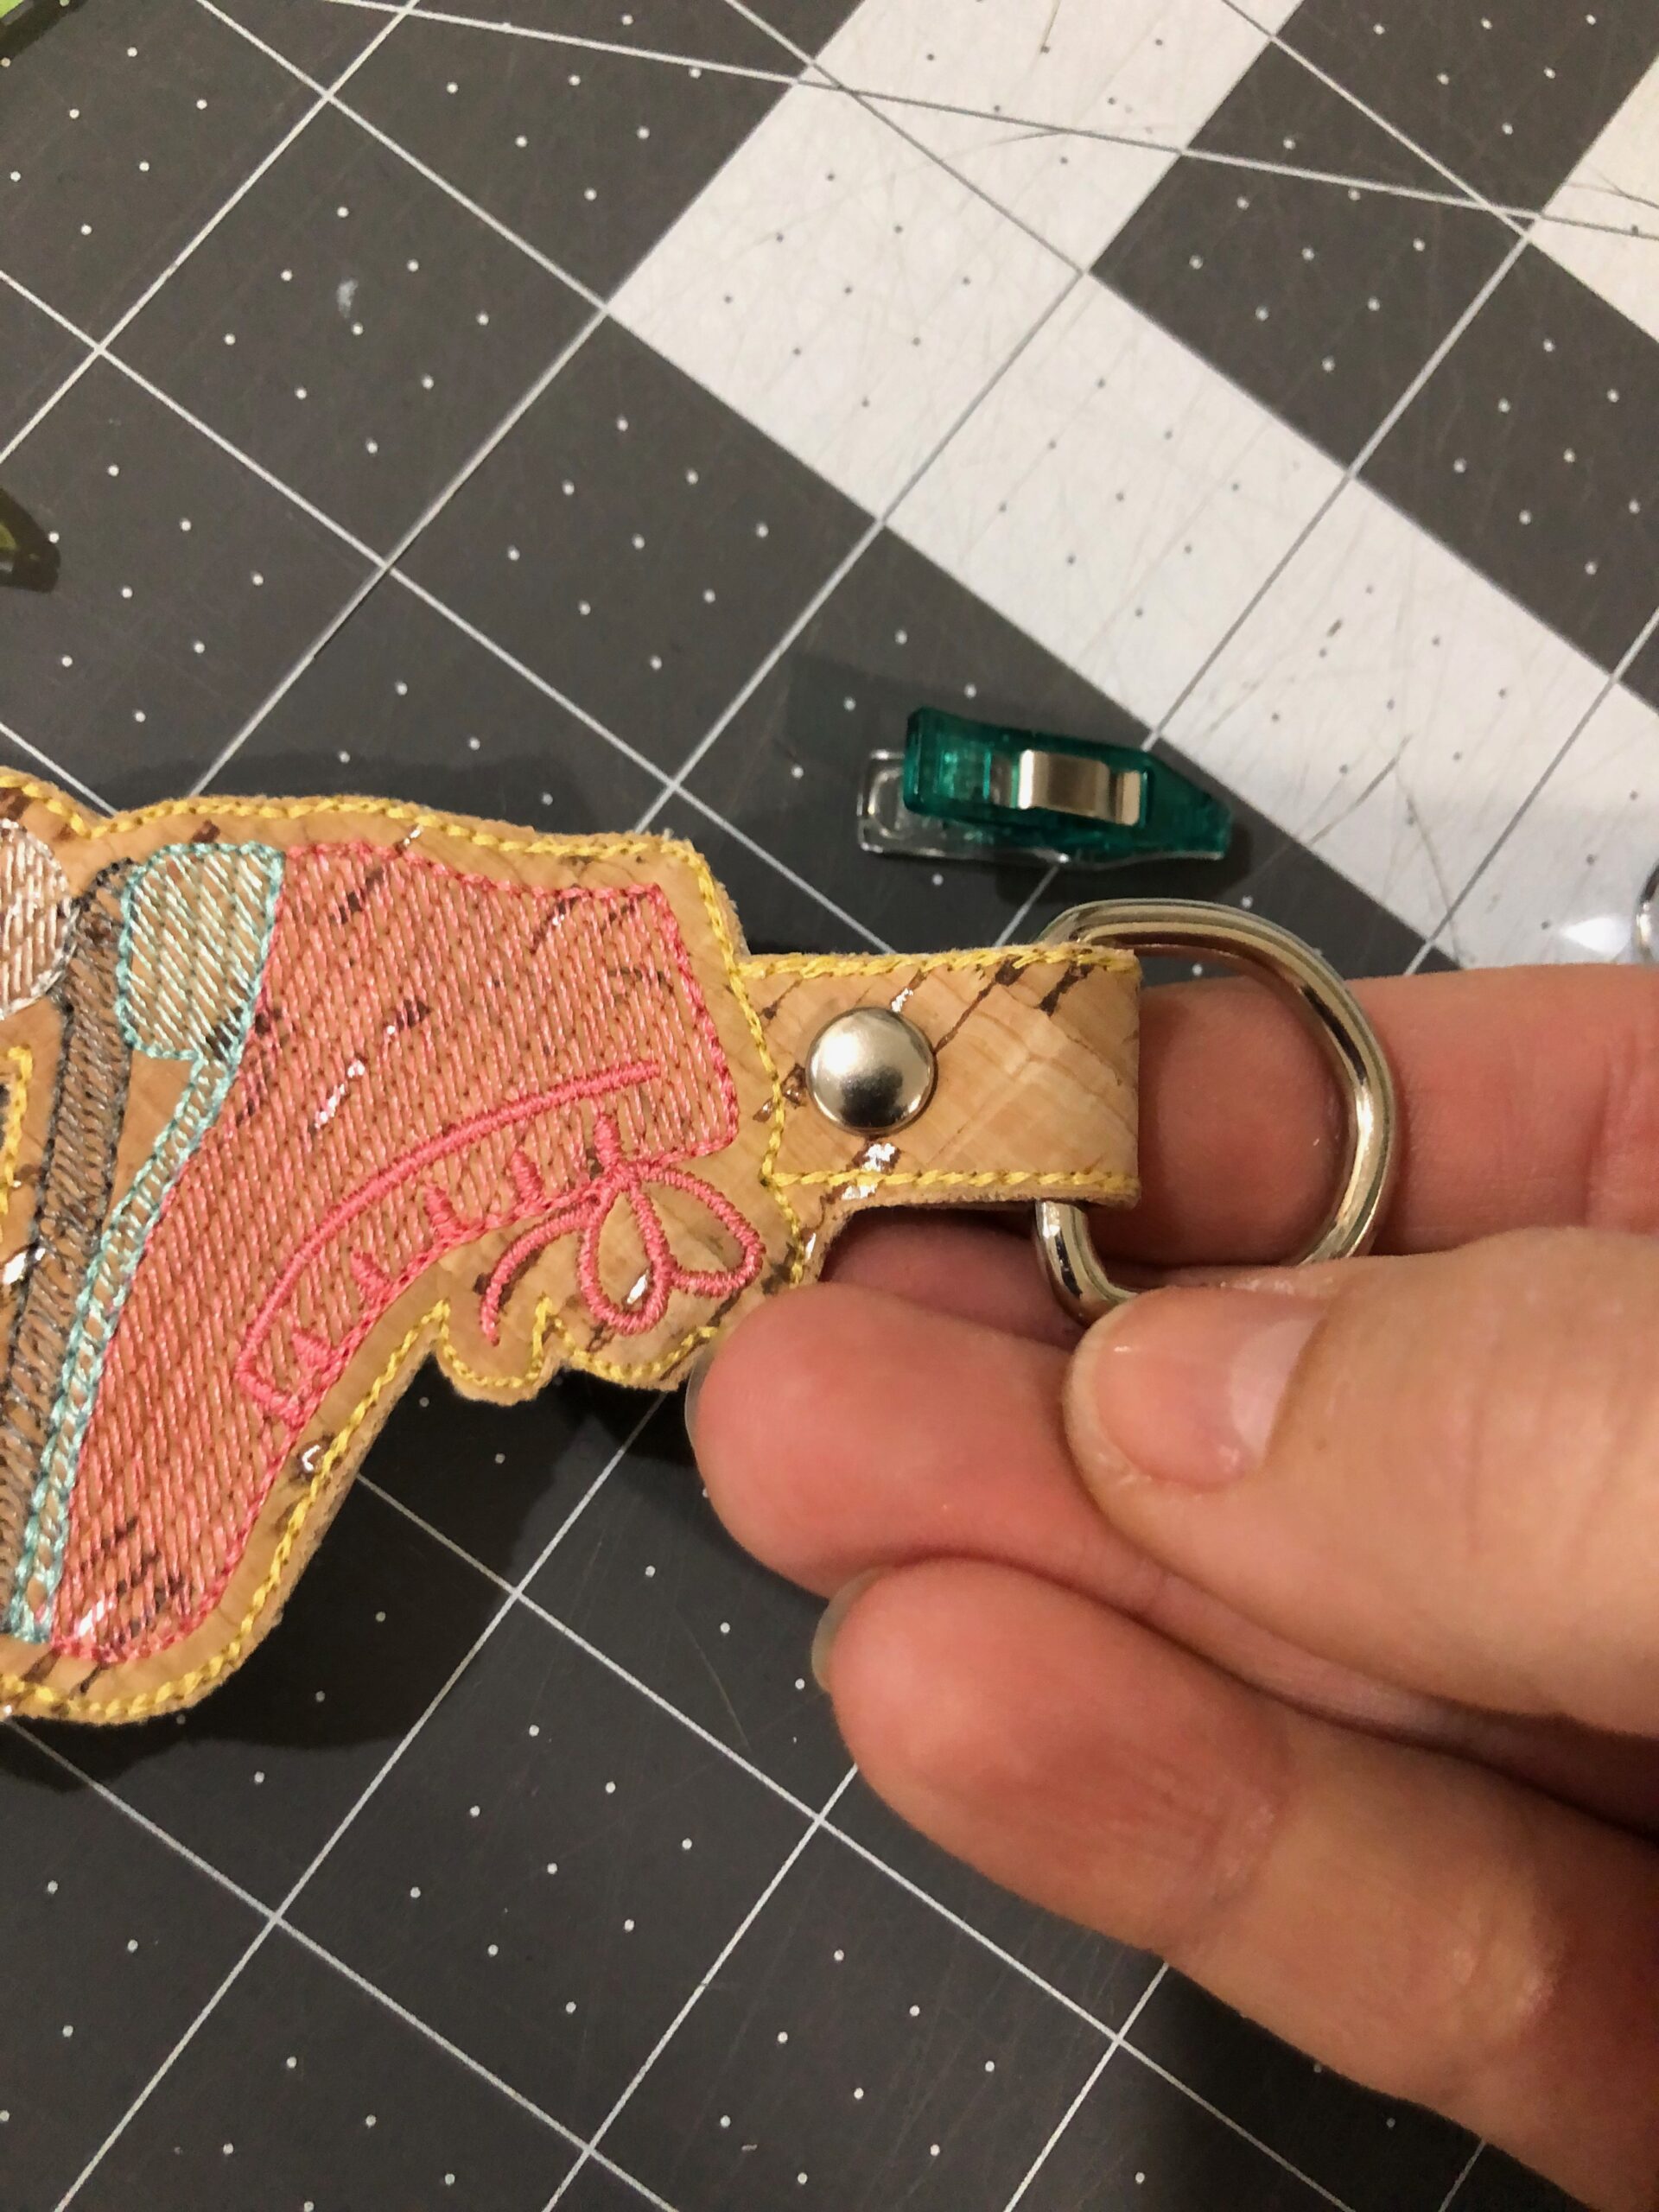
Place the male piece through the rivet female piece from the back. Then, use a rivet setting tool set to secure the pieces together. Make sure to protect your surface when hammering the rivet to avoid damage. Place a small block of wood or neoprene sheet under the charm before the final application step.
Hand the charm on a swivel clip or carabiner and attach it to a roller skate bag or backpack.
ROLLER SKATE BACKPACK
The featured charms are shown on the Boulder Backpack Pattern by Sassafras Lane Designs.
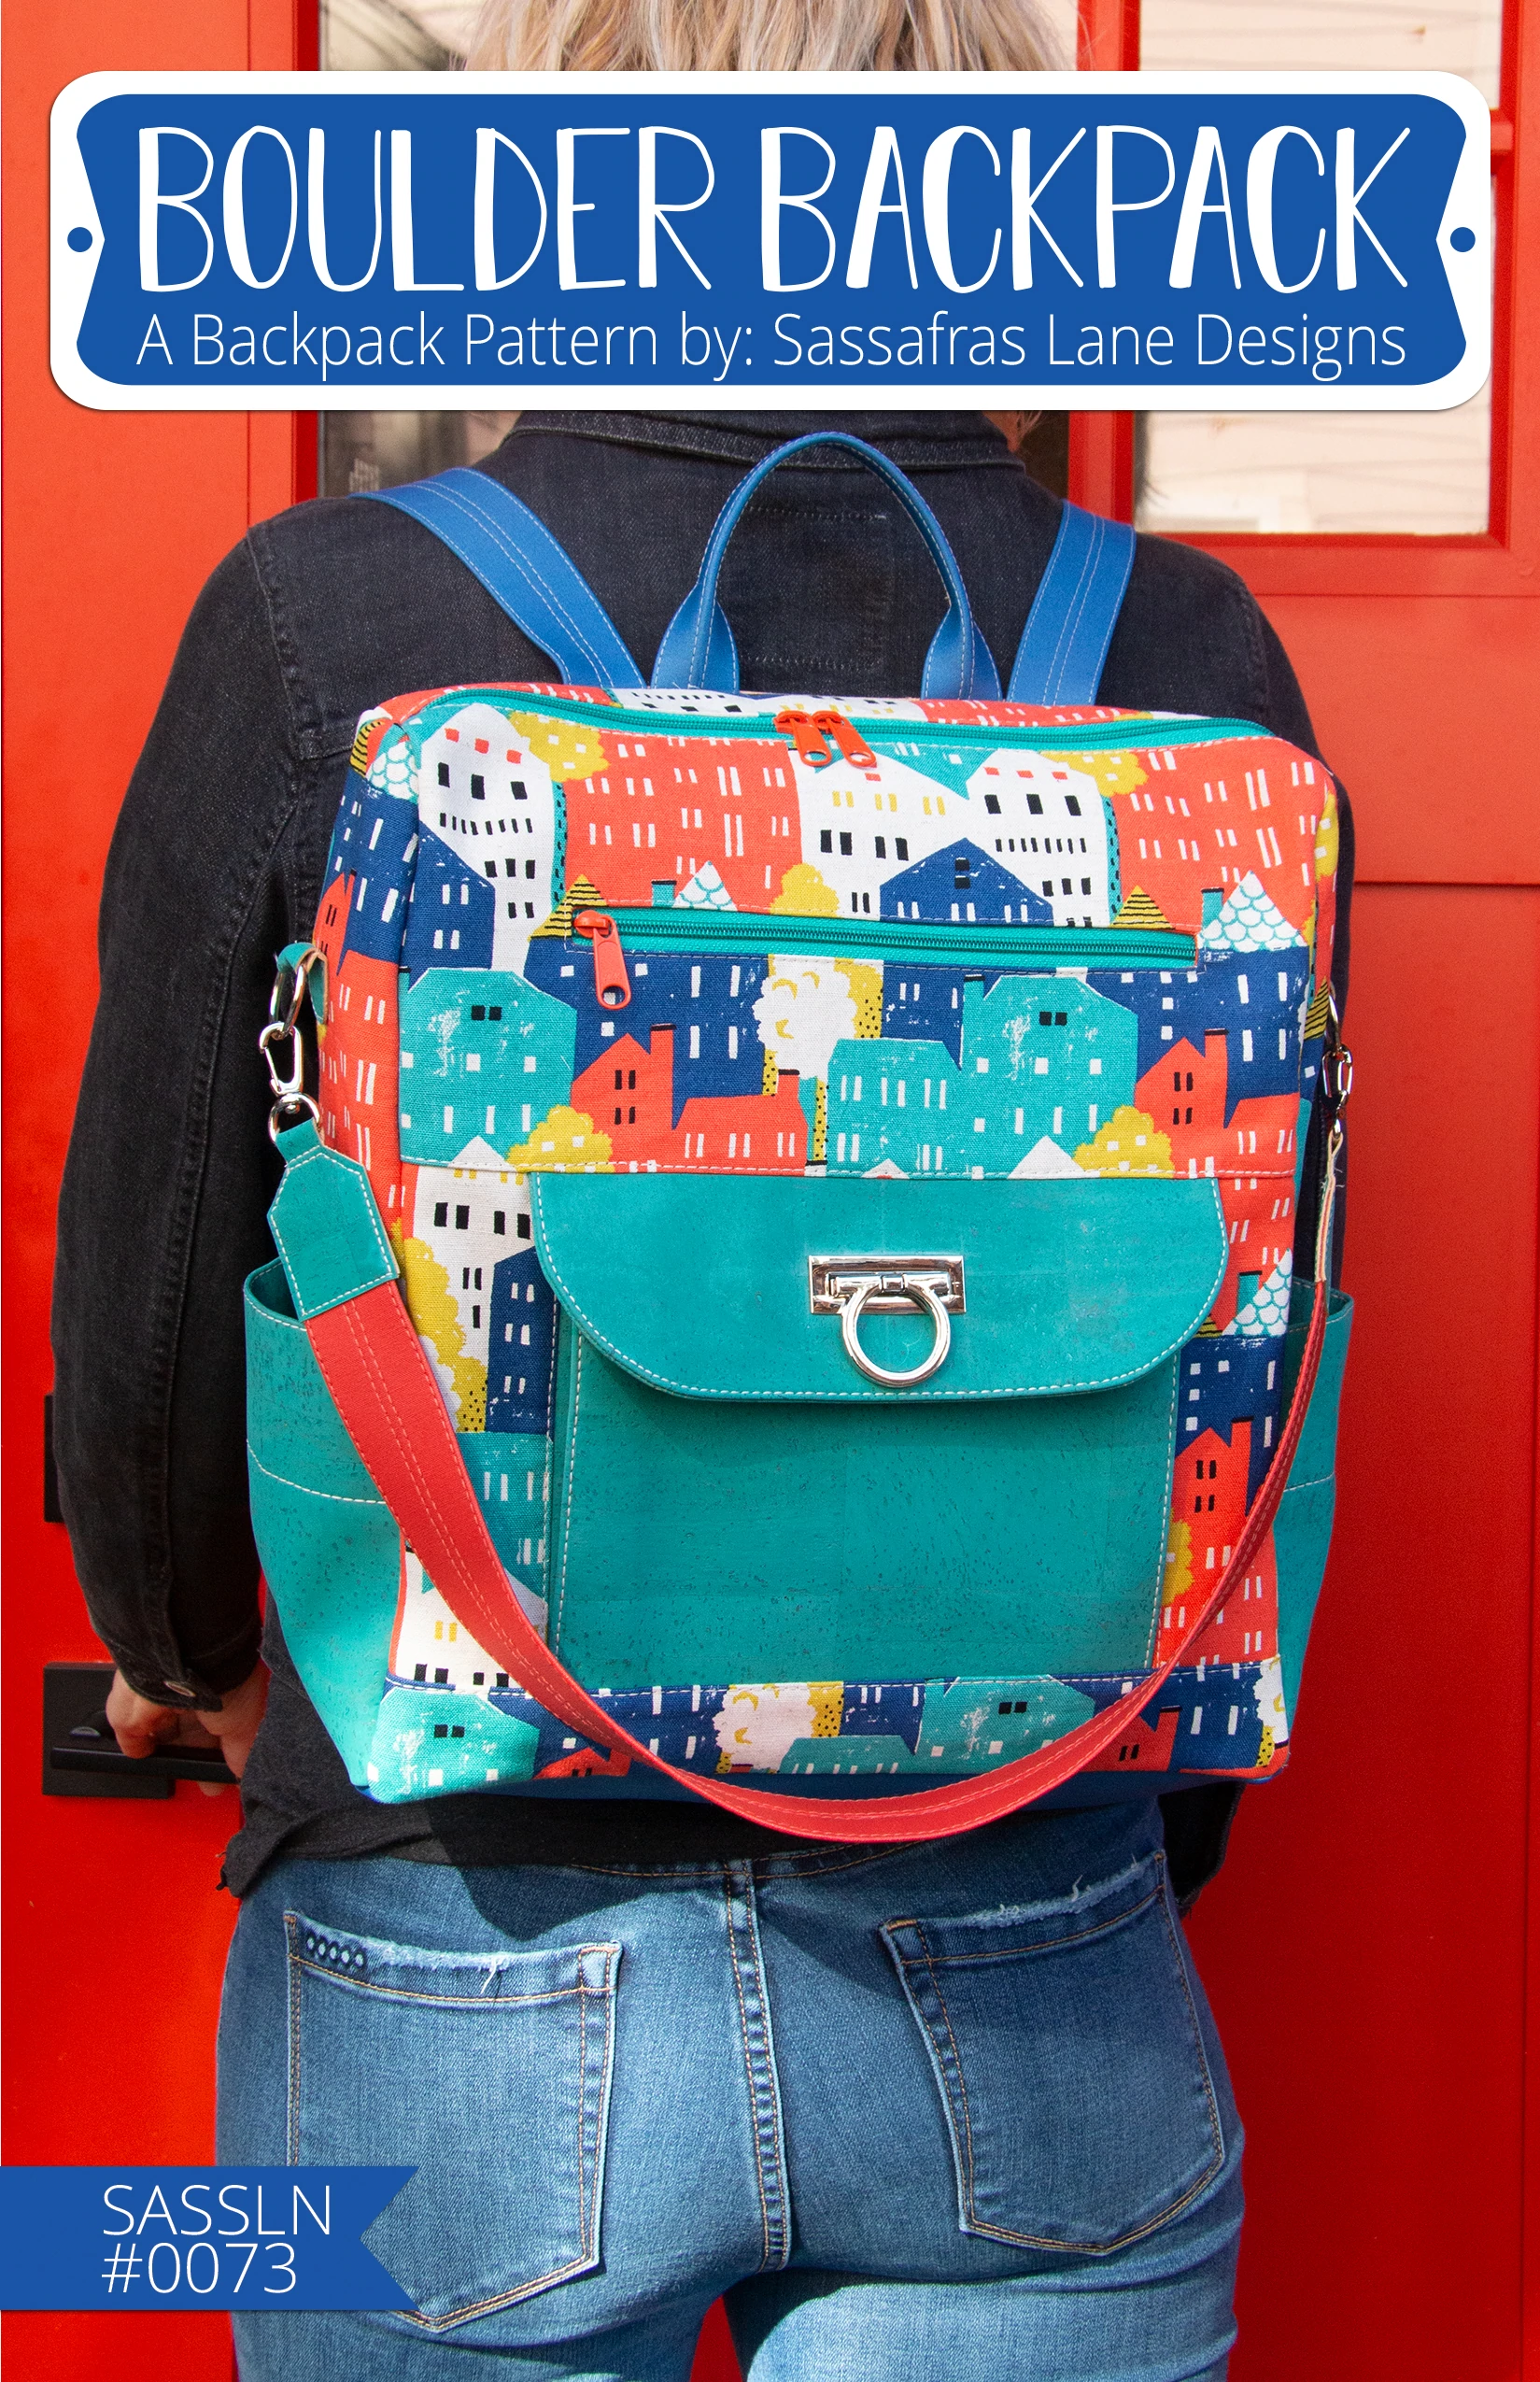
This backpack pattern works great to hold a pair of youth-size roller skates! The finished size is 13″ W x 15″ H x 5 1/2″ D.
Here are a few pattern modifications and design options to consider:
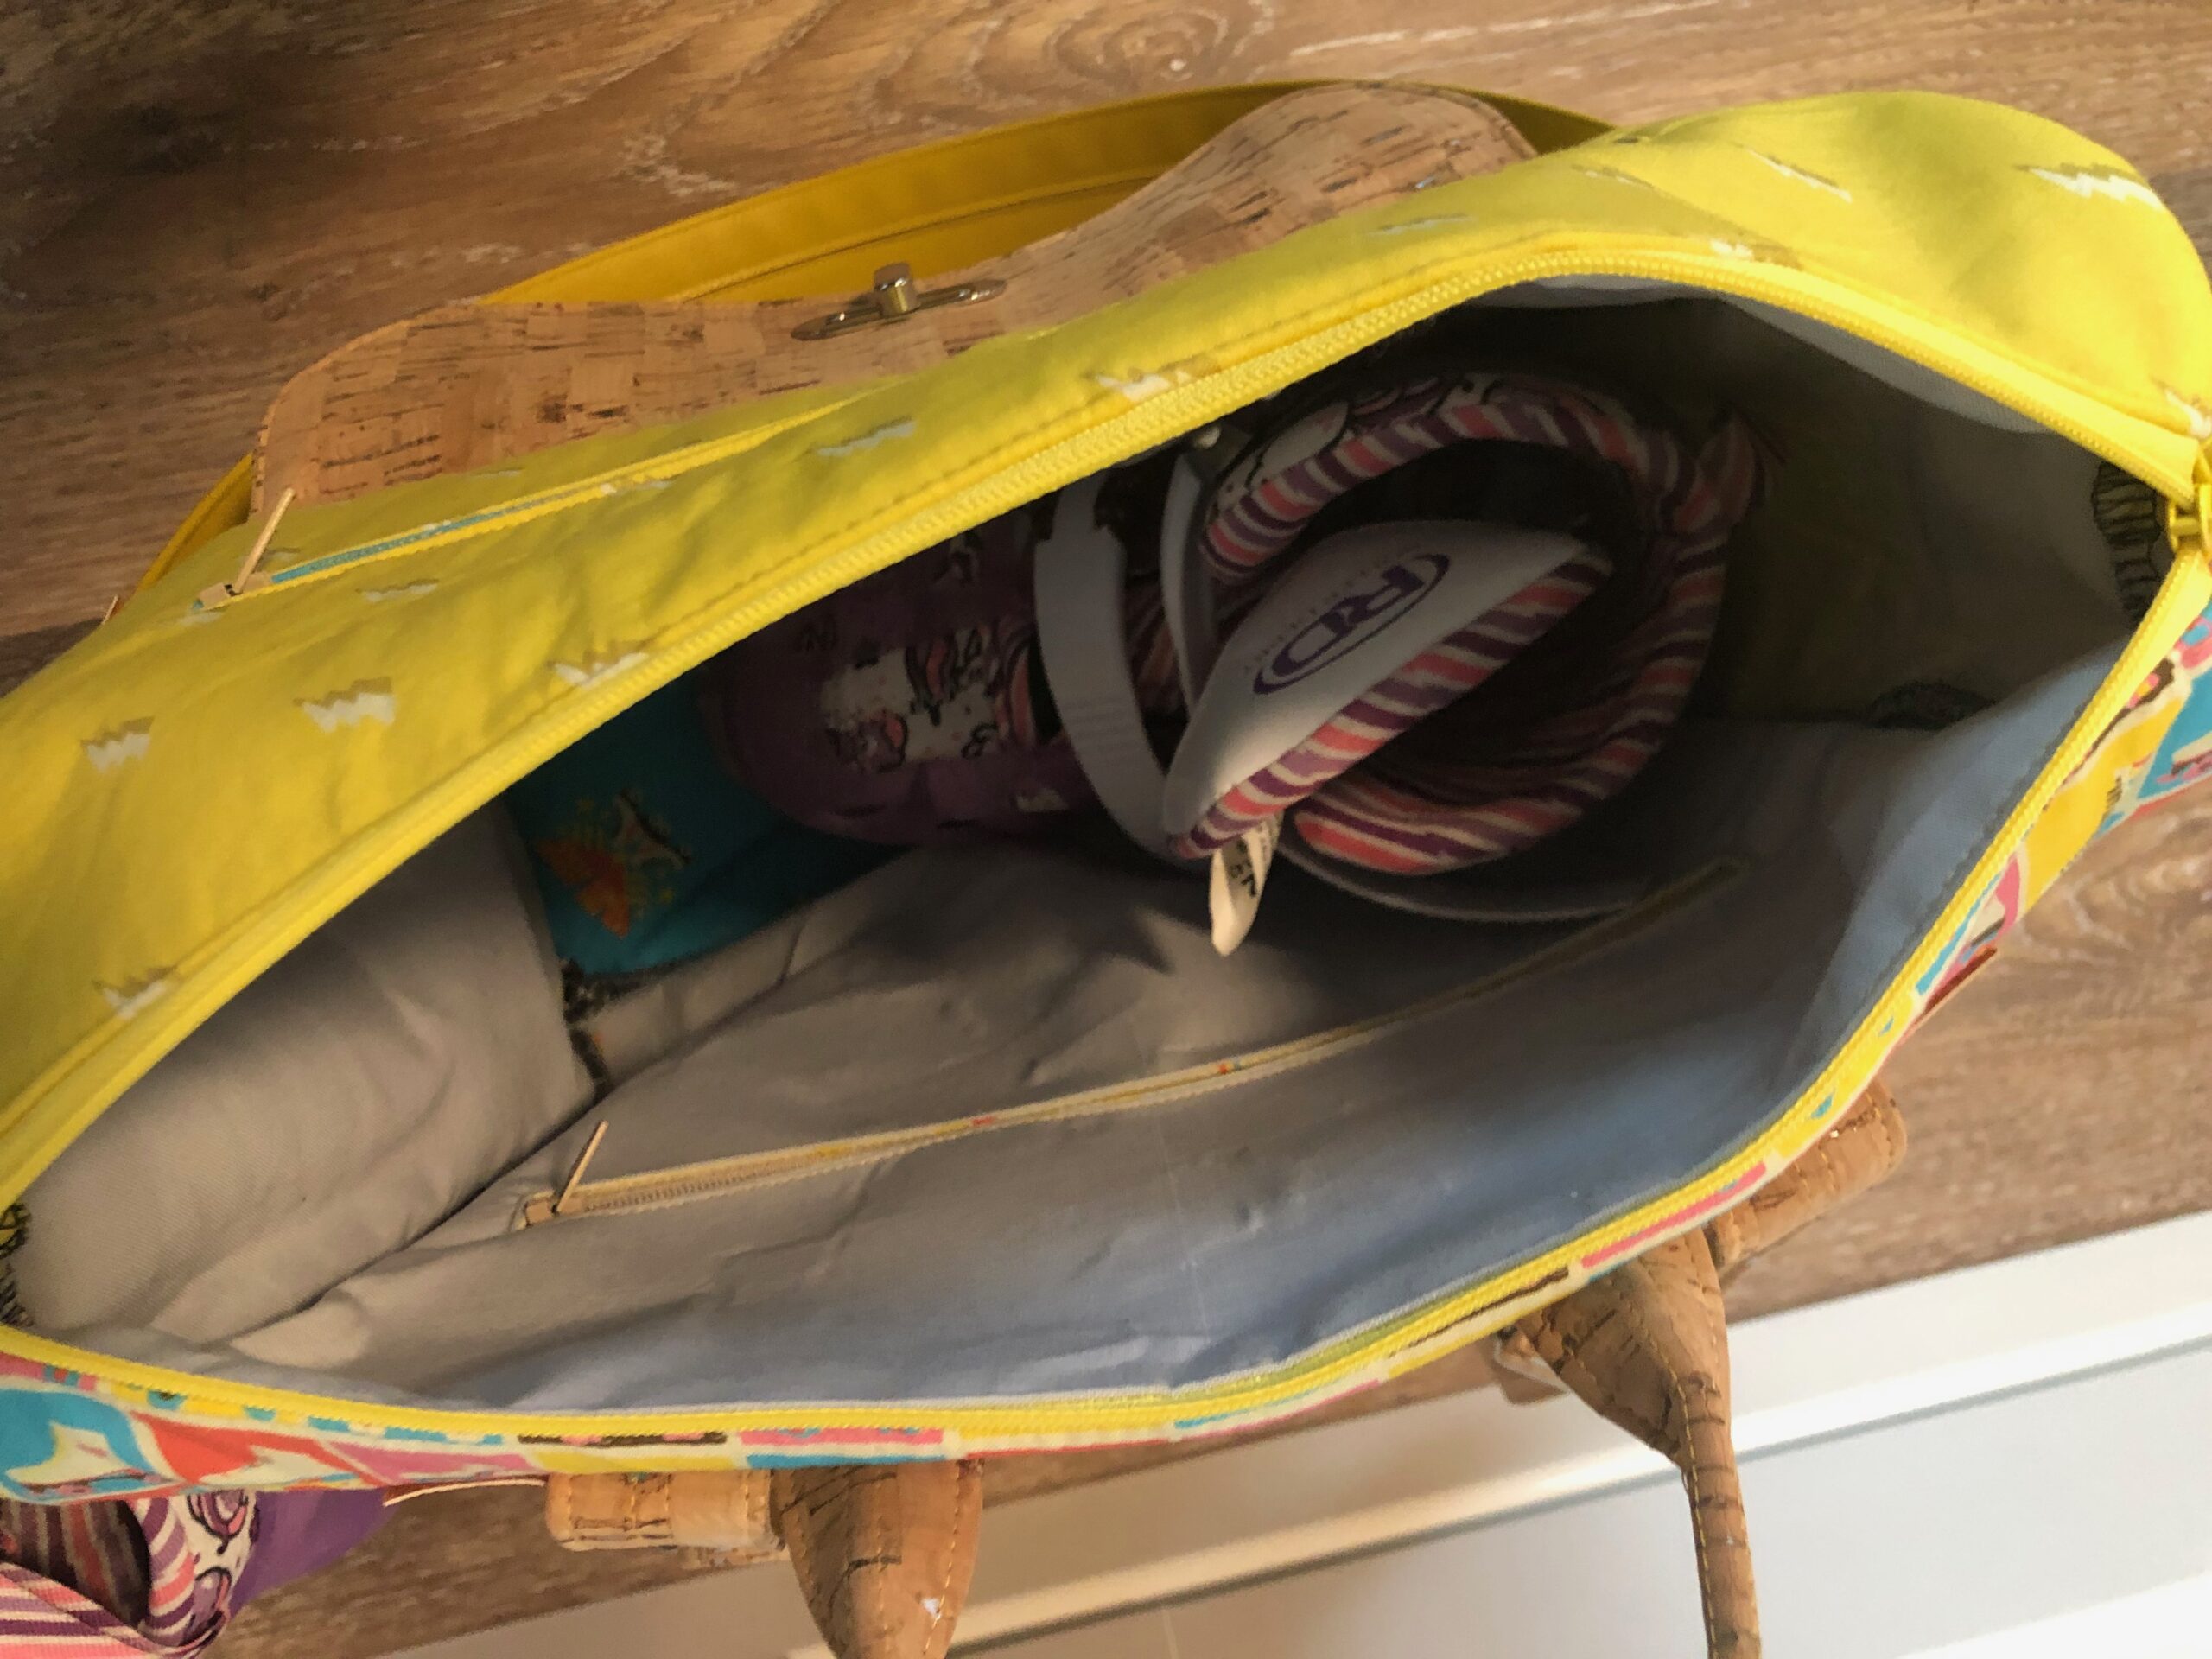
- Add a layer of sew-in foam or fusible fleece to the main bag pieces and sides. Without the addition of this heavyweight, yet pliable, interfacing, the bag sags a bit and could suffer from roller skate storage. While the pattern does indicate to use fusible interfacing, a thicker foam or fleece also allows the bag to stand on its own when on a table or floor.
- Add purse feet to the base before adding it to the outer bag pieces. Feet help prop the bag up off of surfaces, protecting the base fabric from too much wear. Purse feet almost always come with instructions for inserting into fabric layers. After applying them to the base, add a scrap of interfacing over the hardware wrong sides so they don’t scratch against the other fabric layers during use.
- Experiment by using different fabrics for the outer bag pieces. The featured bags were created using a fat quarter pack of coordinating cotton fabrics. The fabric line is Let the Good Times Roll by Lysa Flower for Paintbrush Studio Fabrics. Sallie Tomato cork fabric and faux leather scraps were used for the straps, handles and accent pieces.
- For the featured bag, the strap widths were modified to fit different hardware sizes based on availability. If you cannot find the exact size D-rings, etc., don’t be afraid to alter those pieces slightly!

Ellen March
I am the Director of Content for Sulky of America. The former Editor in Chief of Sew News and Creative Machine Embroidery magazines, I hosted Sew it All TV on PBS for nine seasons. I've appeared on It's Sew Easy on PBS, DIY Network's Uncommon Threads, Hallmark's Marie Osmond Show, MacPhee Workshop and more! Come sew with me!