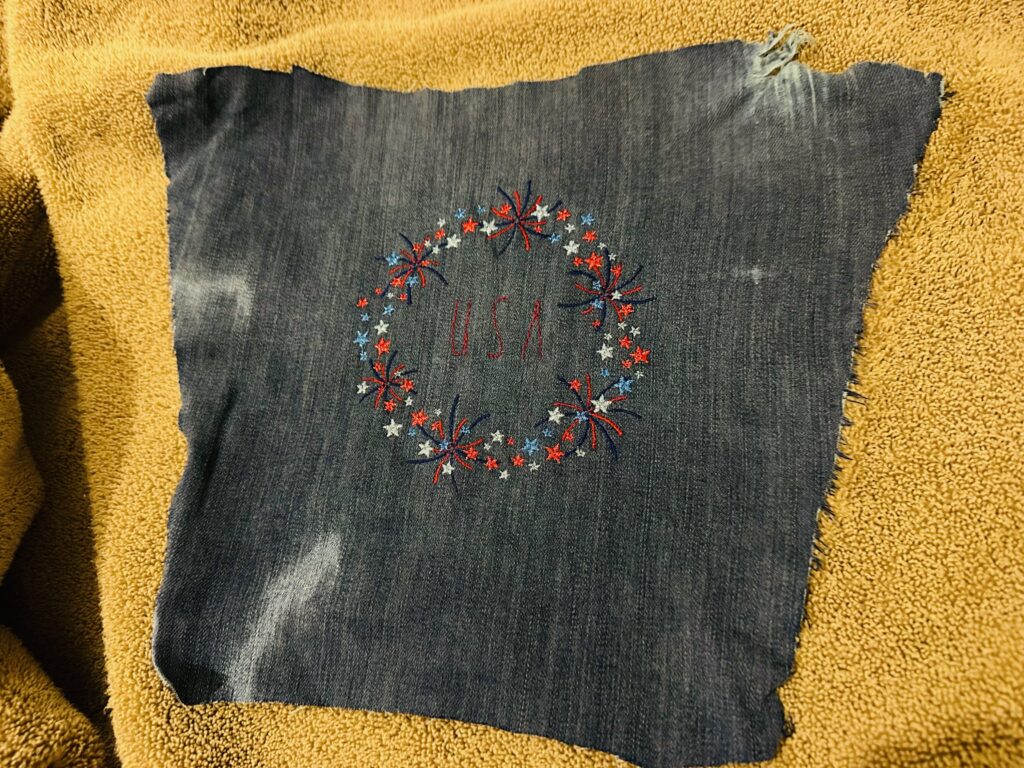
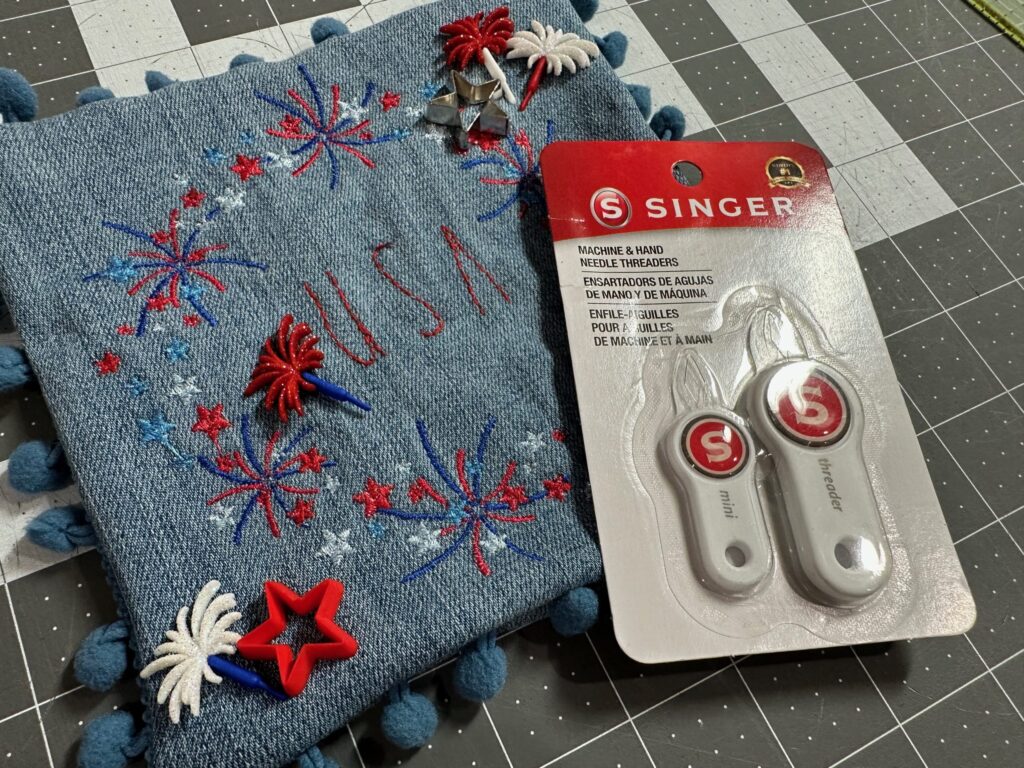
USA Embroidery
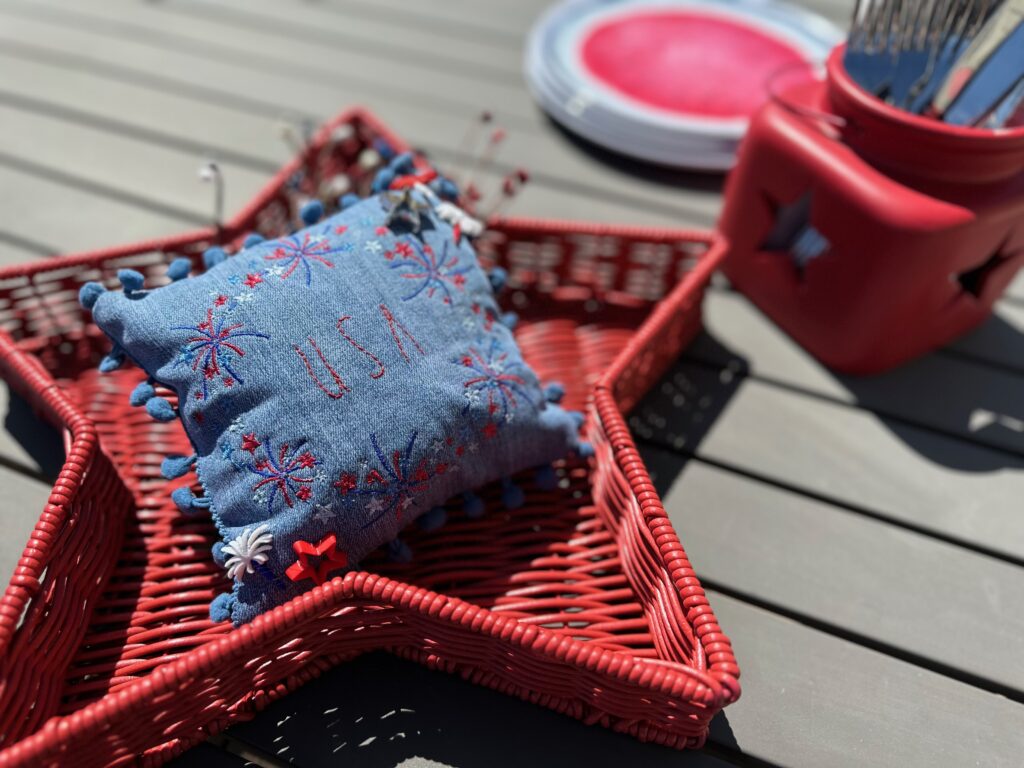
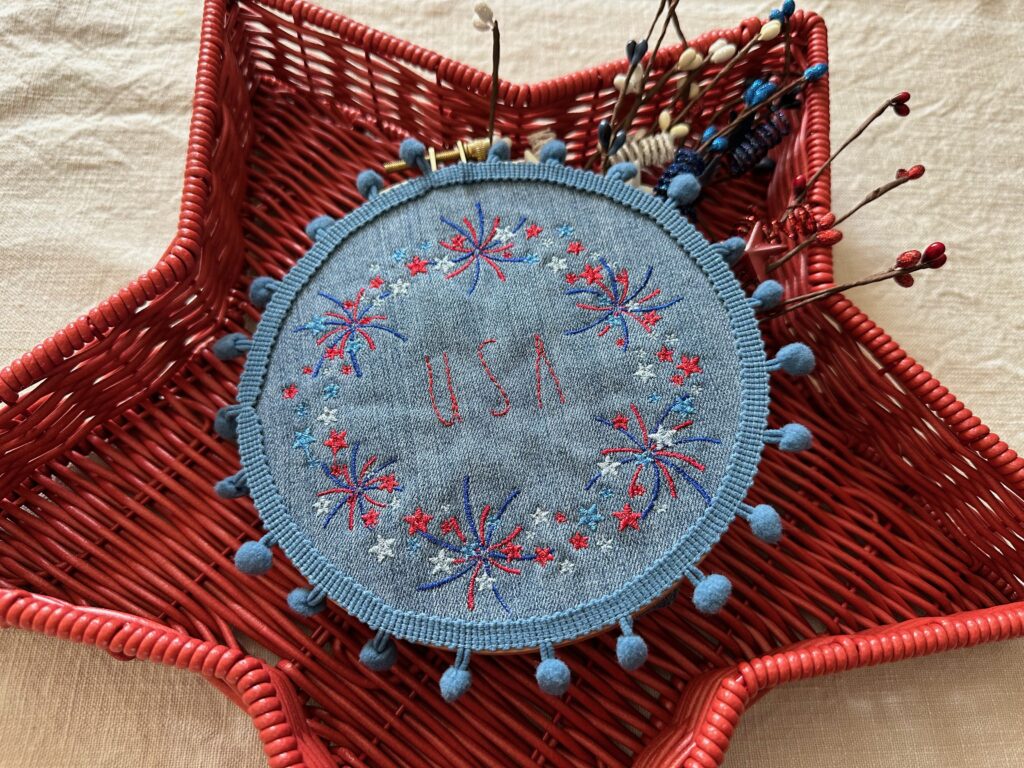
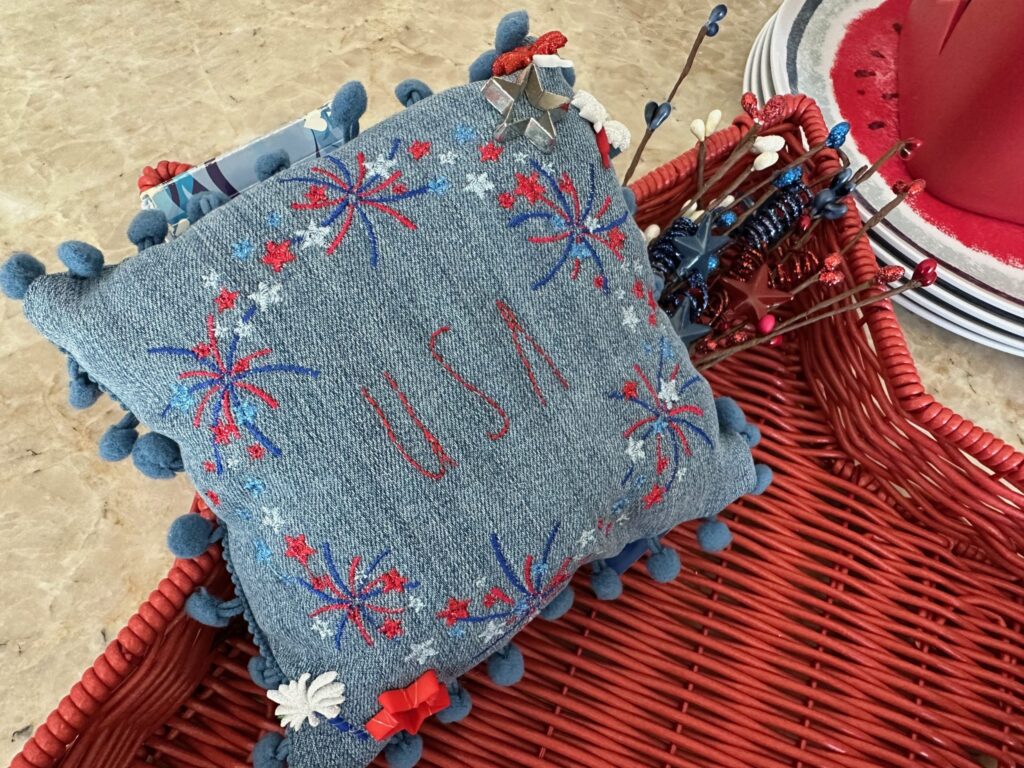
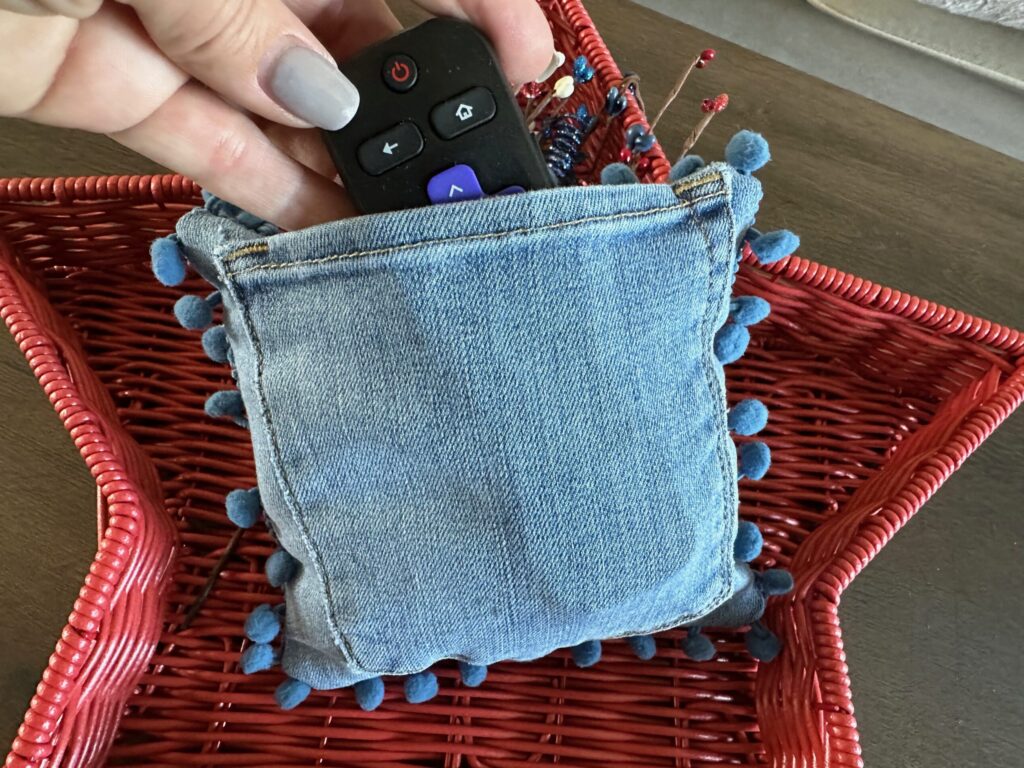
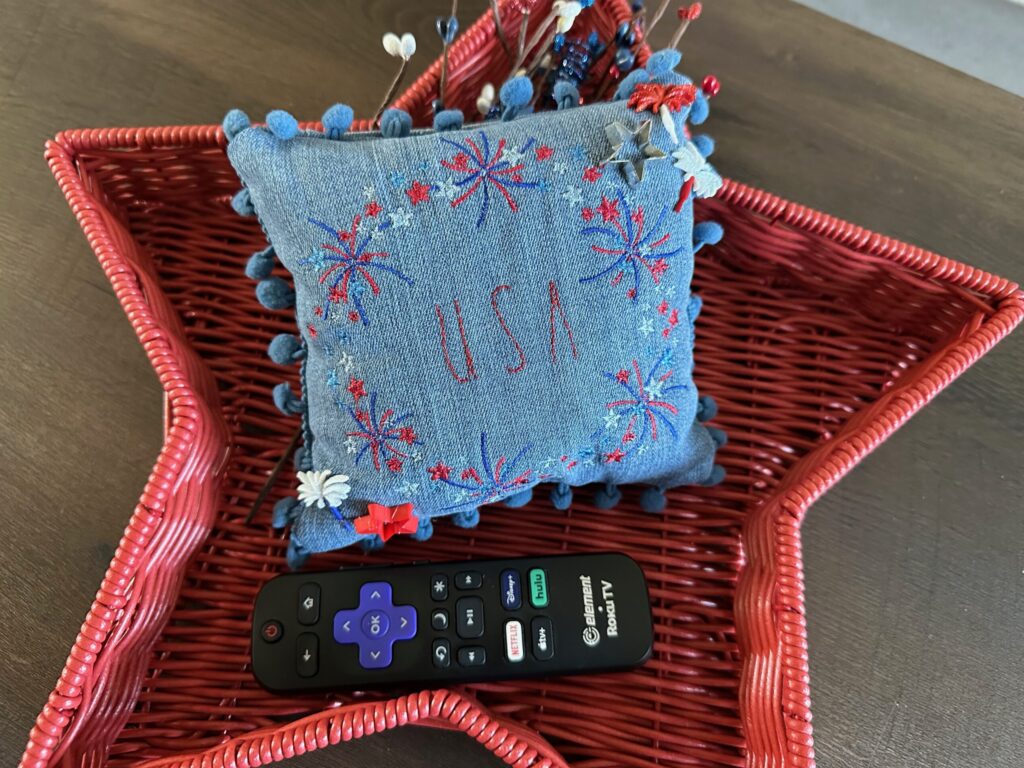
USA Embroidery is the perfect embellishment for a variety of projects. Add USA embroidery to a small shelf pillow, complete with a pocket on the back for storing things like the TV remote for easy access, playing cards for outdoor entertainment or a note for a fallen soldier. Or create wall art to hang up for Memorial Day and July Fourth. Either way, add pom-pom fringe and specialty baubles for fun and whimsy.
USA EMBROIDERY SUPPLIES
- Sulky Tear-Easy™ Stabilizer
- Sulky Stick ’n Stitch™ Stabilizer https://sulky.com/stick-n-stitch-8-12-x-11-printable-sheets
- Frame machine embroidery design, no larger than 6” x 6” (Such as Sulky’s Uncle Sam Frame design) https://sulky.com/uncle-sam-frame-machine-embroidery-design
- Sulky Rayon Thread (purchase the Uncle Sam Machine Embroidery Palette to have six patriotic-themed embroidery designs in 3 sizes each, plus 10 spools of Sulky Rayon and Poly Sparkle Threads)
- Sulky Poly Sparkle™ Thread
- Sulky Bobbin Thread
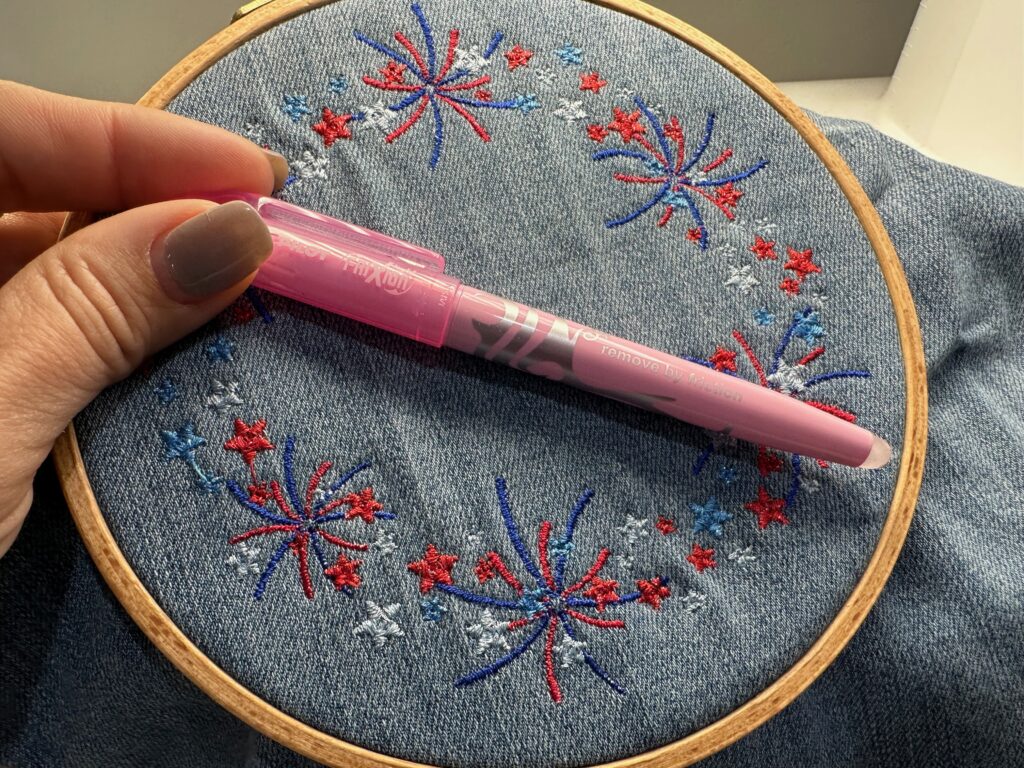
- Removable fabric marker or chalk
- Sulky 12 wt. Cotton Petites™ Thread
- Sulky Clear Invisible Thread
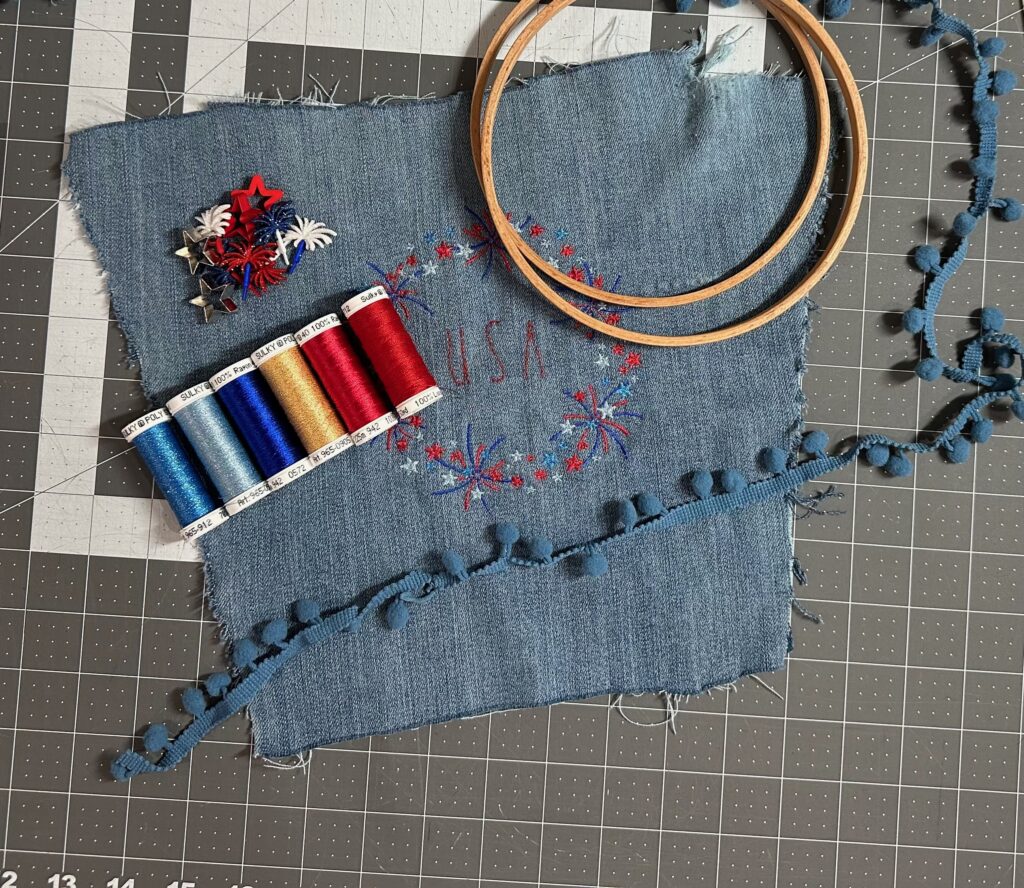
- 1 yard of pom-pom fringe
- Hand sewing needle
- 6”-diameter German Wooden Embroidery Hoop
- Hand embroidery needle
- Patriotic-themed baubles, decorative buttons and/or sequins
- Optional: Sulky KK 2000™ Temporary Spray Adhesive (if using medium- to heavyweight or super stretchy denim)
- Optional: Magnetic Embroidery Hoop
PILLOW ADDITIONAL SUPPLIES
- (2) 7” squares (or larger) of recycled denim fabric (Tip: Use a pair of old jeans that have salvageable fabric areas. If using, center one of the back pockets within one 7” square.)
- Organ size 75/11 Embroidery Needles
- Organ size 80/12 To Stitch Needles
- Clover® Wonder Clips
- Fiberfill
WALL ART ADDITIONAL SUPPLIES
- 9” square of recycled denim fabric
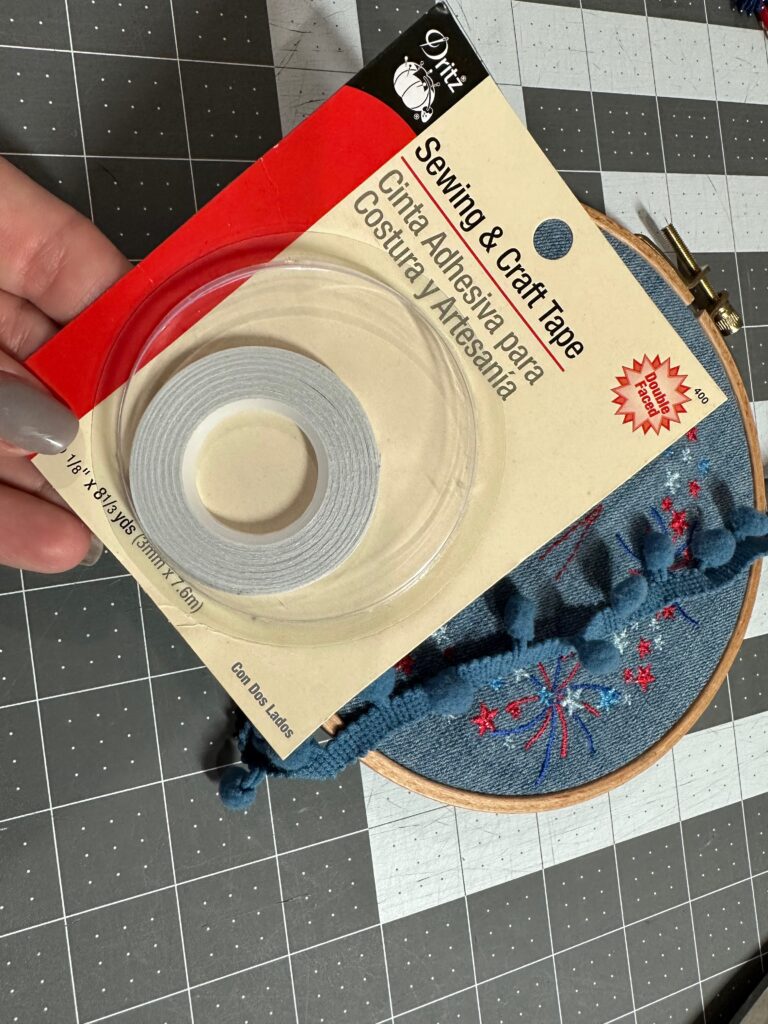
- 1/8”-wide double-sided basting tape
MACHINE EMBROIDERY INSTRUCTIONS
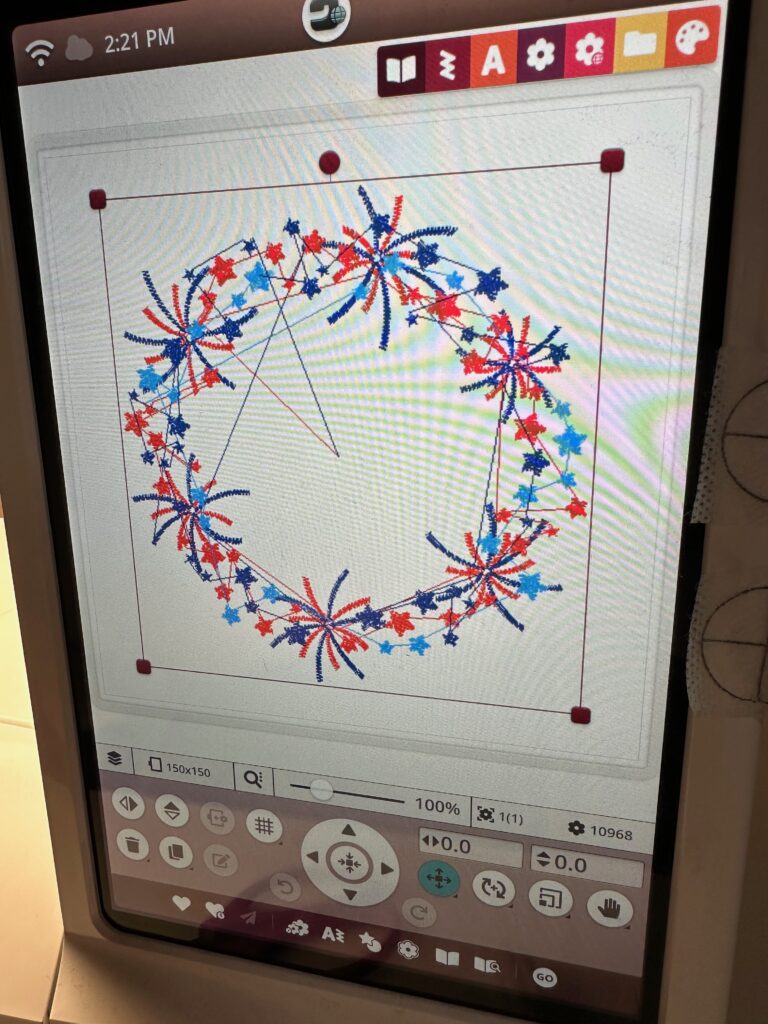
Load the embroidery design into the machine.
Install a size 75/11 Embroidery needle and thread it with the first color in the embroidery design. Wind a bobbin with Sulky Bobbin Thread.
Hoop a denim fabric rectangle with two layers of Sulky Tear-Easy Stabilizer. (Note: In the following photos, a magnetic hoop is used.)
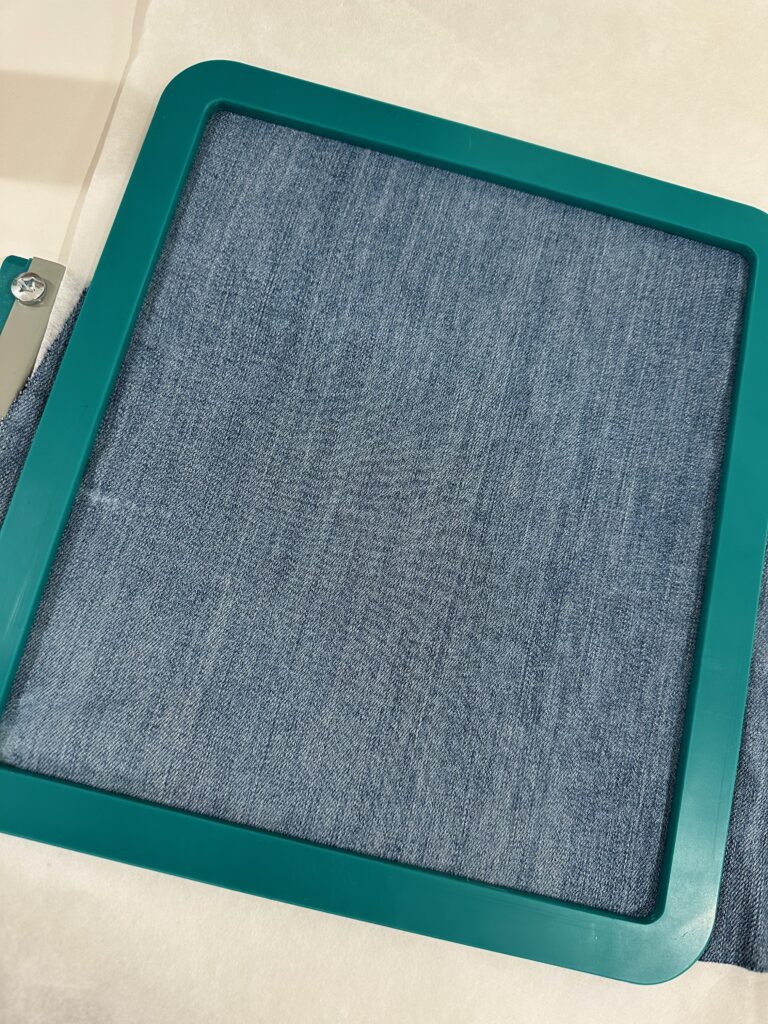
TIP: If working with a medium- to heavyweight or super stretchy denim, do not hoop the fabric. Only hoop the stabilizer, and then adhere the denim to the stabilizer using Sulky KK 2000™ Temporary Spray Adhesive. Or use a magnetic Hoop, available at sulky.com.
Embroider the design, switching thread colors as directed by the color chart. If using the featured design, some portions are embroidered with Sulky Poly Sparkle Thread. Switch to a size 90/14 Needle when embroidering these portions, as the Poly Sparkle Thread is 30 wt. and needs a larger needle eye for the best experience.
Be sure to clip any jump threads with each thread change, using Curved Tip Squeezers.
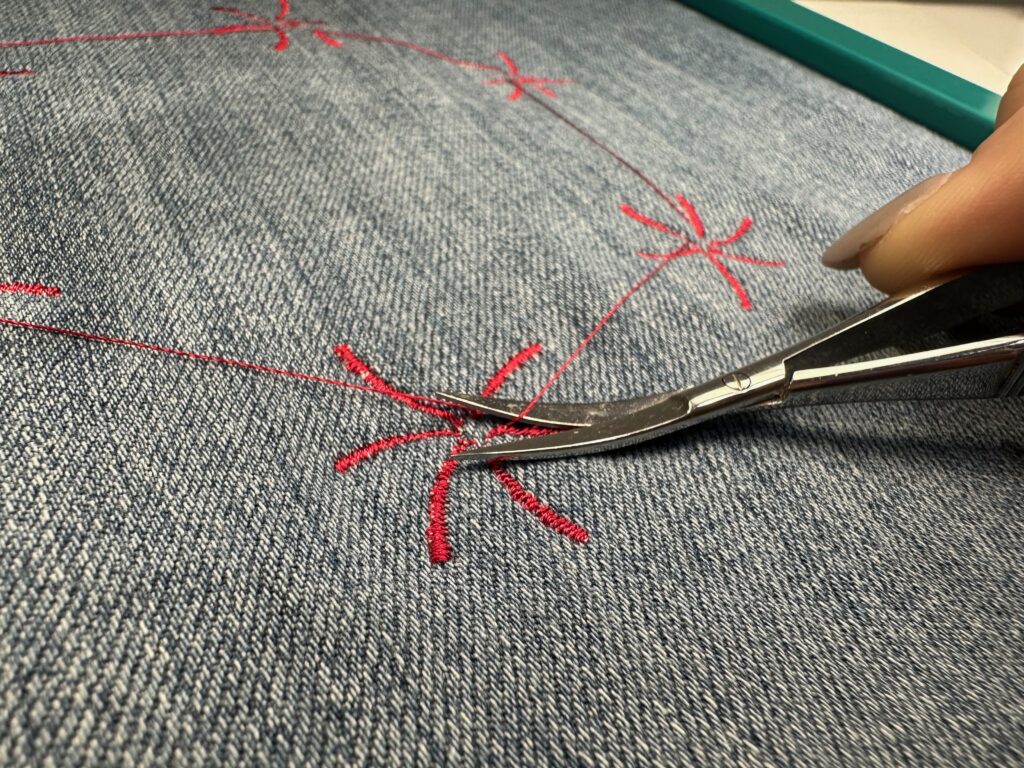
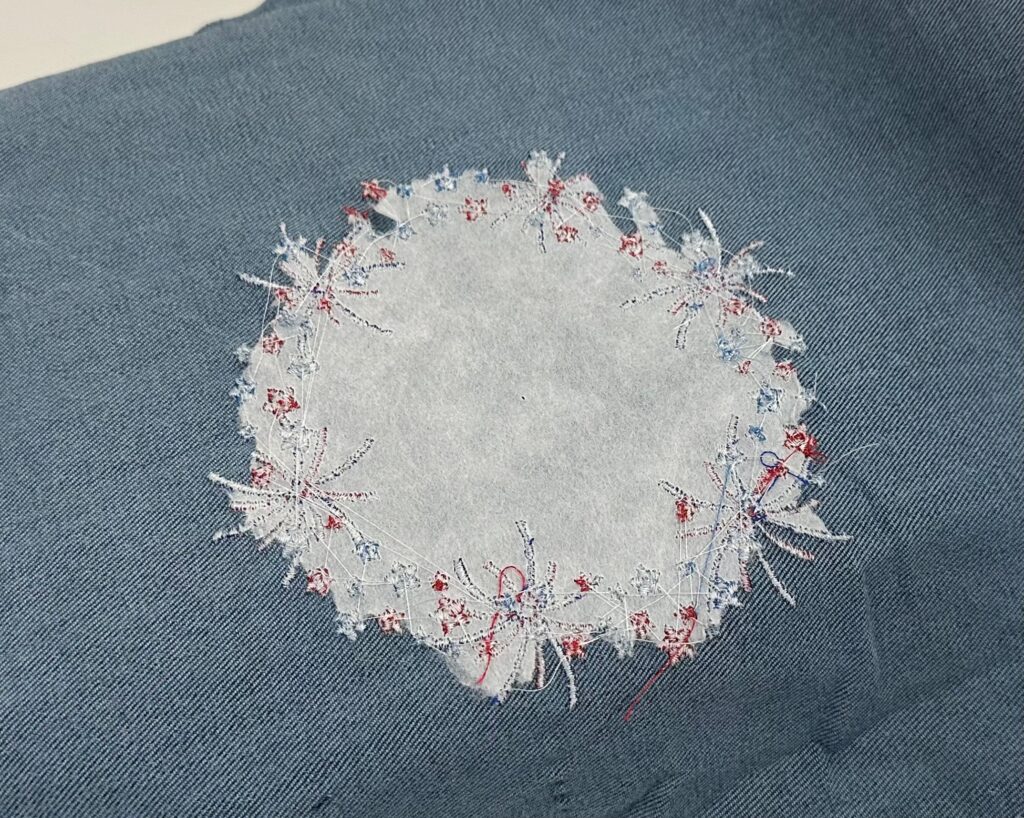
When machine embroidery is complete, remove the stabilizer from the hoop. Carefully tear away each layer of Tear-Easy stabilizer independently, just beyond the outer frame design perimeter.
HAND EMBROIDERY INSTRUCTIONS
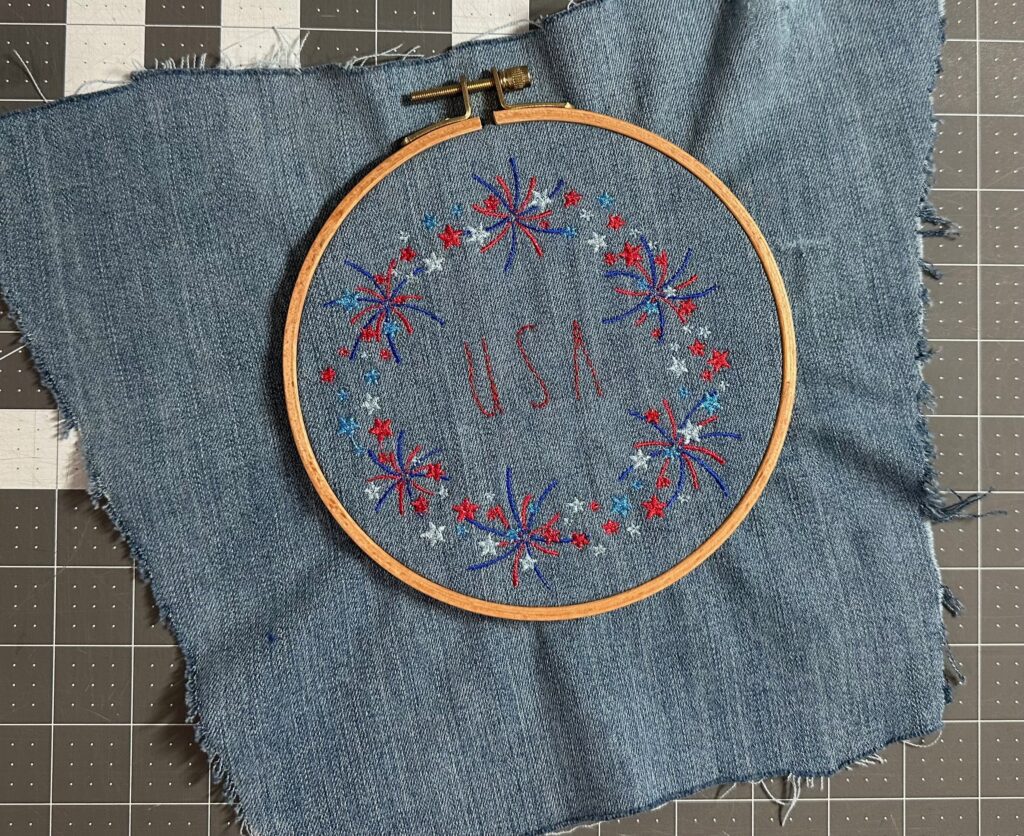
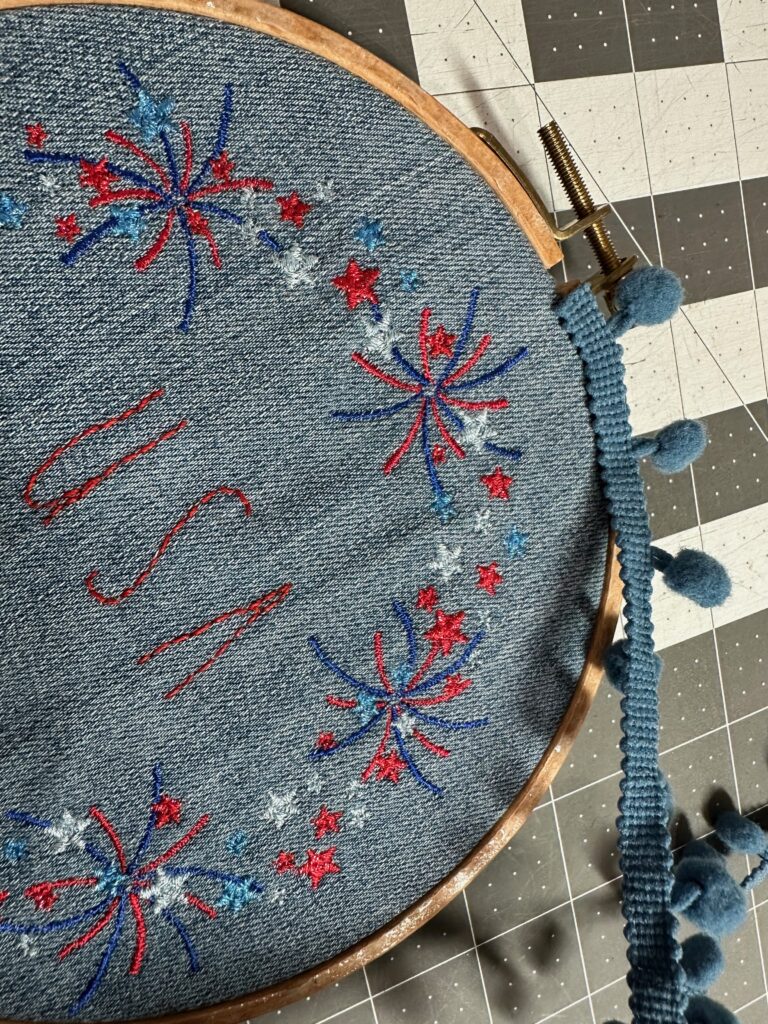
Hoop the machine embroidered fabric in a 6” German Wooden Embroidery Hoop, centering the design.
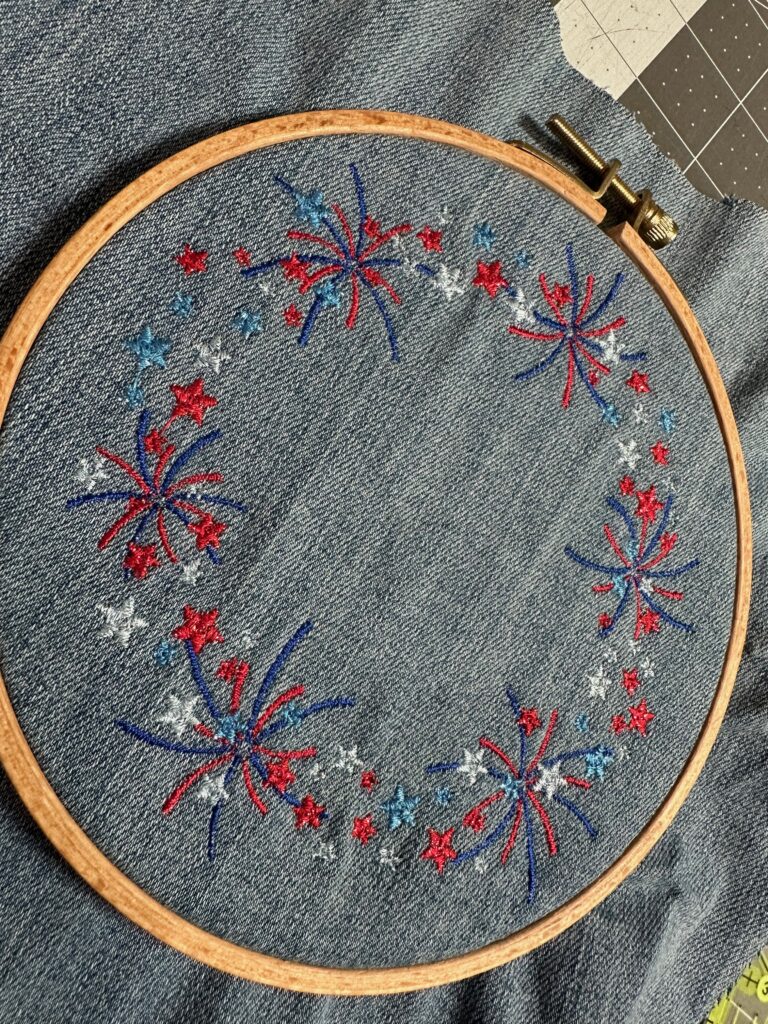
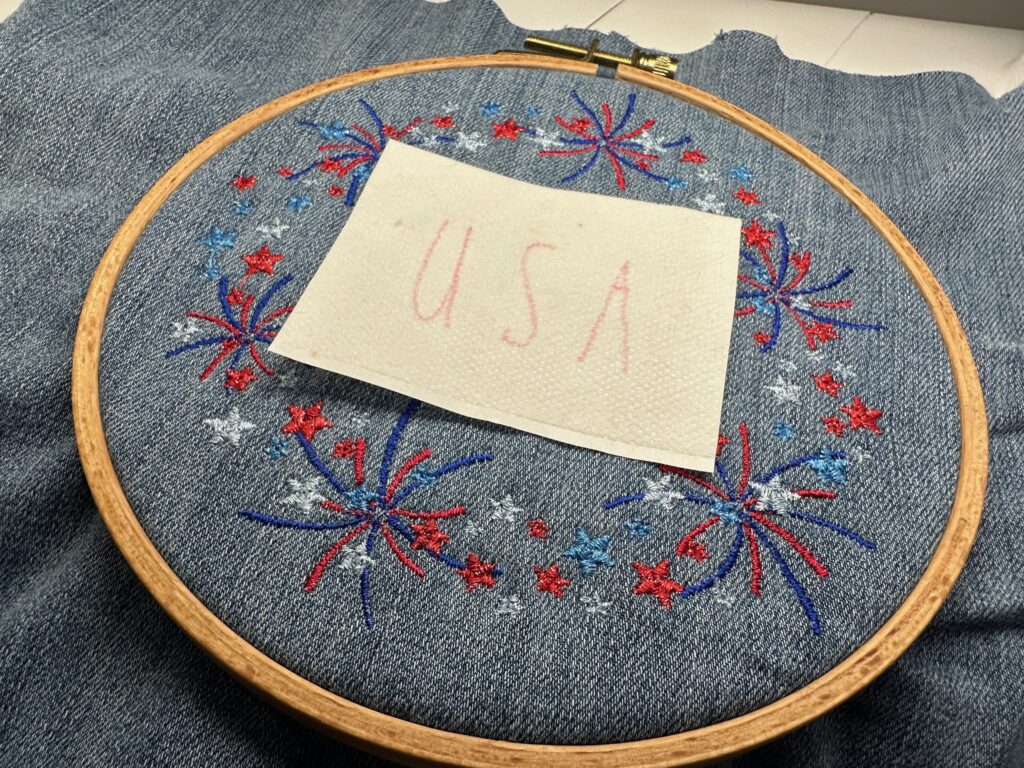
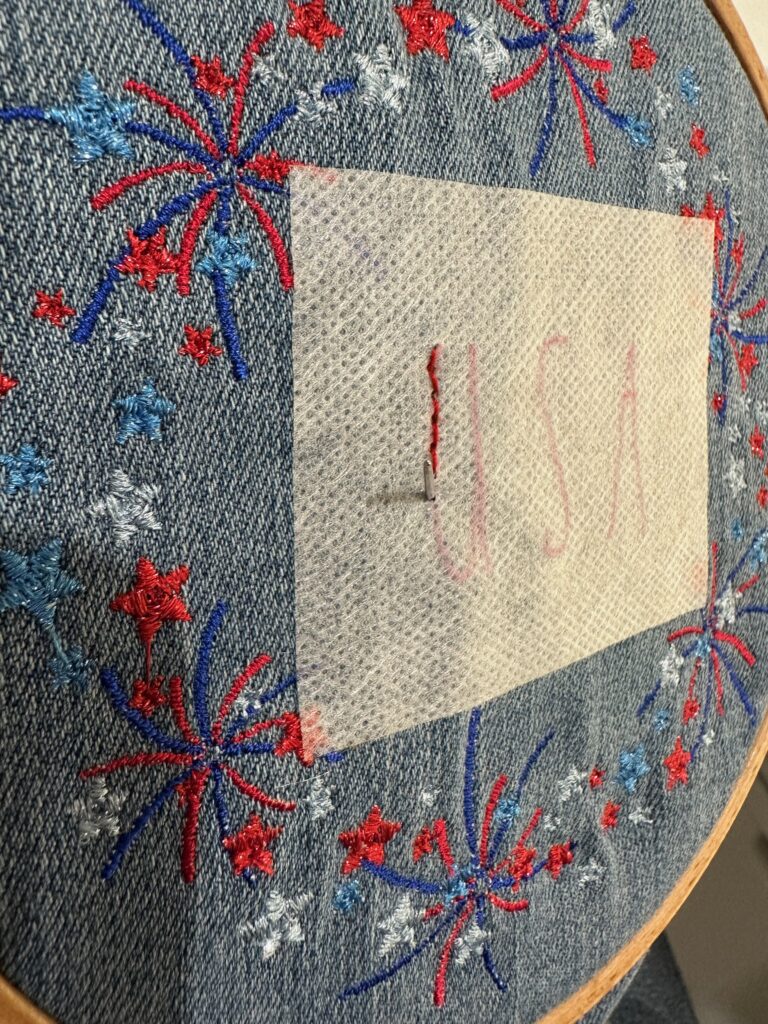
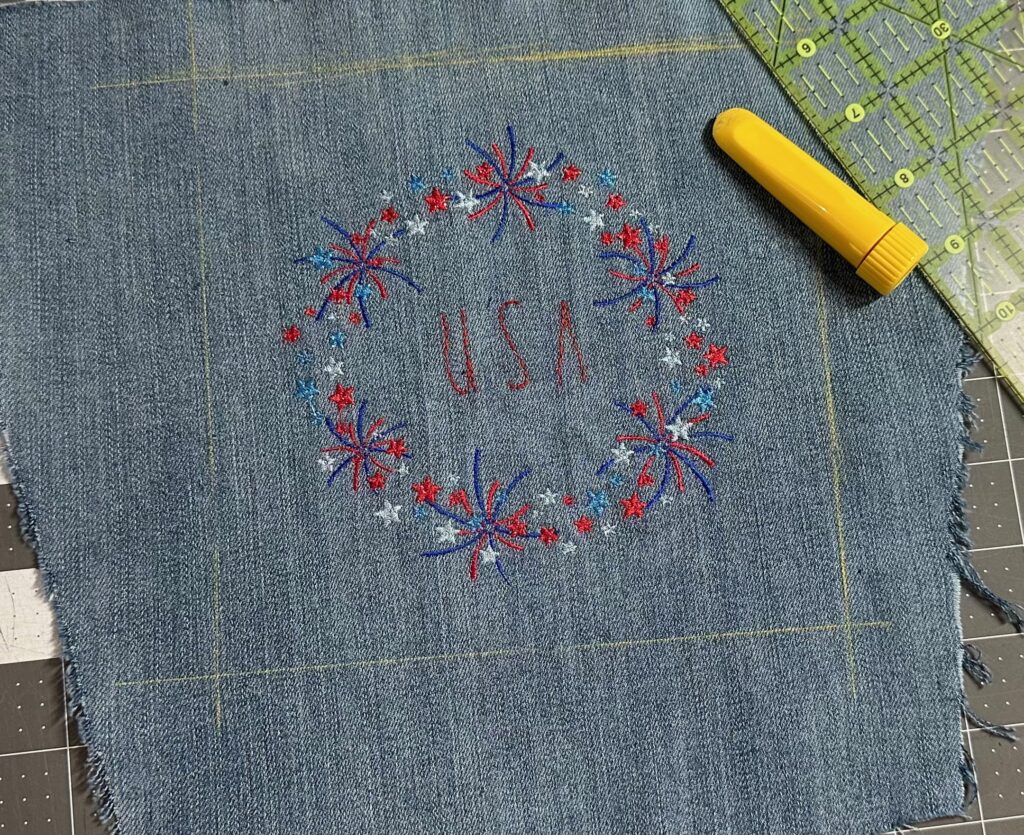
Using a removable fabric marker or chalk, draw the chosen words or phrase in the center of the machine embroidered frame; in this case, “USA.”
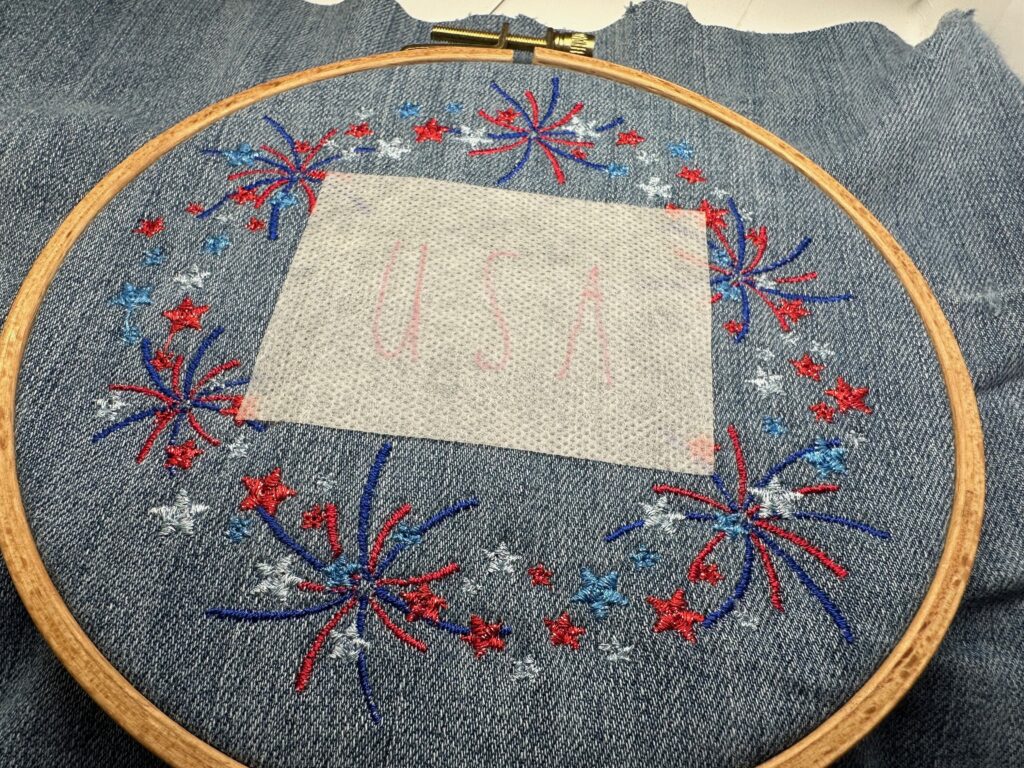
Alternatively, print the chosen letters onto a sheet of Sulky Stick ‘n Stitch Stabilizer. Make sure to print on the fabric-like side. And choose letters that are no taller than 1” and make sure the letters/word fits within a 2½” width. (If using a different frame design, measure the available space prior to printing the letters/words.) Cut out the design, leaving a bit of a border. Then, place the stabilizer sticker in the embroidered frame center on the fabric right side.
TIP: If desired, skip hand embroidery altogether and add the chosen letters/word on the machine embroidery screen before beginning the frame embroidery.
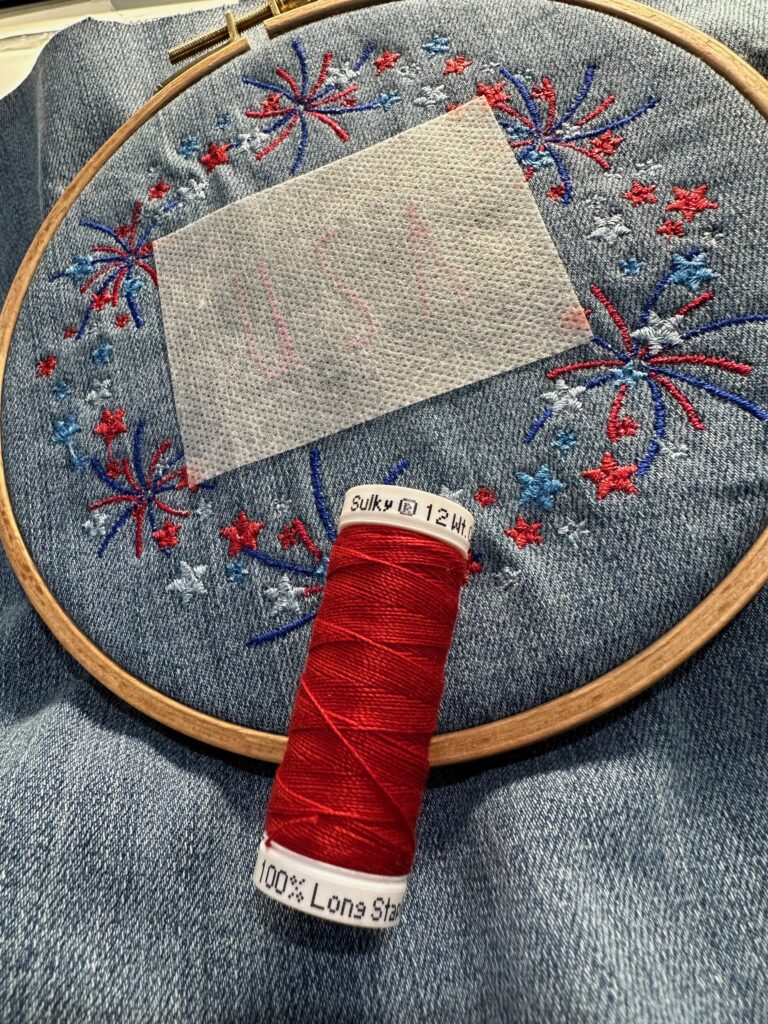
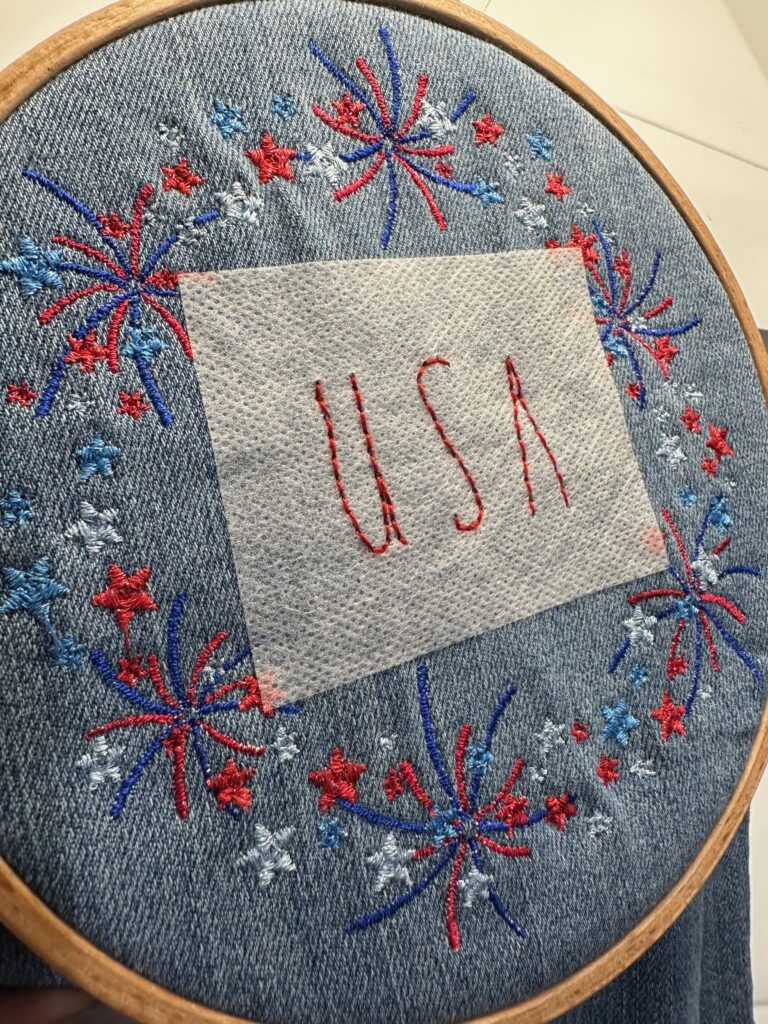
Thread a hand embroidery needle with one strand of Sulky 12 wt. Cotton Petites Thread in the chosen color.
Hand embroider the letters/phrase following the transferred markings. Use a backstitch, stem stitch or running stitch, depending on the desired finished look.
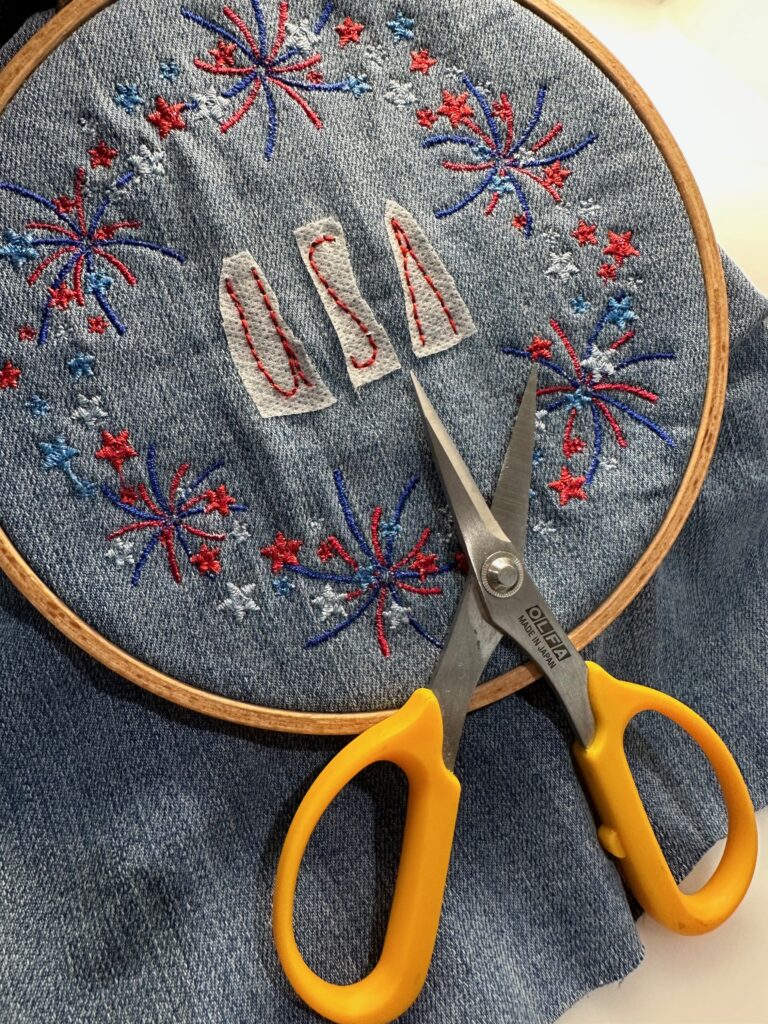
Remove the fabric from the hoop.
If using Stick ‘n Stitch, trim the stabilizer just beyond the embroidery.
Then, when embroidery is complete remove the stabilizer by running it under warm running water.
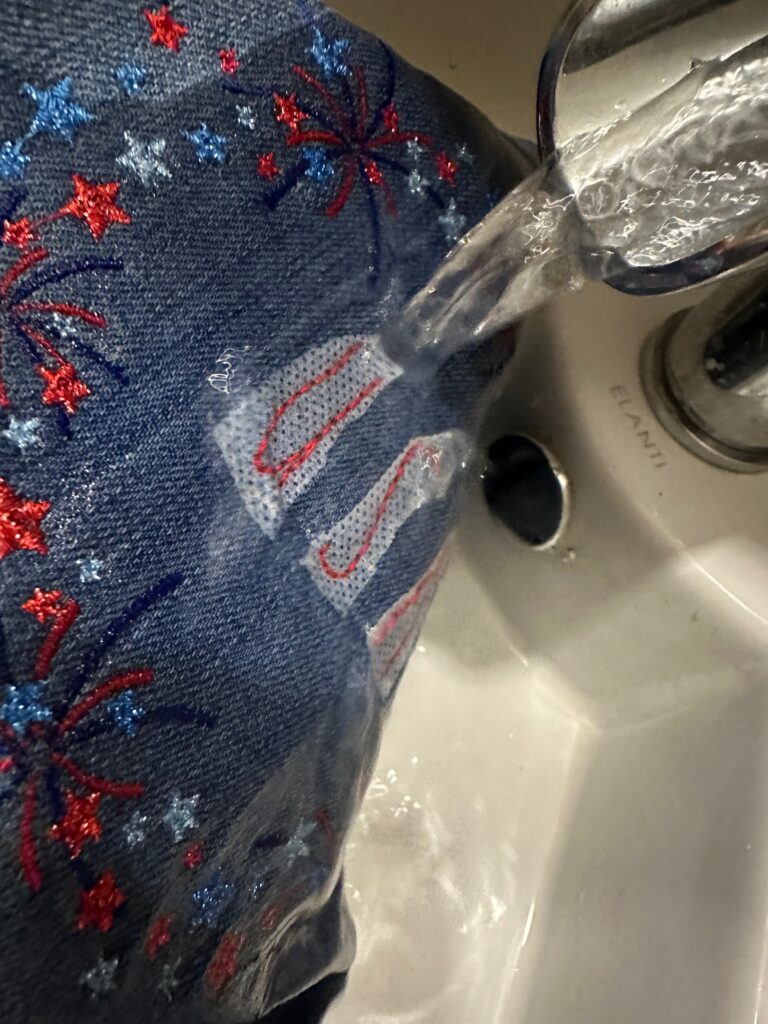
Once the stabilizer is dissolved, let the fabric dry flat on a towel.
When dry, press gently from the fabric wrong side.
If not using Stick ‘n Stitch, remove the markings used to transfer the embroidery design according to the fabric marker or chalk type.
WALL ART INSTRUCTIONS
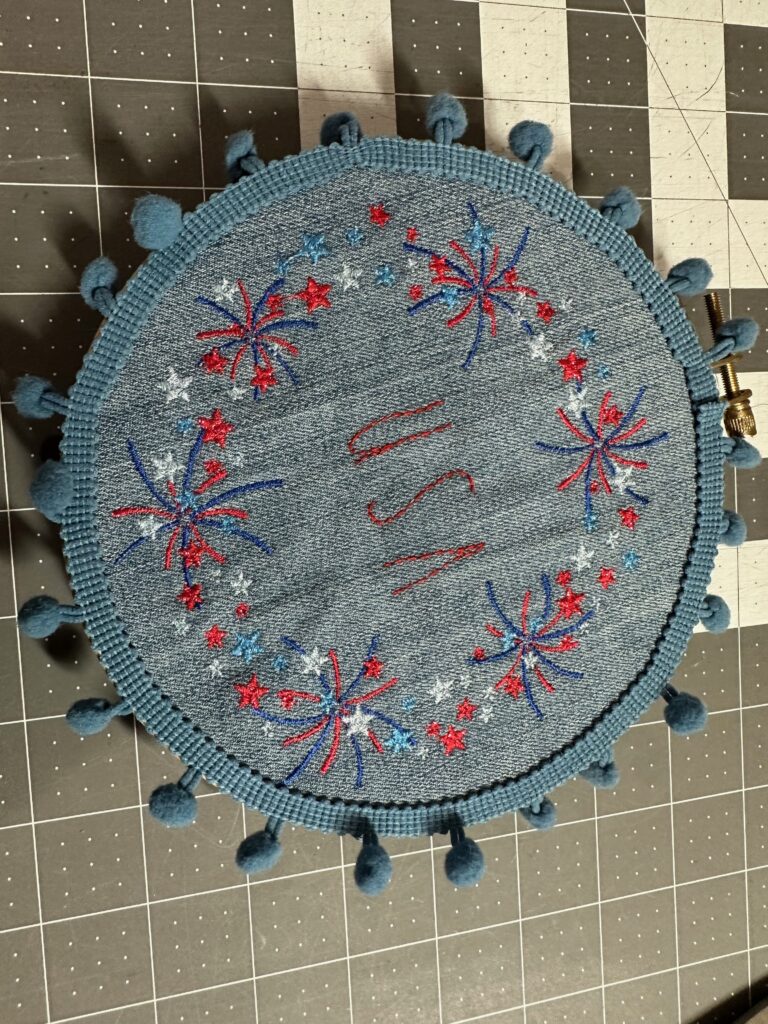
Re-hoop the finished embroidery.
Apply double-sided basting tape to the hoop ring.

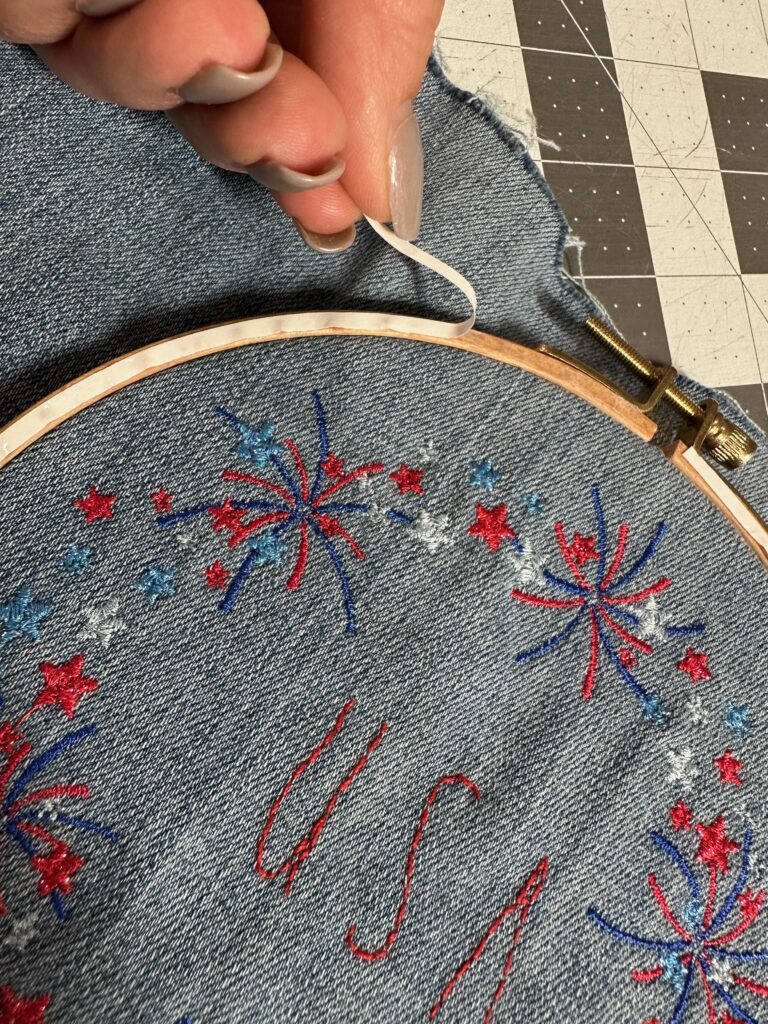
Place the pom-pom fringe along the hoop, over the tape. Begin and end the fringe at the hoop upper-edge center, where the hoop splits apart.
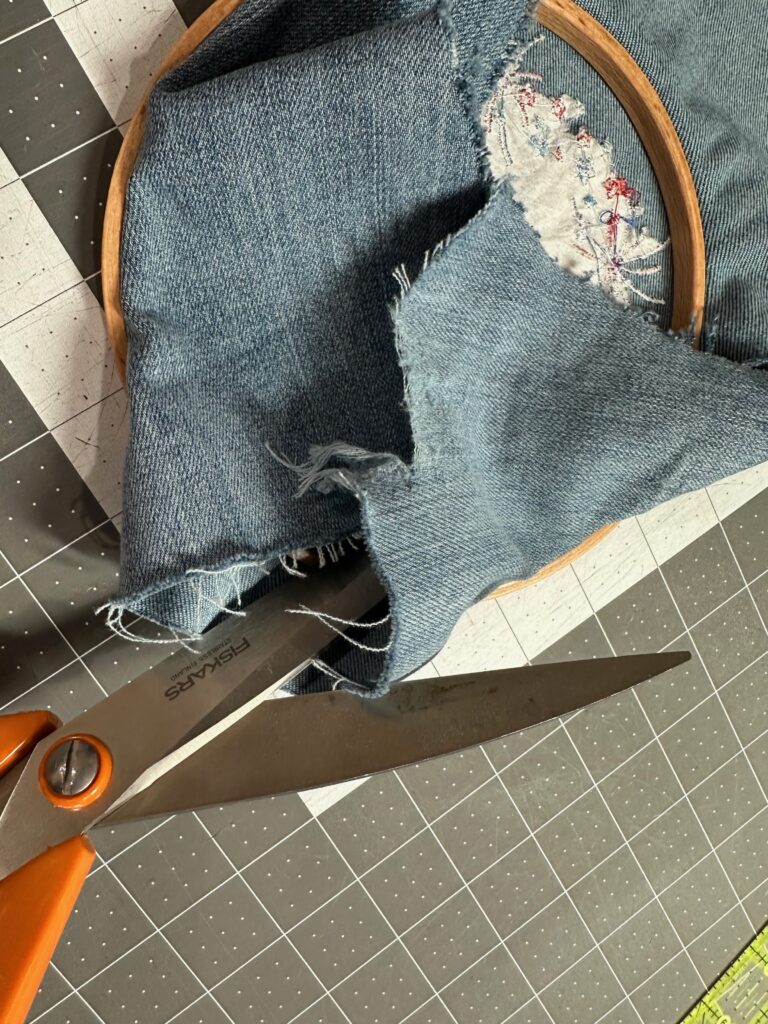
Turn over the hoop to the wrong side and trim the fabric about ½” beyond the hoop ring.
Using double-sided basting tape, secure the fabric edge to the hoop ring, clipping into the fabric if needed to relax it around the curves.
If desired, hand sew buttons, baubles and/or sequins to the wall art using Sulky Invisible Thread.
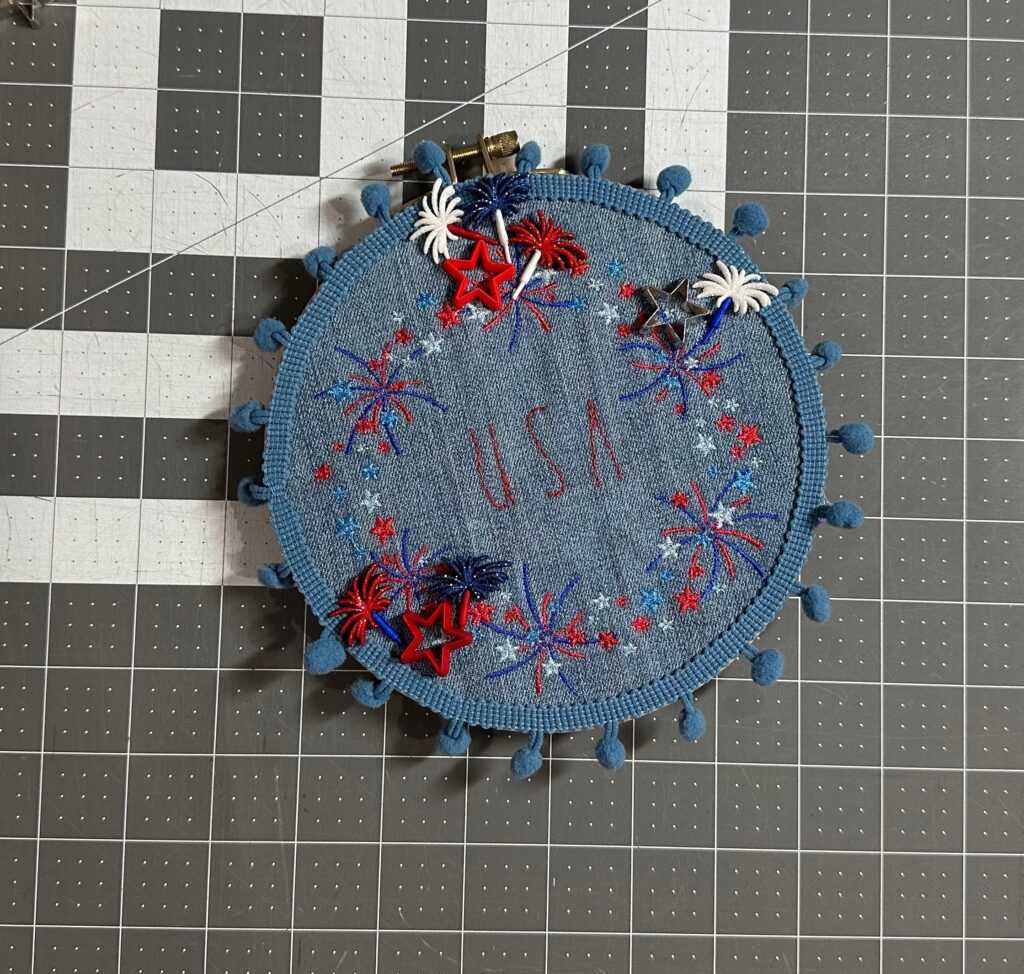
Hang the piece or add it to a table centerpiece with more sparkly accents.
PILLOW INSTRUCTIONS
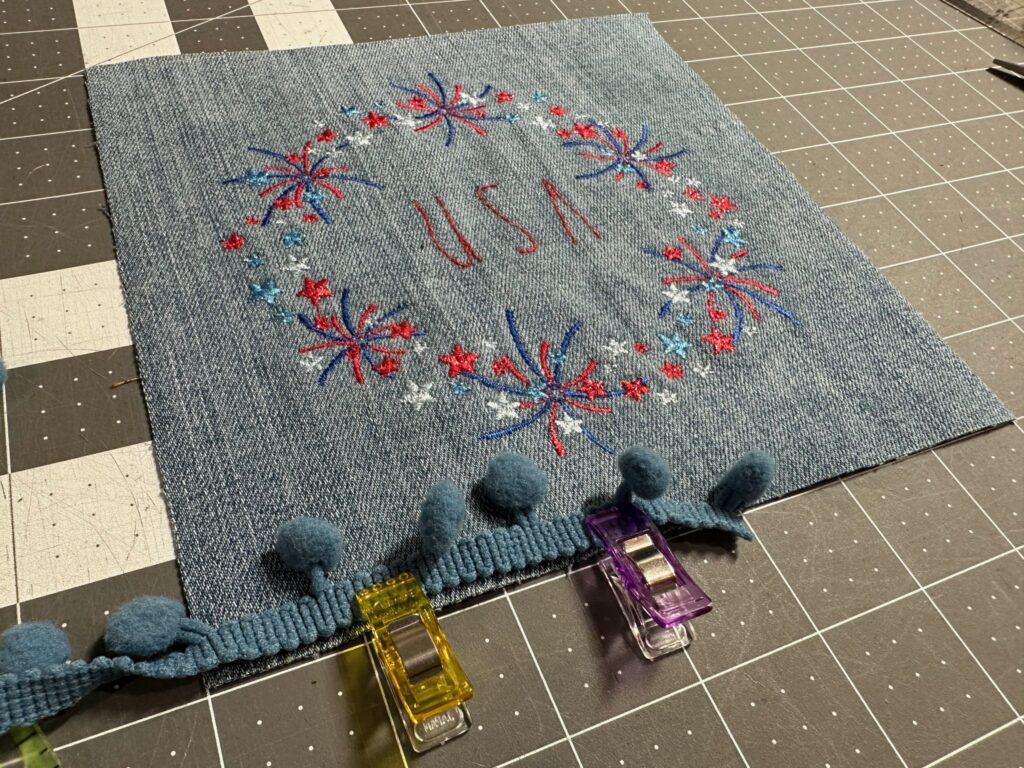
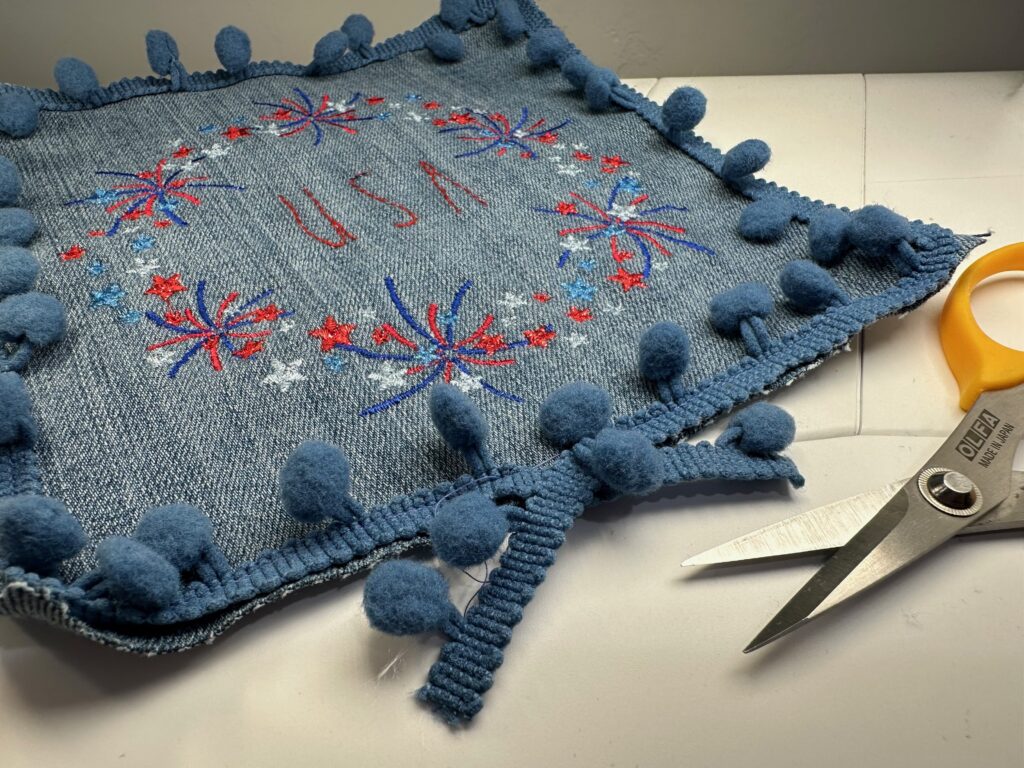
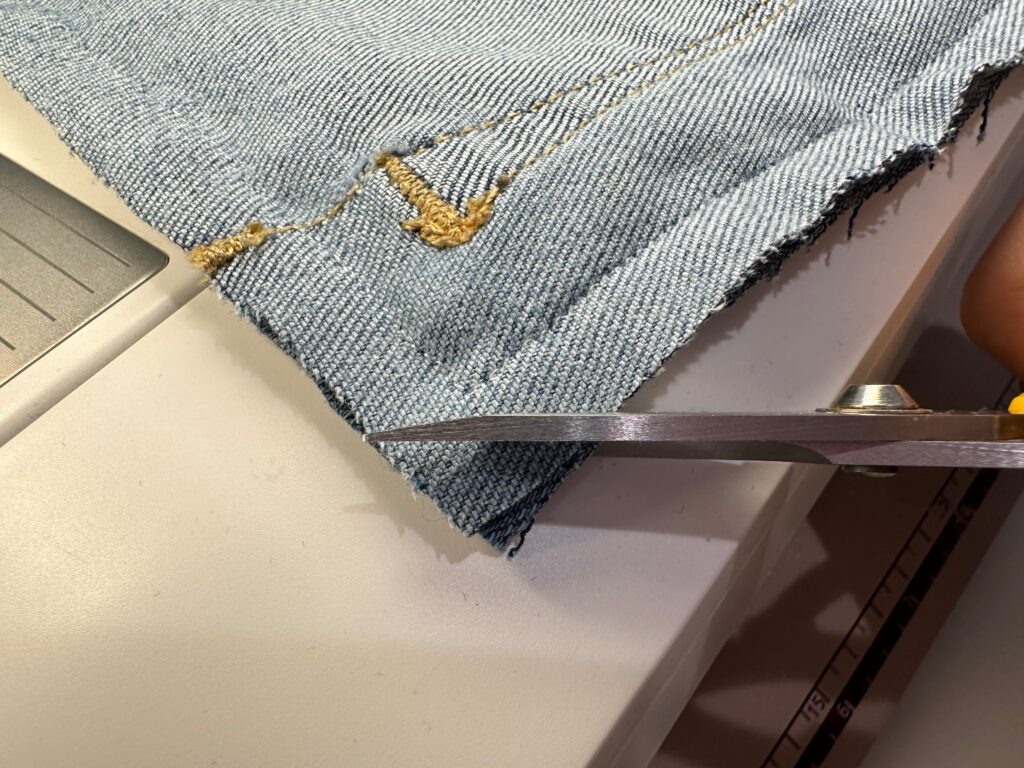
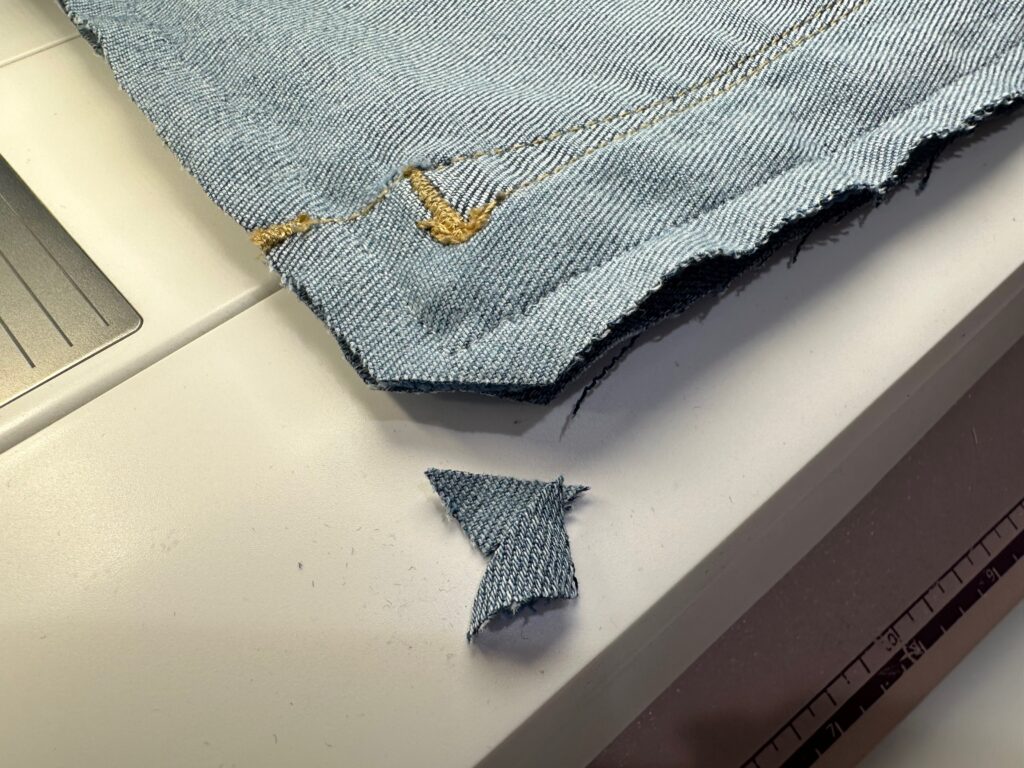
After all embroidery is complete, trim the embroidered fabric to 7” square.
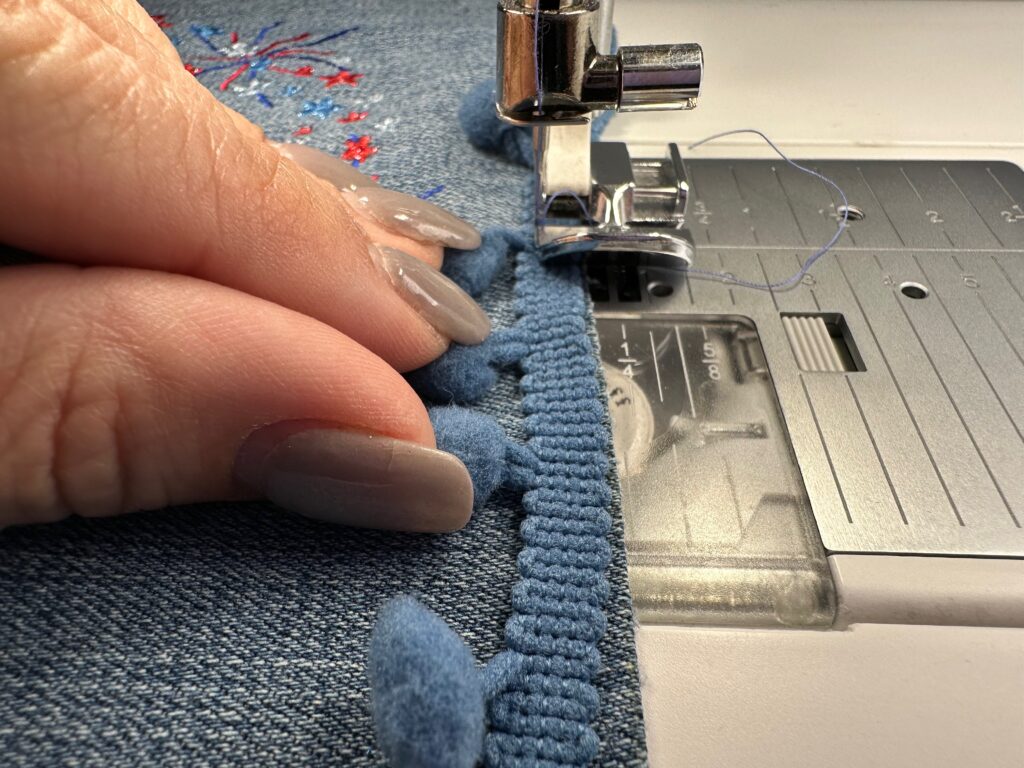
Center one pom-pom fringe end along the embroidered fabric lower-edge center. Use Wonder Clips to secure the trim to the embroidered square, easing it around each corner.
Thread the 80/12 Top Stitch Needle with Sulky 50 wt. Cotton Thread in a color that matches the denim.
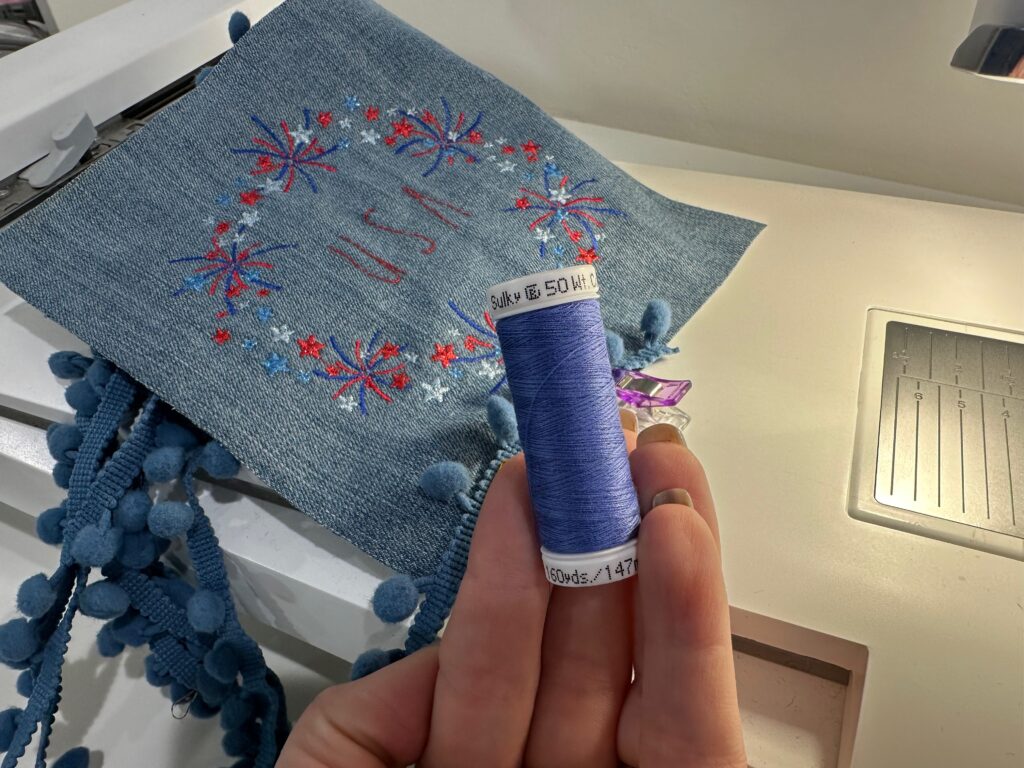
Baste the trim to the fabric, using a zipper foot to get close to the poms.
At the trim beginning, overlap the ends and orient them downward and beyond the fabric edge.
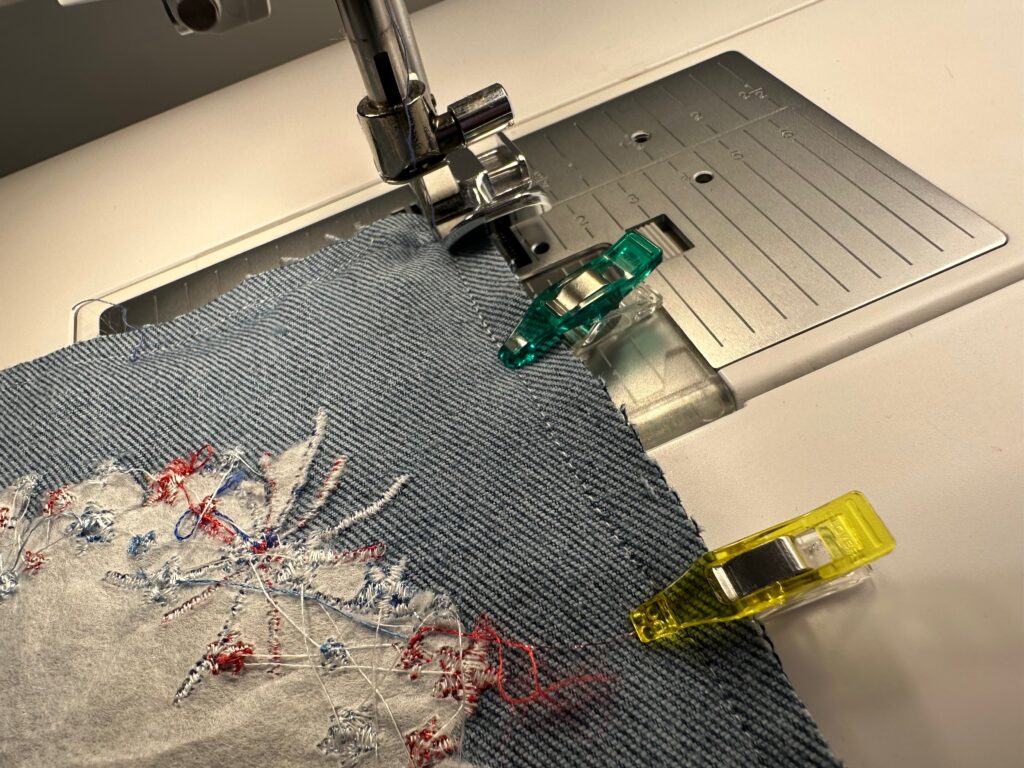
Place the remaining denim fabric on the embroidered fabric with right sides together, sandwiching the trim. If using a jeans pocket on this piece, make sure it’s oriented properly so the pocket opens right side up.
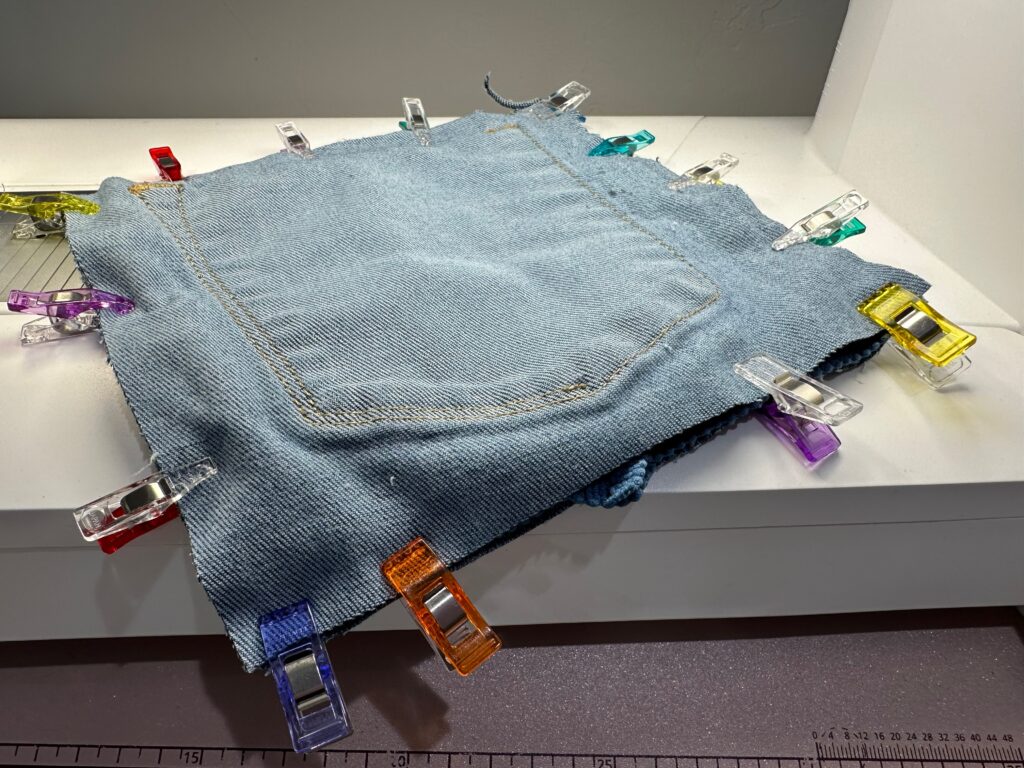
Stitch the pillow perimeter, leaving a 4” opening along the lower edge for turning.
Clip the corners, clipping up to but not through the stitching.
Turn the pillow right side out through the opening.
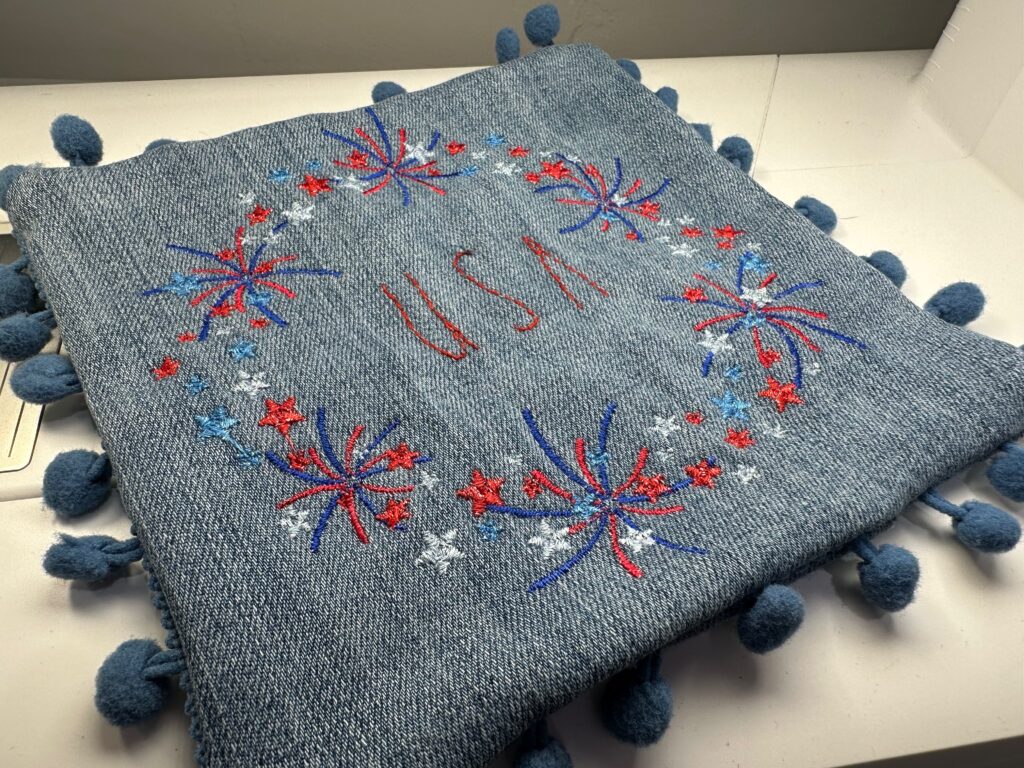
Hand sew baubles, buttons and/or sequins to the pillow right side using Sulky Invisible Thread.
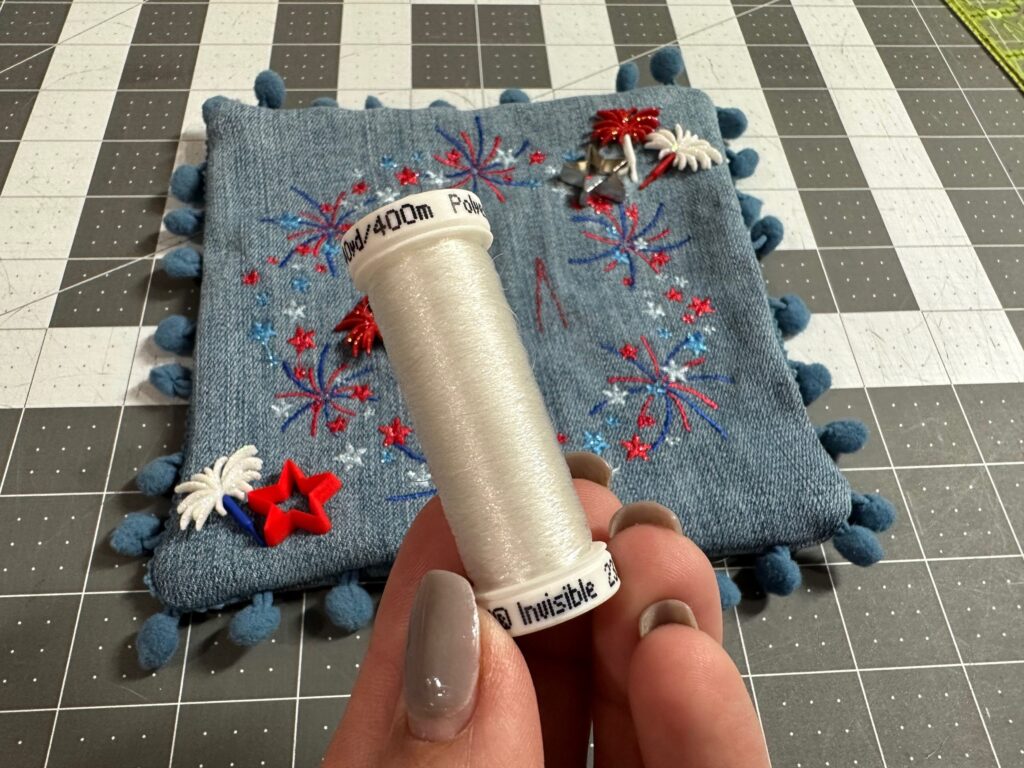
TIP: It’s difficult to thread a hand sewing needle with Invisible Thread because…well…you can’t see it very well! Try a needle threader to make things easier to manage.
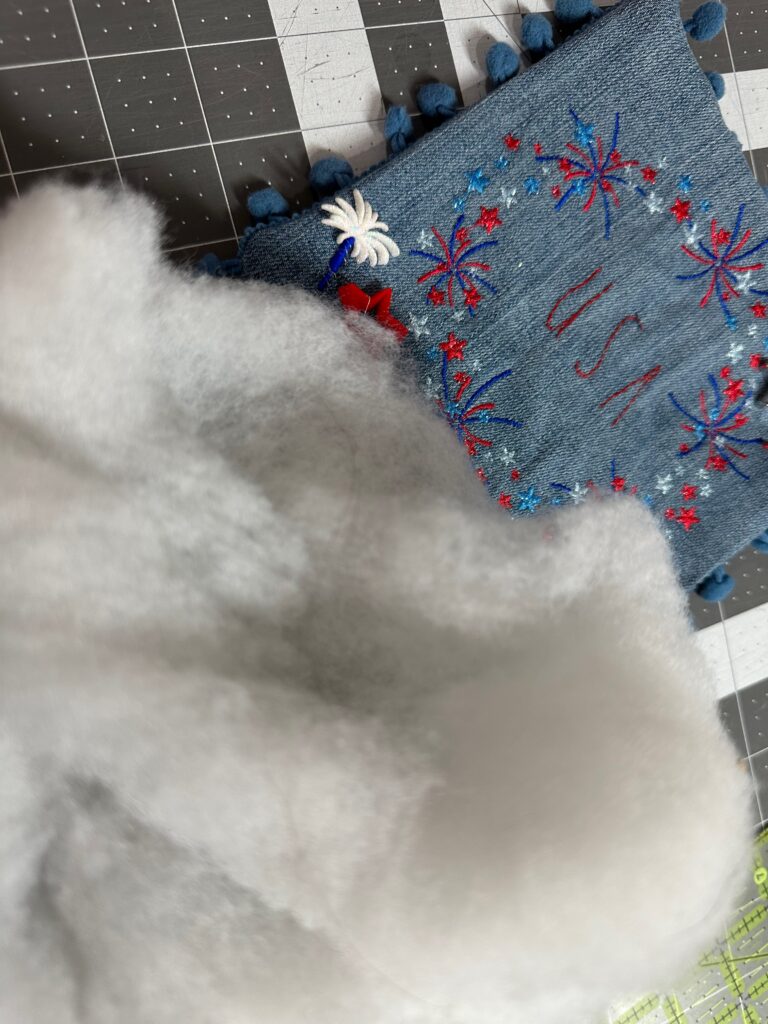
Stuff the pillow with fiberfill to the desired plumpness. Use a chopstick to push the fiberfill into the corners.
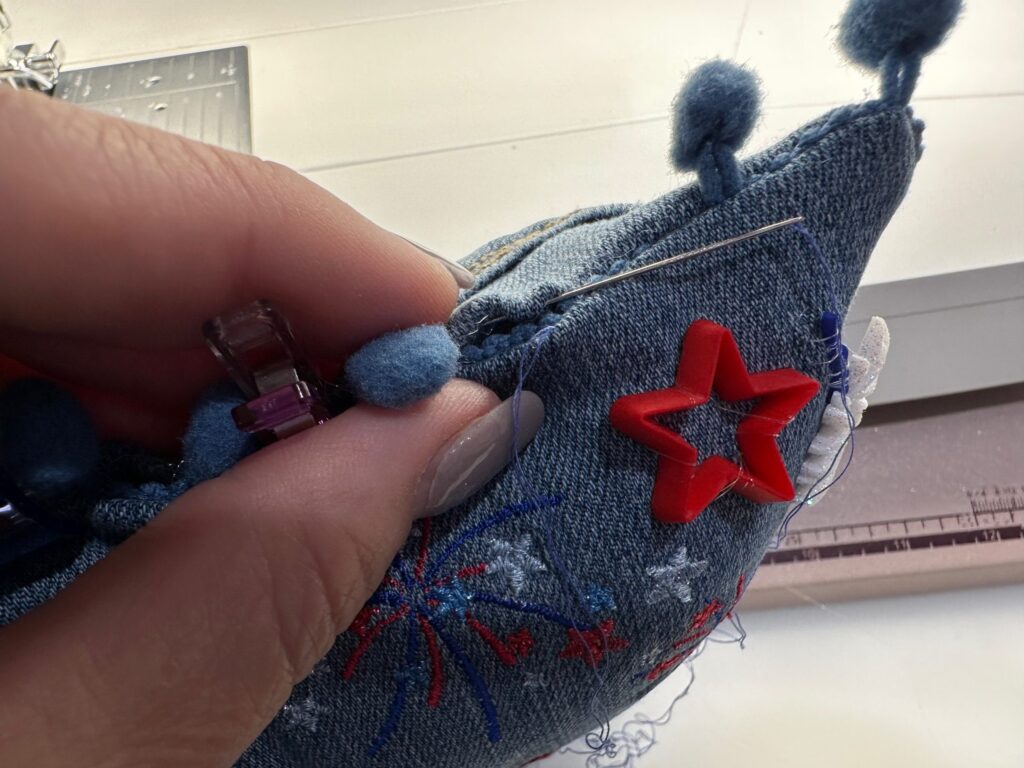
Clip the opening seam allowances shut. Then, hand stitch the opening closed using a ladder stitch or whipstitch.
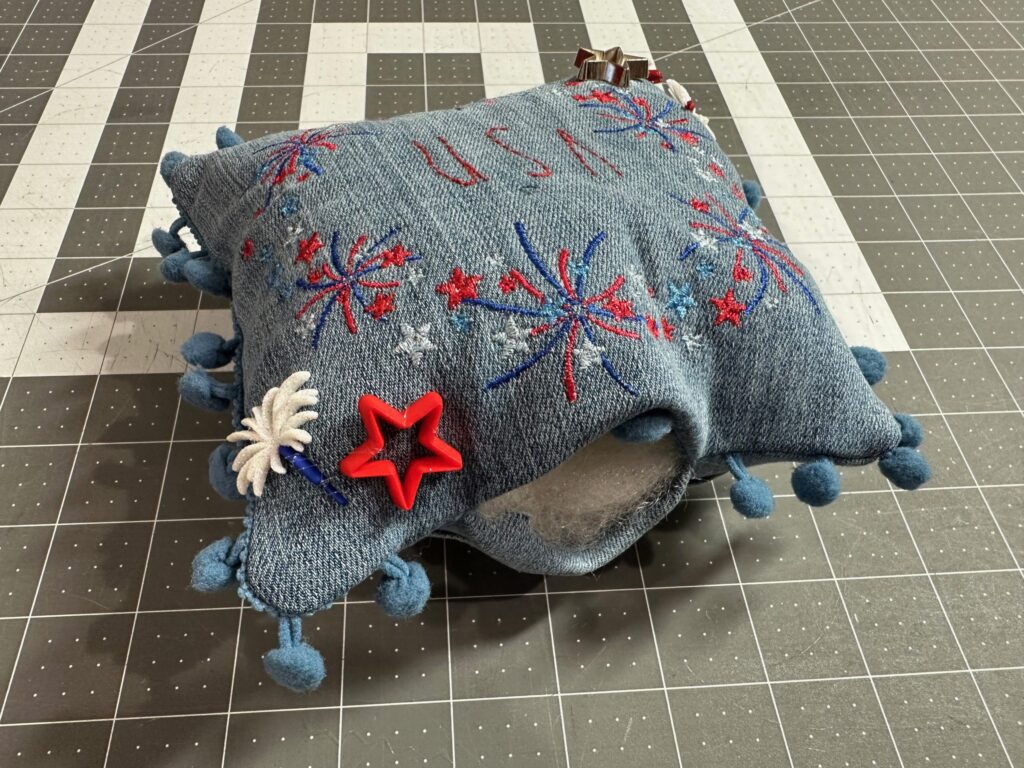
Place the pillow into a basket or centerpiece and fill the pocket with the tv remote, deck of cards or special note. Or place the pillow on a shelf with other decorative items.

This is a really cute project!
Where do I find the embroidery file?
Hi Val,
It is linked in the supply list, and you can also find it here: https://sulky.com/uncle-sam-frame-machine-embroidery-design