Yoga Bag Pattern – Bliss Yoga Bag by Sew Hungry Hippie
This yoga bag pattern is a pretty easy sew; however, a few tips and tricks will help you navigate the tricky parts. Stitch up this yoga bag and sew your way to wellness in the new year!
Note: this post includes affiliate links. If you make a purchase from those links, we may receive a commission on those purchases.
Yoga Bag Pattern Particulars
This yoga bag is lined with a layer of interfacing and fusible fleece (or batting) between the layers. This results in a nicely structured bag with a comfy strap.
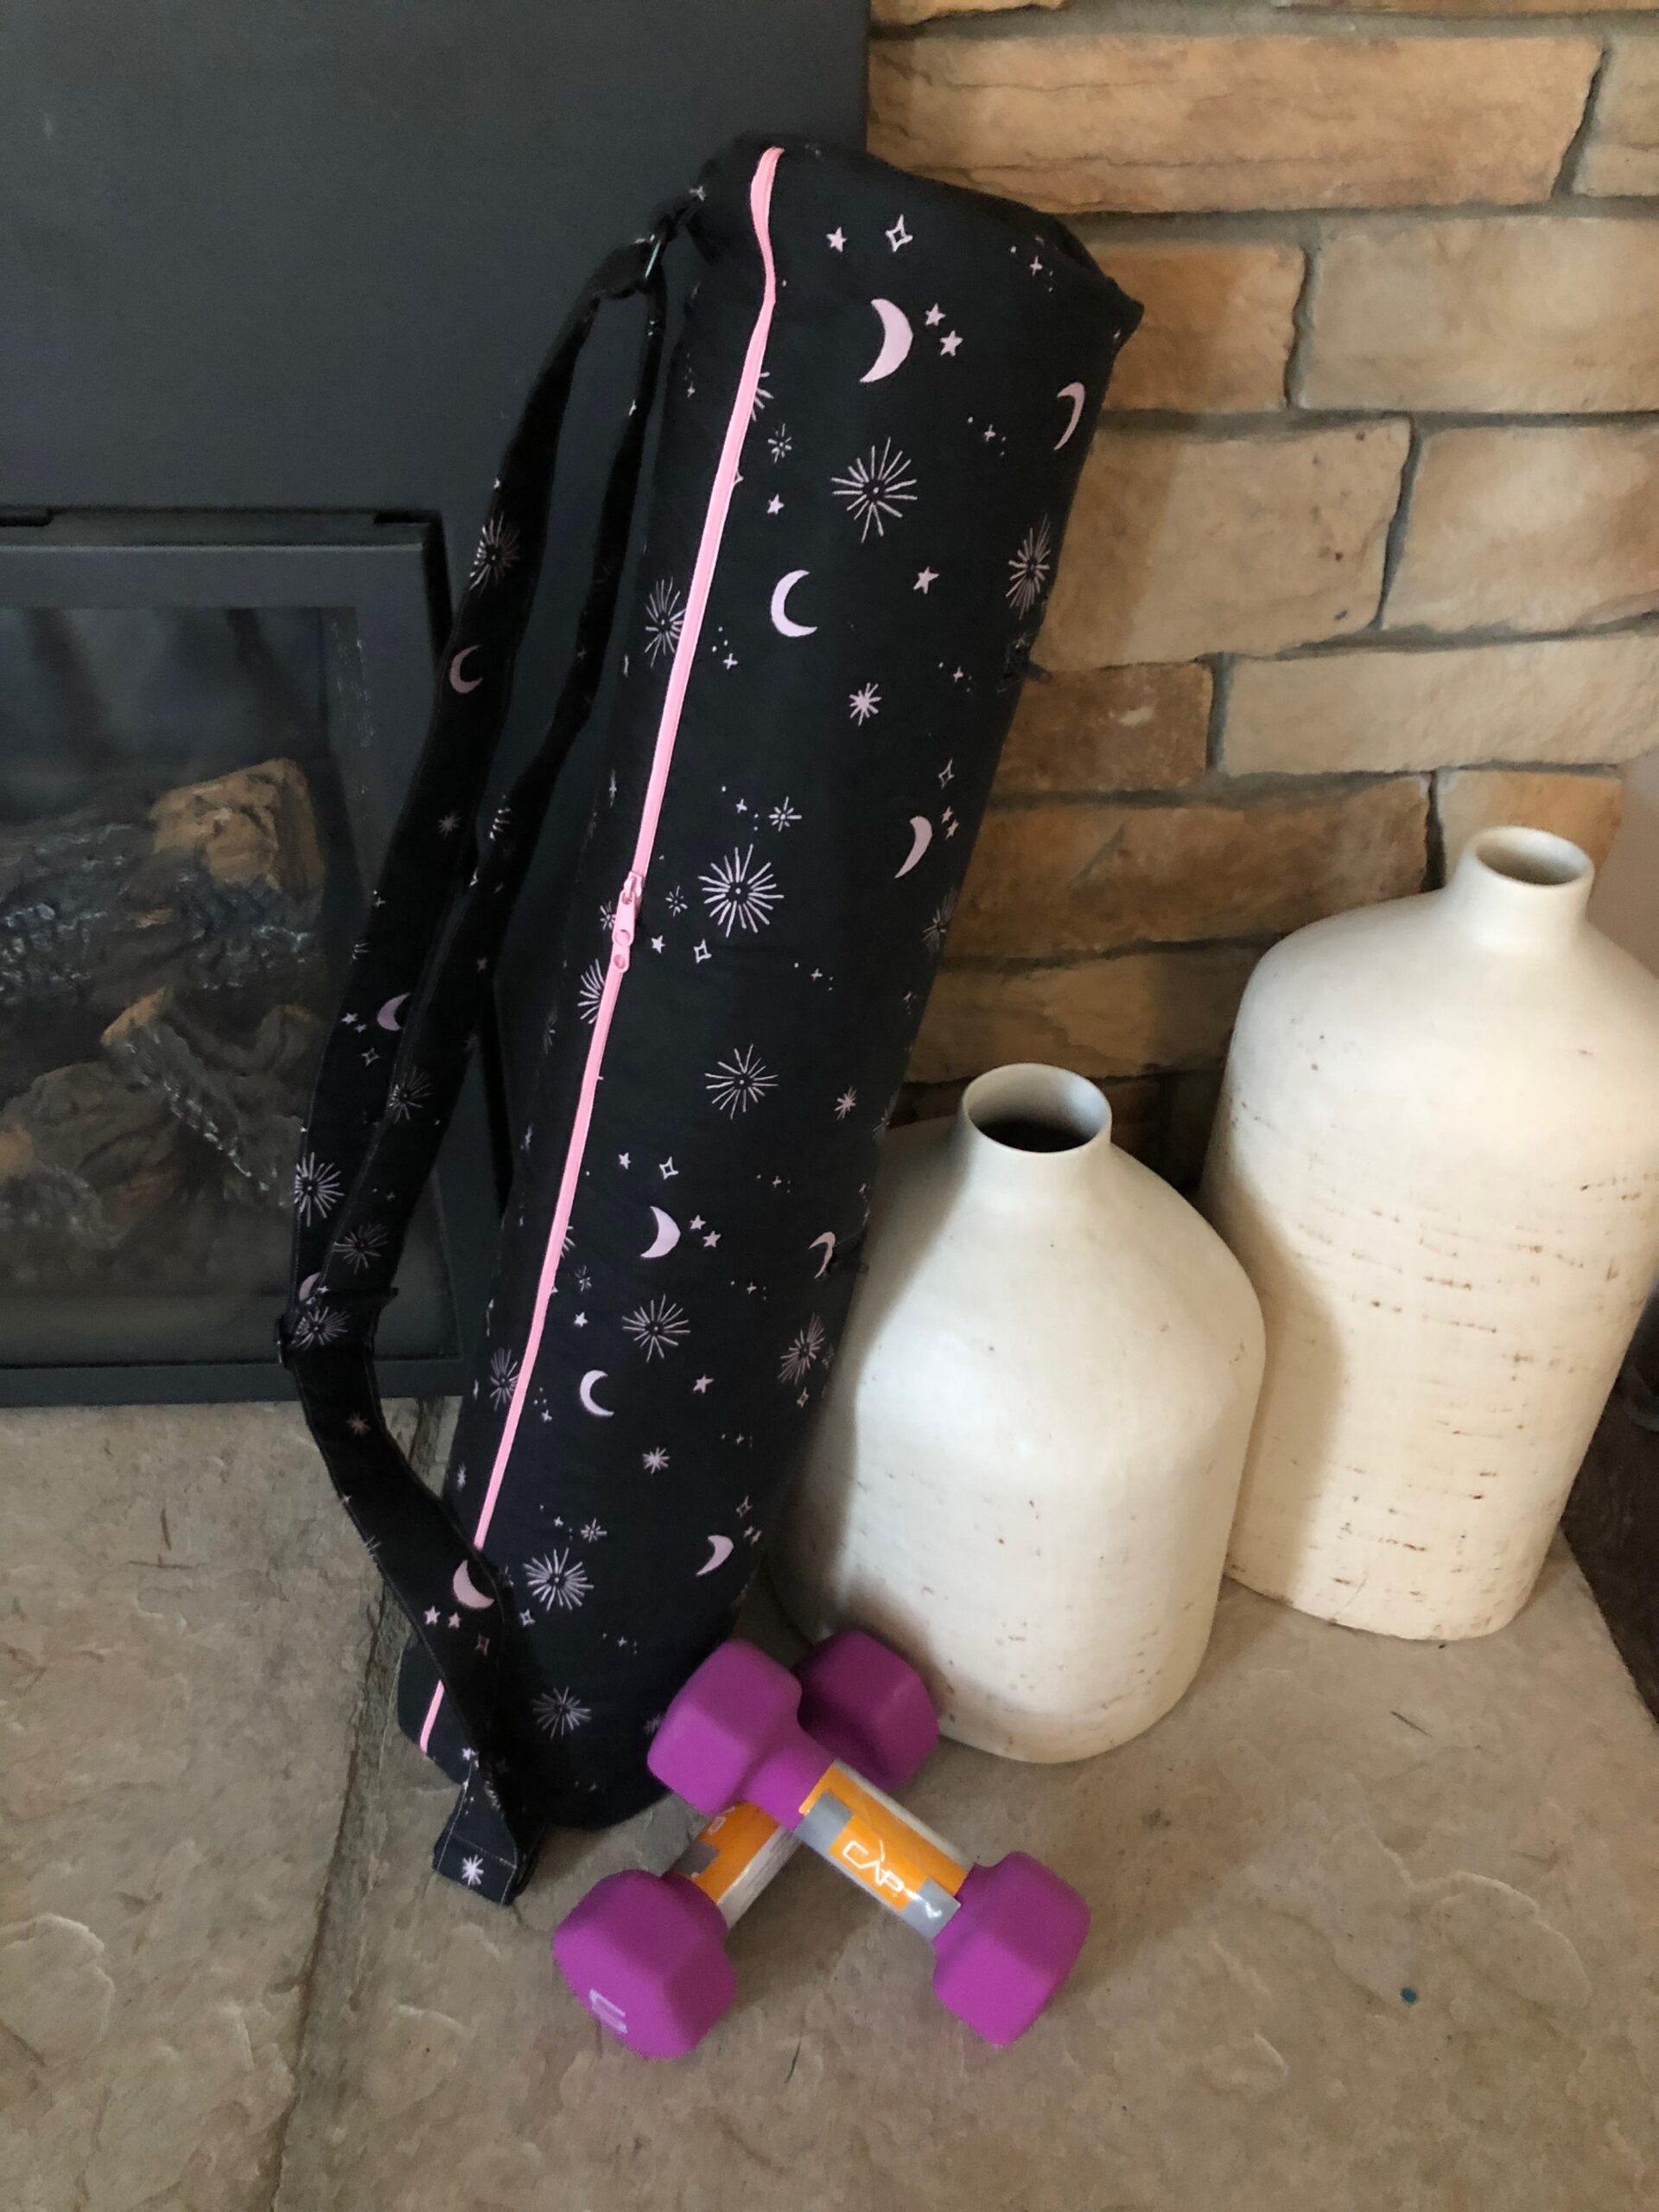
What I did: I used a heavyweight denim fabric for the lining and omitted the interfacing on this piece. For the outer fabric, I chose a printed quilting cotton-weight fabric and added the fusible fleece to this piece. Because the inside fabric was already pretty bulky, I didn’t need any more weight added to it. Why didn’t I use denim for the outer fabric? I preferred the print on the outside but wanted the denim for structure.
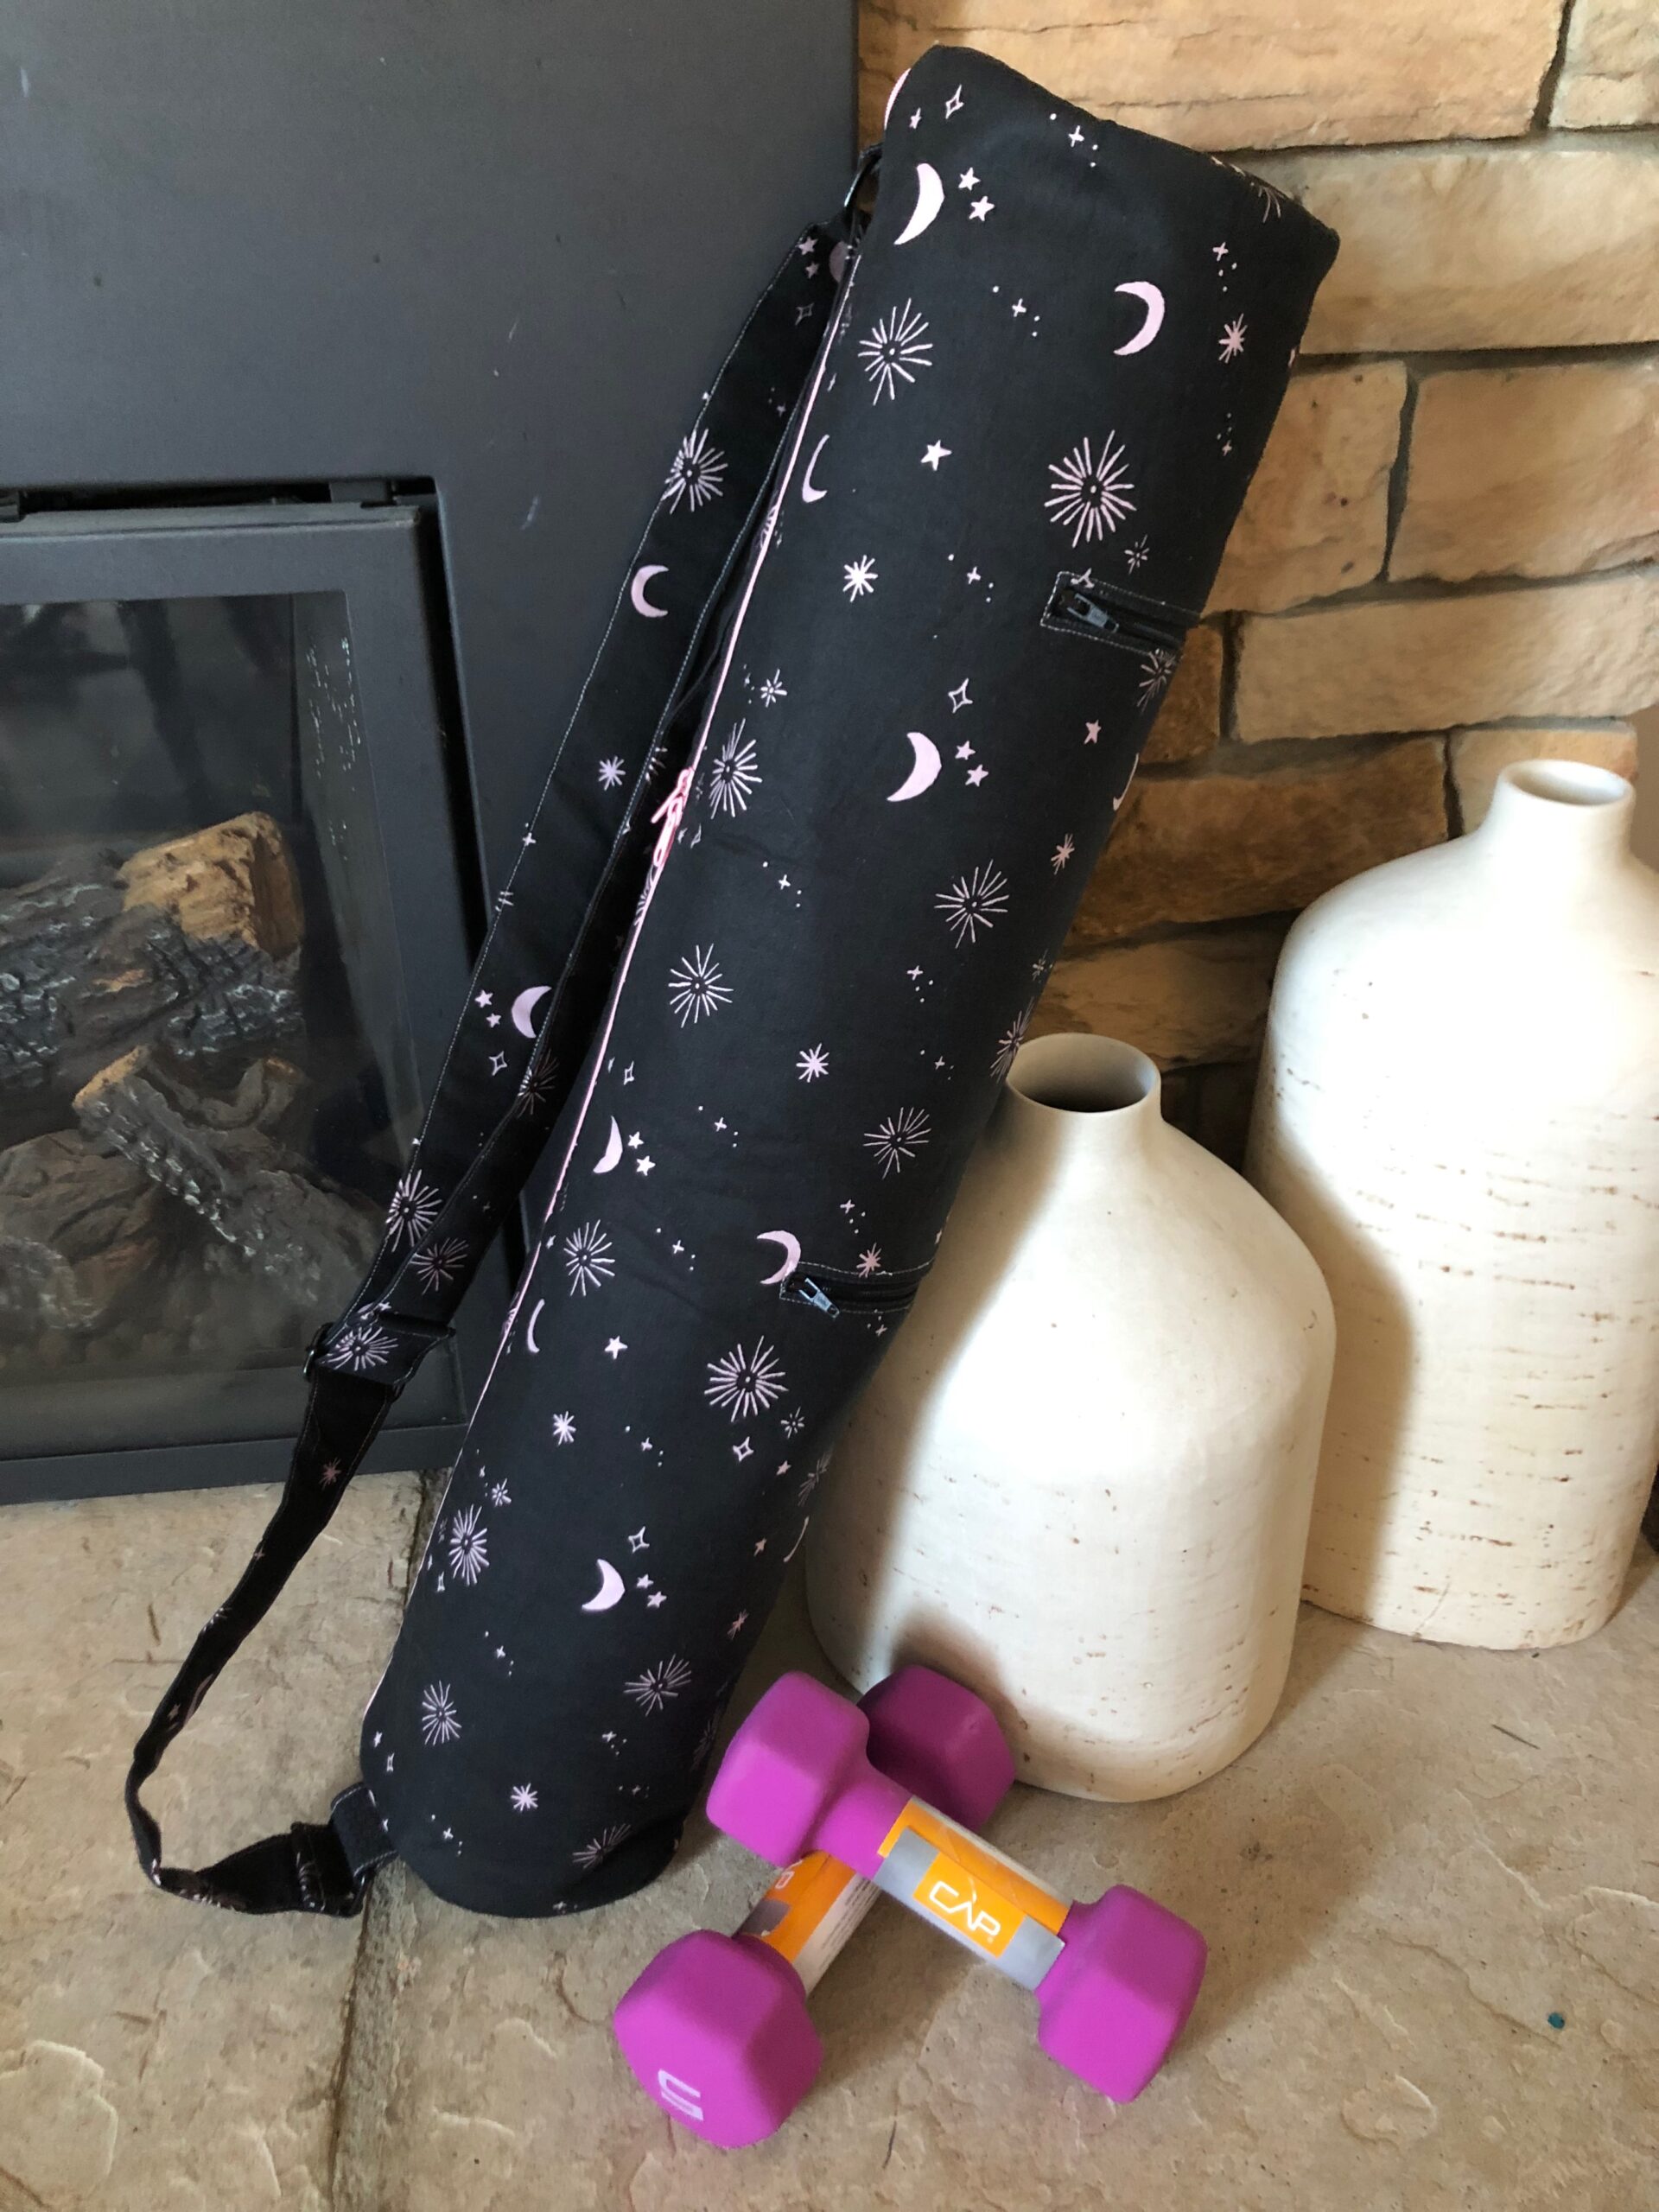
There are three zippers on this bag: two for the outer pockets and one that zips the entire bag to enclose the contents. The two pocket zippers are topstitched after insertion. The long closure zipper is not.
What I did: I used a zipper with two pulls for the long closure zipper. It allows you to open the bag easier when inserting or removing a yoga mat.

For the pocket zippers, I used a contrasting thread for the topstitching to add a decorative detail. Sulky 50 wt. Cotton + Steel Thread was used for the construction and topstitching thread.
To make it easier to install the zippers along the pockets, I used double-sided basting tape to secure the zipper tape lengths. As a result, the zipper didn’t shift during sewing and sewed beautifully.

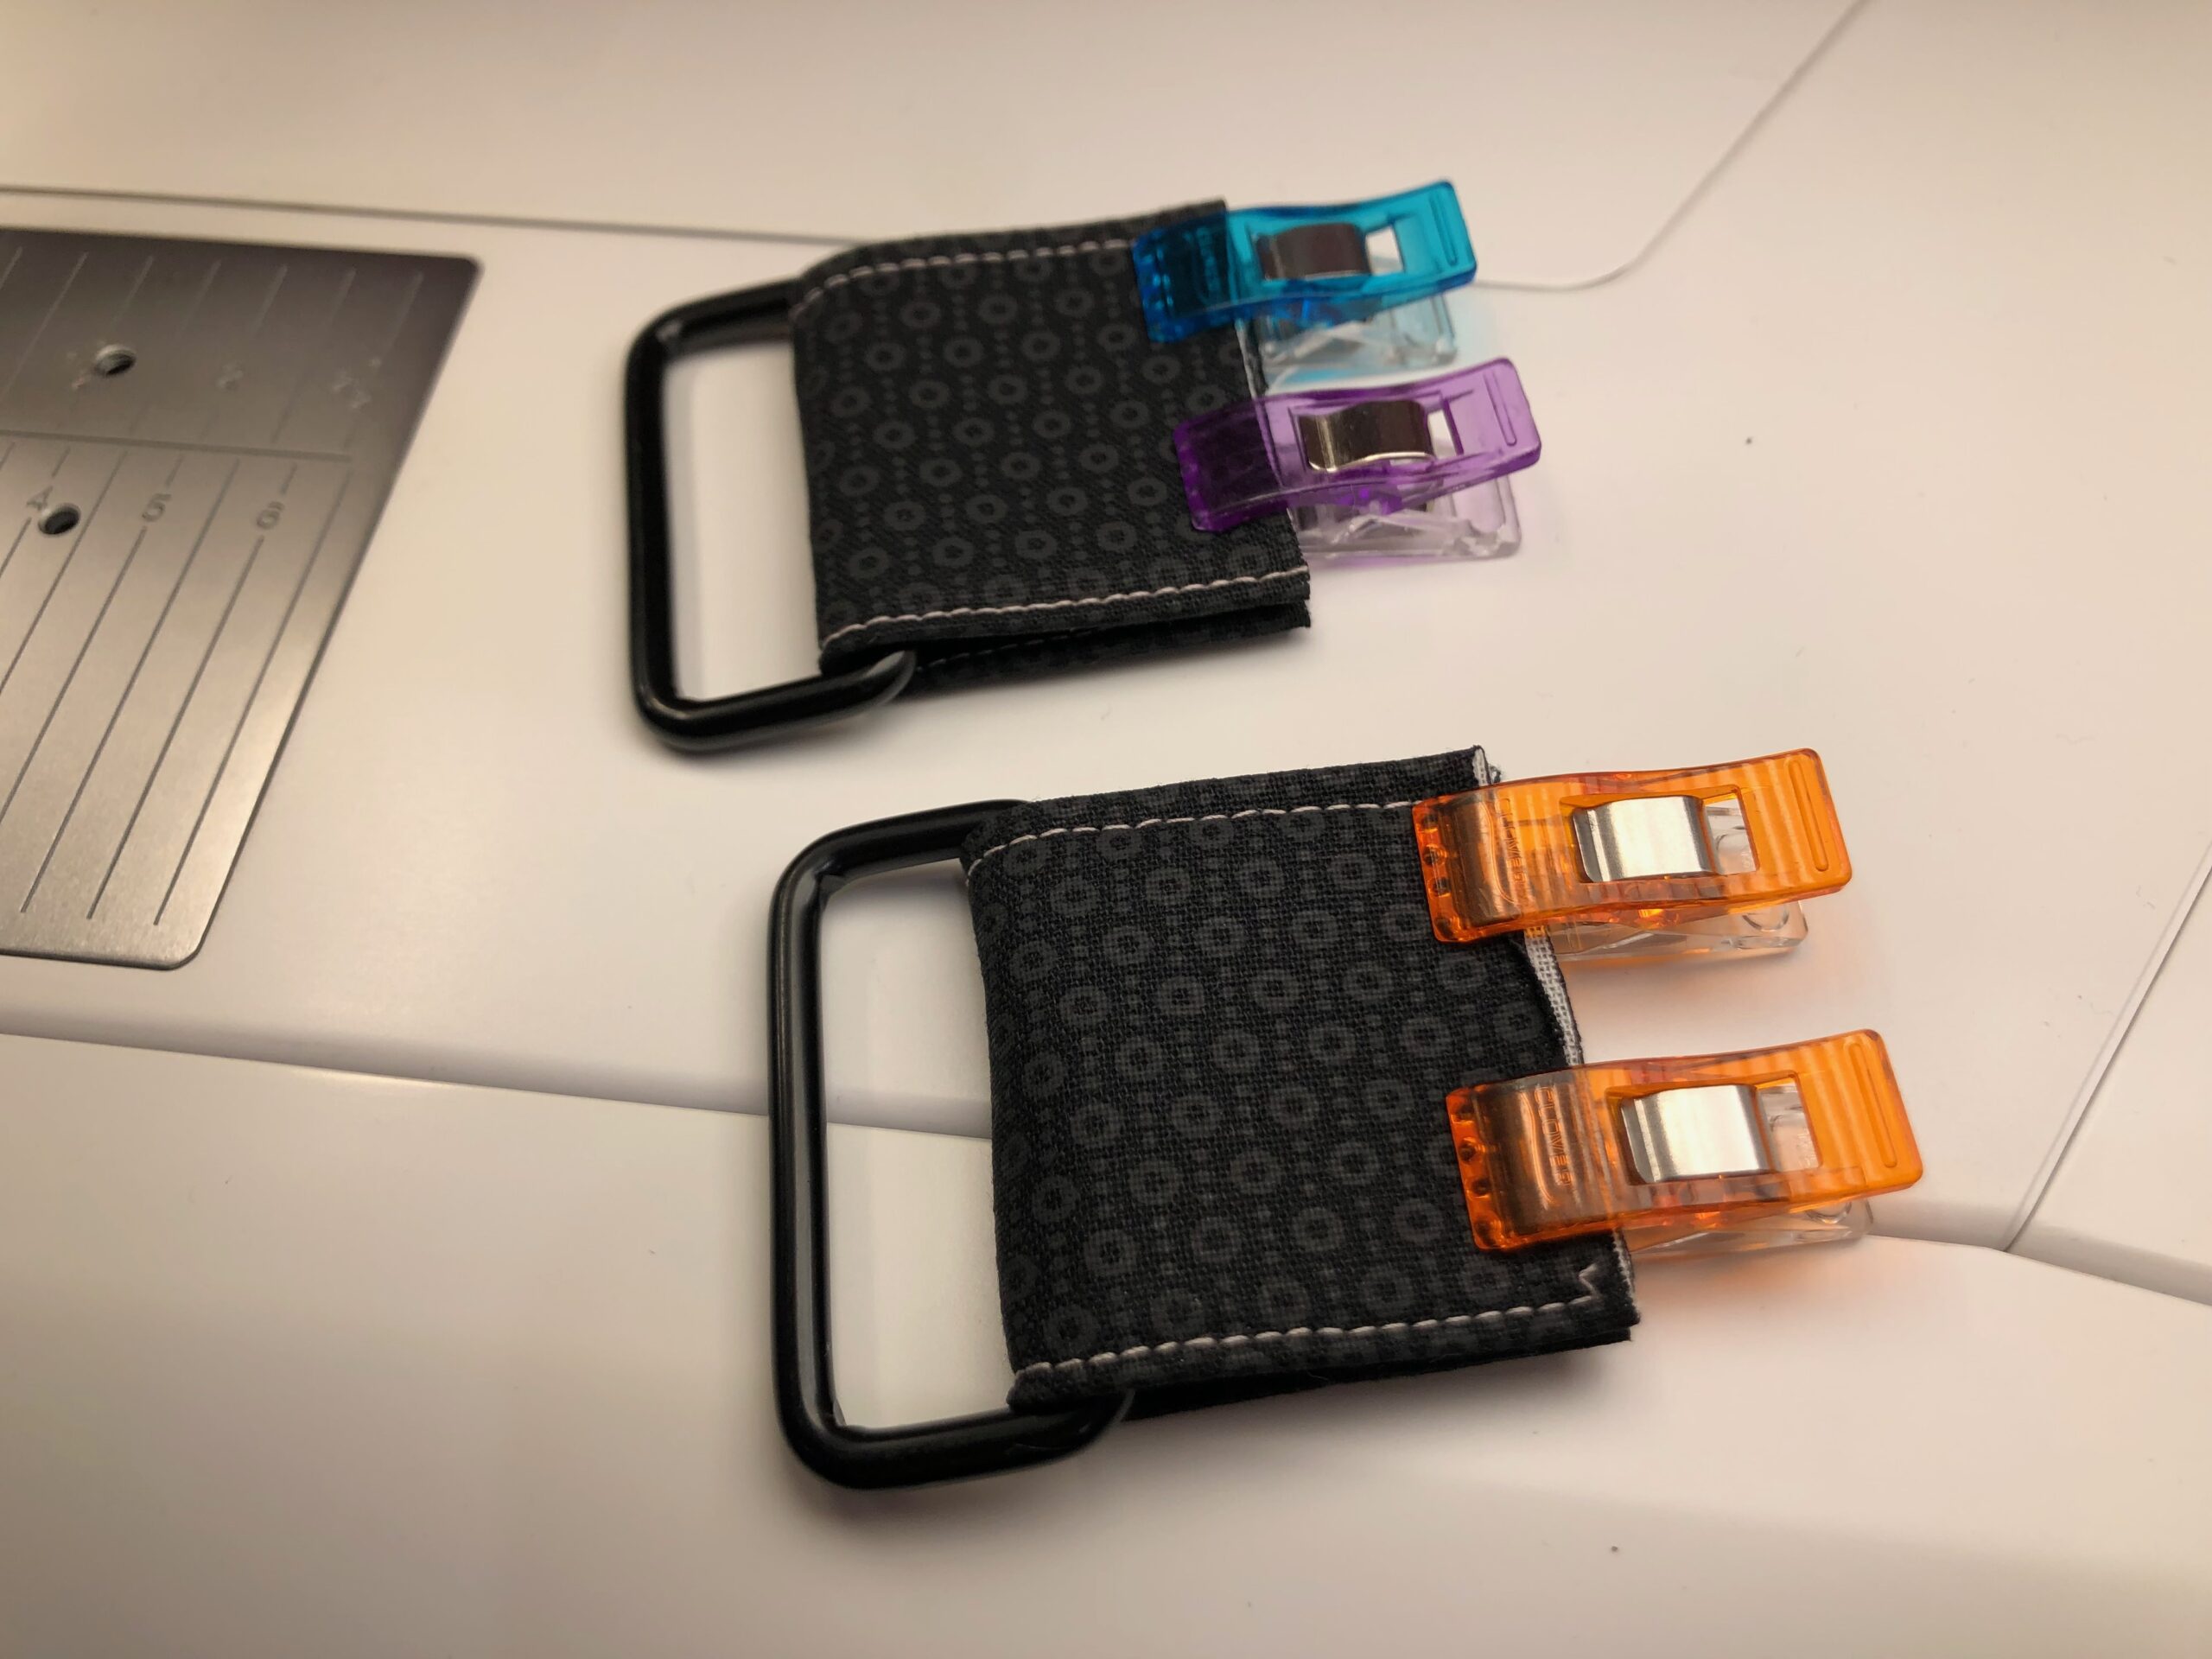
The bag also featured two D-rings for the strap application. Instead of D-rings, I used rectangle rings. I prefer this treatment, as it’s easier to stitch close to the rectangle bars because they’re straight rather than curved. (I also preferred the black finish and could only find that on rectangle rings at my local fabric store.)
Yoga Bag Sewing Tips
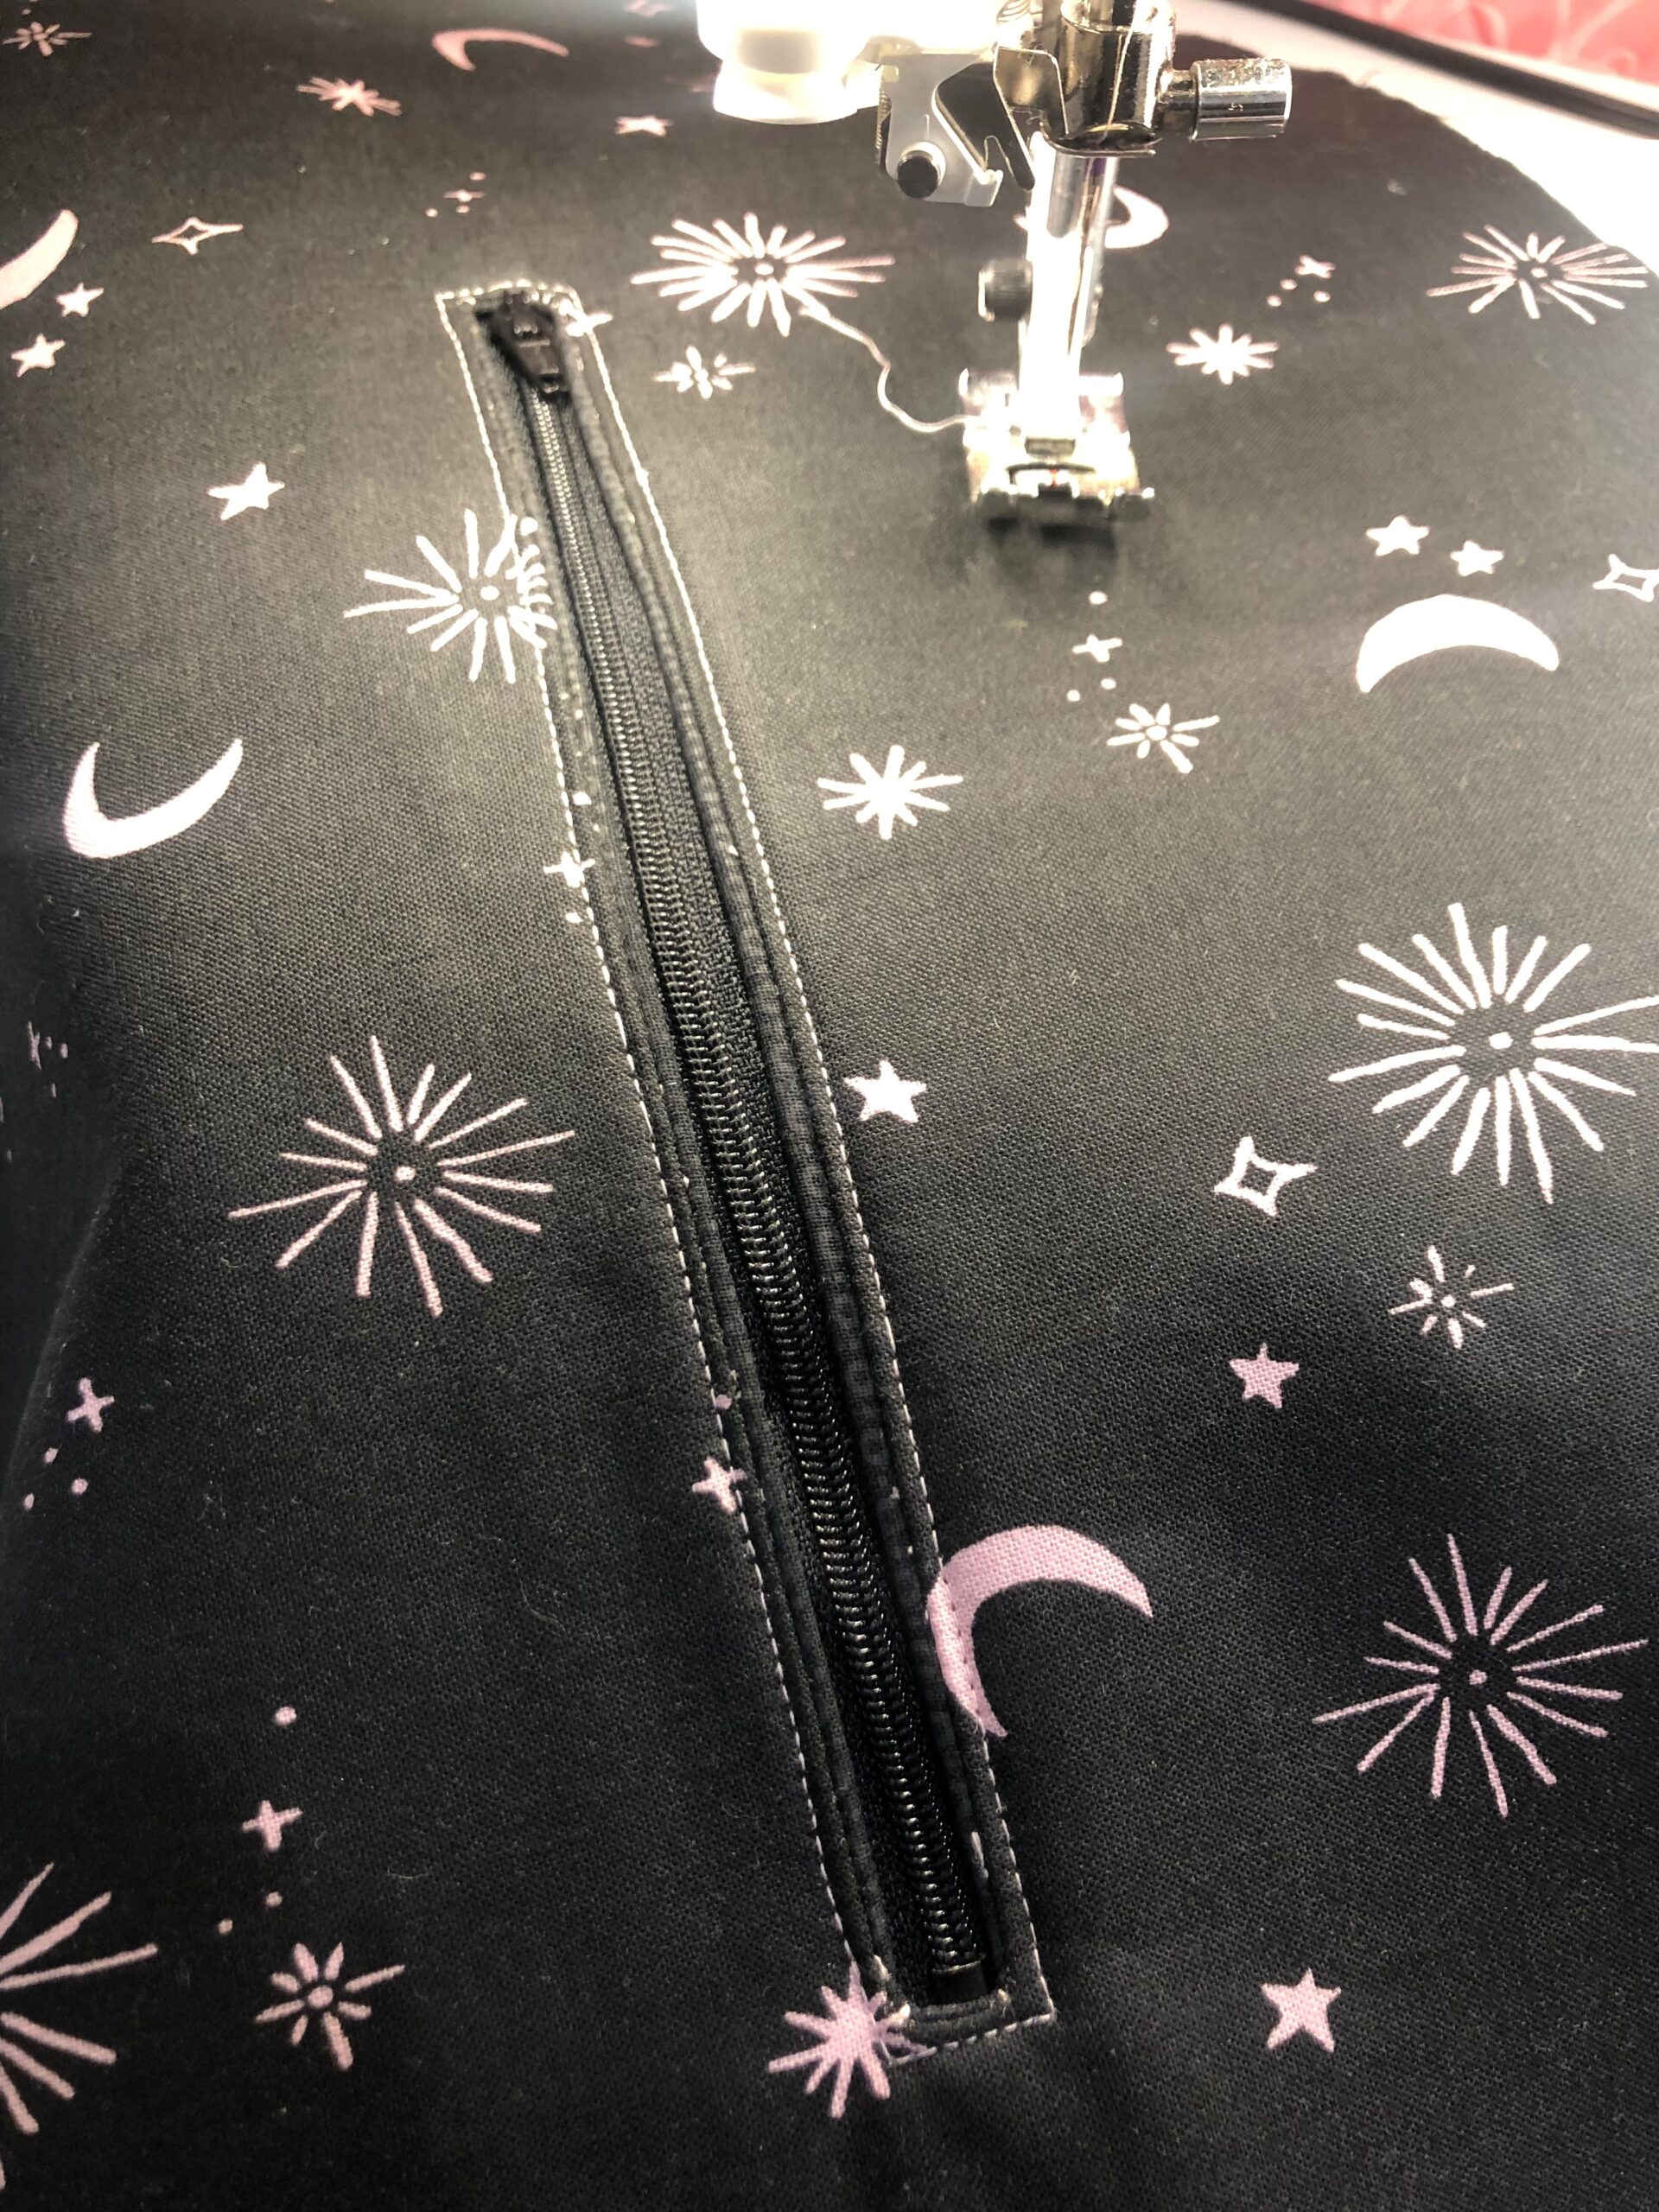
When topstitching the zipper, begin along one long edge, rather than a corner. It’s easier to match the beginning and ending of the stitching along that long edge and results in a more professional finish.

Be sure to move the zipper pull as you reach it to ensure the presser foot doesn’t hit it during stitching. A zipper foot can be used for this step, but the pull still needs to move as you reach it regardless of which foot you use.
The pattern directs you to press the outer fabric and lining away from the zipper after stitching it in place. I cannot emphasize this enough! Be sure to unzip the zipper all the way to get the iron into the lining and press from both sides.
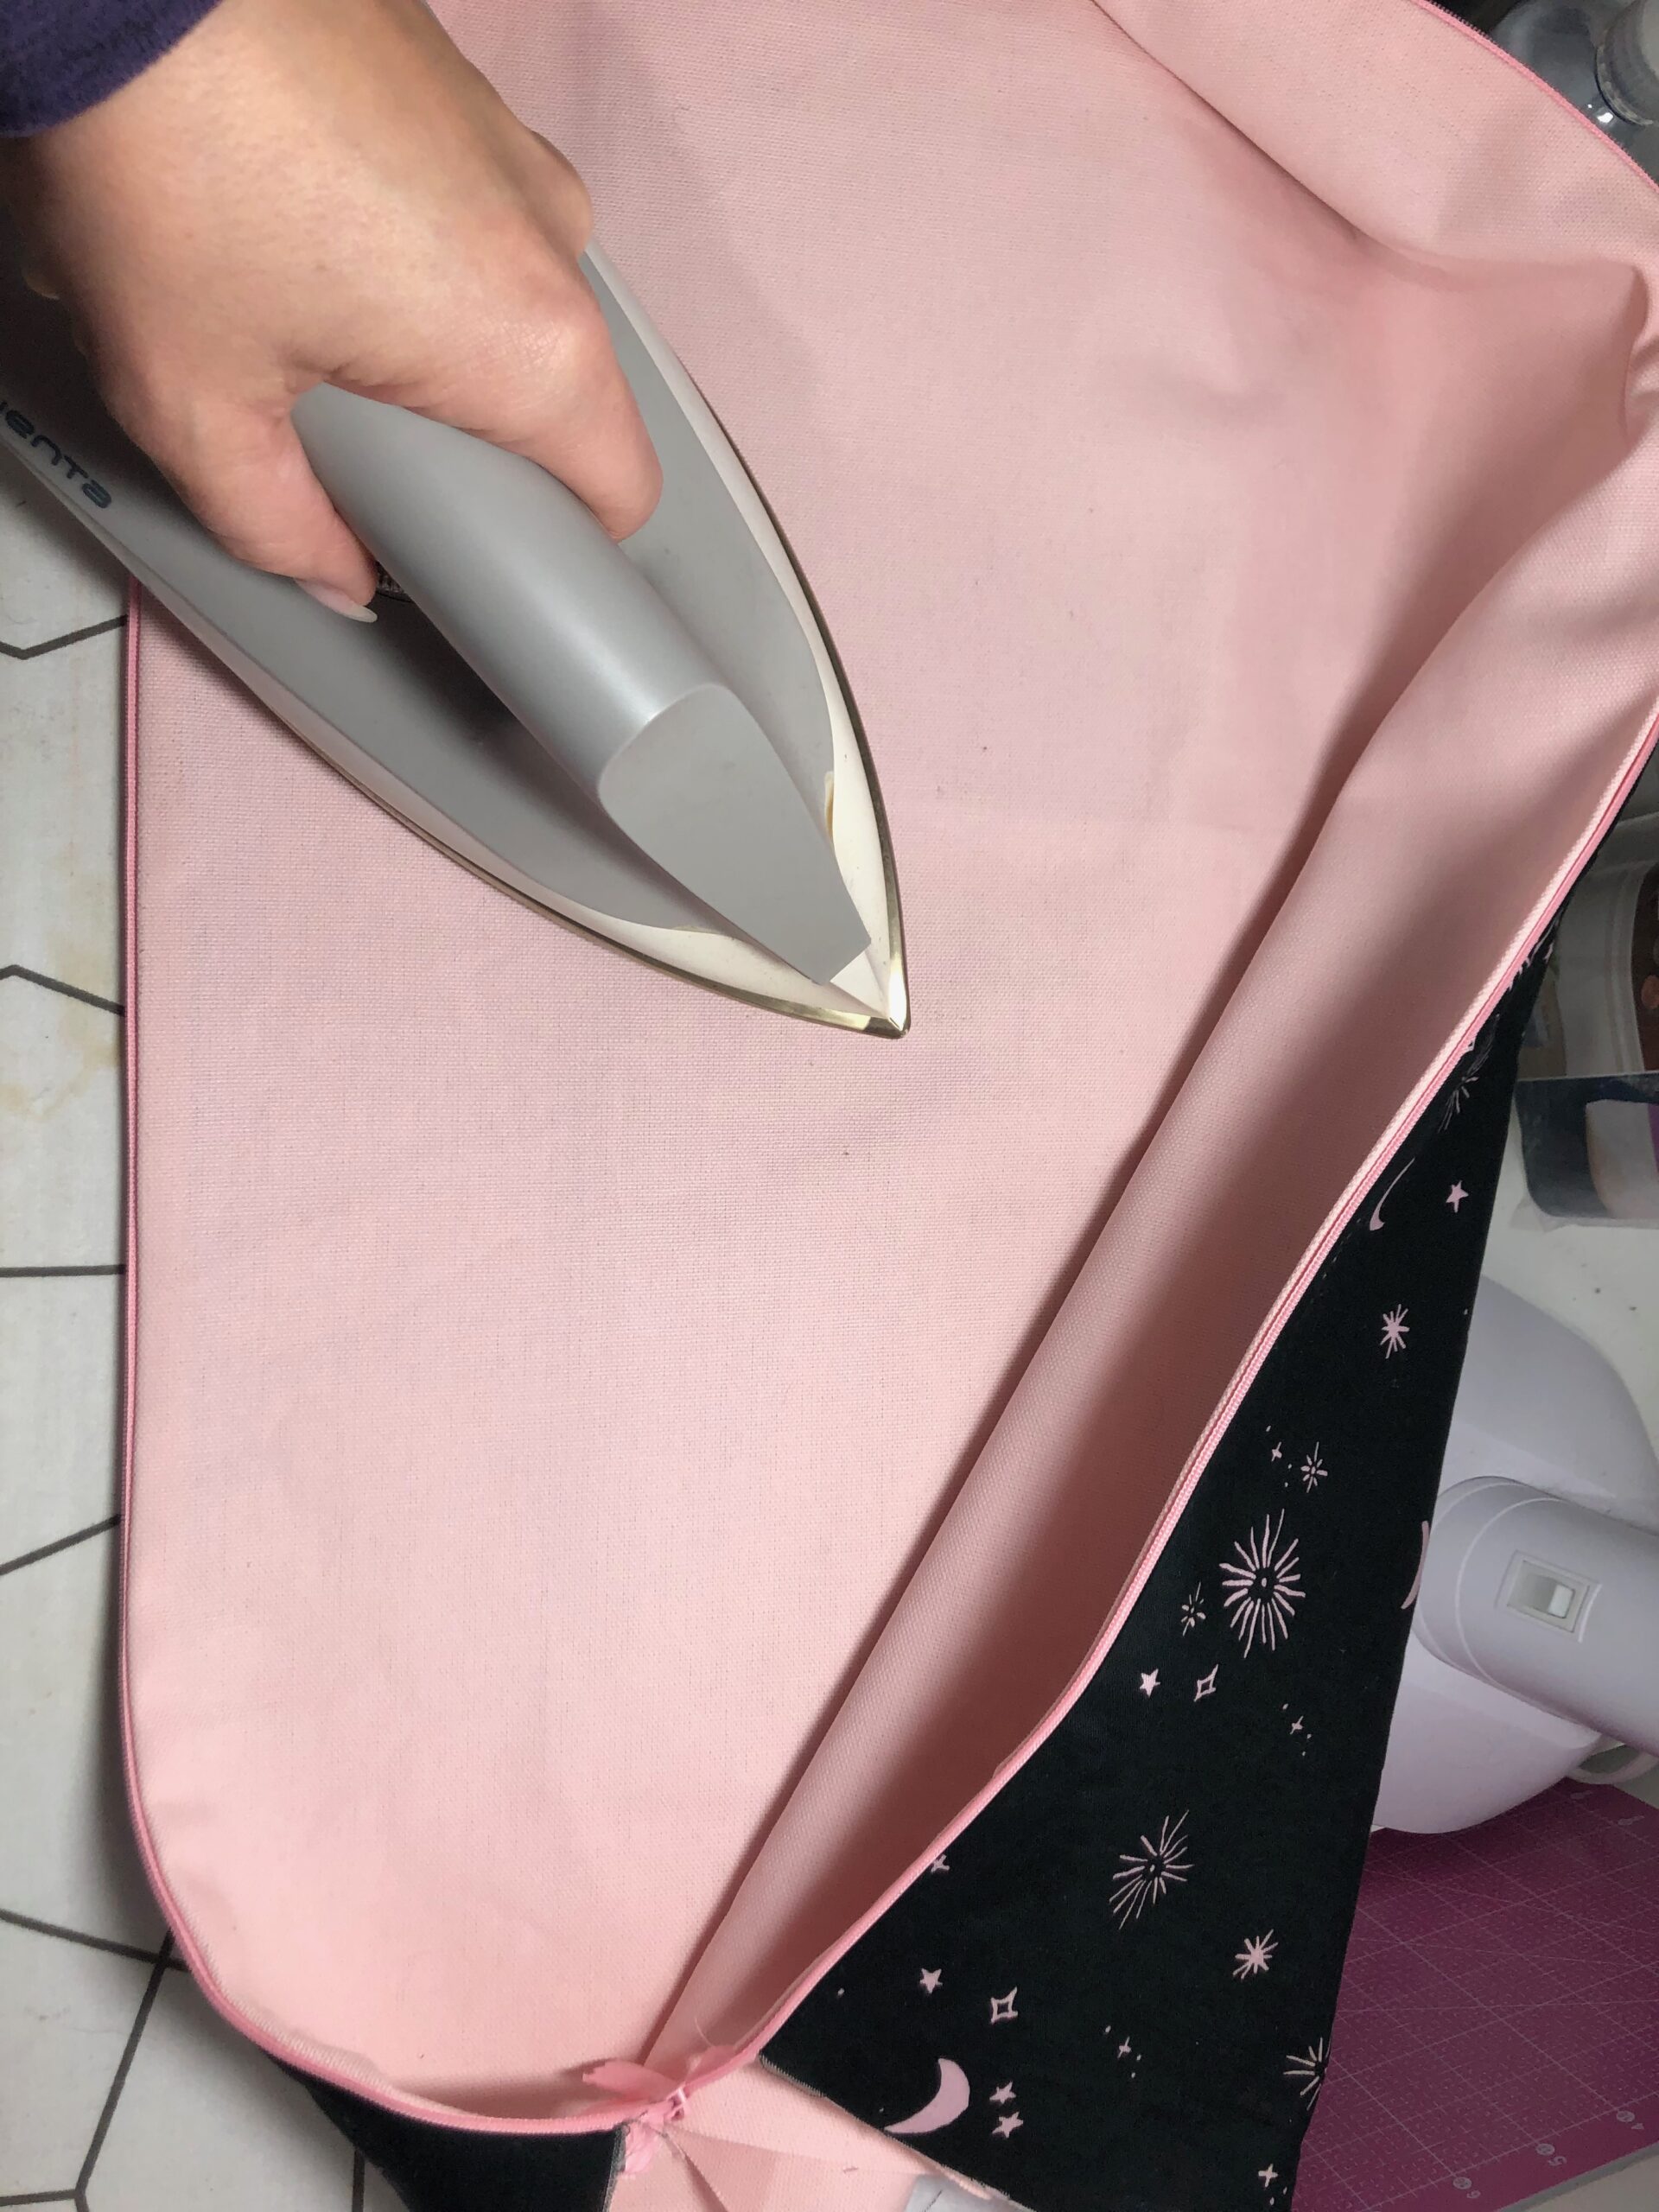
Remember that at this point you may have several layers of fusibles within the fabric layers. So use caution when using steam to ensure the fusibles don’t bubble within the layers.
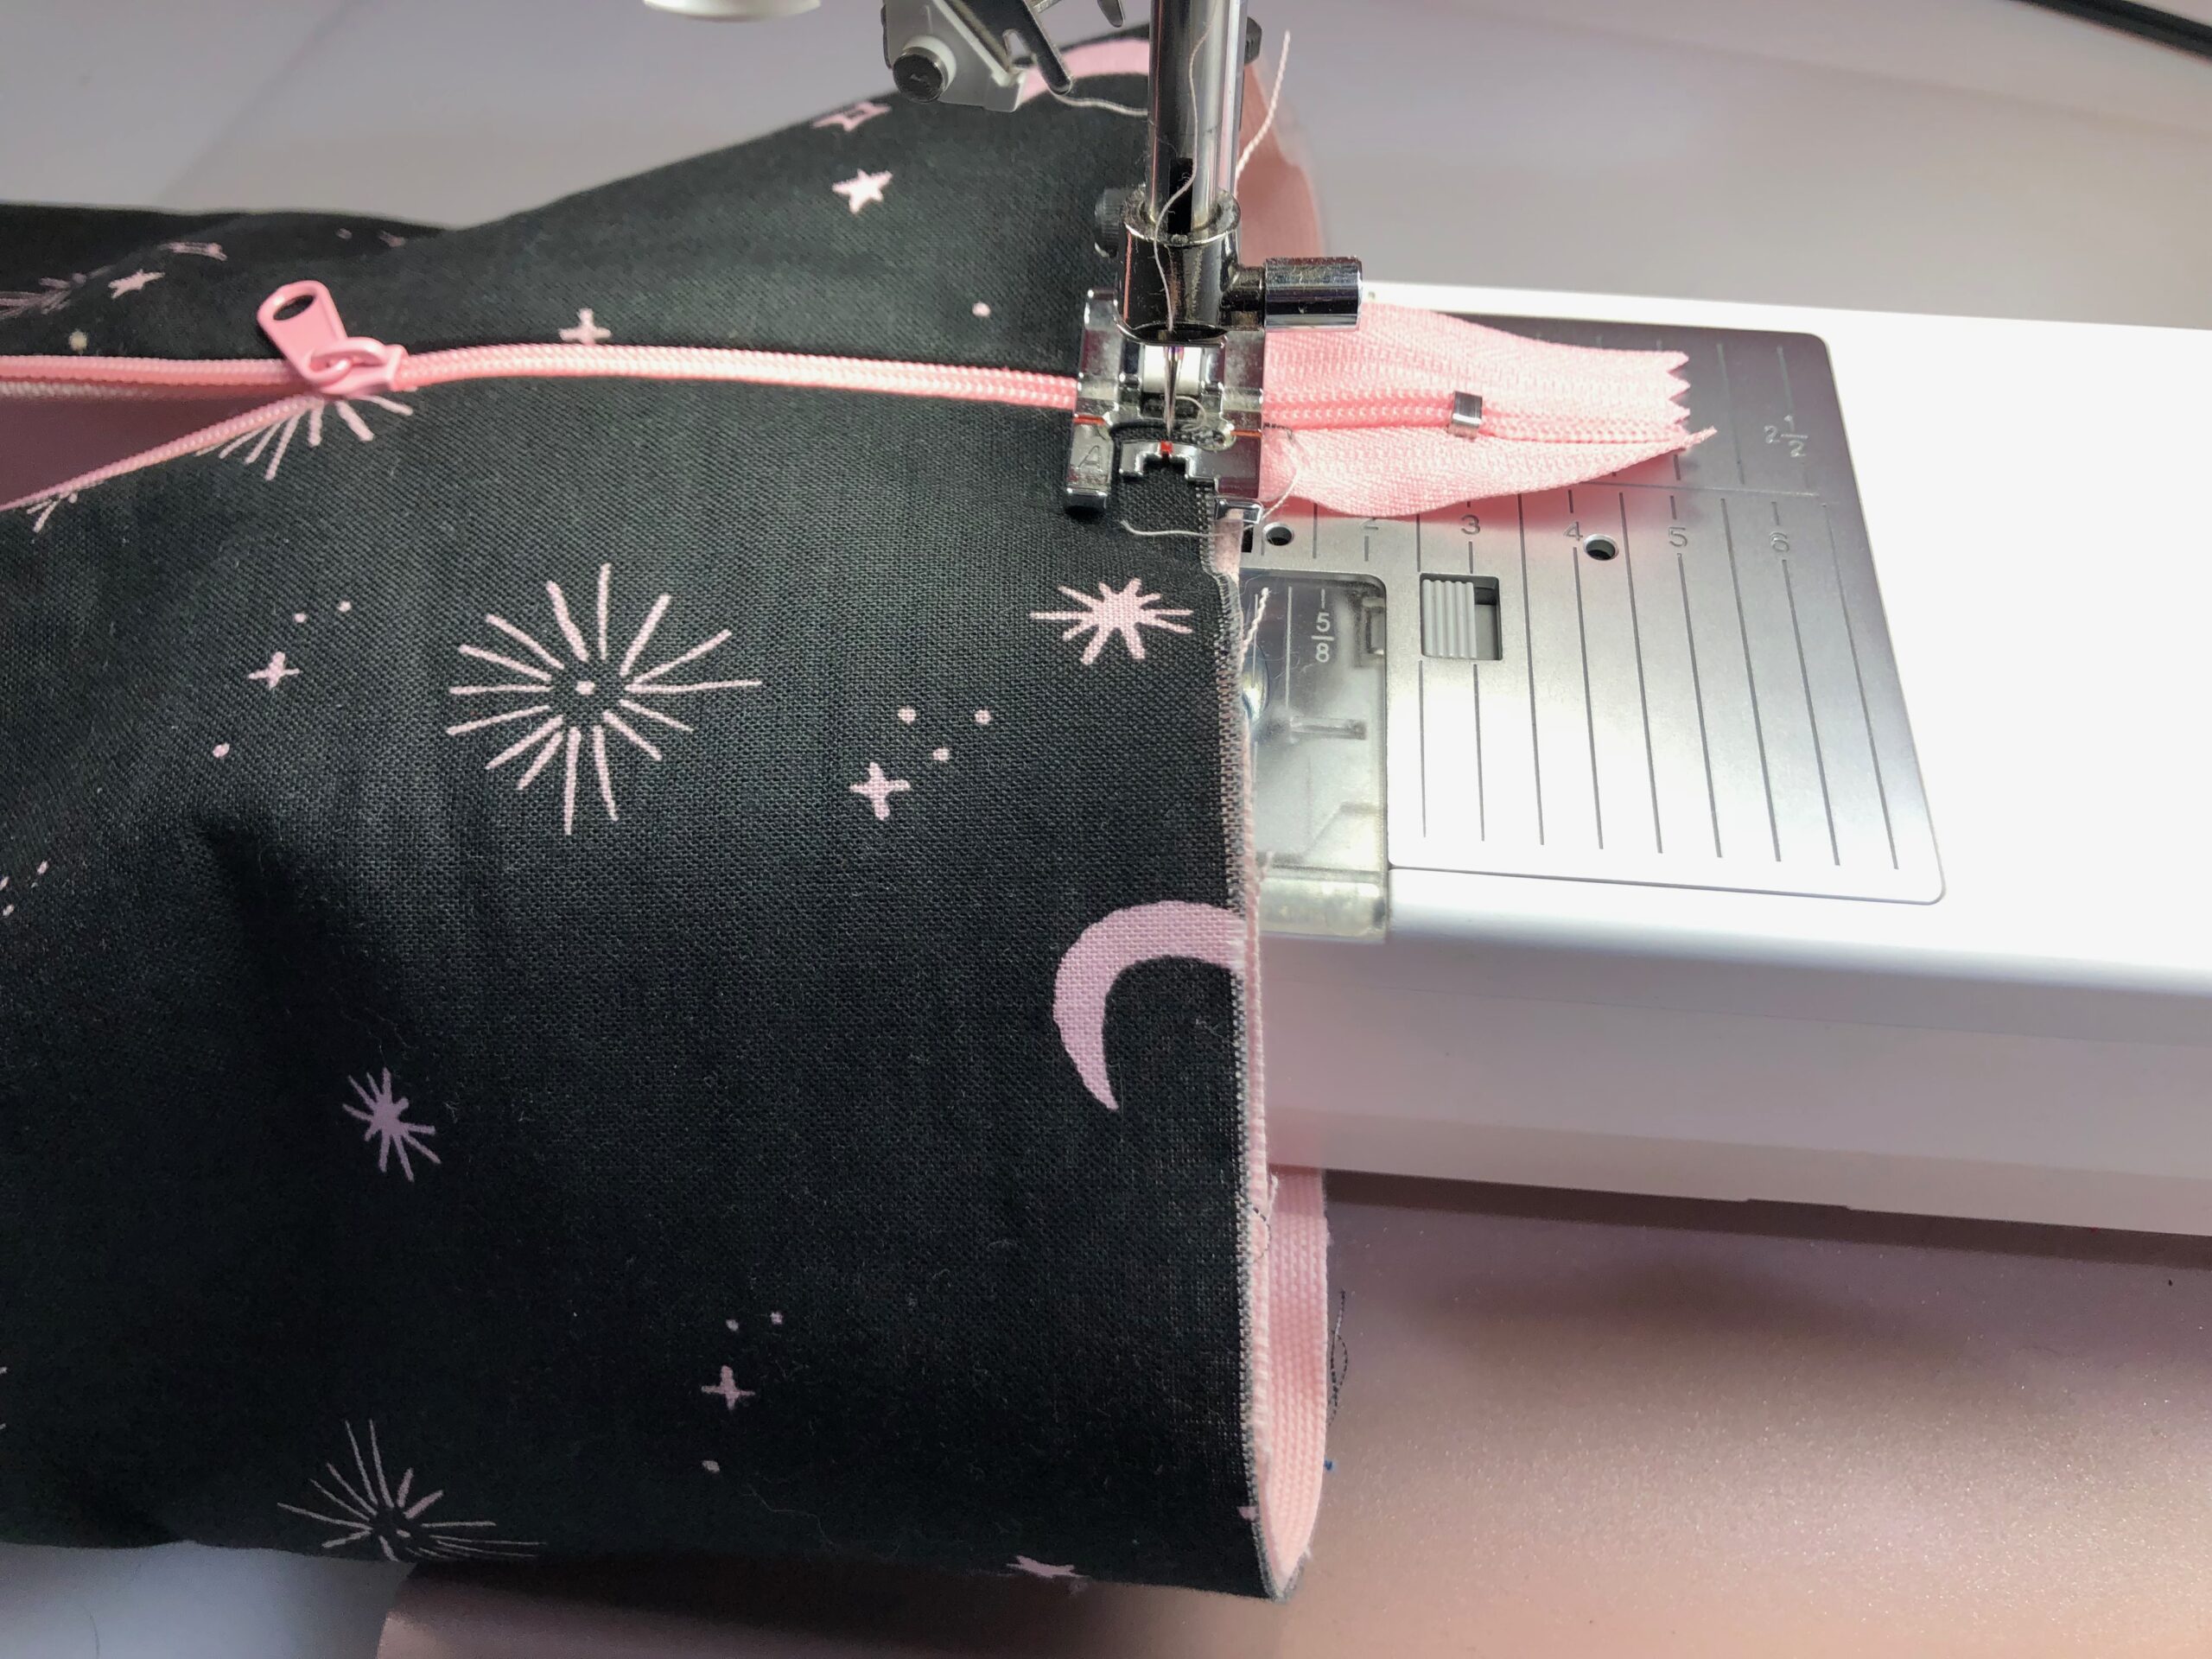
The pattern also directs you to sew across the zipper ends after trimming to ensure the pull(s) don’t fall off the tape during stitching.
What I did: Before even trimming the zipper ends flush with the bag, I stitched across the entire top and bottom of the bag. At the zipper ends, I backstitched across the teeth several times. (It’s important to not use any metal zippers for this project because you sew over the zipper teeth in all three instances.)
Remove the sewing machine free arm to accommodate the narrow tube of fabric when stitching both ends.
Then, trim the zipper tape ends flush with the bag edges.

If desired, serge-finish these edges to prepare for inserting the fabric circles at either end.
Yoga Bag Pattern Finishing Tricks
This yoga bag pattern has three finishing options: fabric circles at both ends to enclose the bag; a fabric circle at one end and the upper end left open with a bound edge; a vinyl circle at one (or both) ends to see the contents without opening the bag yet keep things enclosed.
The end circles are either bound with bias tape or serge-finished.
What I did: I chose to finish the yoga bag with two fabric circles. I serge-finished both the circles and the bag ends, and then serged them together, following the previous stitching. Whether you use a serger or sewing machine to stitch the end circle(s), be sure to baste them in place first. There is a lot of bulk at the zipper and D-ring loops, and the basting ensures nothing slips out of place.
The yoga bag strap is either sewn down through both D-rings or made adjustable with a slide buckle.
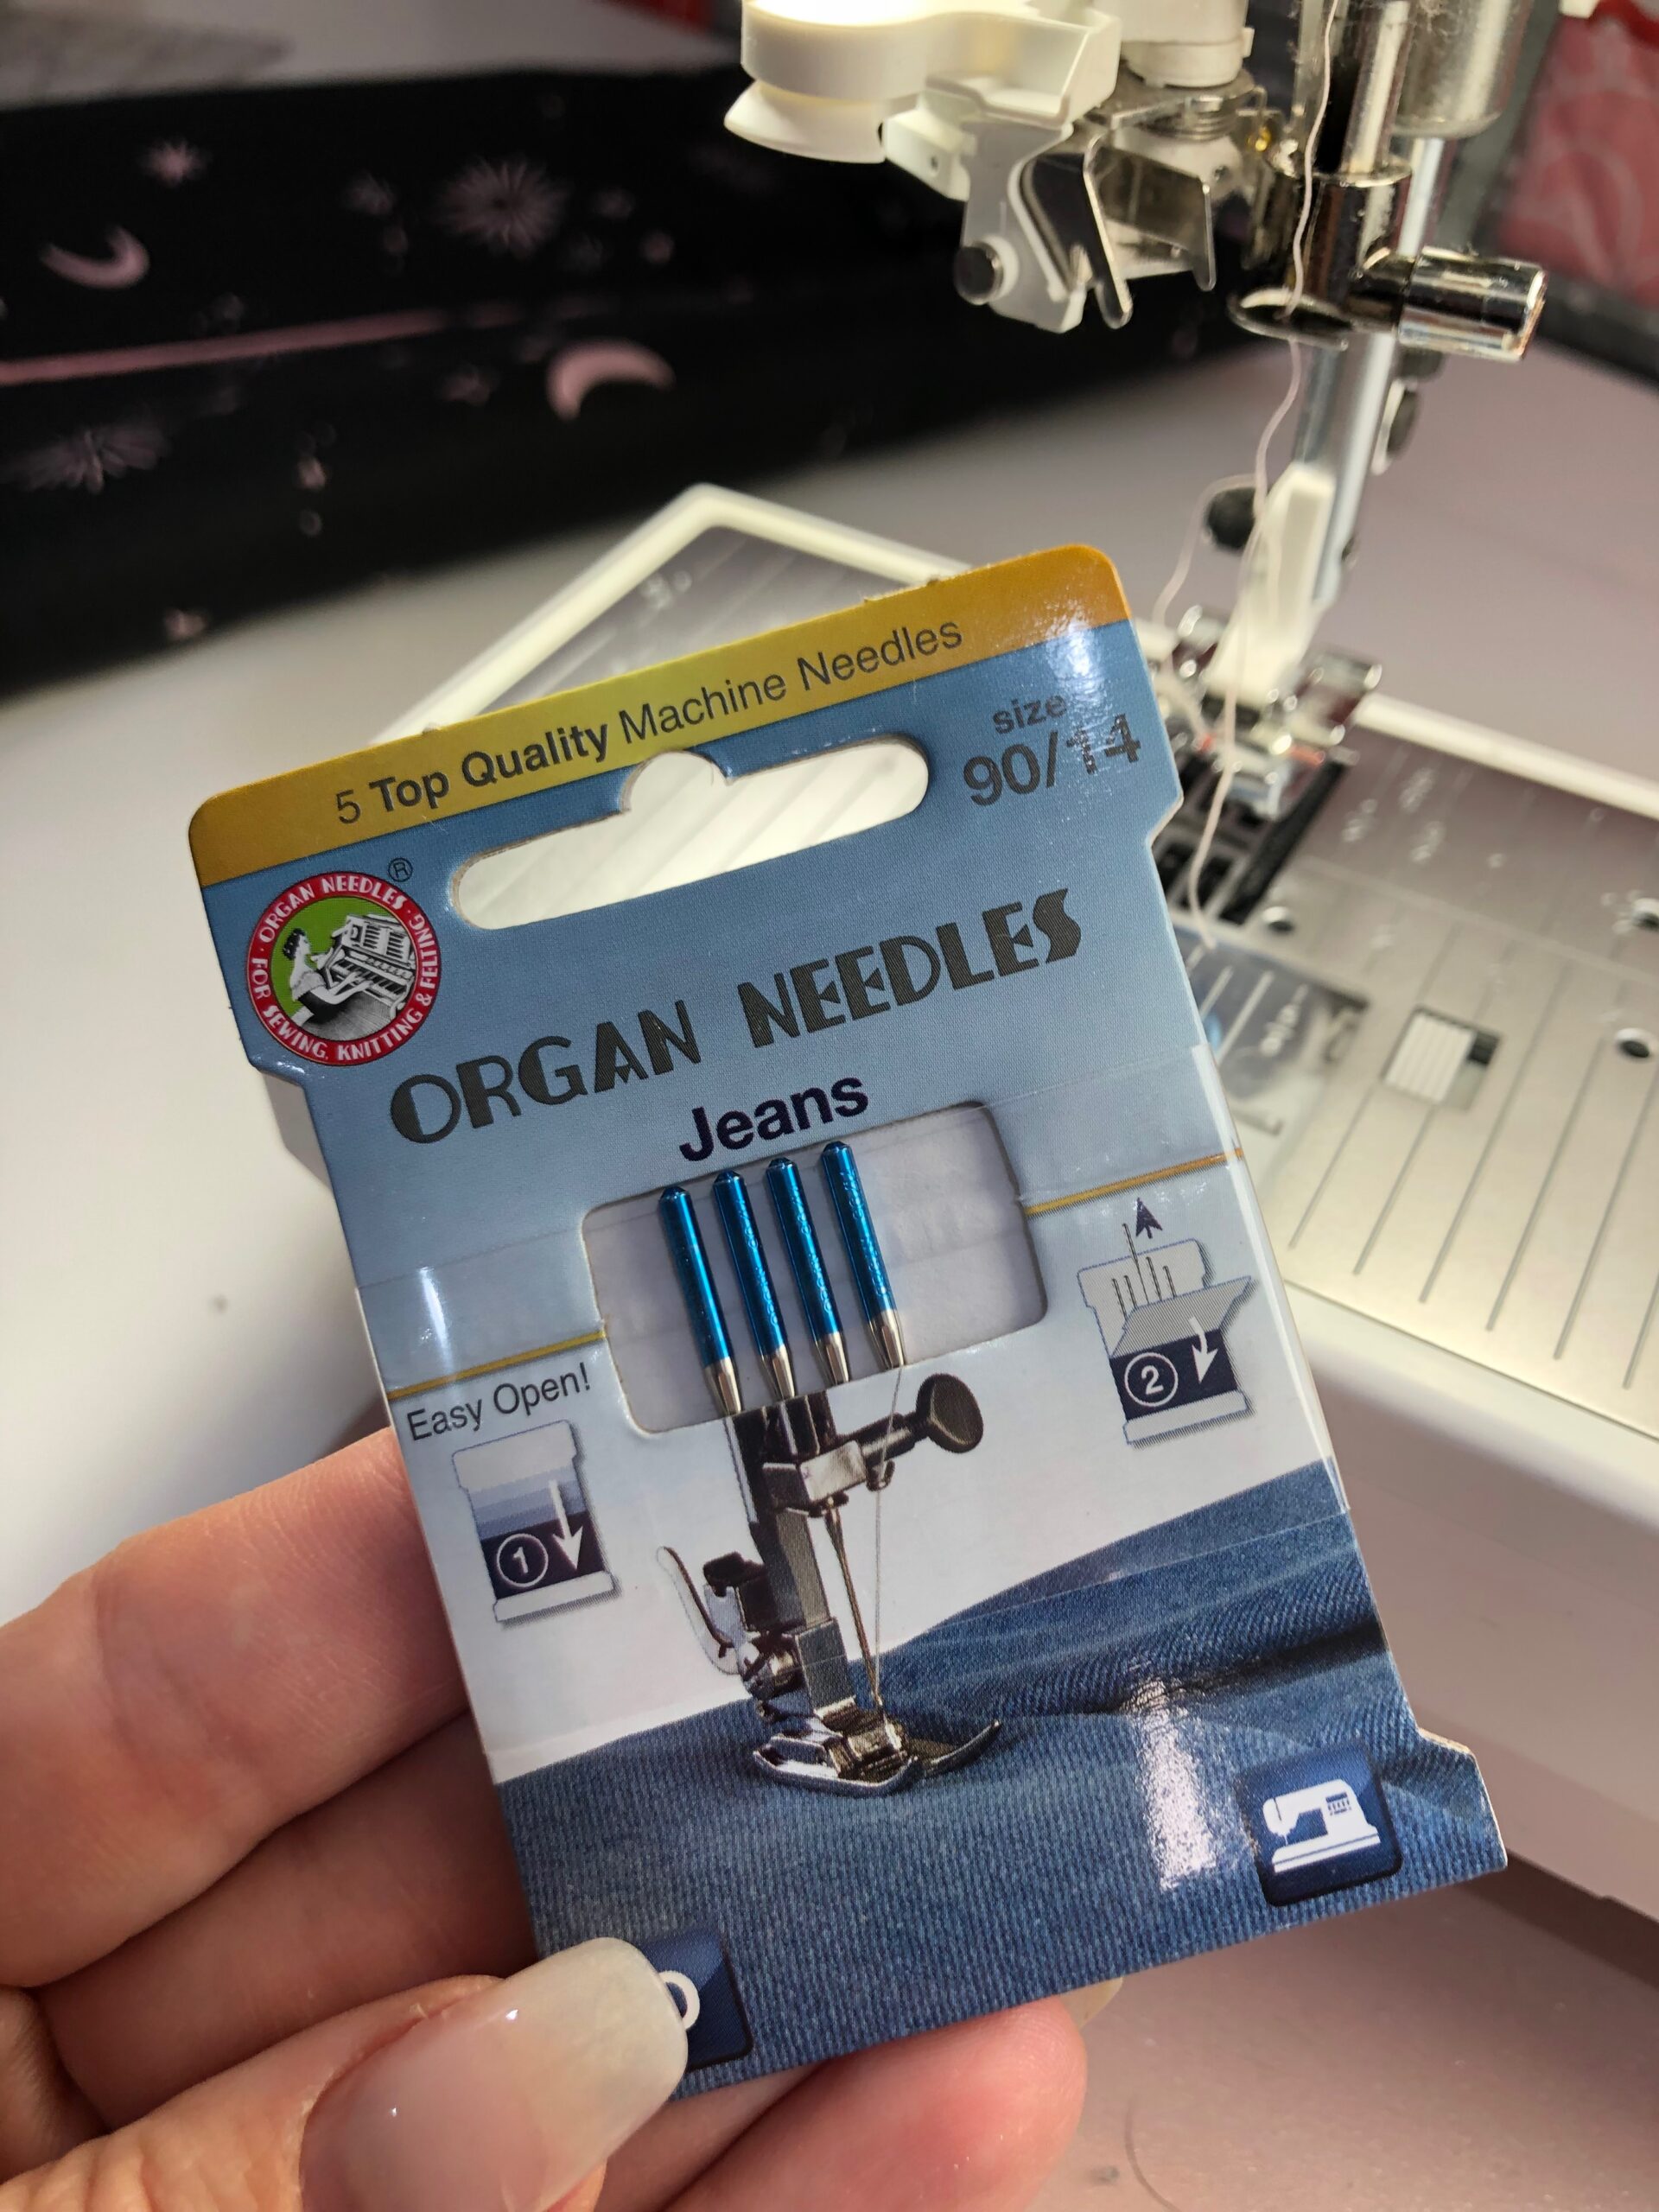
What I did: I chose to make the adjustable strap to have more versatility when carrying the yoga bag. I highly suggest using a Jeans Needle when finishing the strap, as there’s a lot of bulk to contend with. (This tip applies whether you’re using denim fabric or not.)
Overall, I enjoyed making this pattern by Sew Hungry Hippie and look forward to making more! Perhaps having a stylish bag to house my yoga mat will make me more inclined to do more yoga. Here’s hoping I stay motivated this year!