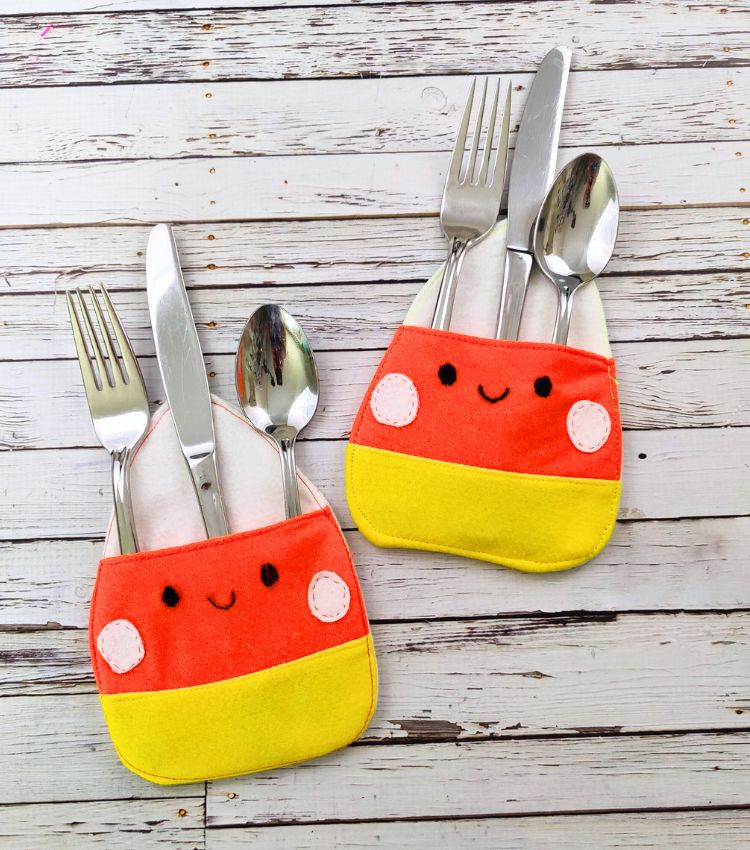
Candy Corn Utensil Holder
by Chelsea Briner, Sew Simple Home
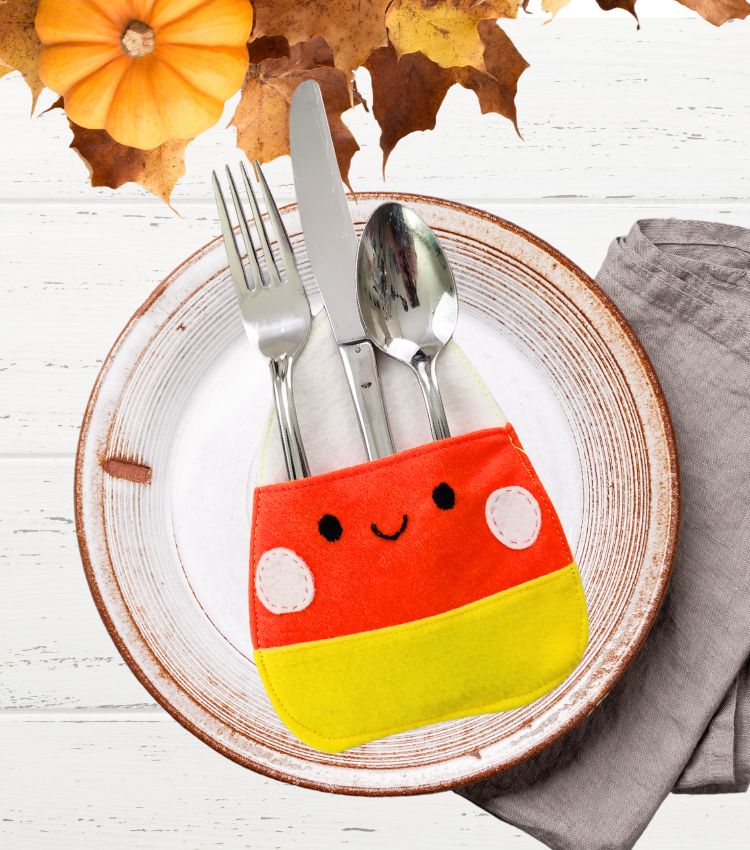
Stitch a set of Candy Corn Utensil Holders for your Halloween, fall and/or Thanksgiving table. These cute pocket pals can hold silverware for the kid (or adult!) table to create a fun, whimsical setting. Or tuck a bit of candy inside and give away the Candy Corns as party favors. Sulky Felty is the perfect fabric for these quick, no-fuss projects!
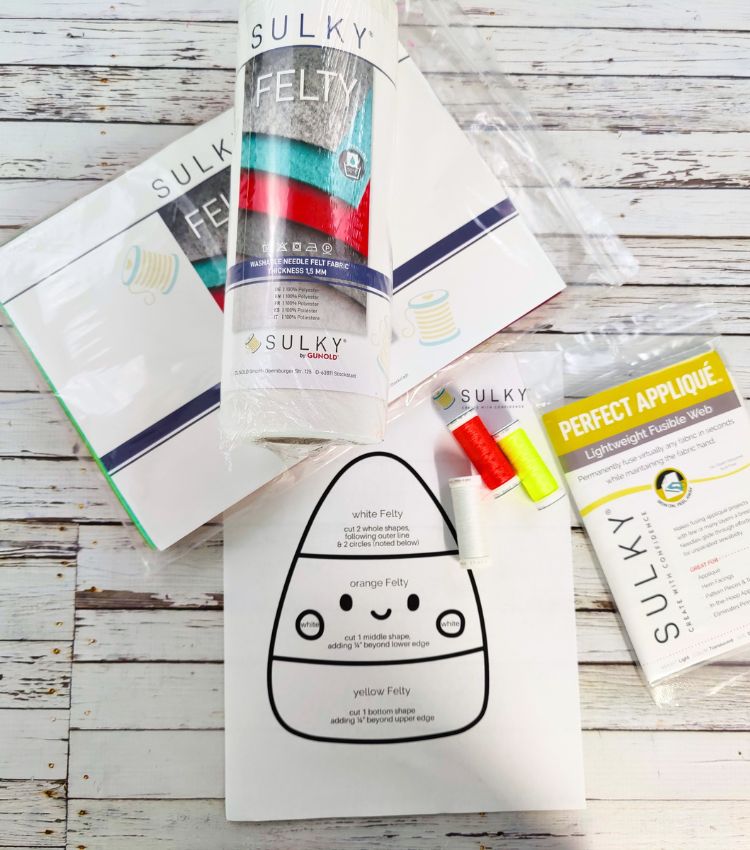
CANDY CORN UTENSIL HOLDER SUPPLIES
- Candy Corn Utensil Pattern
- 1 roll of Sulky Felty: white
- 1 Sheet of Sulky Felty: orange & yellow
- 1-yard pack of Sulky Perfect Appliqué Fusible Web
- Sulky Neon Thread – Yellow – 110 Yd Spool
- Sulky Neon Thread – Orange – 110 Yd Spool
- Sulky 12 Wt. Cotton Petites – Black – 50 yd. Spool
- Sulky 30 Wt. Cotton Thread – Bright White – 500 yd. Spool
- Organ® Needles Universal Size 80/12 – 5 Needles Per Pack

CANDY CORN CUTTING & PREP
Cut two white Felty pieces from the entire candy corn pattern and two cheek pieces. Then, cut the pattern into three sections and cut one orange Felty from the middle section and one yellow Felty from the bottom section.
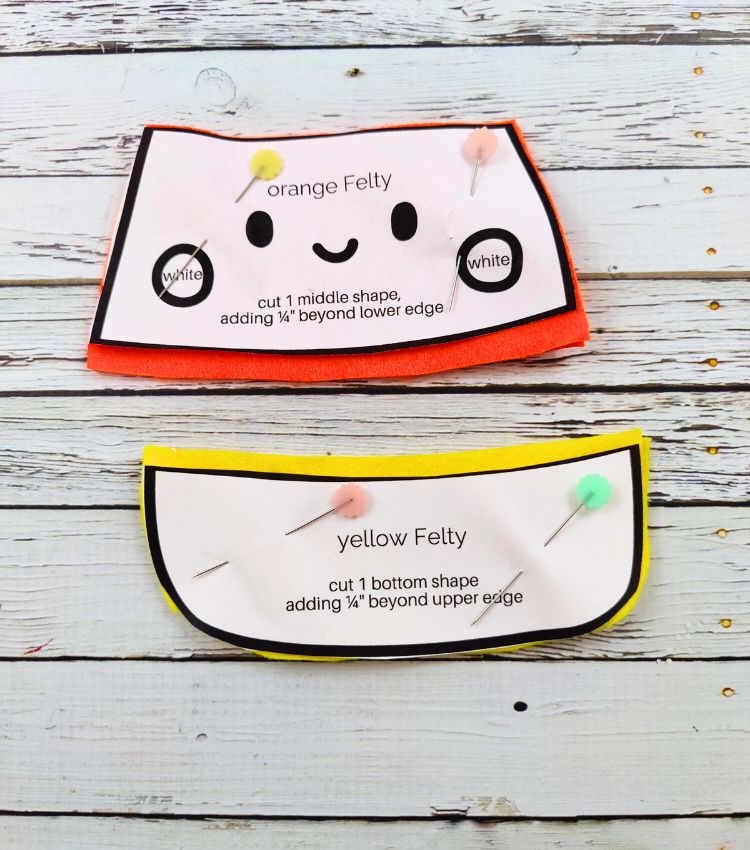
NOTE: Add a ¼” seam allowance to the bottom of the middle section and to the top of the bottom section (see photo above).
CANDY CORN FACE EMBROIDERY
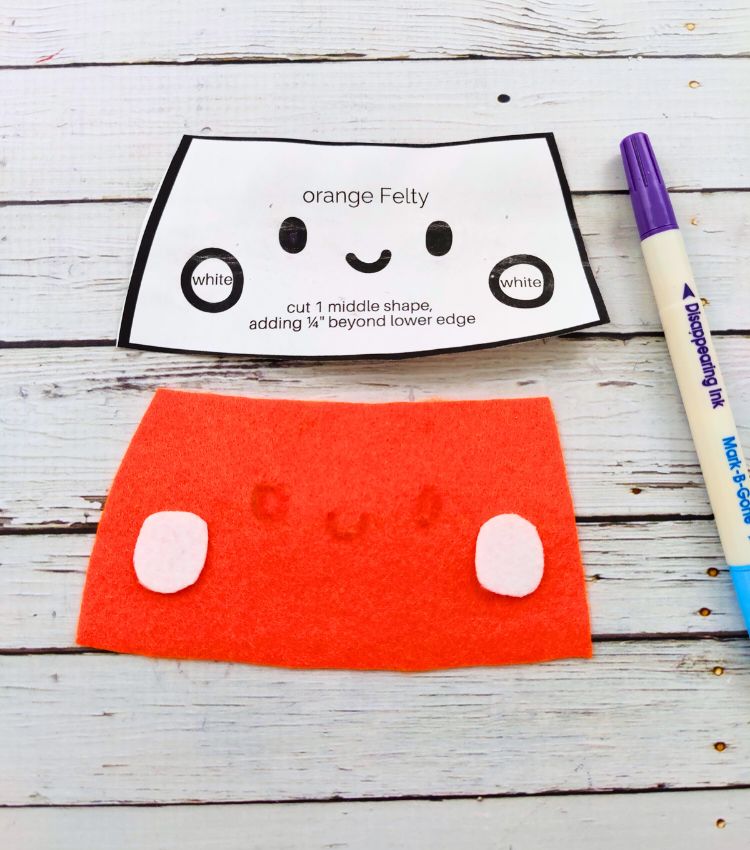
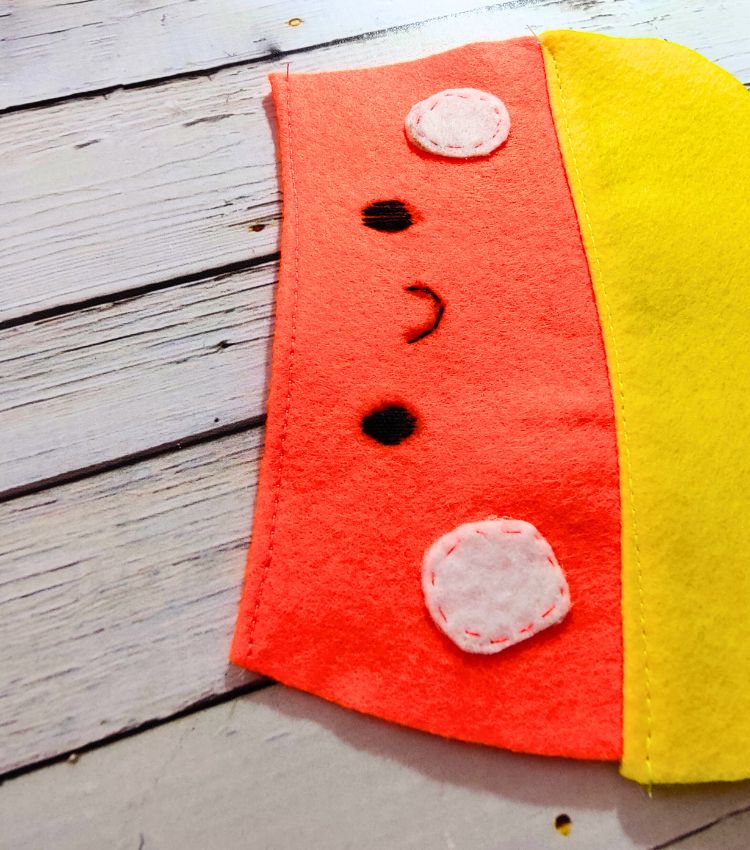
Transfer the candy corn face to the orange section using a removable fabric marker. It may be helpful to temporarily place the white cheeks on the face to determine placement.
Using black 12 wt. Cotton Thread, hand stitch the candy corn face using a chain stitch or backstitch.
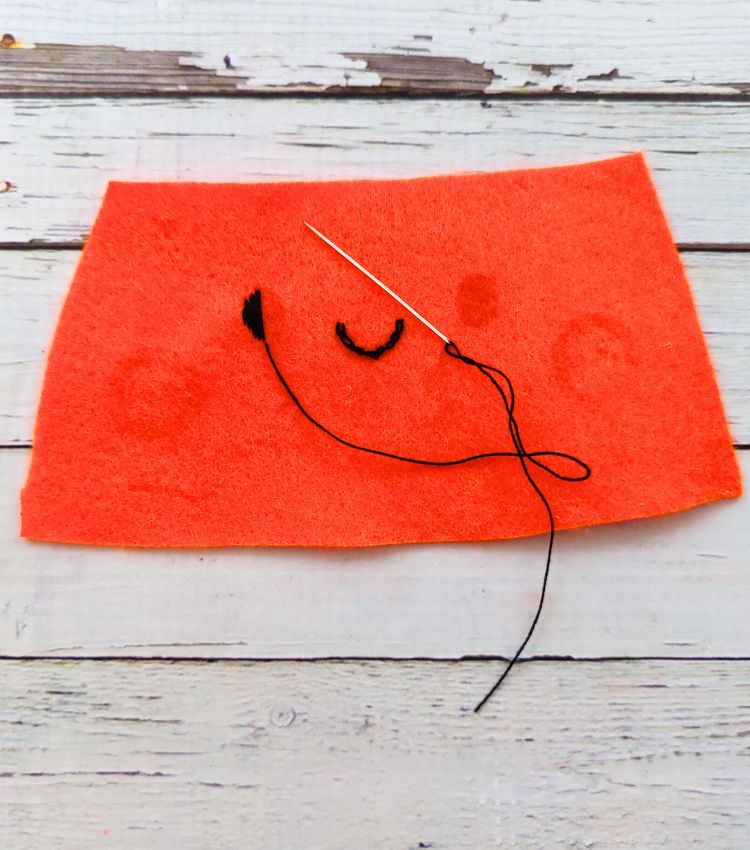
Stitch the eyes using a satin stitch.
CHEEK APPLIQUÉ
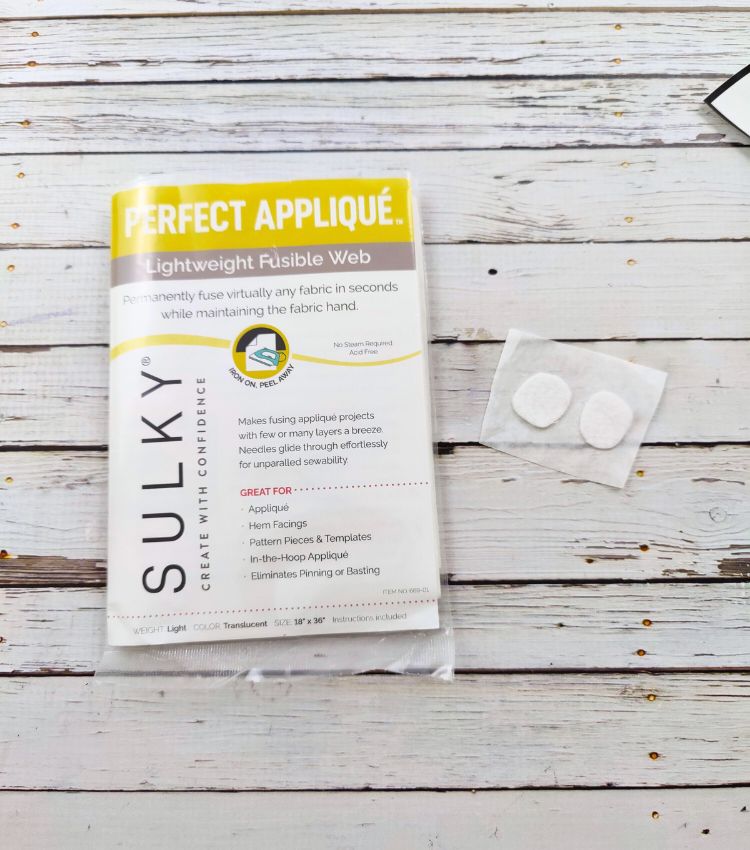
Press Sulky Perfect Appliqué to the back of the white Felty cheeks. Next, fuse the cheeks in place onto the orange section.
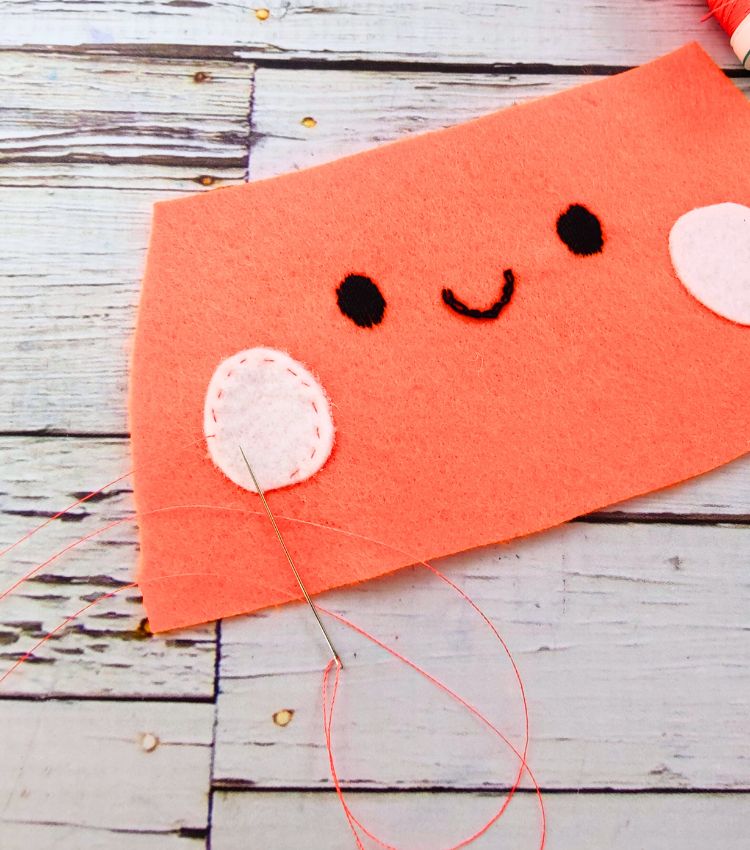
Use a running stitch to stitch to stitch each cheek by hand. Use orange Neon Thread to add some more color. Alternatively, stitch the cheeks on a sewing machine, using a blanket or straight stitch, and either white or Neon Thread.
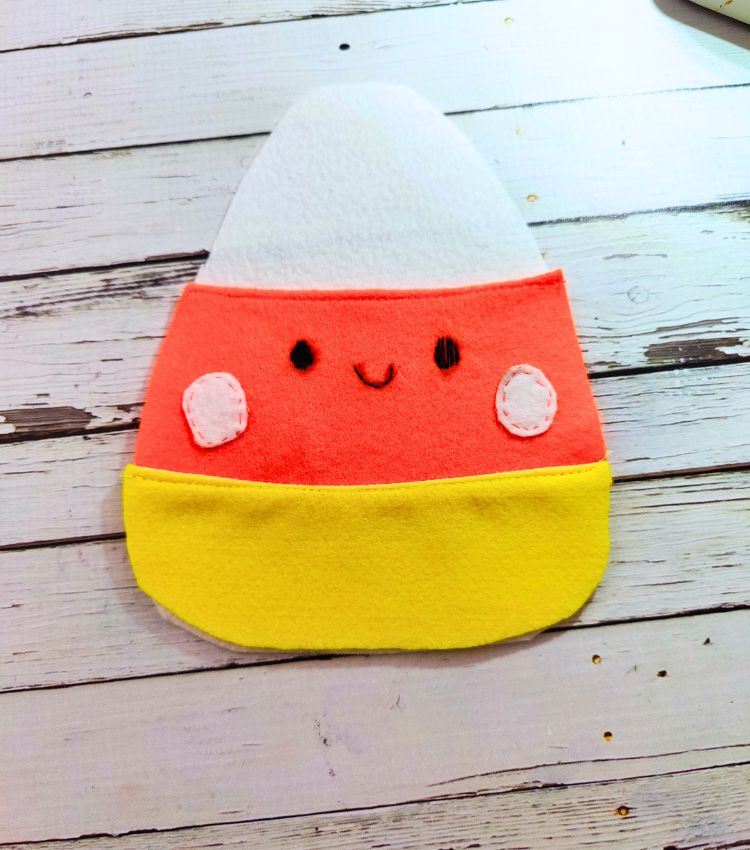
CANDY CORN CONSTRUCTION
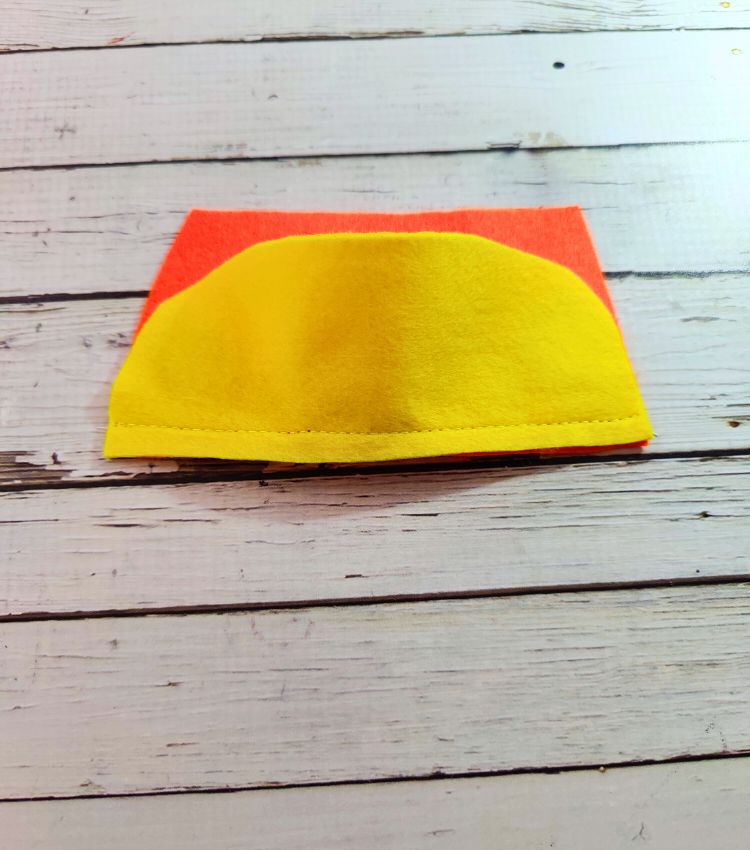
With right sides together, place the yellow-piece upper edge over the orange-piece lower edge. Stitch the edge using a 1/4″ seam allowance. Then, clip along the seam allowance to help the rounded edges lay flat.
To finish the pocket upper edge, fold it ¼” to the wrong side; topstitch along the seam using orange Neon Thread. Topstitch along the yellow edge as well, using matching yellow Neon Thread.
Next, place the front white Felty piece on a flat work surface. Position the pocket piece right side up over the white Felty front, aligning the lower edges. Baste the two layers together around the outer pocket edges.
CANDY CORN UTENSIL HOLDER FINISHING
To finish the Candy Corn Utensil Holder, place the back white Felty piece over the front with right sides together. Pin the perimeter. Then, stitch the perimeter using a ¼” seam allowance, leaving a 2” opening for turning.
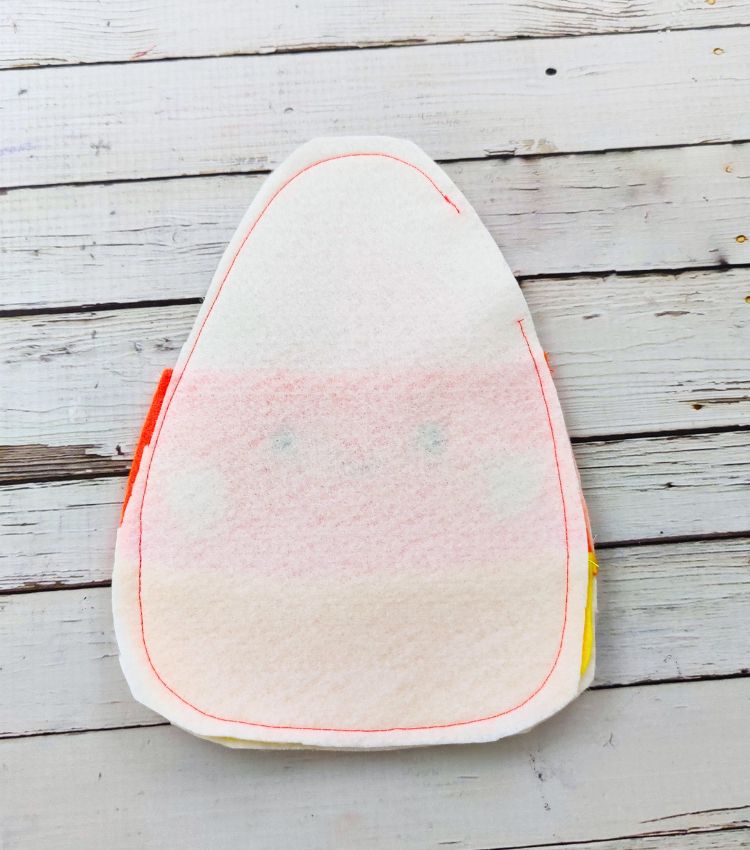
Turn the Candy Corn Utensil Holder right side out through the opening. Use a Sulky Multipurpose Turning Tool to smooth the interior edges. Fold the opening raw edges toward the wrong side. Press flat from the back, to avoid the embroidery stitching. Lastly, topstitch the entire Candy Corn Utensil Holder perimeter to close the opening and finish. If needed, press again along the outer edges.
TIP: If not using a heat-removable marking pen, be sure to remove the pen markings before press
Repeat to create as many Candy Corn Utensil Holders as needed for your fall table!

Such a cute project! Thank you!