Embroidered Pillow
DIY Pillow of the Month: January Edition
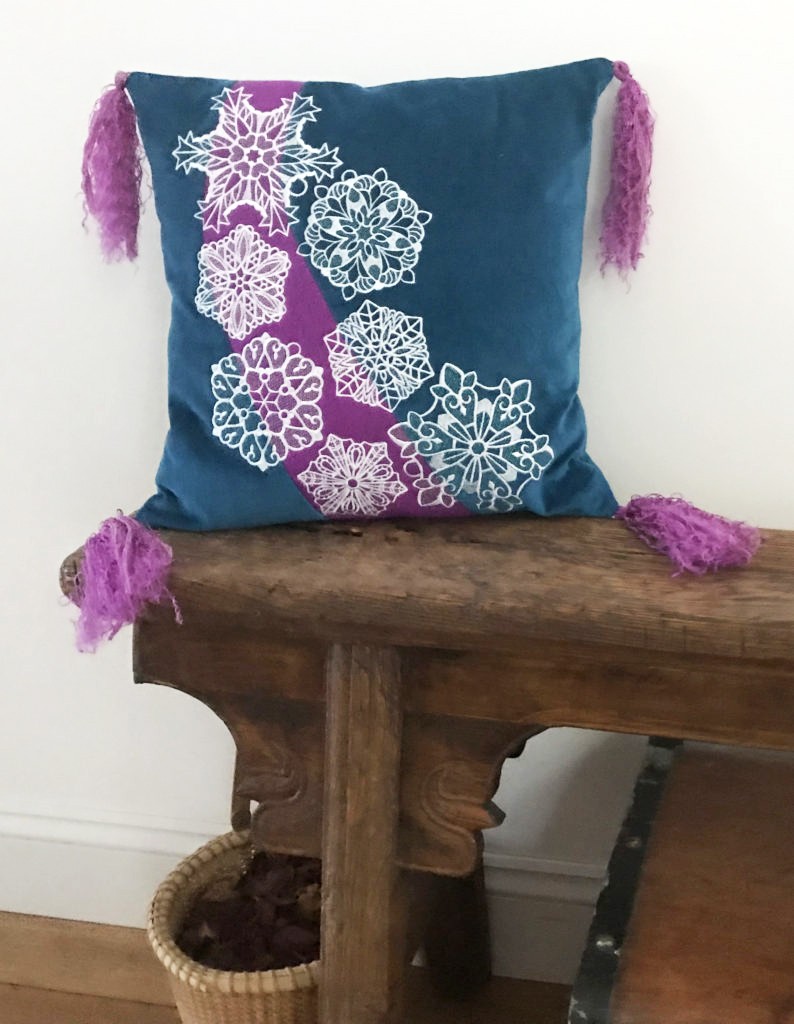
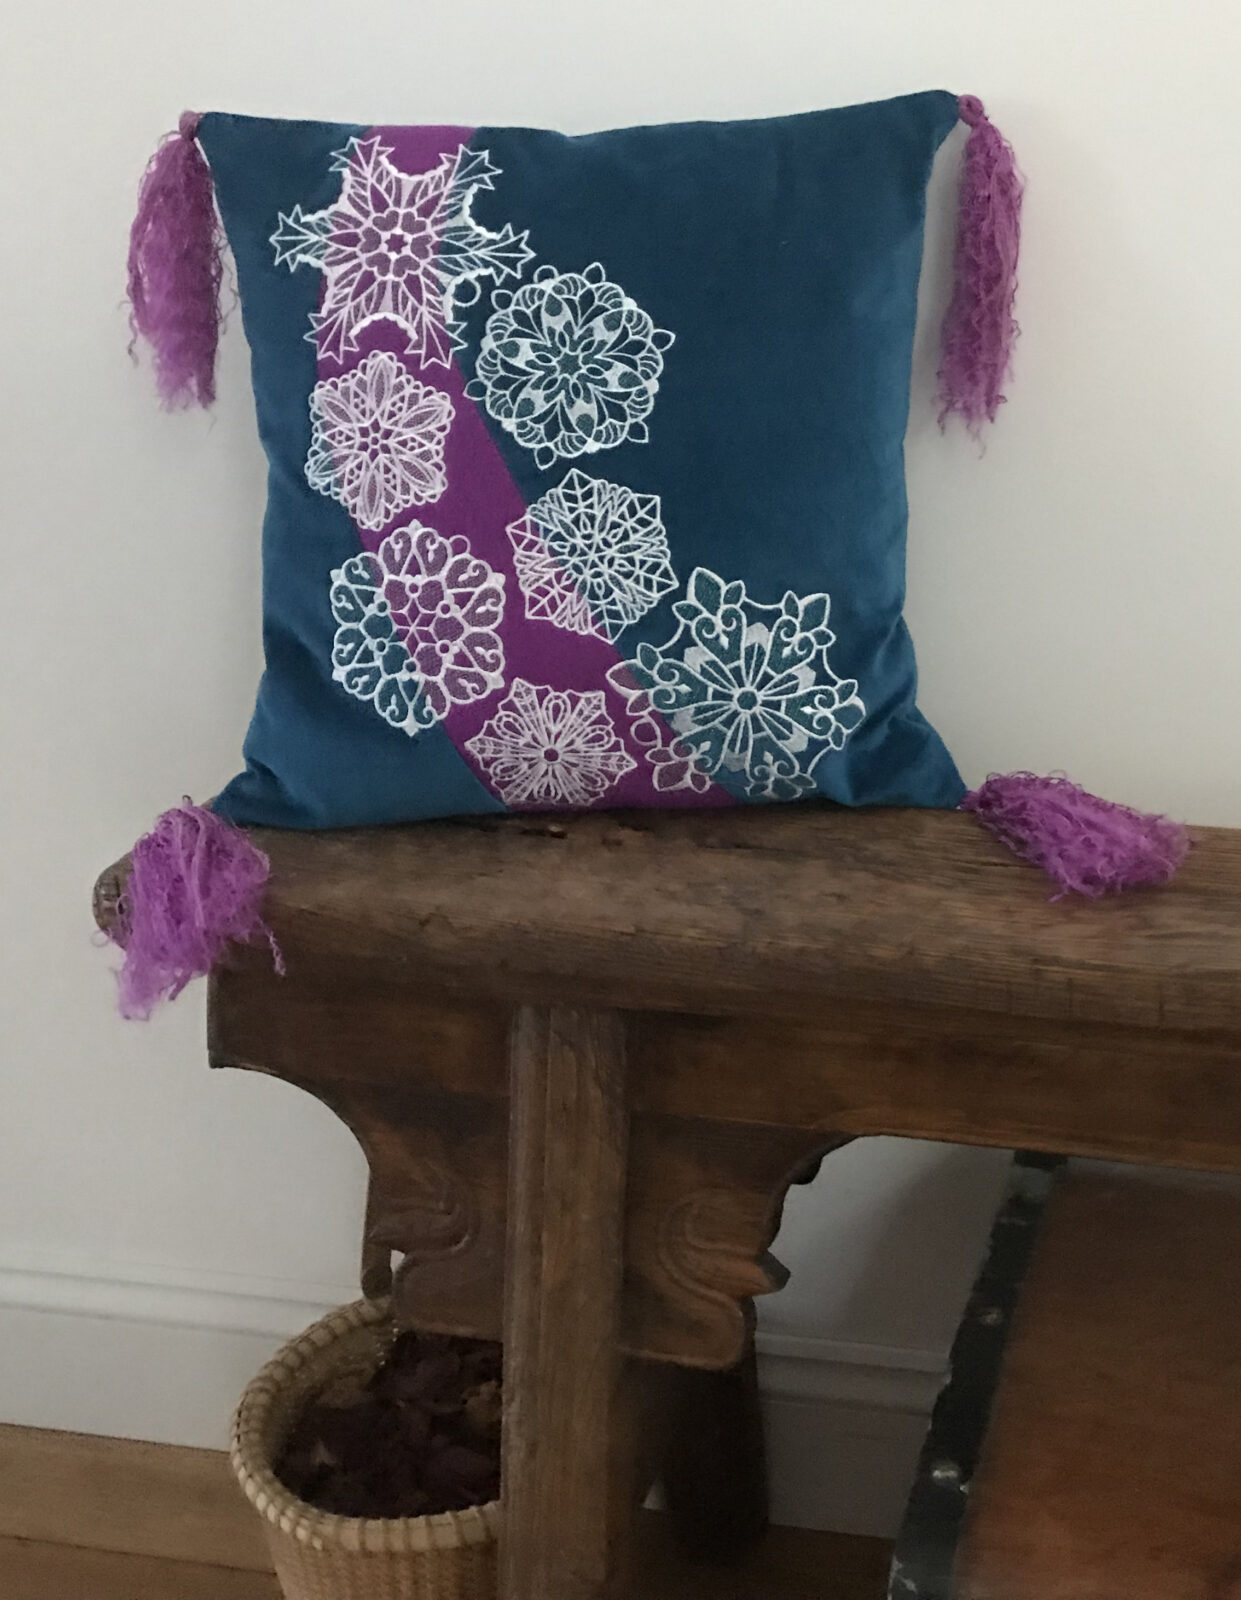
For the next twelve months of 2019, we will feature a DIY Pillow of the Month with a a 14” square pillow form that can be slipped off and easily stored. January’s Embroidered Pillow keeps winter in mind with embroidered snowflakes and a touch of metallic sparkle.
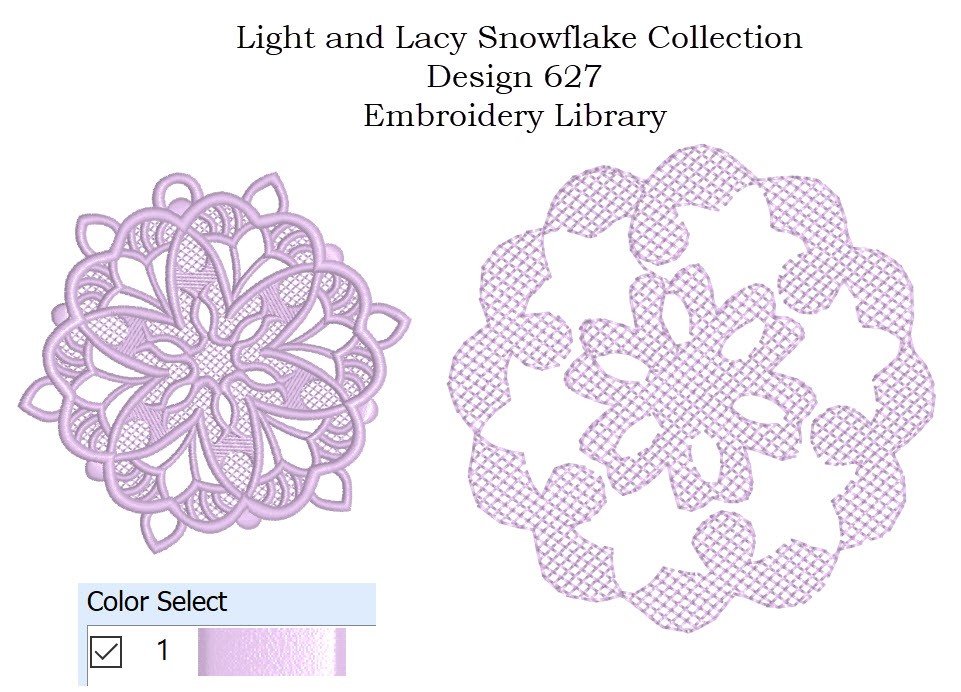
Not only is it exciting to regularly change decorating themes, but reusing the same pillow form will save money. January finds winter well under way and, even in those warmer states, it is always fun to think of snowflakes! Embroidery Library offers two enticing freestanding lace (FSL) collections of “Light and Lacy Snowflakes”. Each are available in three different sizes, which we will feature on January’s embroidered pillow. Designs available at: www.emblibrary.com
January’s Pillow of the Month: Embroidered Pillow
The objective of this project is not to have you make a carbon copy of January’s embroidered pillow, although a chart can be found at the end of the article documenting the designs selected and their position on the embroidered pillow, but rather to demonstrate how an interesting background of mixed textures can enhance a large cascading snowflake layout and how it can be stitched out.
Often, embroidery designs can be used in applications other than originally intended. A simple example might be a collection advertised for table linens and yet some creative embroiderer uses them to beautifully enhance a garment. Think of your embroidery collection in a different way to incorporate applique designs or quilting designs, for example, as standard designs for an embroidered pillow.
Embroidered Pillow Supply List
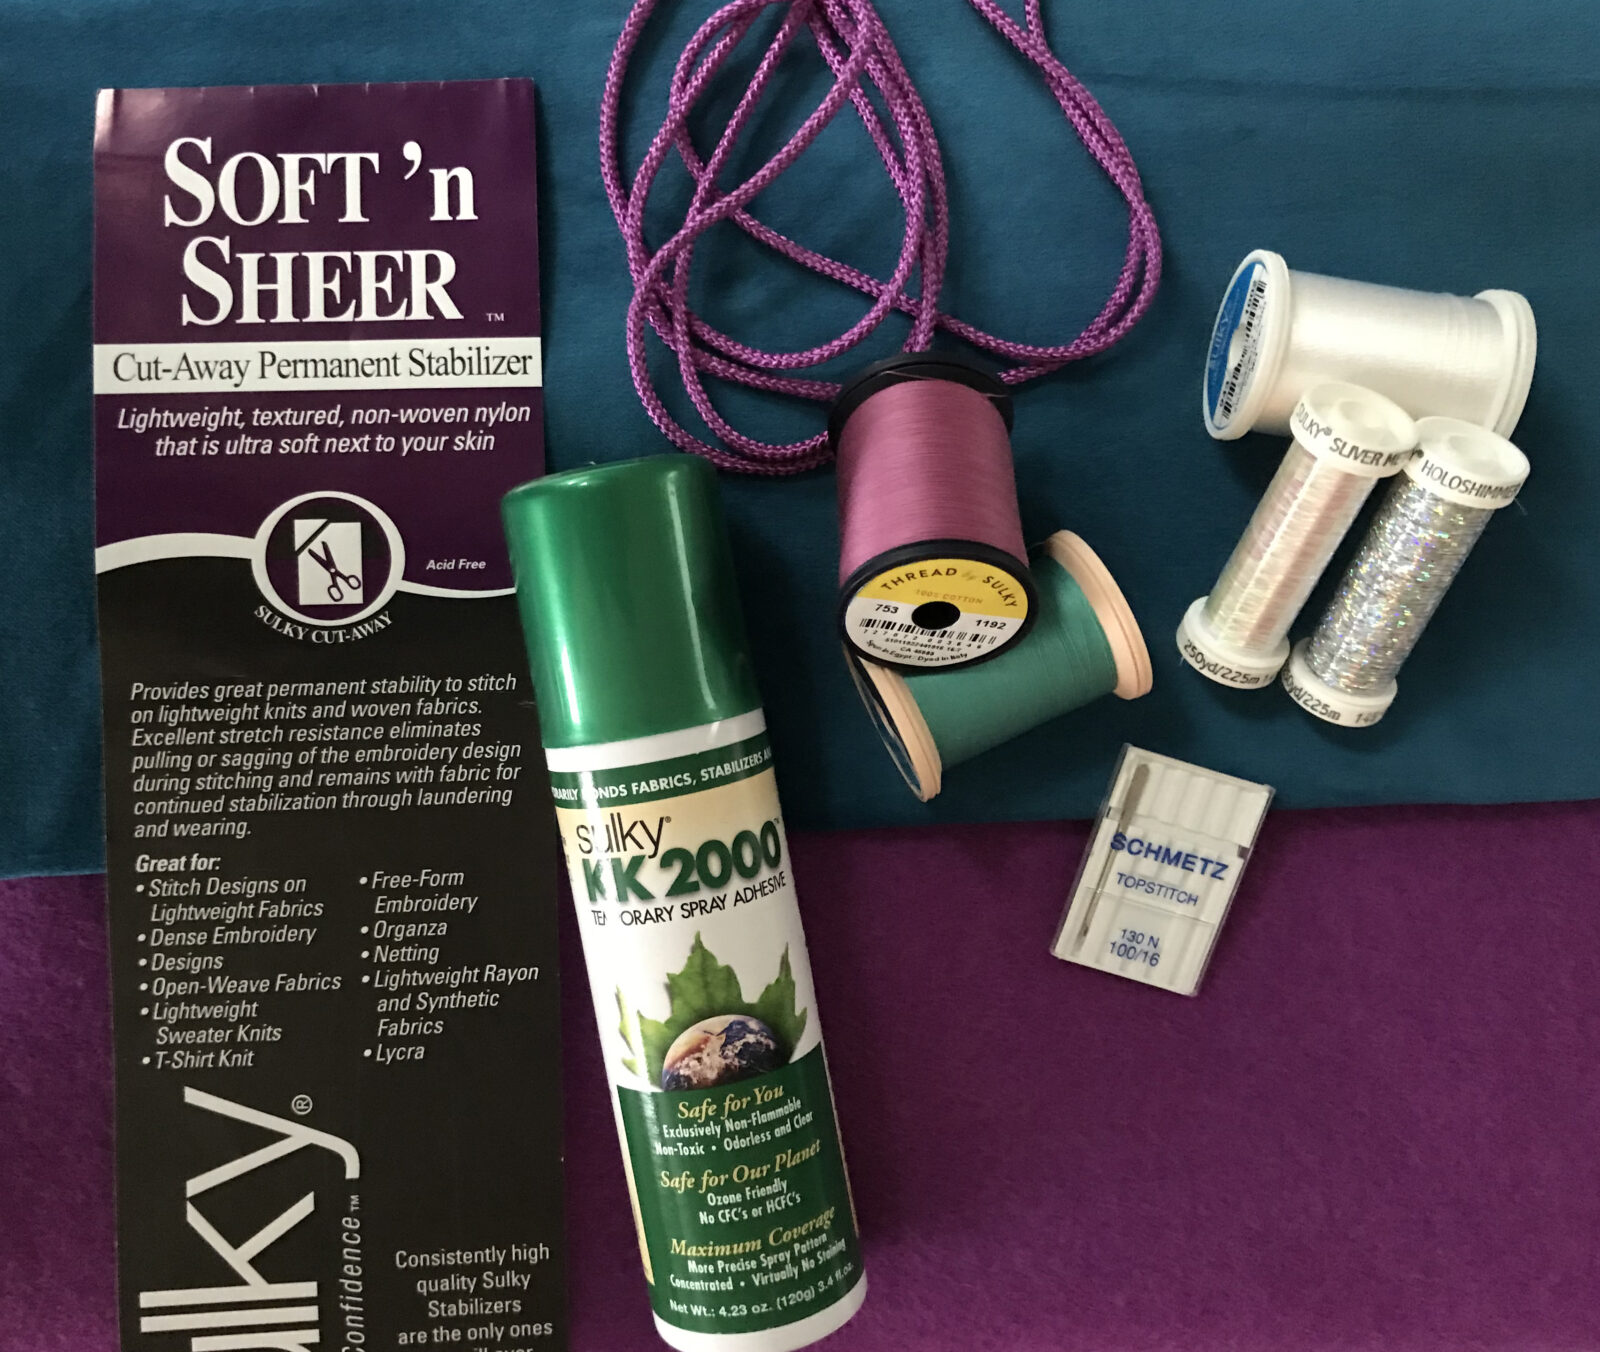
Thread:
Sulky 40 wt. Rayon – snowflakes
Sulky Holoshimmer™ Metallic and/or Sliver™ Metallic – snowflake accents
Sulky Cotton + Steel – pillow construction
Sulky Soft ’n Sheer™ Stabilizer
KK 2000™ Temporary Spray Adhesive
100/16 Topstitch Needle
½ yard of velveteen fabric
10” x 17” rectangle of wool felt
3 yards of cording for tassels (or four pre-made tassels)
Patchwork Template
Getting Started
FSL designs are digitized to be stitched on a water-soluble stabilizer such as Sulky® Fabri-Solvy™. The many interlocking stitches enable the element to hold its shape once the stabilizer is rinsed away.

However, these same interlocking stitches can also provide depth and solid definition to a design when stitched on fabric, such as for this embroidered pillow.
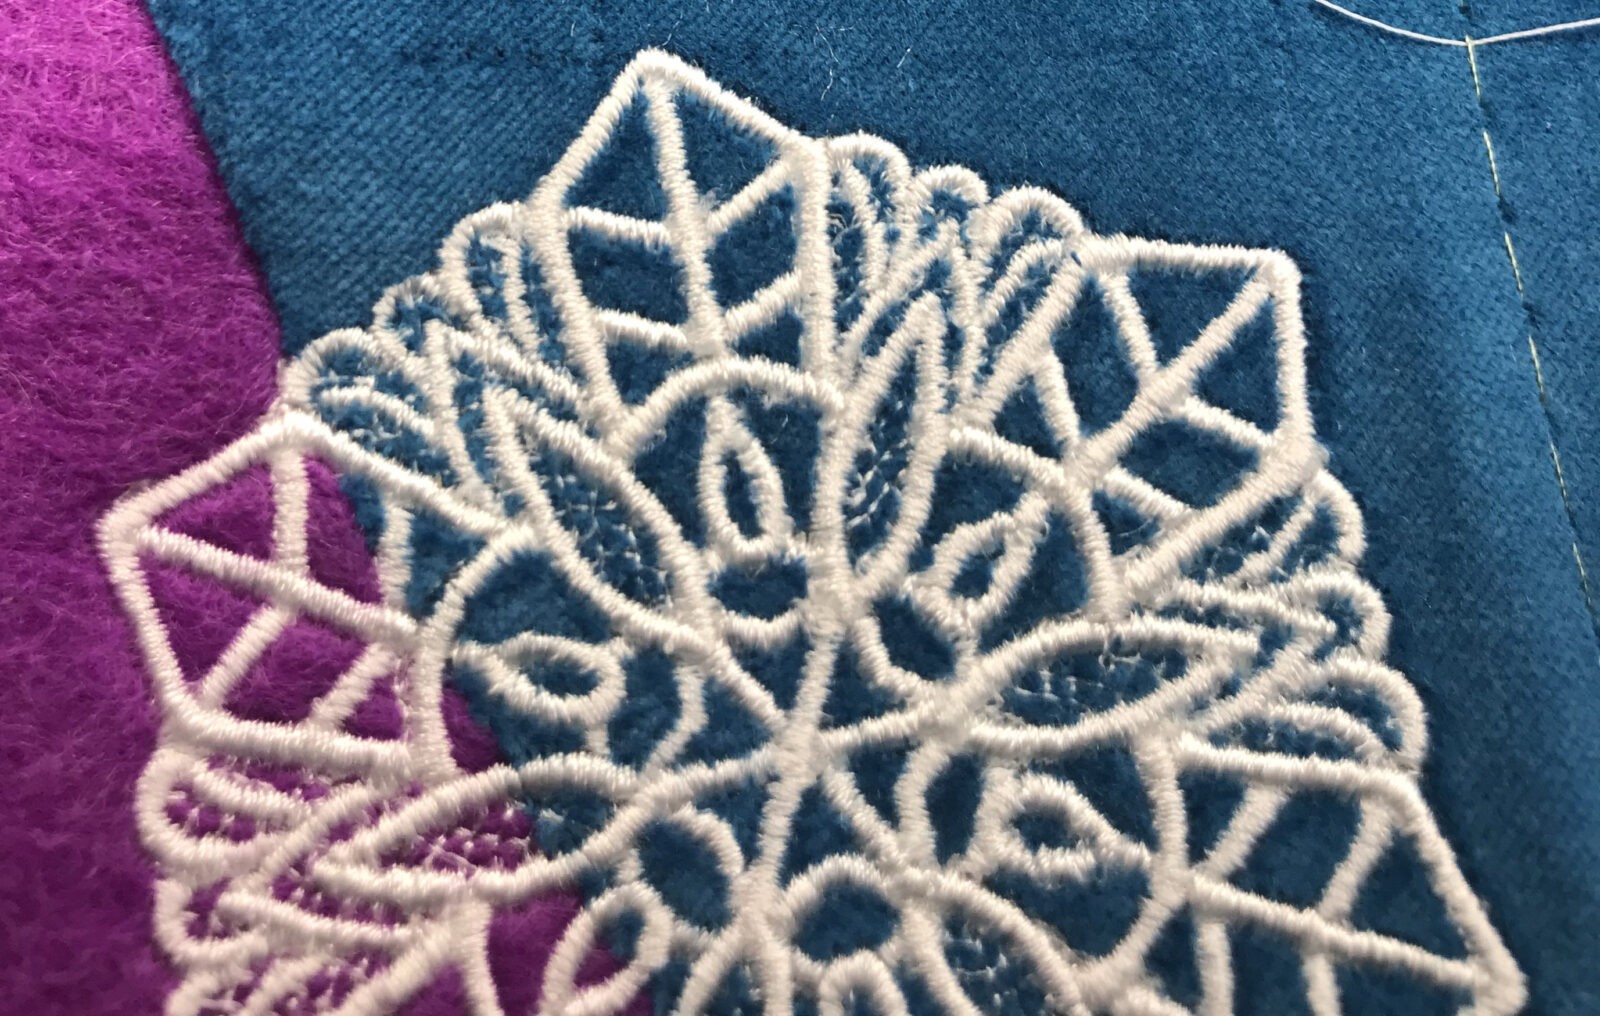
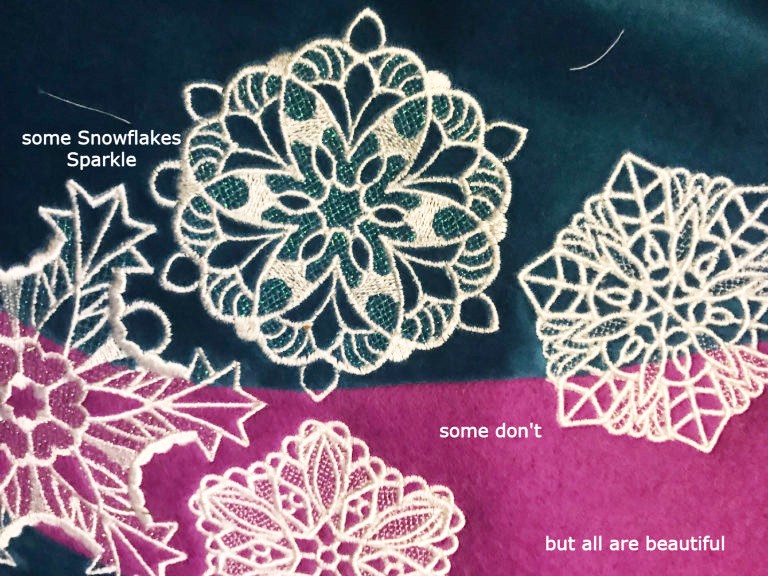
During the process of stitching snowflakes for my “Snowflake Wreath with Freestanding Lace Designs” blog post, I noticed that several snowflakes first stitch the background fill before stitching any of the heavier, defining pattern lines. Perfect for adding a bit of sparkle to the single color snowflakes on this embroidered pillow.
I placed The Thread Director 2 on the machine to allow Sulky Sliver™ Metallic thread, a thin, flat ribbon-like thread, to spool horizontally into the machine to begin the embroidery. I used #8040 – Opalescent.

I monitored the stitching until the fill was completely stitched, stopping the machine at that point.

The metallic thread was cut at the spool, leaving a long tail. Rayon 40 wt. was threaded in the machine and several stitches were laid down before cutting both thread tails.
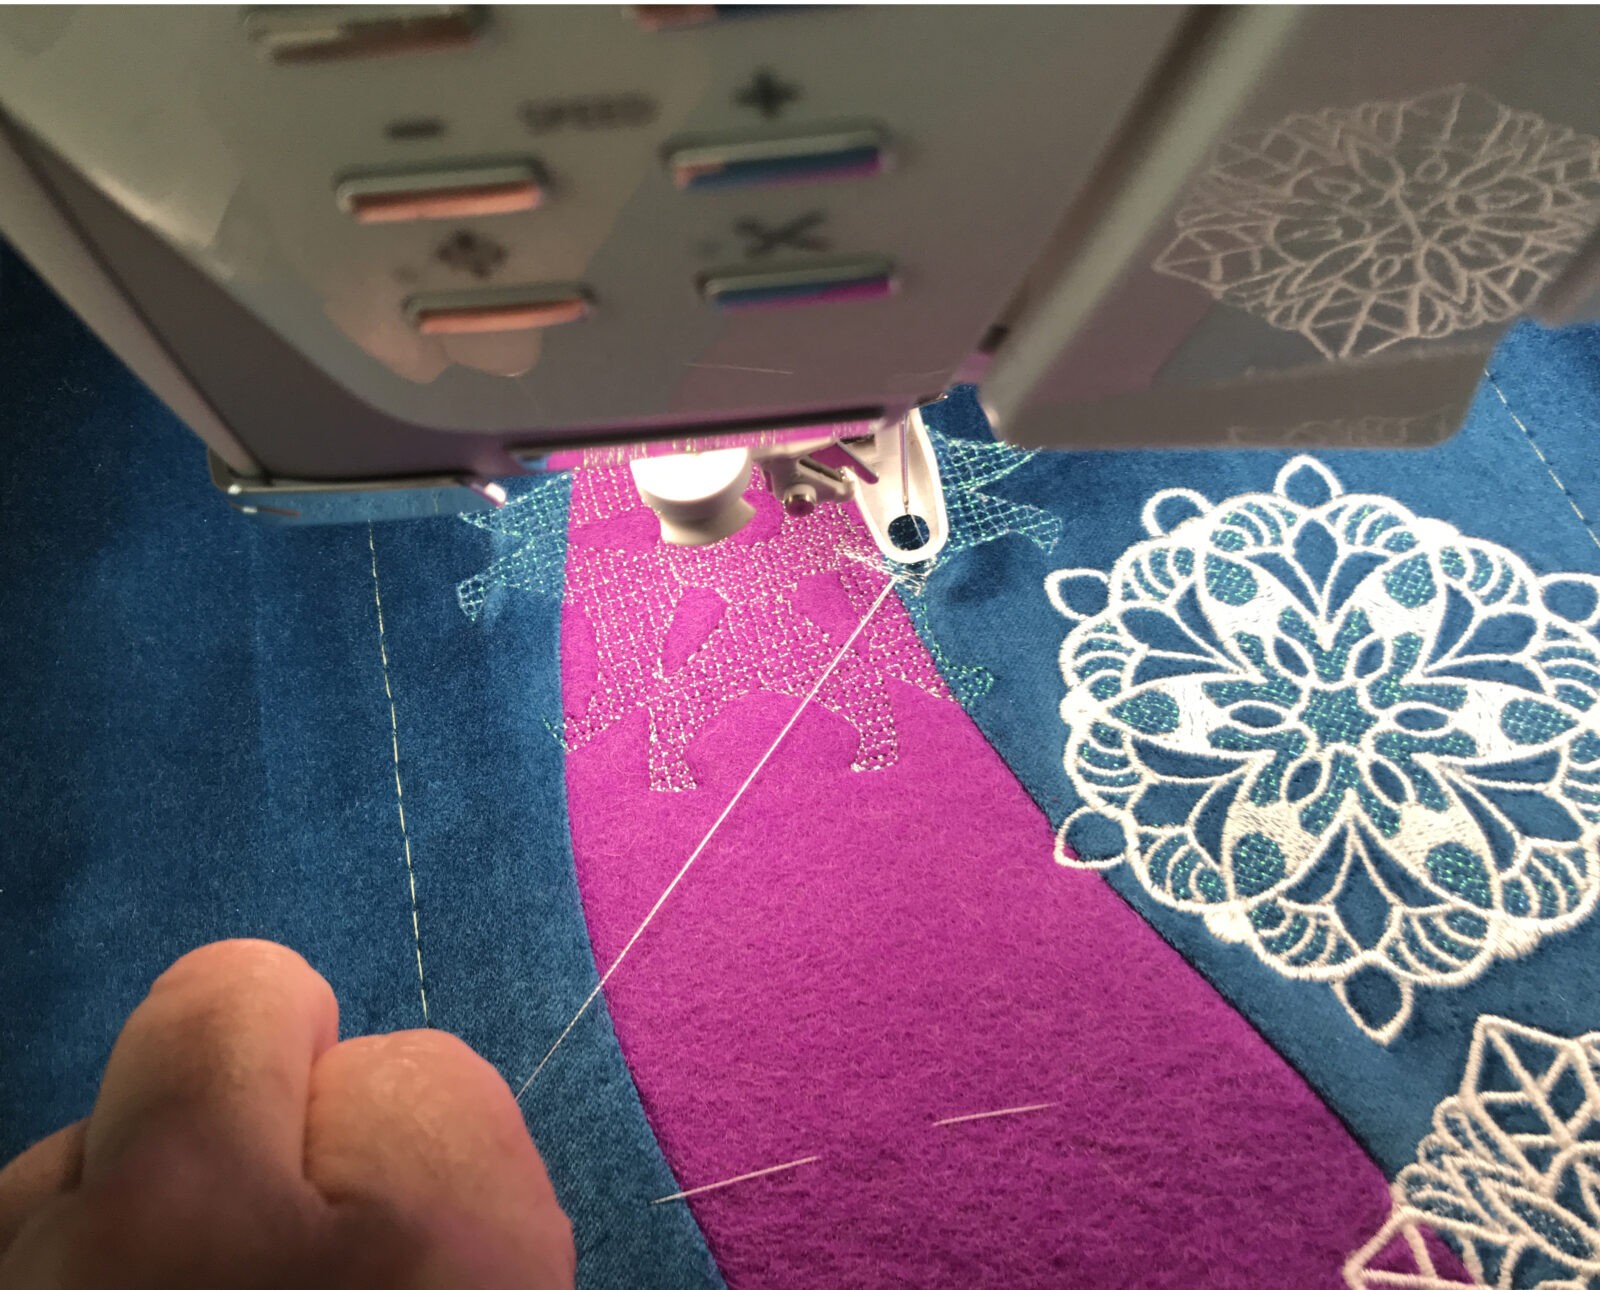
The heavy, interlocking stitches that will cover the ends will also secure them. Our single color snowflake now has a “new look” for the embroidered pillow.
Embroidered Pillow How To
Cut the three pattern sections apart on the starred curved lines.
Lay the two side pieces on a single layer of velveteen fabric, placing the center panel on the wool felt fabric.
DO NOT CUT! Before cutting, add a ½” seam allowance to each curved edge using a fabric-safe marker.
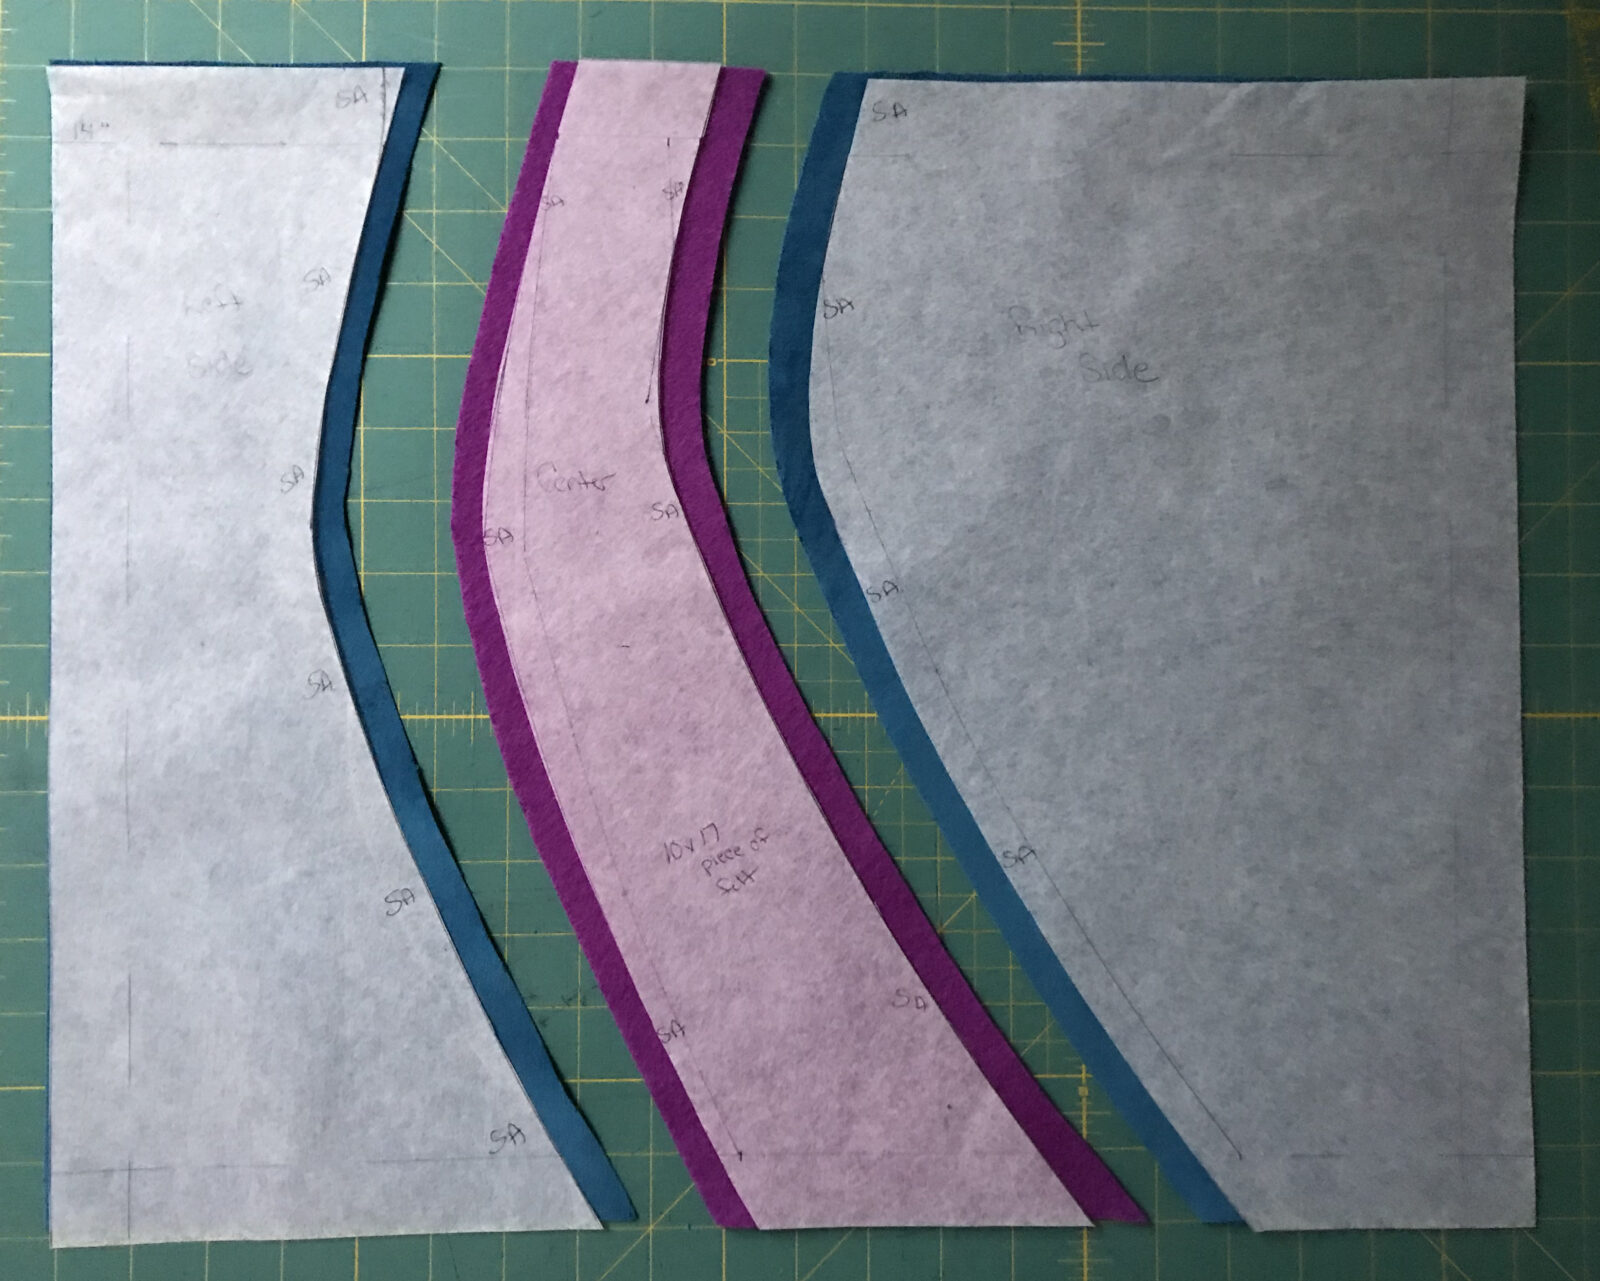
Cut front pieces to include seam allowance.
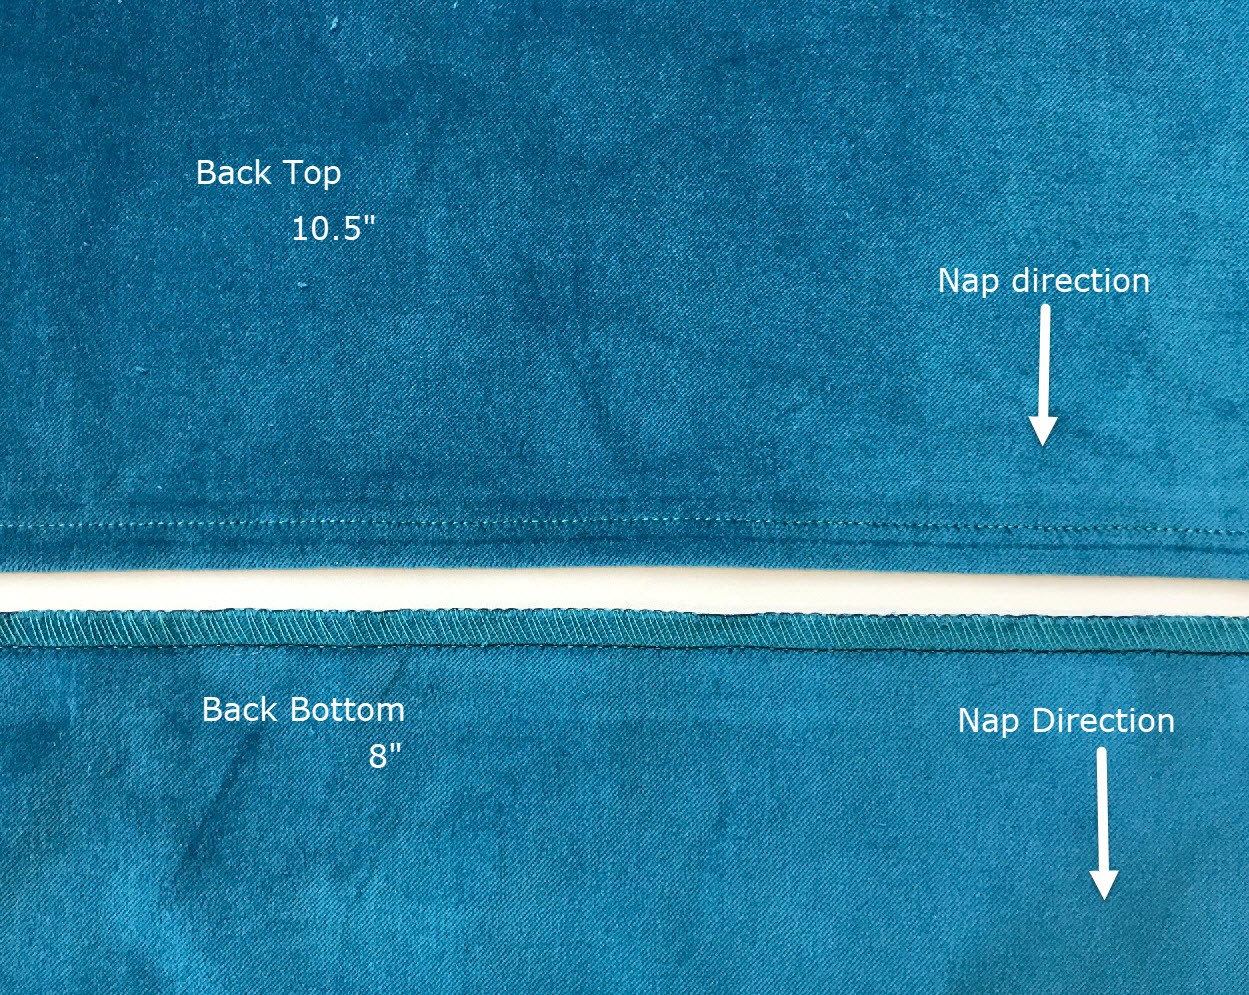
From the remaining velveteen fabric, cut two panels for the pillow back:
15” x 10½”
15” x 8”
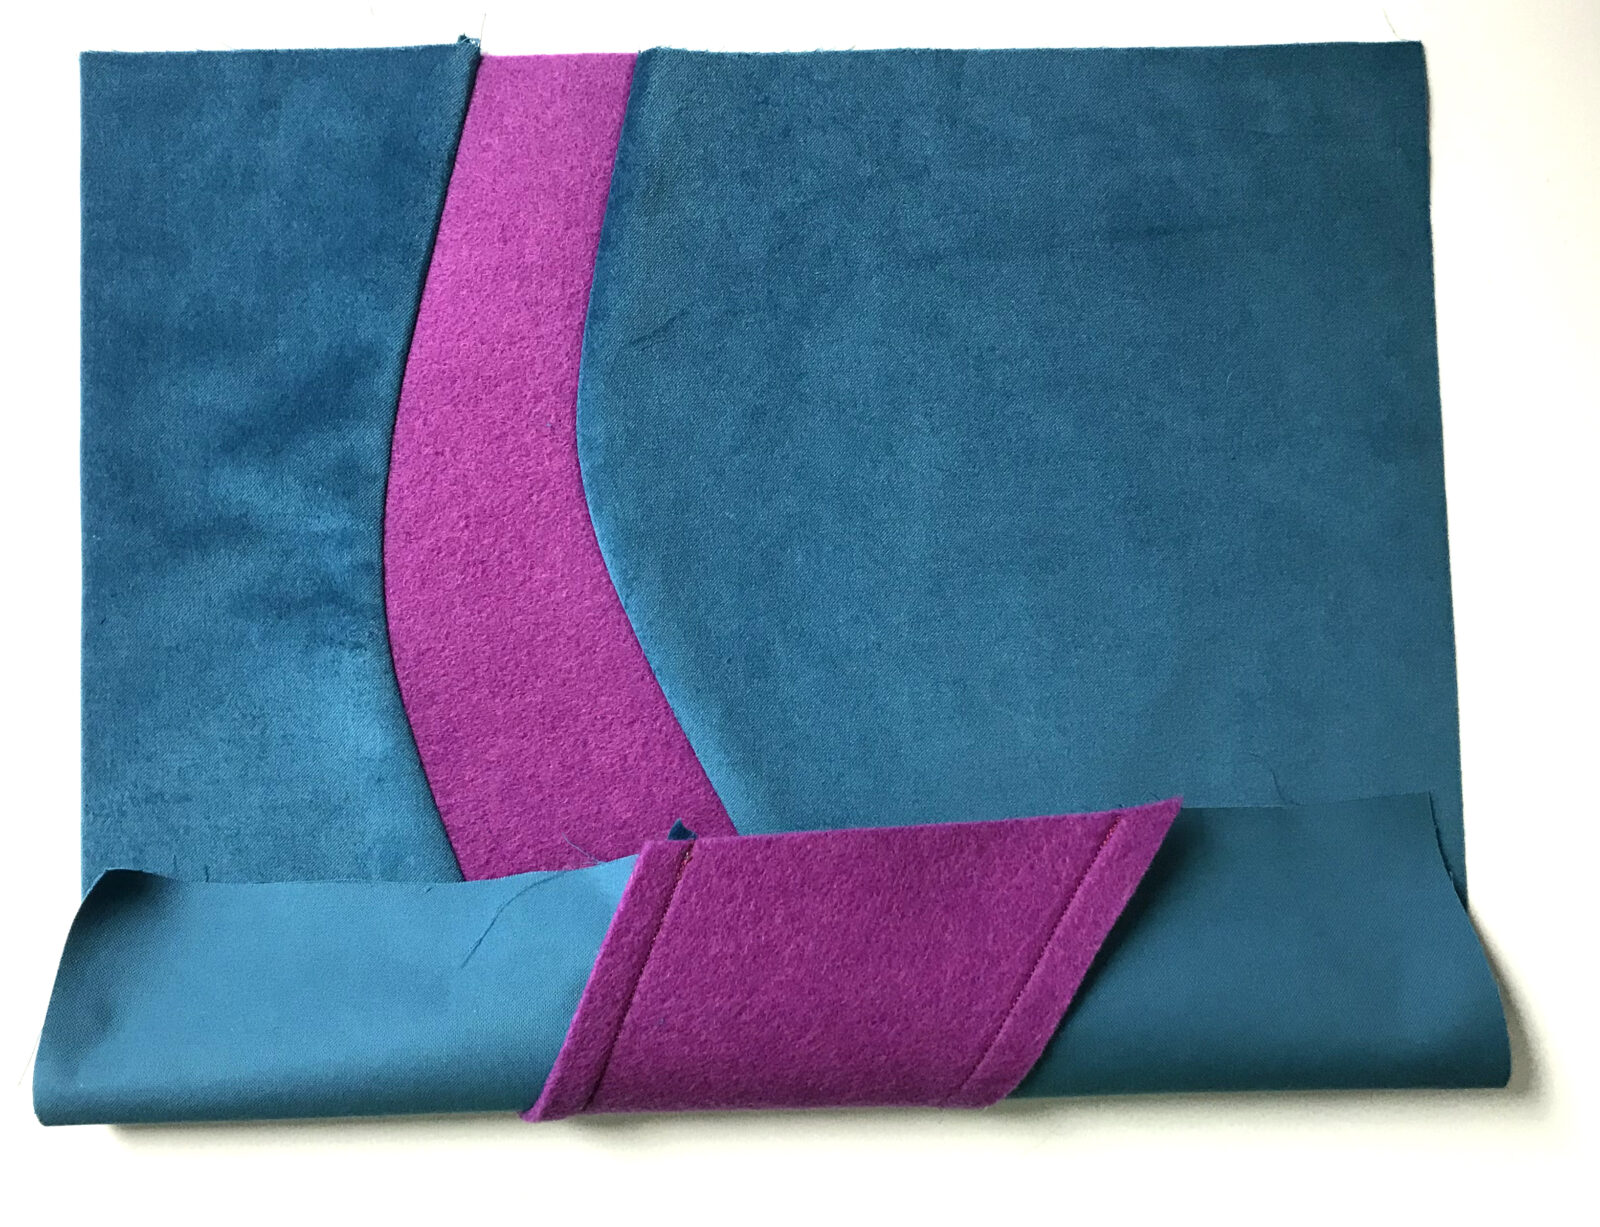
Stitch Pillow Front
With right sides together, stitch the three panels together. Always work with the inside curve facing up, easing it around the outside curved edge.
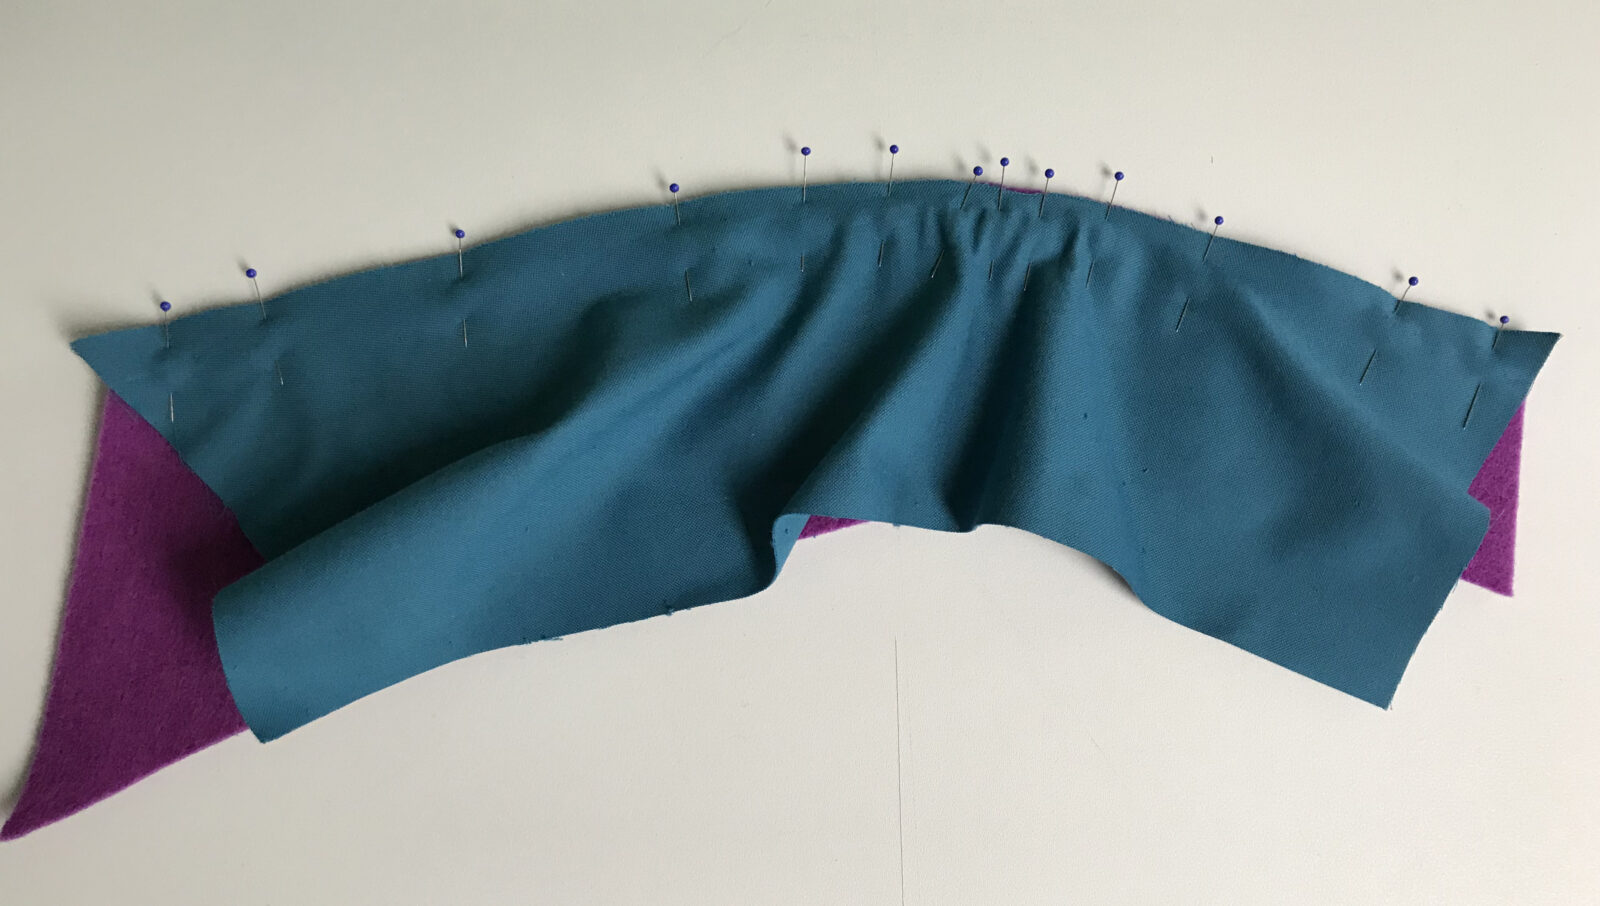 Stitch ½” seams
Grade seam allowance by cutting the velveteen allowance to ¼” wide.
Clip curves and steam seams pressing towards the side panels.
Embroidery
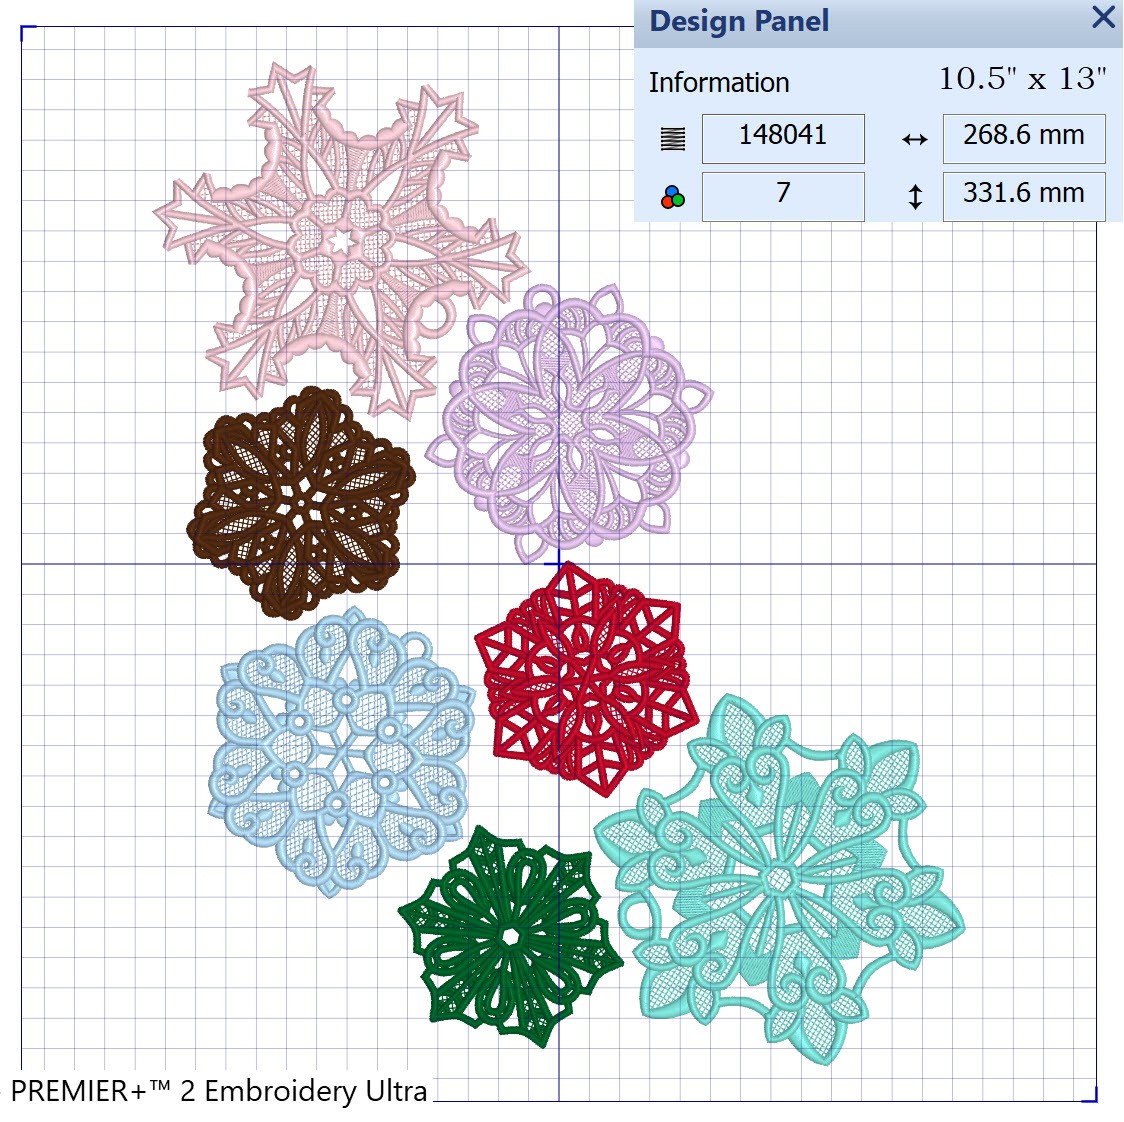
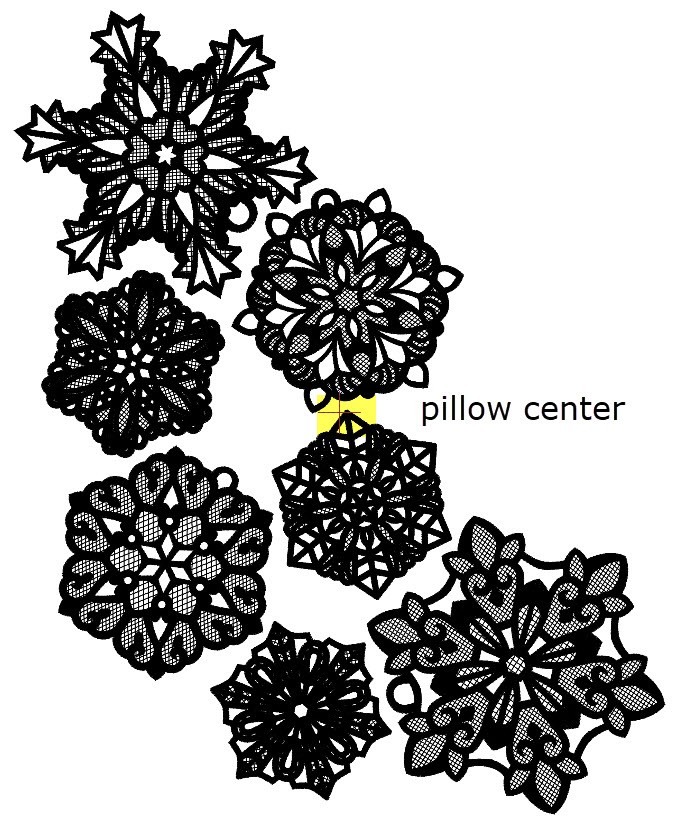
With the pillow front made, it’s time to talk about the overall embroidery design for the pillow front. Begin by choosing several snowflake designs (4-7) mixing sizes. The final layout should be no larger than 13 ½” in any direction. Arrange the snowflakes to flow in the same direction of the contrasting curve, allowing individual snowflakes to stitch on the overlapping fabric textures.
In all honesty, this process is a lot of trial and error (even for the “experts”), but it is also a lot of fun!
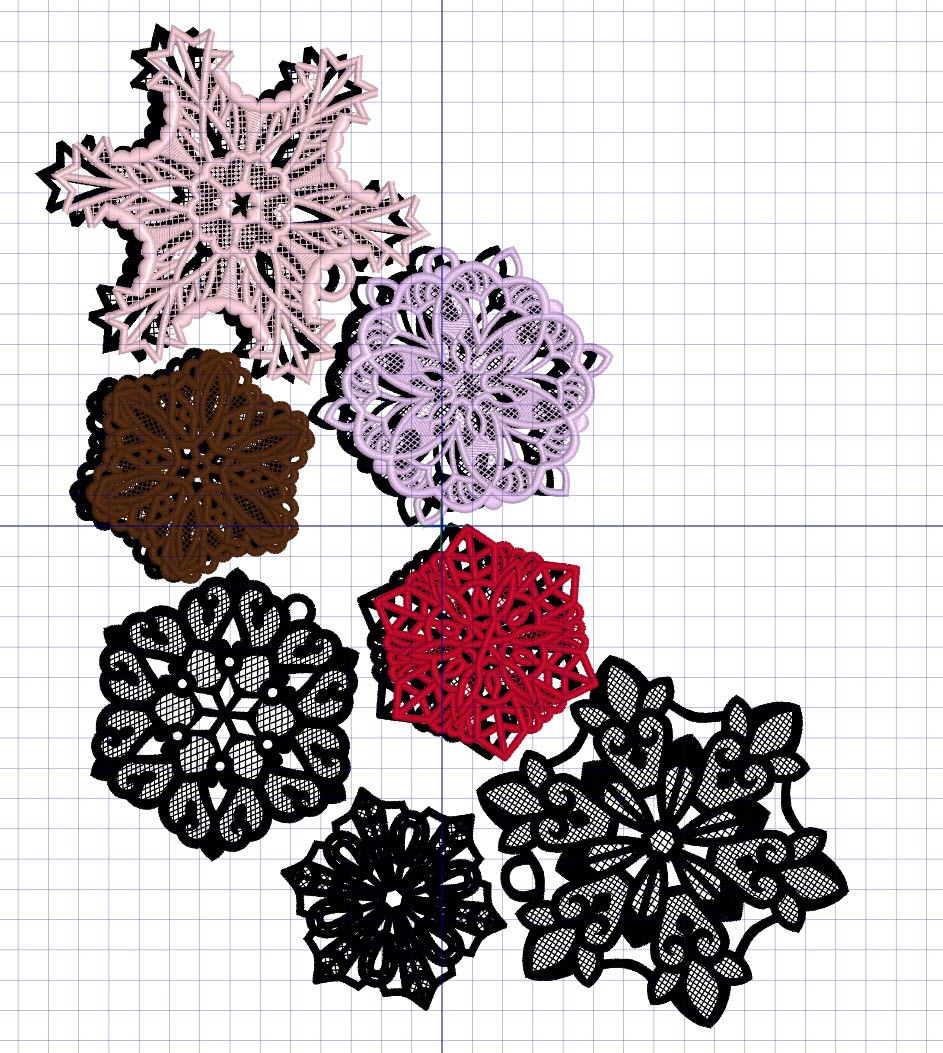
Editing software makes this process easier when using a 14” square custom hoop as the working space. Individual snowflakes can be brought into the space, moved, rotated, grouped, or even exchanged.

If editing software is not an option, arranging a large layout can be done by making “templates”. Cut paper squares to the size of the chosen snowflake. Divide them in quarters to mark the center. Then, round the corners and write the design number on each circle.
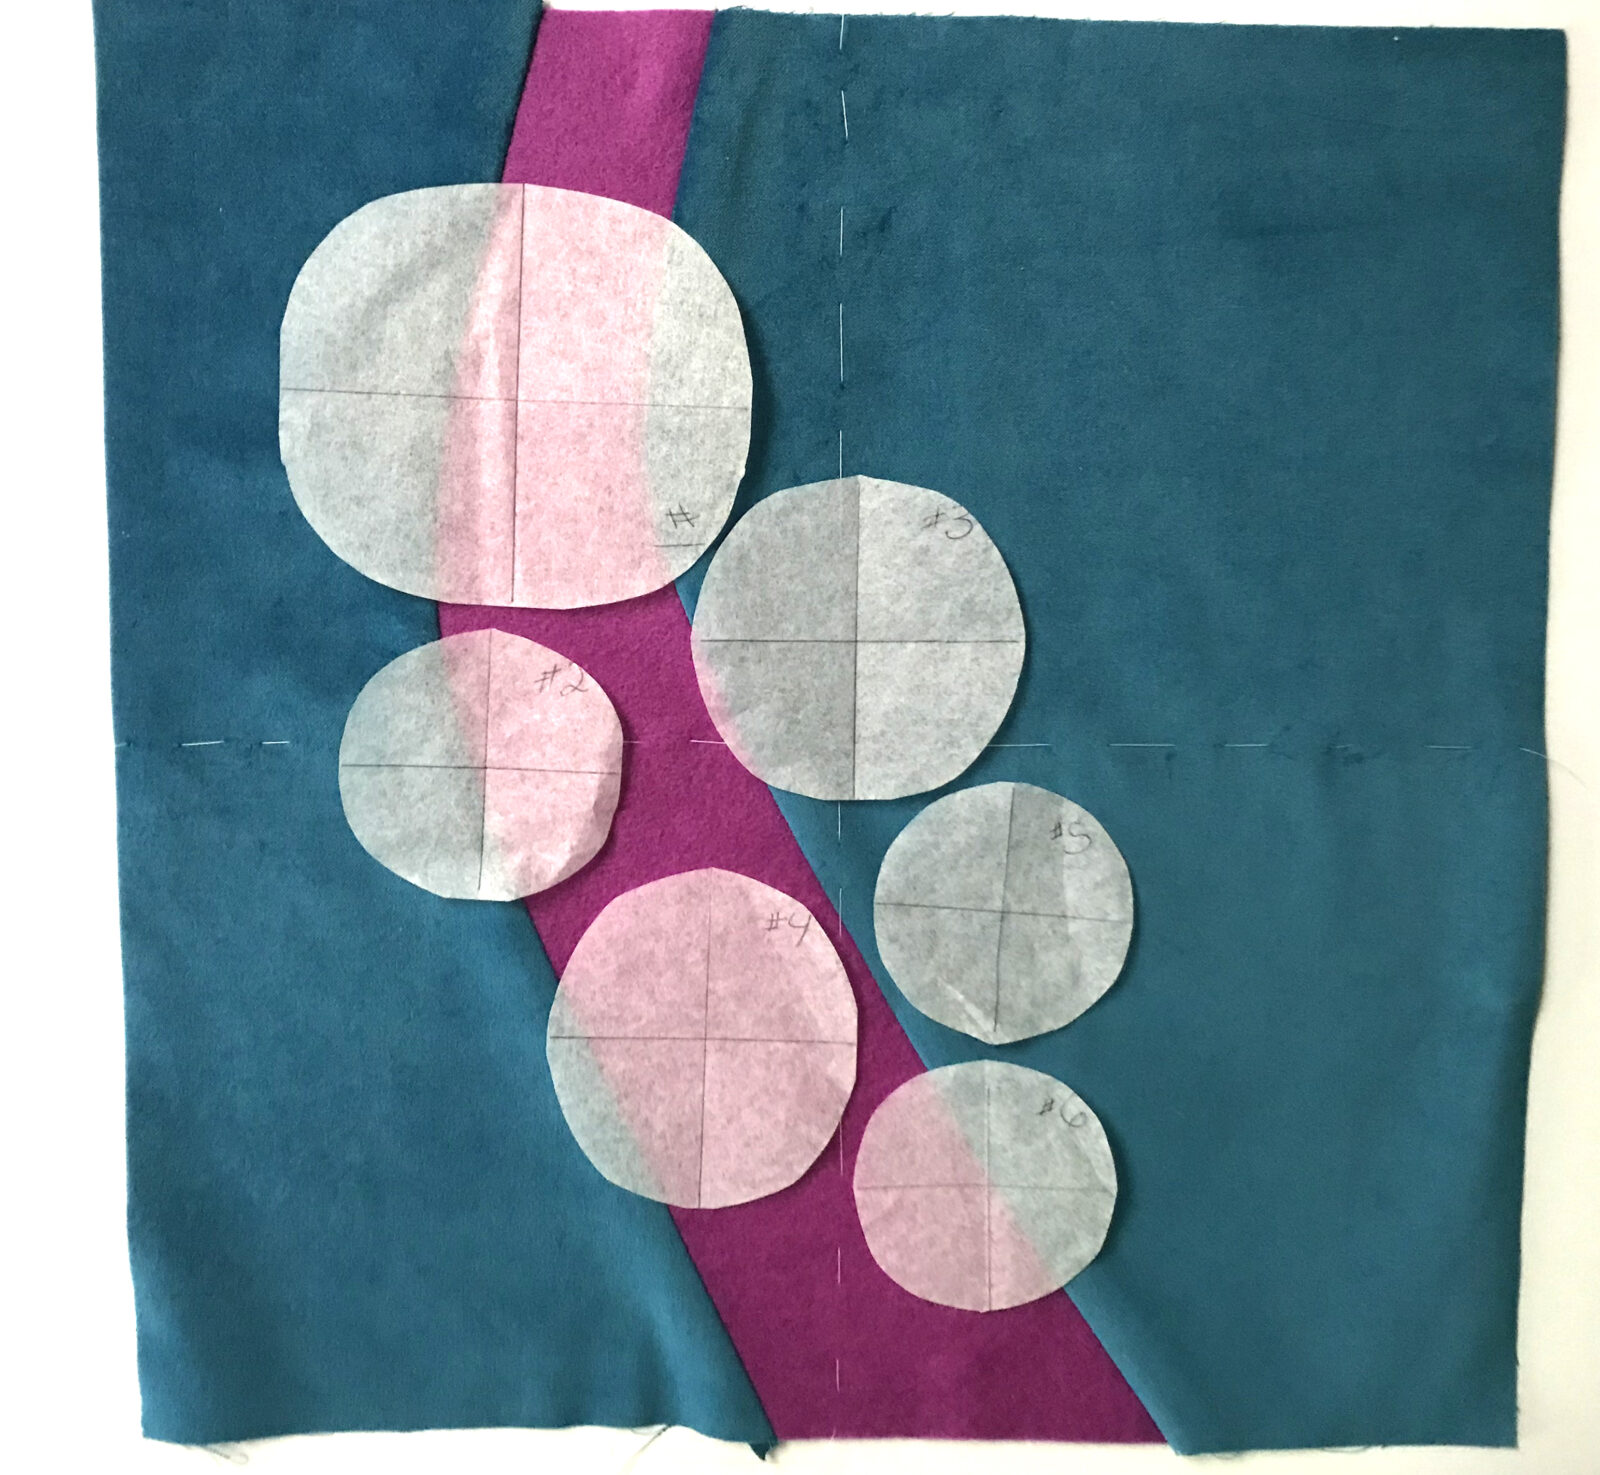
Lightly spray the templates with KK 2000 to hold their place as each snowflake is individually embroidered.
Let’s explore how a large layout can be broken into segments that fit within the embroidery hoop yet still have all the puzzle pieces match.
As previously mentioned, each snowflake can be individually hooped and stitched, and for those with smaller hoop limitations, this is the necessary method.
Many software programs offer “auto” functions to allow the computer to divide a large design into smaller hoops. However, the easy way is not always the best way.
Another method is to group specific elements by saving each grouping with its own file name.

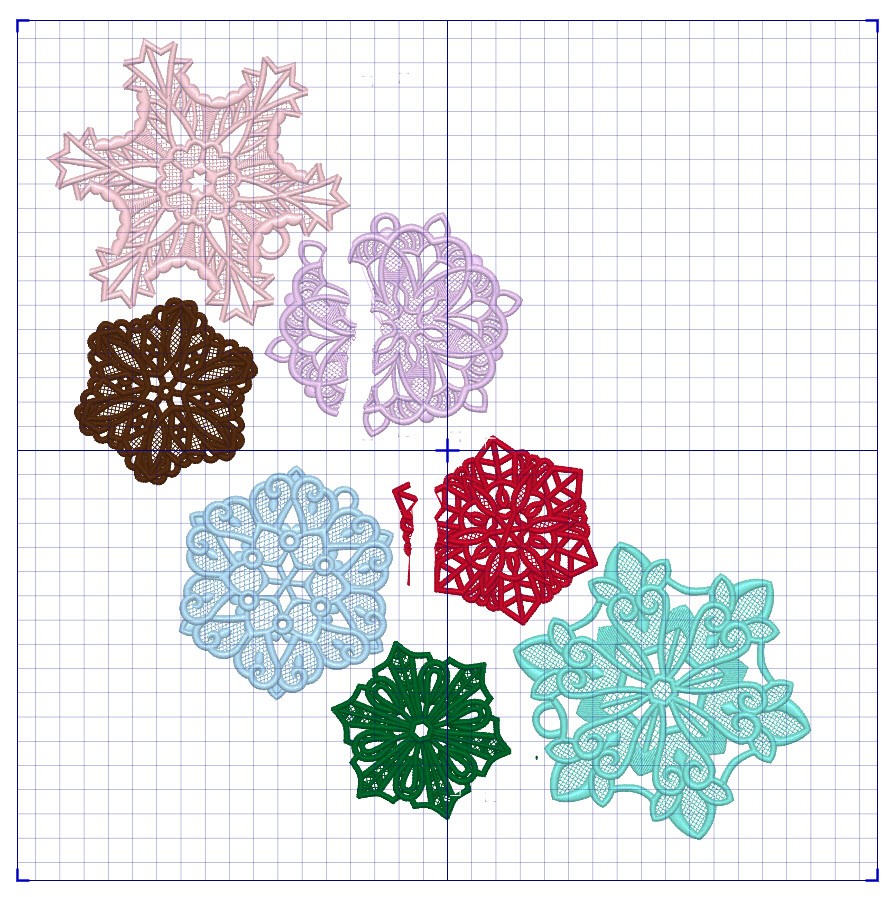
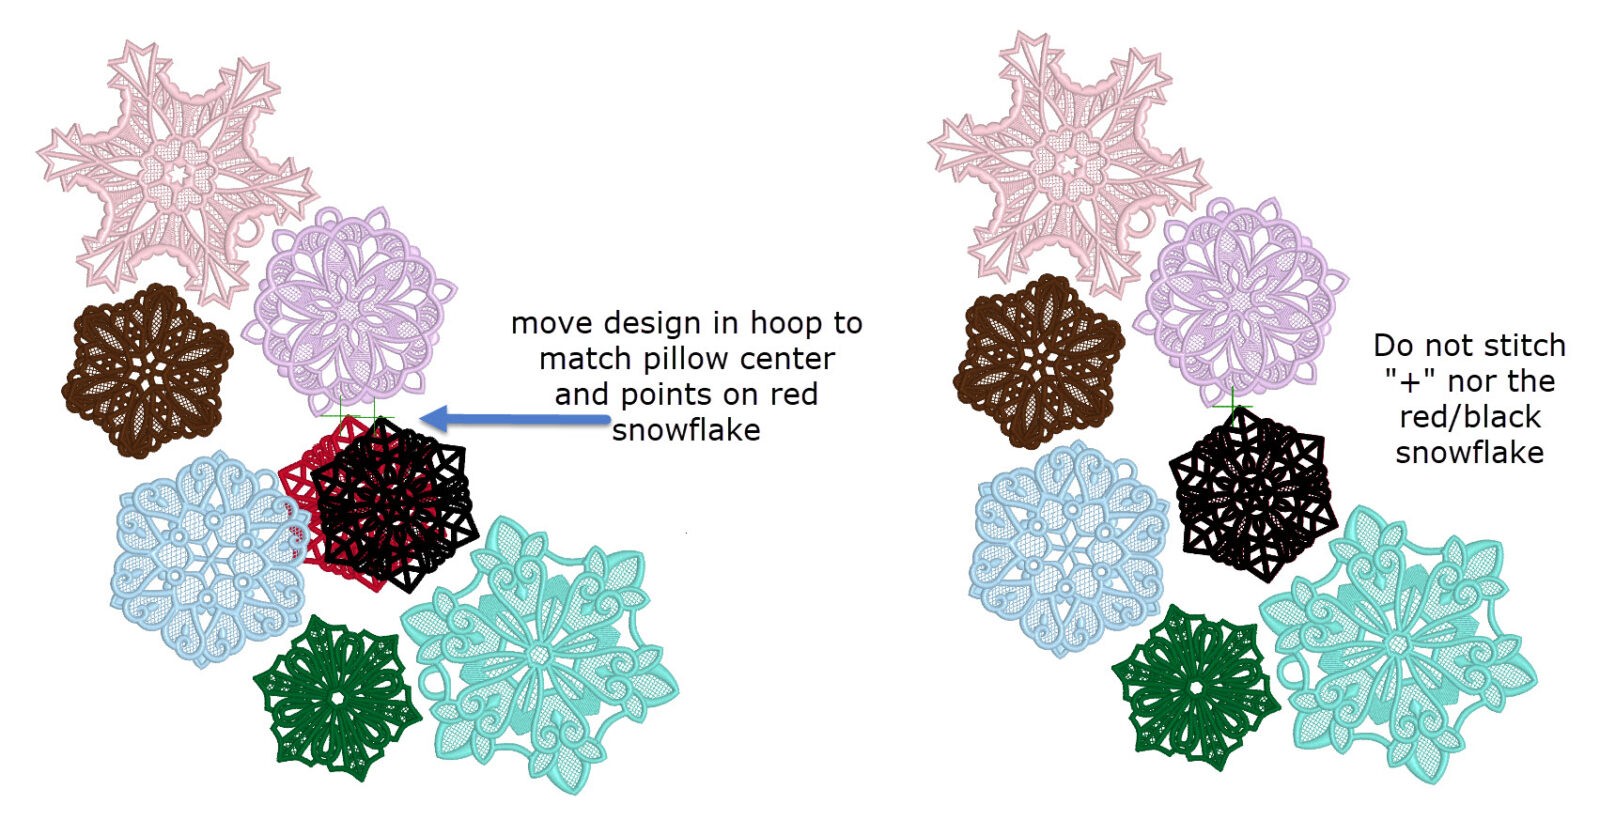
The red snowflake appears in both segments and will serve as a guide in lining the two sections back together.
Change the original large layout to a single color. Add a large “+” to the layout using a line-block font centering in hoop, which also represents pillow front center. Save file.
With the single colored layout in the work space, open the top section and slide it right on top of the black layout, matching all points.
Add the “+” on top of the original one. When the colored layout matches exactly, delete the black snowflakes, which leaves the colored snowflakes along with the center marker. Combine and re-save the file, now with a pillow front center marker.
Return the black layout to the work space and repeat the process for the bottom section.
Thread colors can be used in large layouts to trigger steps. For example, my layout has pastel colors for snowflakes that I want to begin stitching with Sliver™ Metallic thread. “+” signs were changed to black reminding me not to stitch out, but only use as a locator for the pillow front center. I also changed the red snowflake to black in the bottom group because it, too, is just to be used in matching the two groups and not to be stitched.
Divide the pillow front into quarters and mark with hand-basted stitches. Secure a single layer of Sulky Soft ’n Sheer Stabilizer in the hoop, making it as tight as a drum as possible. Lightly spray the pillow front with KK 2000 and press firmly in place after matching machine needle position to the centered “+” sign.
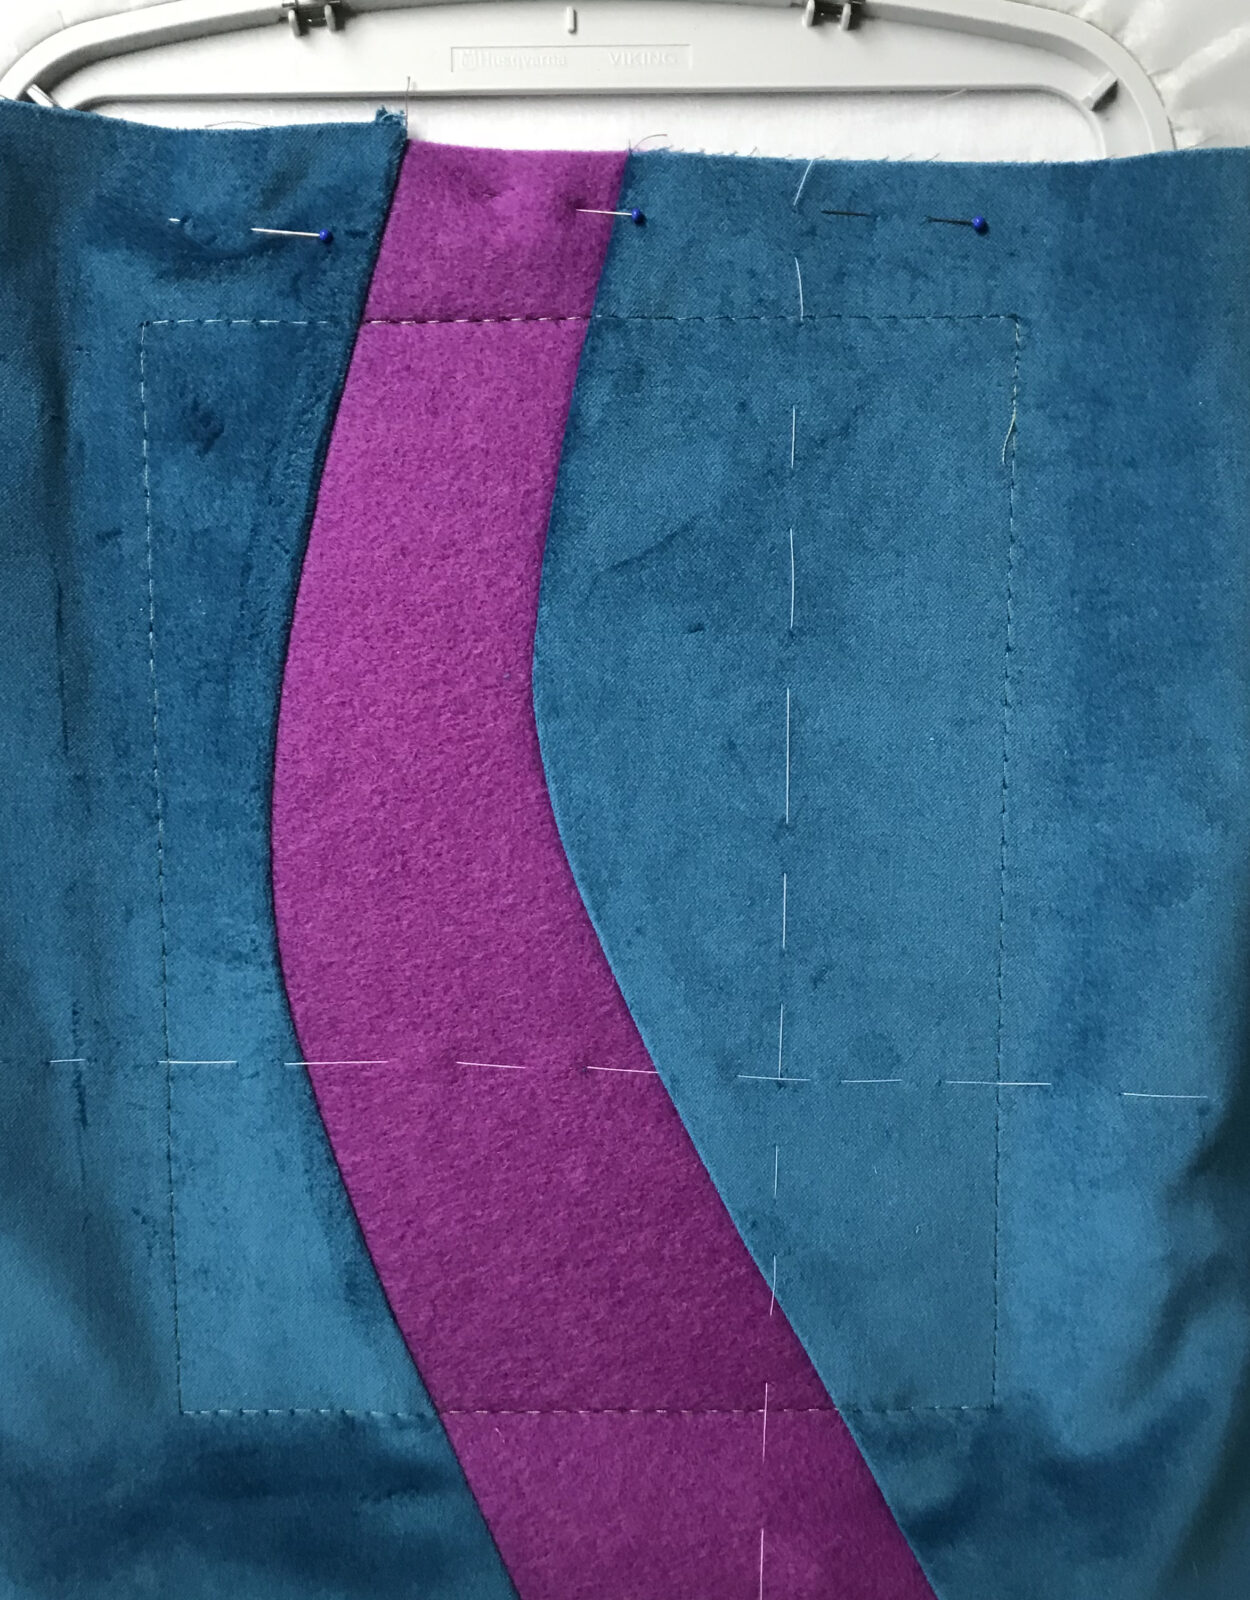
The intersecting hand-basted lines will not match hoop’s center because the embroidery design flows across the front from upper left to lower right rather than being centered on the front.
Only remove hand-basted stitches that will interfere with the snowflake being embroidered. Leave as much of the basting intact. Remove excess stabilizer before going on to the next hooping. If need be, steam-press the embroidered fabric face down into a thick terry towel.
Finishing
When all the snowflakes are embroidered, and excess stabilizer removed, re-cut the embroidered pillow front to a 15” square. Use the remaining hand-basted line to locate pillow center. Measure over 7 ½” to one side.
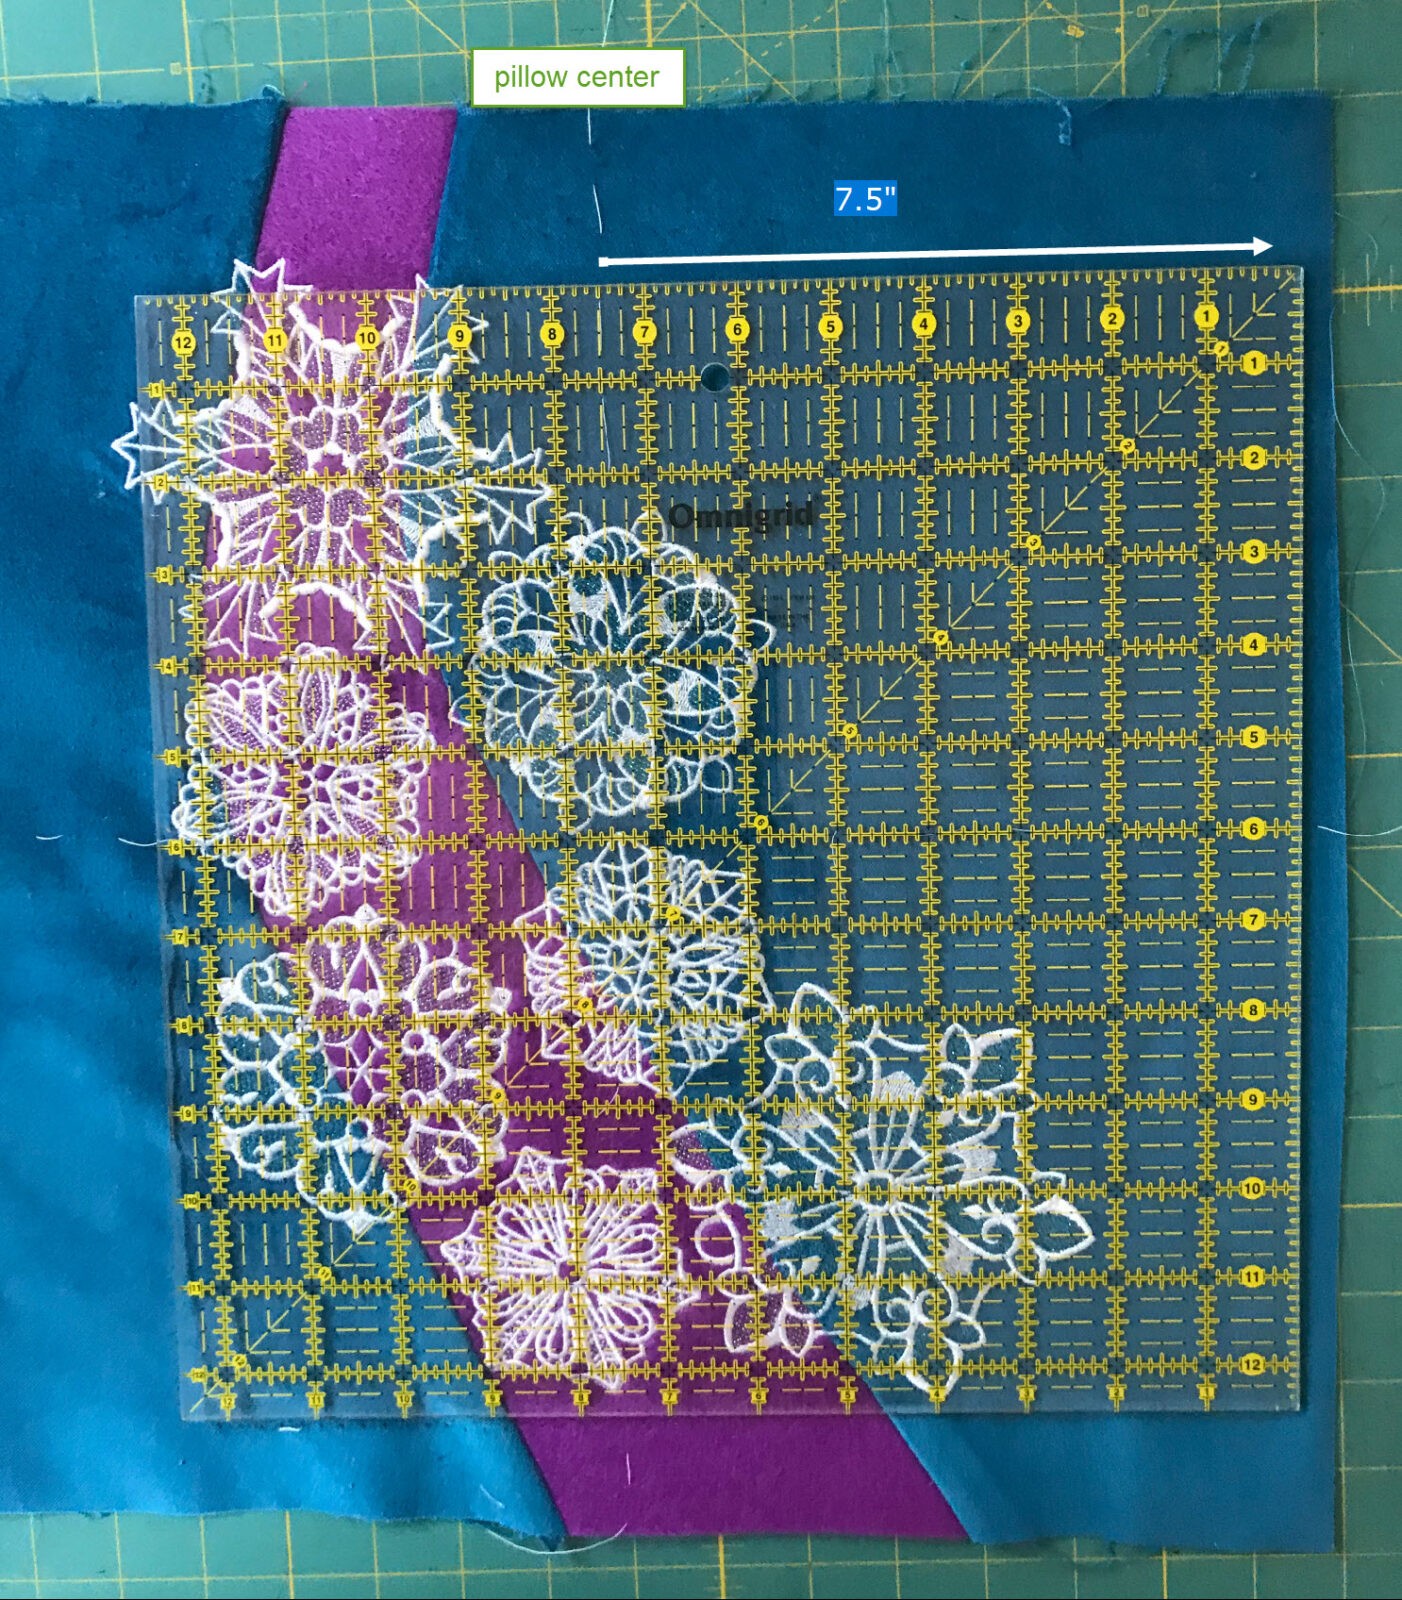
Straight cut that side. From this cut line, measure over the full 15” and make the second cut.
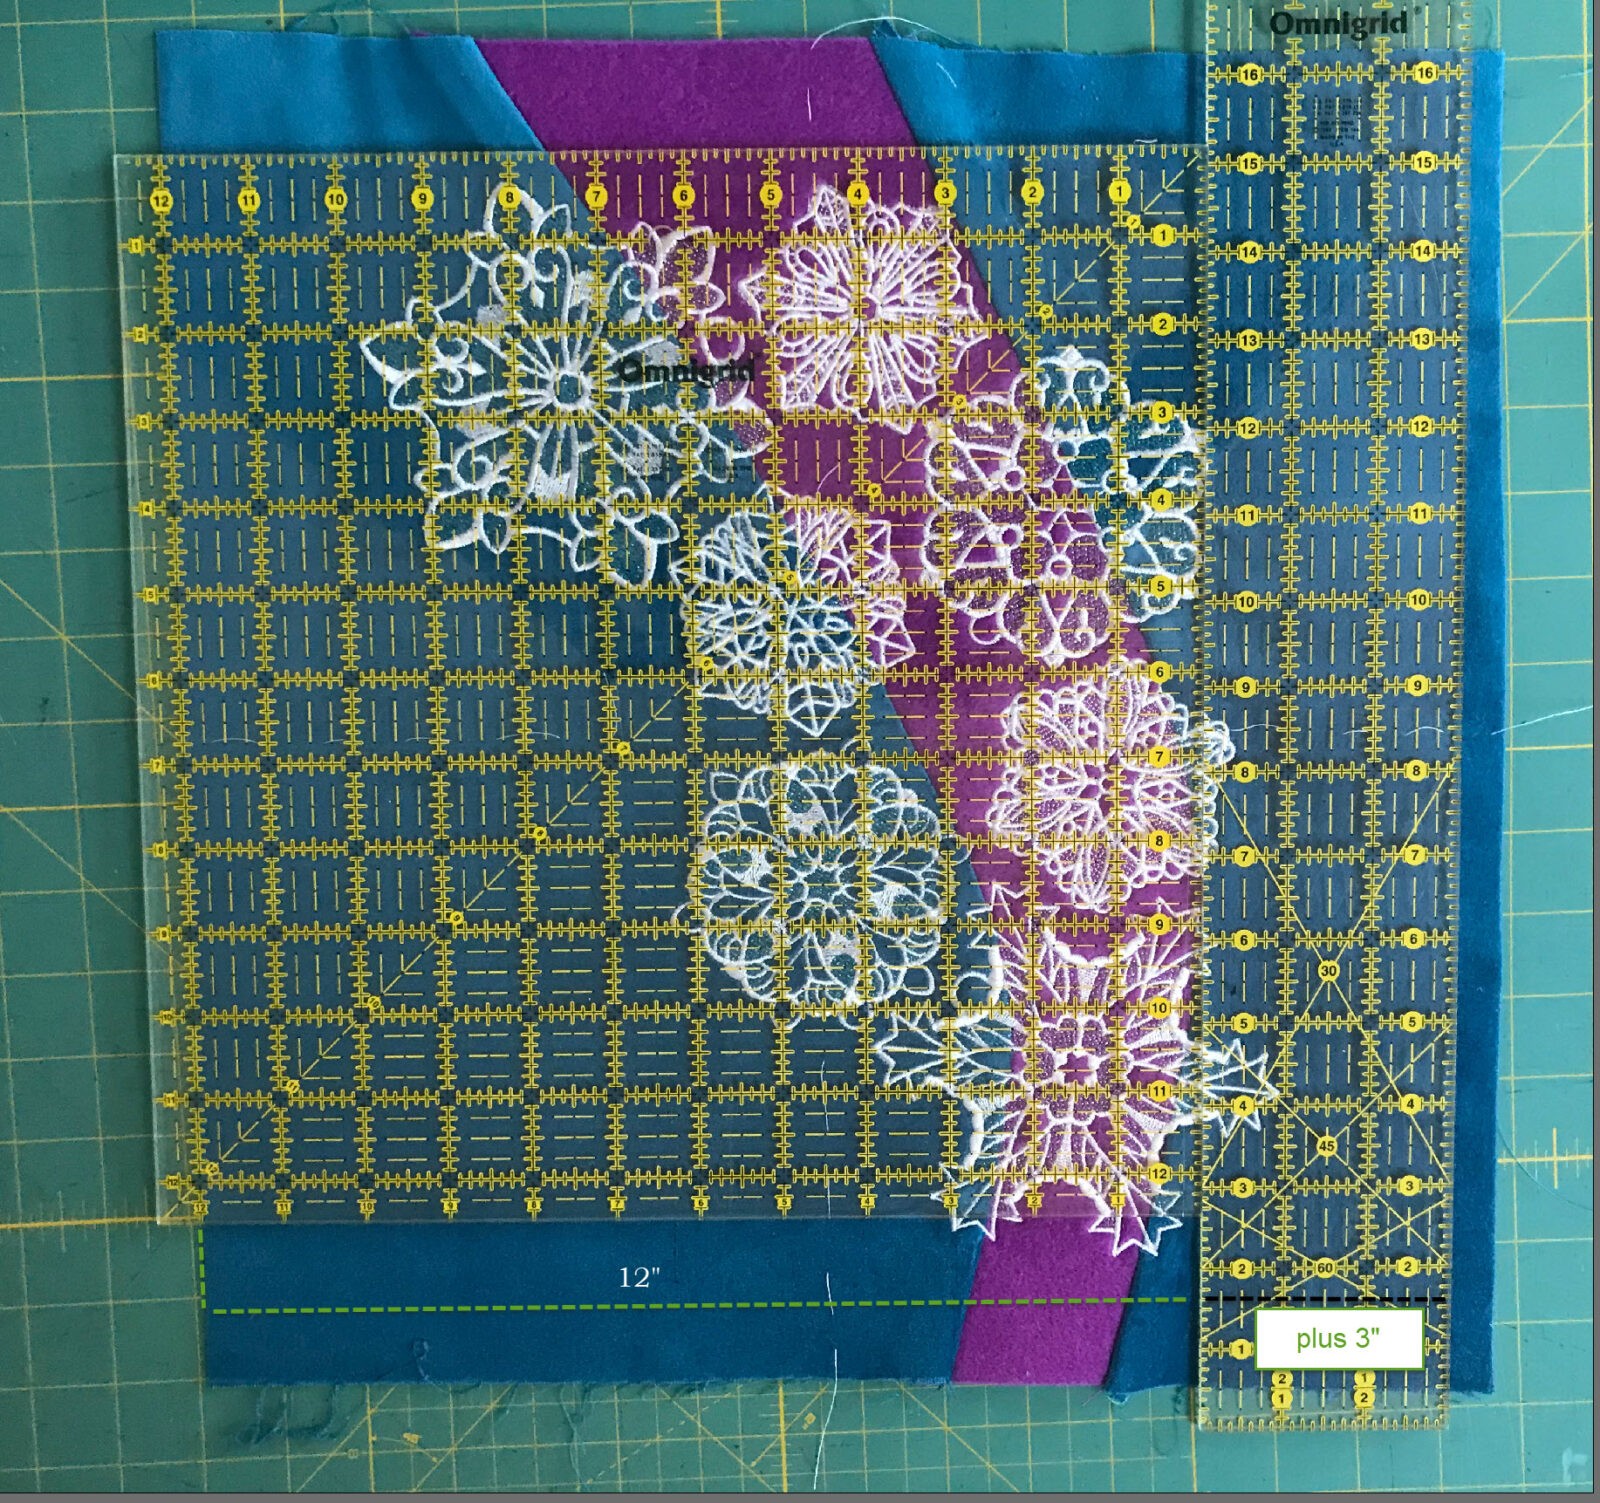
Repeat this process for the top and bottom edges.
For the pillow back, over-edge stitch the top edge of the 8” panel. Then, hem the bottom edge of the 10 ½” panel.
With right sides together, stitch the larger back panel to the pillow front, facing the hemmed edge towards center. Stitch with a ½” seam. Add the 8” panel facing the finished edge towards the center. It will overlap the top panel.
Press seams, clip corners diagonally, and turn right side out.
If making tassels, cut eight 11” lengths of cording. Fold in half and unravel to make a fluffy tassel.
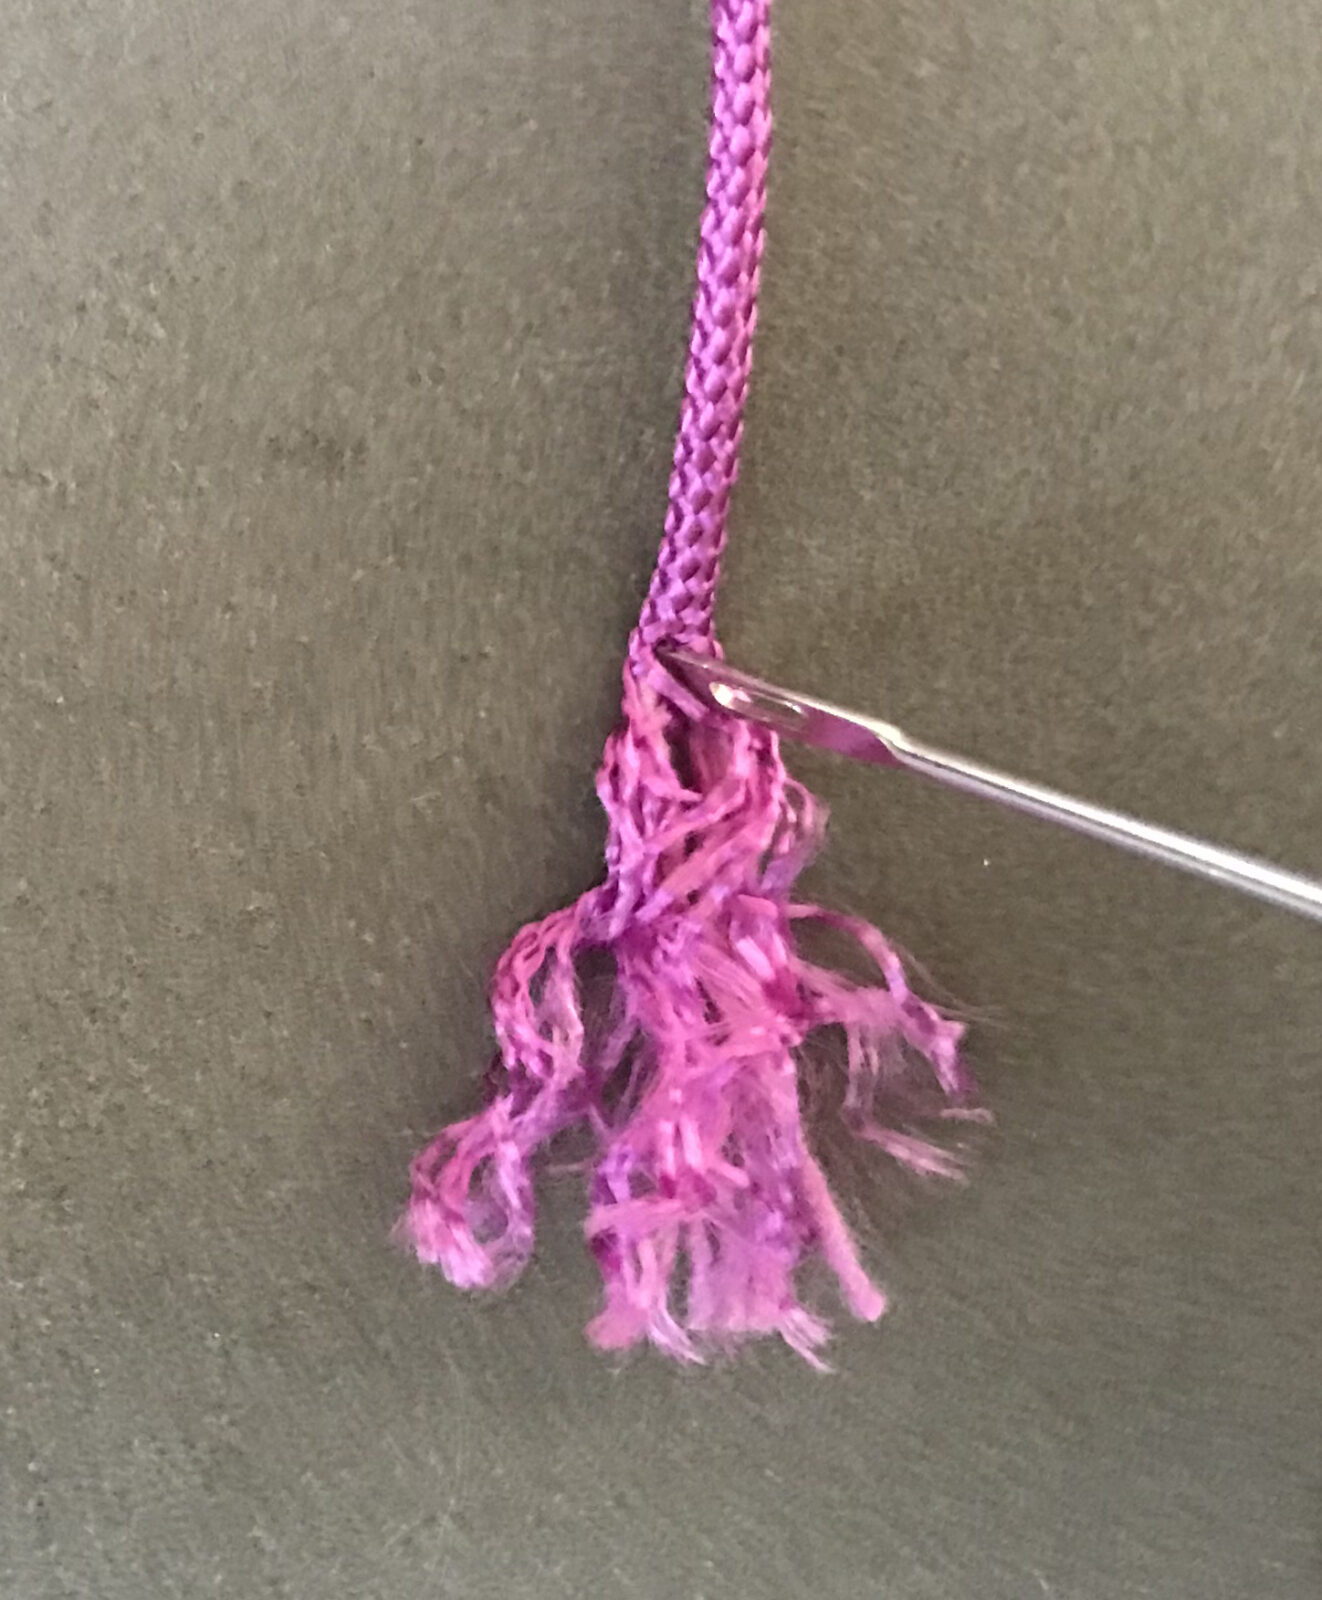
Pull threads from another length of cord to tie the tassel tops. Then, tack tassels to each corner.
All done! Now display your beautiful embroidered pillow until we meet again!
Key for stitching Snowflake Design
Light and Lacy Snowflake Collection From Embroidery Library
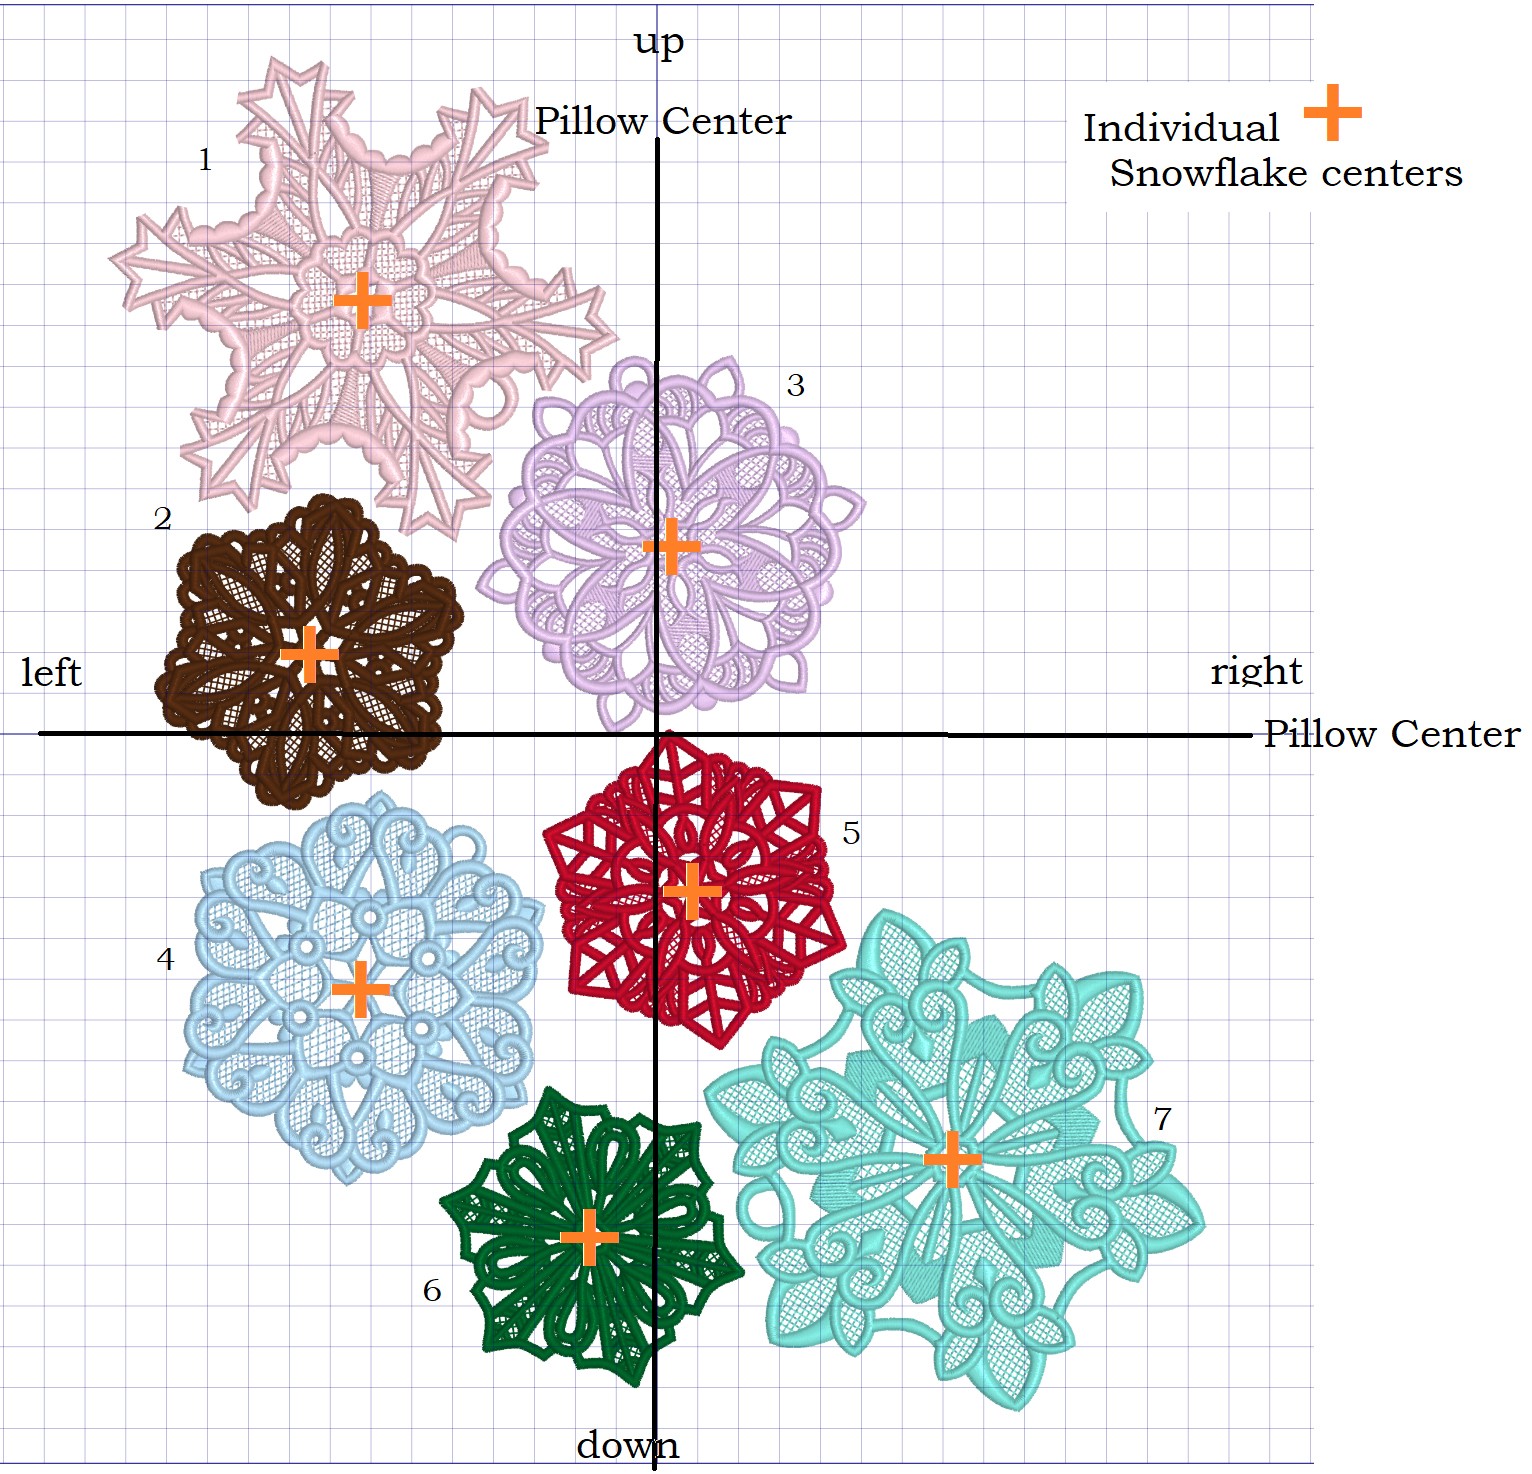
All Measurements begin at the center of the pillow, intersecting lines that divide the 16” square into quarters
Snowflake #1-9015 from collection 9367 – 4⅛” up and 27/8” left
Snowflake #2-16350 from collection 13735 – ¾” up and 2¼” left
Snowflake #3-6275 from collection 2764 – 2” up and ⅛” right
Snowflake #4-6271 from collection 2764 – 2¾” down and 23/8” left
Snowflake #5-16347 from collection 13735 – 1½” down and 3/8” right
Snowflake #6-16338 from collection 13735 – 47/8” down and ⅝” left
Snowflake #7-9006 from collection 9367 – 4” down and 27/8” right

This pillow is beautiful.
Thank you. It was really a fun project!
I love this pillow! I will change the colors to fit in with my decor, but I just love,it! Thank you so much for sharing the idea and pattern with us!
Where can I get the patchwork templates for the snowflake embroidered pillow. Thank you. The pillow is very pretty and I have the snowflake designs already.
Hi Agnes! We are working on getting the templates up right now. I will inform you when those are up! Sorry for the inconvenience.
Hello – love this pillow – the template link does not seem to be working. How can I get the pillow template?
It should be working now. If you’re still having trouble please email patti.lee@sulky.com.