Start Your First Machine Embroidery Project!
by Pamela Cox
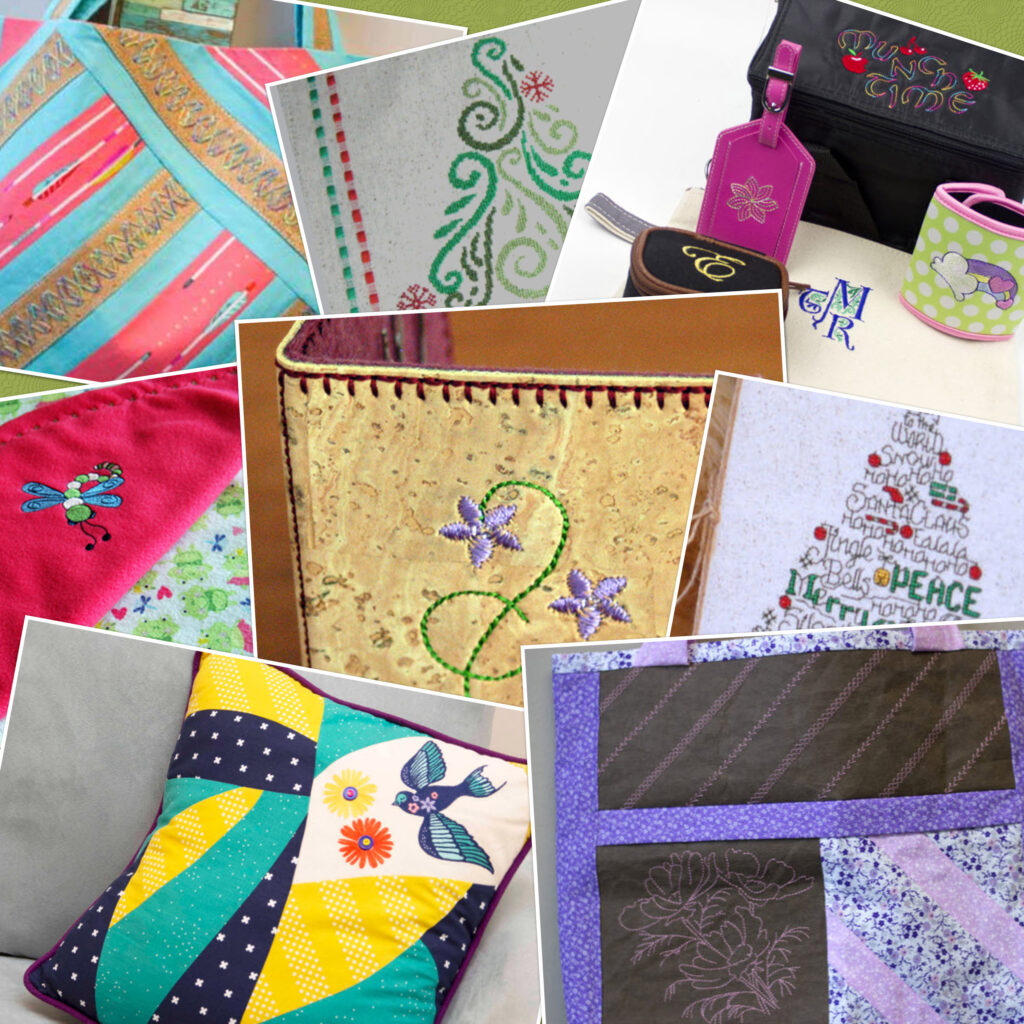
It’s time to start your first machine embroidery project to wrap up National Embroidery Month! We’ve covered how to start adding machine embroidery techniques into your sewing repertoire, and we’ve defined the must-know machine embroidery terms. Now it’s time for the fun stuff–embroidering that first project.
WHERE TO FIND MACHINE EMBROIDERY PROJECTS
The internet is a veritable salad bar of sewing, quilting and machine embroidery projects. How do we know which ones are good for beginners?
- Narrow your search by being very specific. What do YOU want to make (think small, and go bigger once you’ve had more practice.)? Do you want to add embroidery to a purchased T-shirt? How about adding machine embroidery to a tea towel?
- Go to a reputable source (ahem, Sulky) for your first project instructions. You want to have success, and starting with a company that specializes in machine embroidery and machine embroidery projects is your best bet for desired results. Visit the Sulky Free Project page for lots of ideas!
- Give yourself a break. This is your first machine embroidery project, and if you expect it to be perfect you may have disappointment. That being said, your end result could very well be perfect! Just don’t have high expectations at the start, and know where to go (ahem, Sulky) if you need additional guidance throughout the project.
- Create Pinterest boards of machine embroidery projects you want to make and categorize them by type for easy reference.
- Decide on the machine embroidery design for the intended project. Make sure to choose a design that will fit in the intended space for the machine embroidery embellishment (see “Sizing the Chosen Machine Embroidery Design” below).
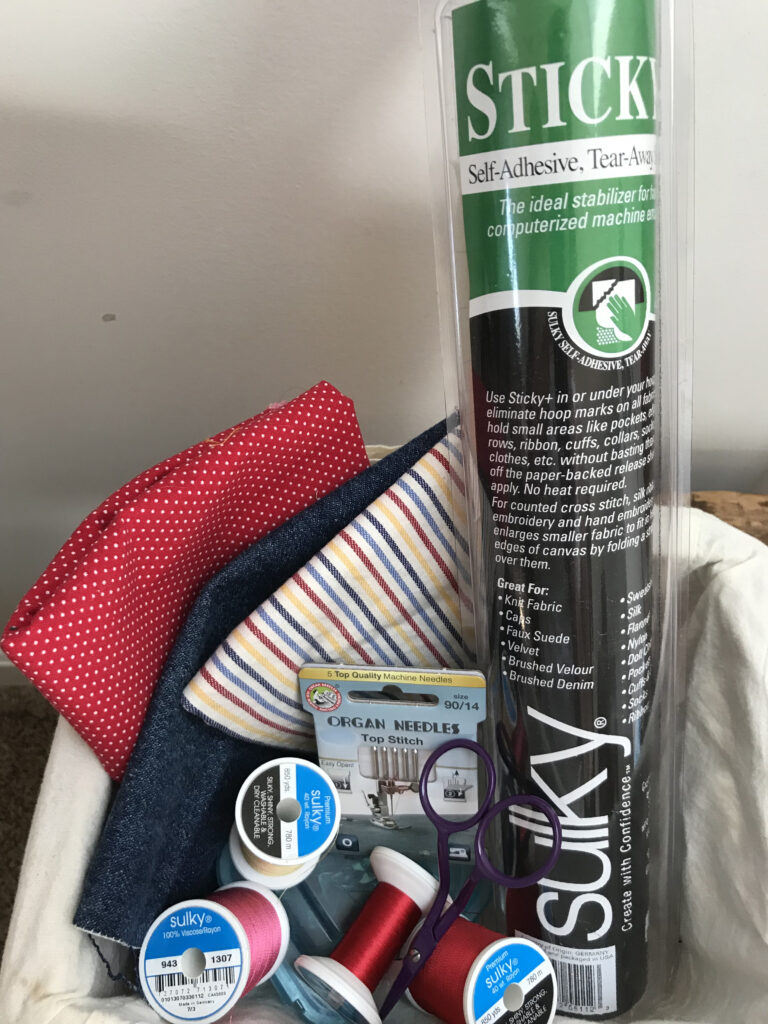
Once you’ve decided on the first project you want to make, it’s time to gather the supplies you need to make it happen.
FIRST STEP FOR MACHINE EMBROIDERY PROJECT
Place all the supplies for the project in a location to keep them together until the project is complete. Fabrics that can be should be pre-washed and dried to allow for shrinkage as well as removing sizing chemicals necessary during the manufacturing process.
SIZING THE CHOSEN MACHINE EMBROIDERY DESIGN
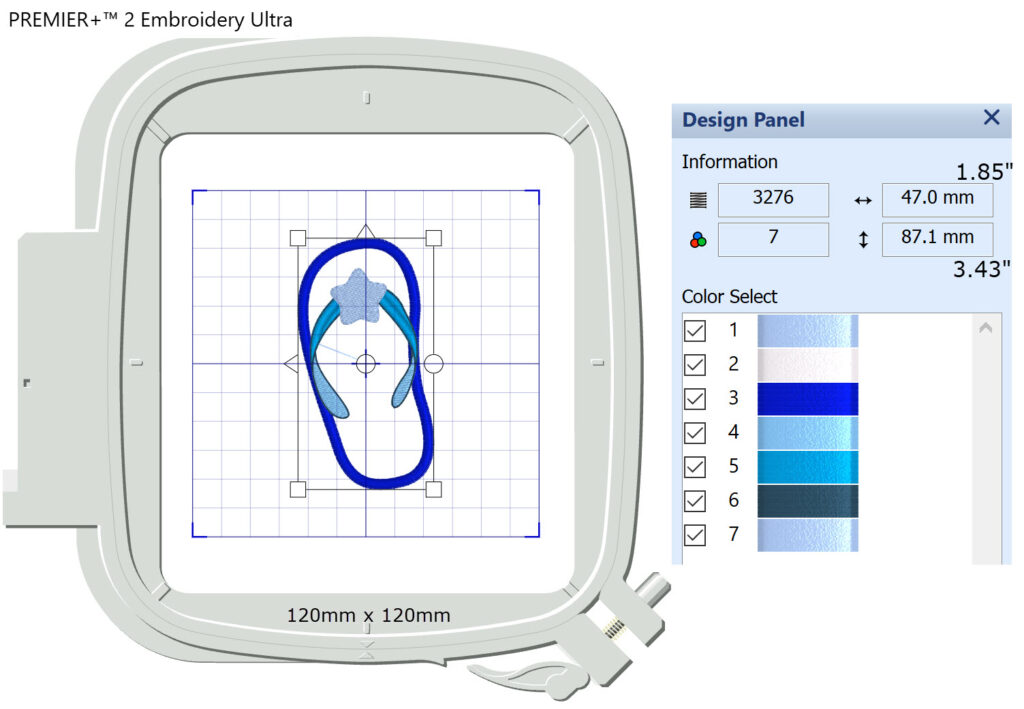
Know the chosen embroidery design size (both height and width). If needed, resize the design to fit the intended placement on the project.
 Metric measurements don’t always translate conveniently into an even inch amount. Feel free to round out decimal points to the nearest fraction.
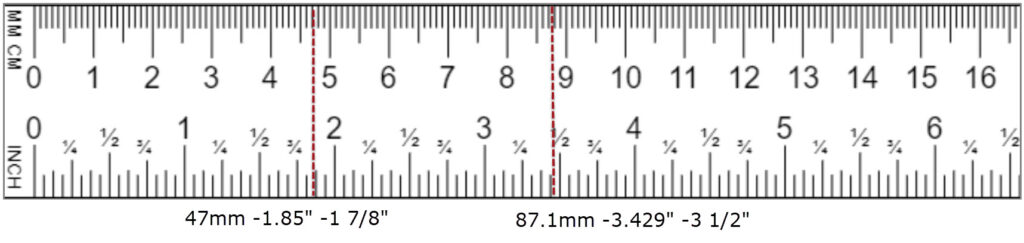
DESIGN PLACEMENT FOR FIRST PROJECT
Plan the design placement before stitching begins. If working with a pattern, make sure the design fits within the seam allowance with enough clearance so the stitches aren’t caught in any seam.
There are many “placement aids” that can help achieve perfect machine embroidery placement. 
Many of the more expensive embroidery machines offer an “exact placement” function right on the embroidery machine. 
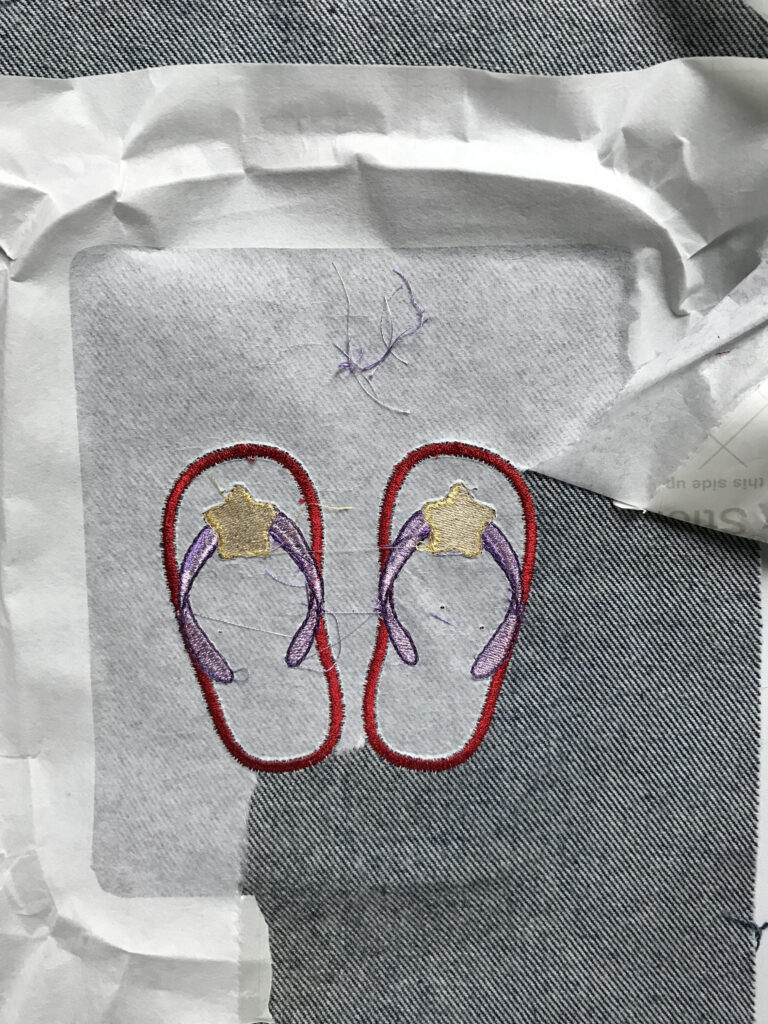
If you have machine embroidery software, and it allows, print a template of the design to aid in positioning it onto the fabric.
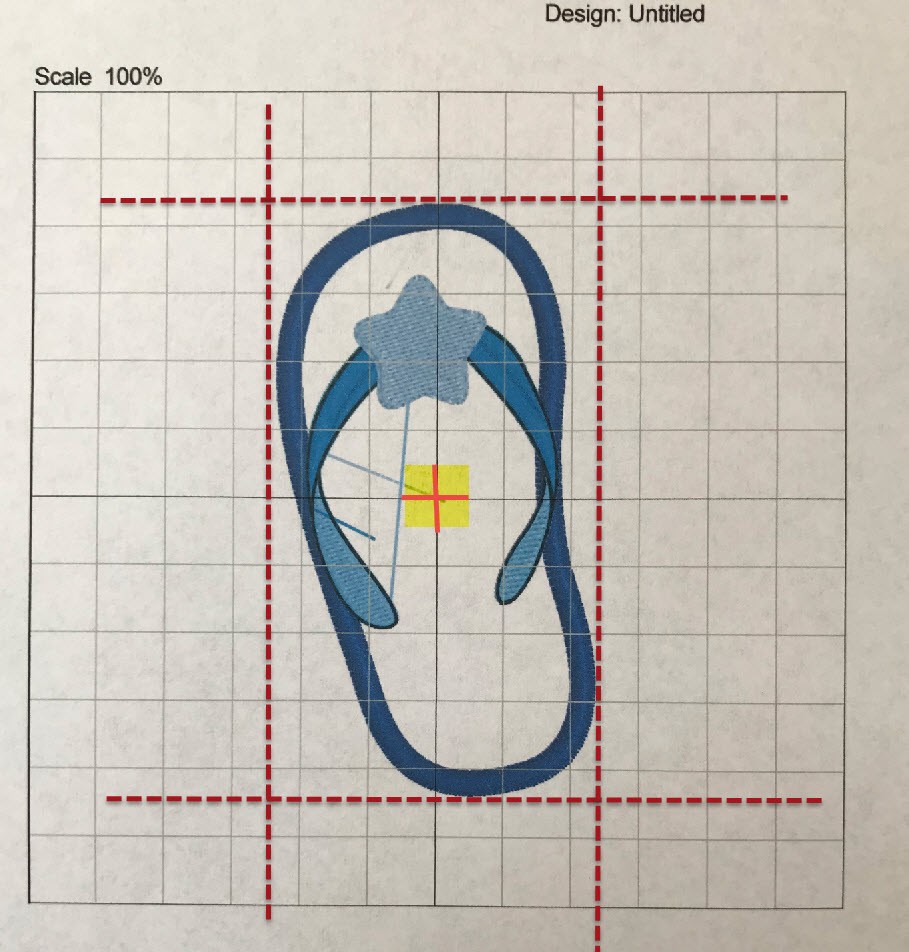 Trim paper close to design’s edges for a more realistic view of how the design will appear on the fabric.
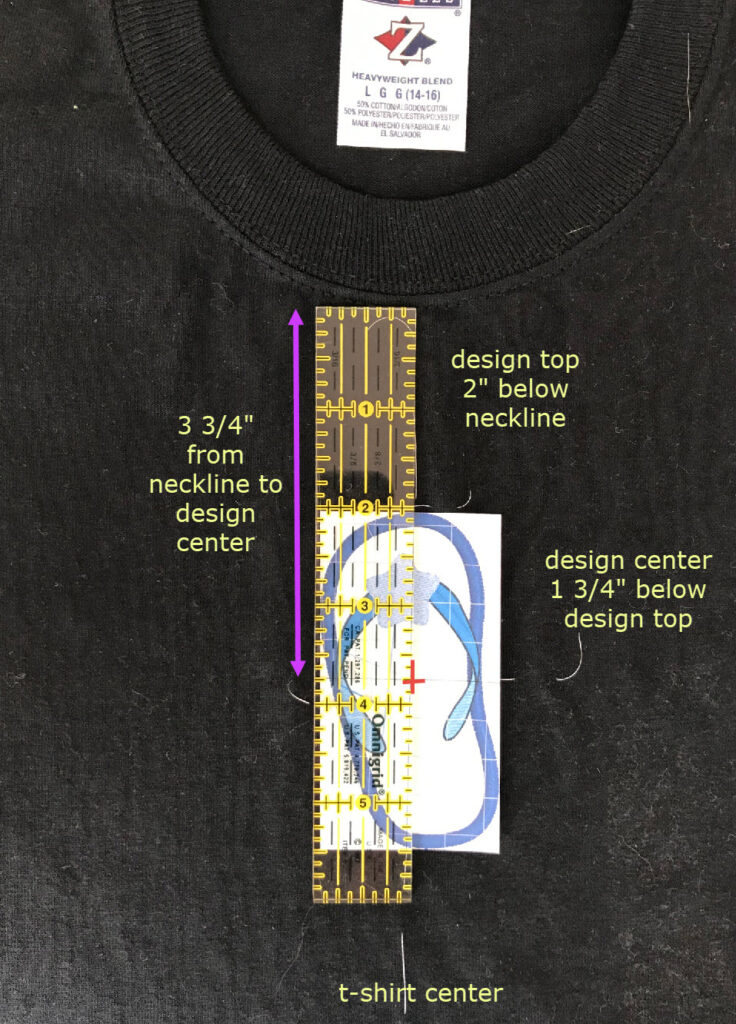
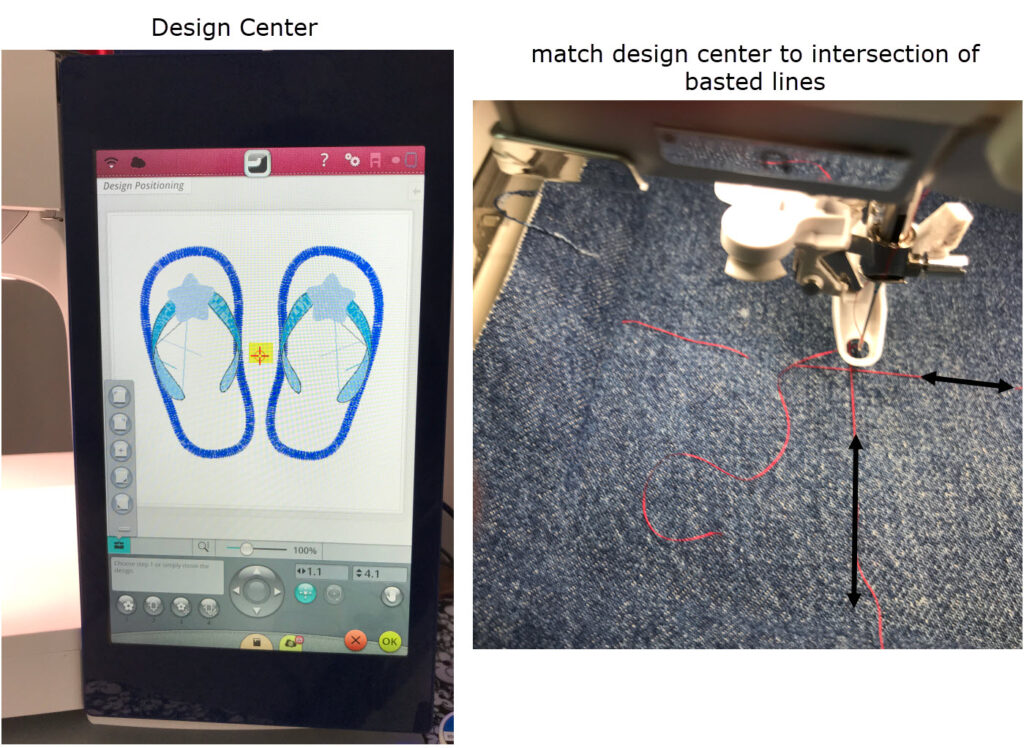
Although placement aids certainly are quicker, basic mathematics, a ruler, and hand-basting stitches is all you really need to accurately position designs. Begin by basting a line down the center of the T-shirt, garment or fabric, dividing it in half. Baste another line to indicate where the embroidery upper edge should be. Using the flip-flop design as an example, measure down from the upper-edge line 1¾”, which is half the design height. For the featured T-shirt sample, the design will be centered on the T-shirt front 2” below the neckline.
If the design is intended for the T-shirt shoulder, measure over from the T-shirt center where the side of the embroidery is desired, add half of the design width (15/16”) and then baste a line. Measure down 1¾” from the design upper edge. 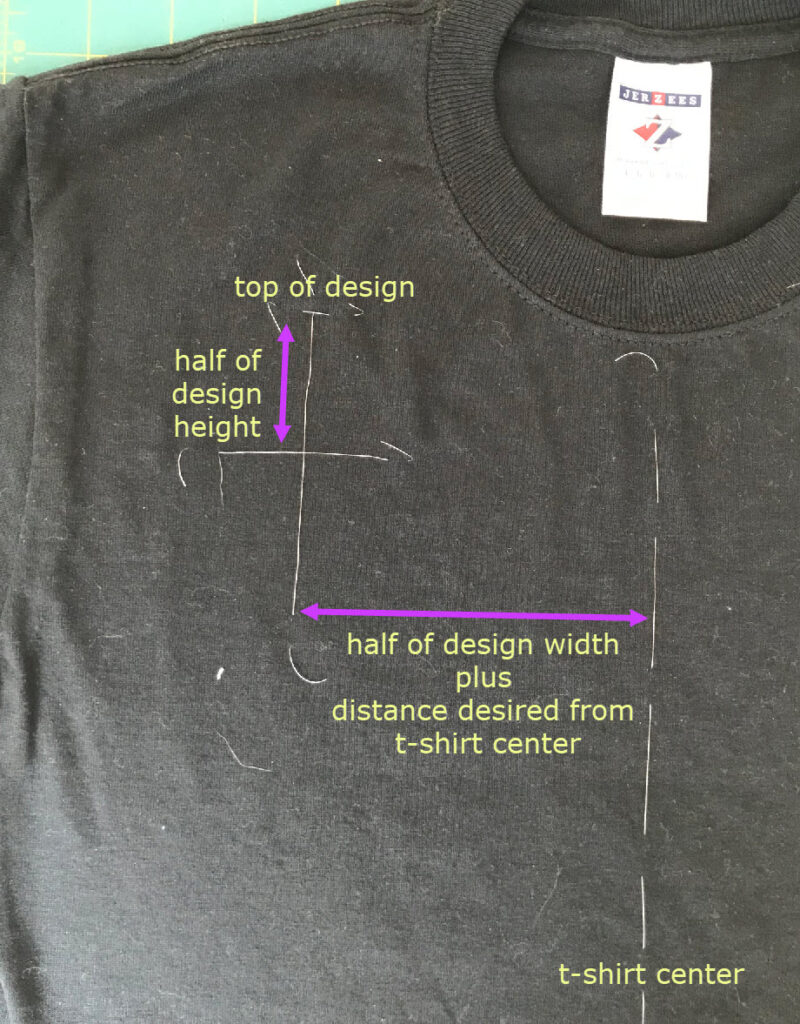
Refer to the Sulky Blog “How to Achieve Perfect Design Placement” for more detailed information.
HOOPING THAT FIRST PROJECT
A quality stabilizer is the key ingredient in hooping. Depending on the fabric choice, either the fabric is hooped with stabilizer, or only the stabilizer is secured directly in the frame of the hoop. It is then pulled as “tight as a drum,” with the fabric secured to the stabilizer with Sulky KK 2000™ or by using an adhesive backed stabilizer, such as Sulky Sticky +™.
Choose a stabilizer based on the fabric weight, thread weight and technique you’re doing. Consult the Sulky Stabilizer Selection Tool for great guidance. You want the stabilizer to be supple enough not to affect the drape of the fabric, making sure it’s easily removed if desired. 
If not hooping the fabric or garment, match the design and hoop centers to the hooped stabilizer by one or more of the following methods:
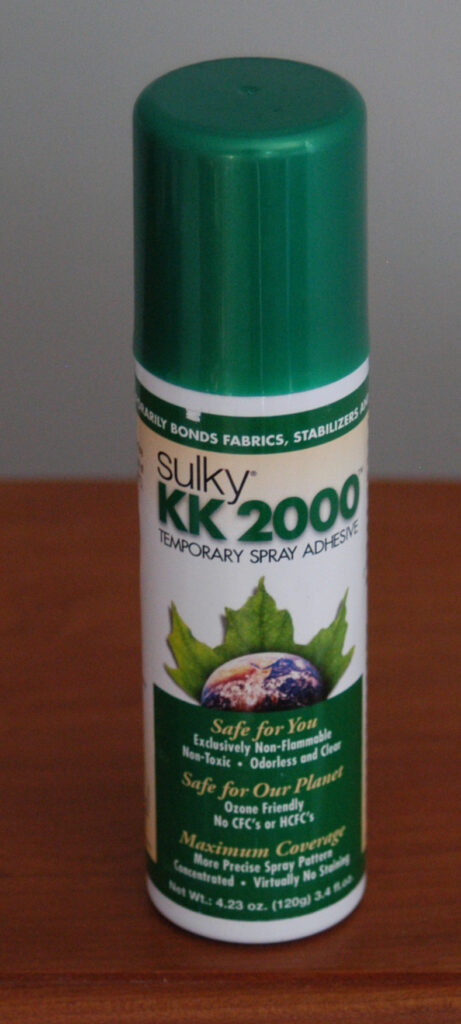
- Lightly spray the wrong side of the fabric with KK 2000™ Temporary Spray Adhesive and firmly press the fabric to the stabilizer.
Securely pin the fabric to the stabilizer beyond the embroidery area.
Use the baste-in-the-hoop function, if available.
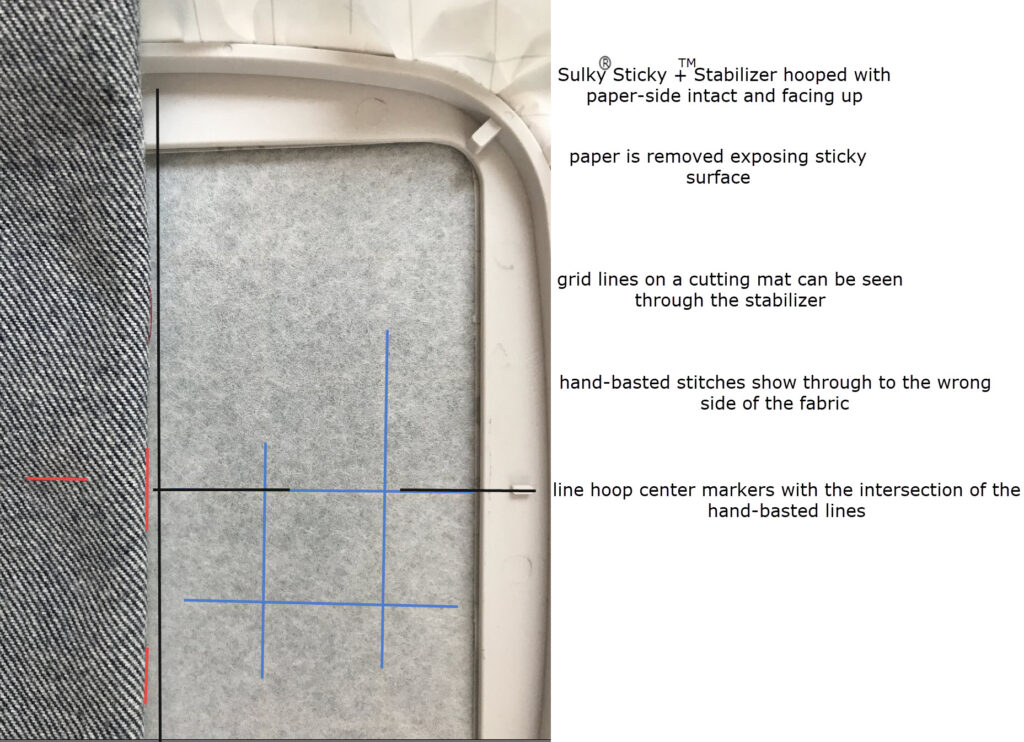
- Select Sulky® Sticky +™ stabilizer. Hoop the stabilizer only with the paper side facing up. Score the paper within the inner hoop ring, and then peel away the paper backing to reveal the adhesive. Place the fabric or item onto the stabilizer, centering the design area.
SEWING MACHINE SET-UP
Set up the sewing machine with a new, sharp Organ Embroidery or Top Stitch needle. Both offer a larger eye which will reduce the friction on the thread as it passes through. It is important to match the machine needle size to the task by evaluating the fabric weight, type of thread and the density of the embroidery design.

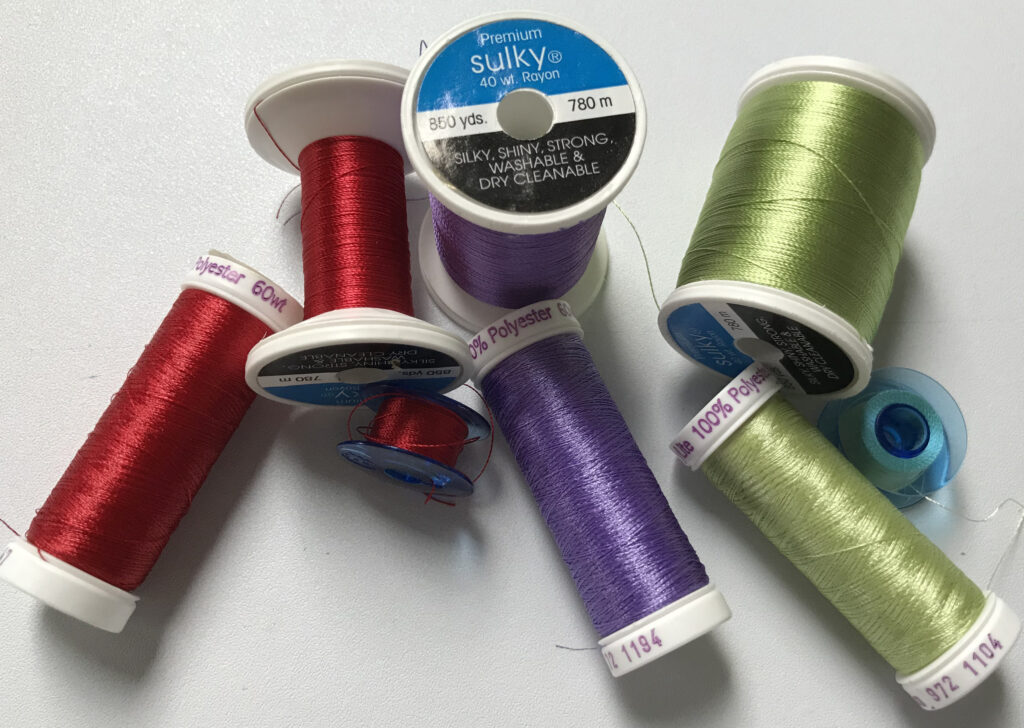
40 wt. Rayon thread is the most widely used thread for machine embroidery. For beautifully embroidered designs, use a matching shade of Sulky PolyLite™ in the bobbin to ensure that any bottom threads that might show on the surface during the stitching process won’t be noticeable on the fabric surface.
Slide the hoop into the arm of the embroidery machine. Match the center needle position to the intersection of the two hand-basted lines marking the design center position.
MACHINE EMBROIDERY BEGINS!
Embroider the design. Although embroidery machines can operate at very high speeds, reducing the speed at least by half saves wear and tear on the machine and reduces friction on threads. Monitoring the stitchout helps catch any minor issue before it becomes a major one, and allows you to trim jump stitches from the surface before the next color is stitched. 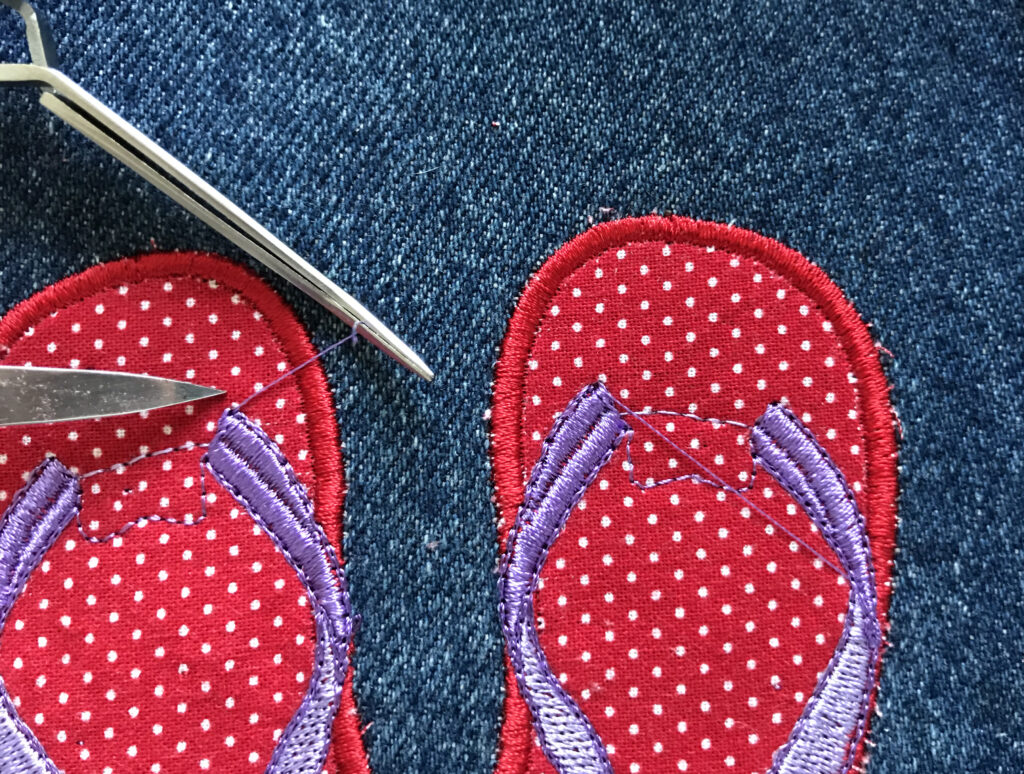
REMOVING STABILIZER FROM FIRST MACHINE EMBROIDERY DESIGN
Once the embroidery design is complete, remove it from the hoop. Remove the excess stabilizer and trim jump threads from the wrong side. Press the embroidery right side down in a thick terry towel to preserve the stitching depth.
This cute flip -flop applique is now ready to become the focal point on a patchwork beach bag. Finish constructing the project according to the pattern or instructions, being mindful of the design placement.
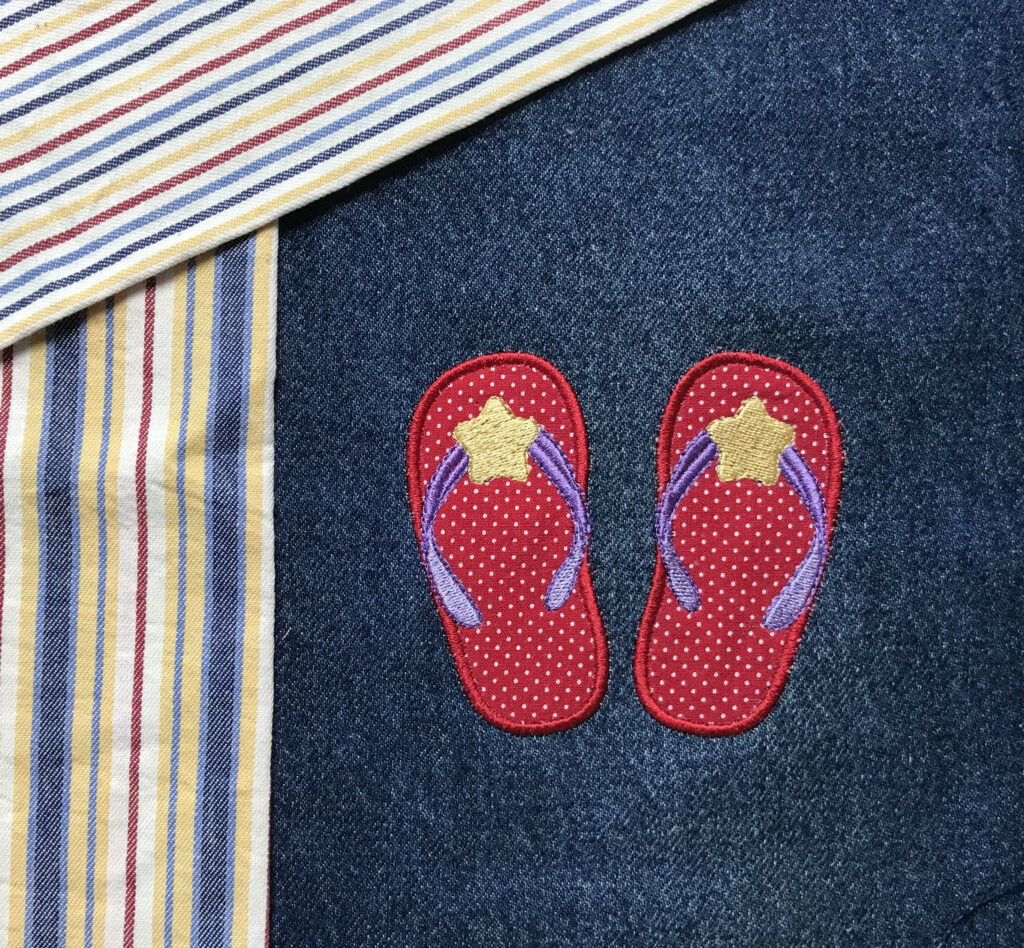

Really cute designs. What brand are the striped fabrics shown with the examples. They go so well with the denim.
Unfortunately Pamela says she does not remember where she got that fabric from, as she purchased it a while ago. I’m sorry!
Really very beautiful designs. I love your blog and designs
Thank you so much for sharing such a blog!