
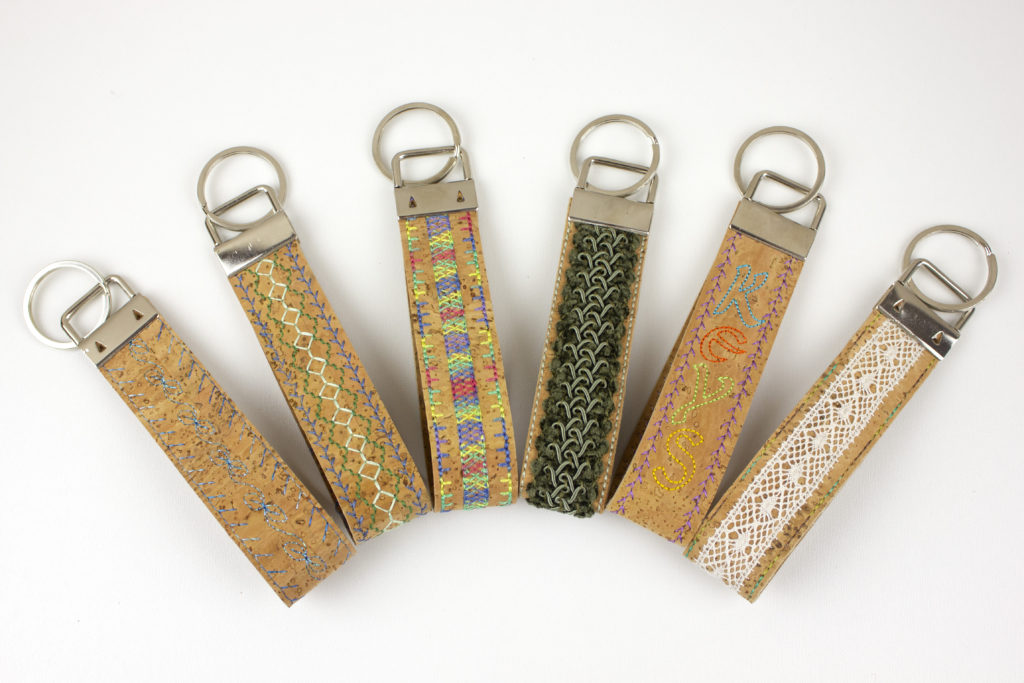
Machine Embroidered Cork Key Fobs
By Pamela Cox
Making these machine embroidered cork key fobs were quite easy (and fun!). Cork Fabric is one of my top favorite materials to stitch on! It cuts easily and the edges do not fray. It also easily feeds through a sewing machine, allowing a true seam to be stitched, and it even accepts machine embroidery! Specific information about working with Cork Fabric can be found in Sulky’s Materials Blog Archives.
Key Fob Instructions
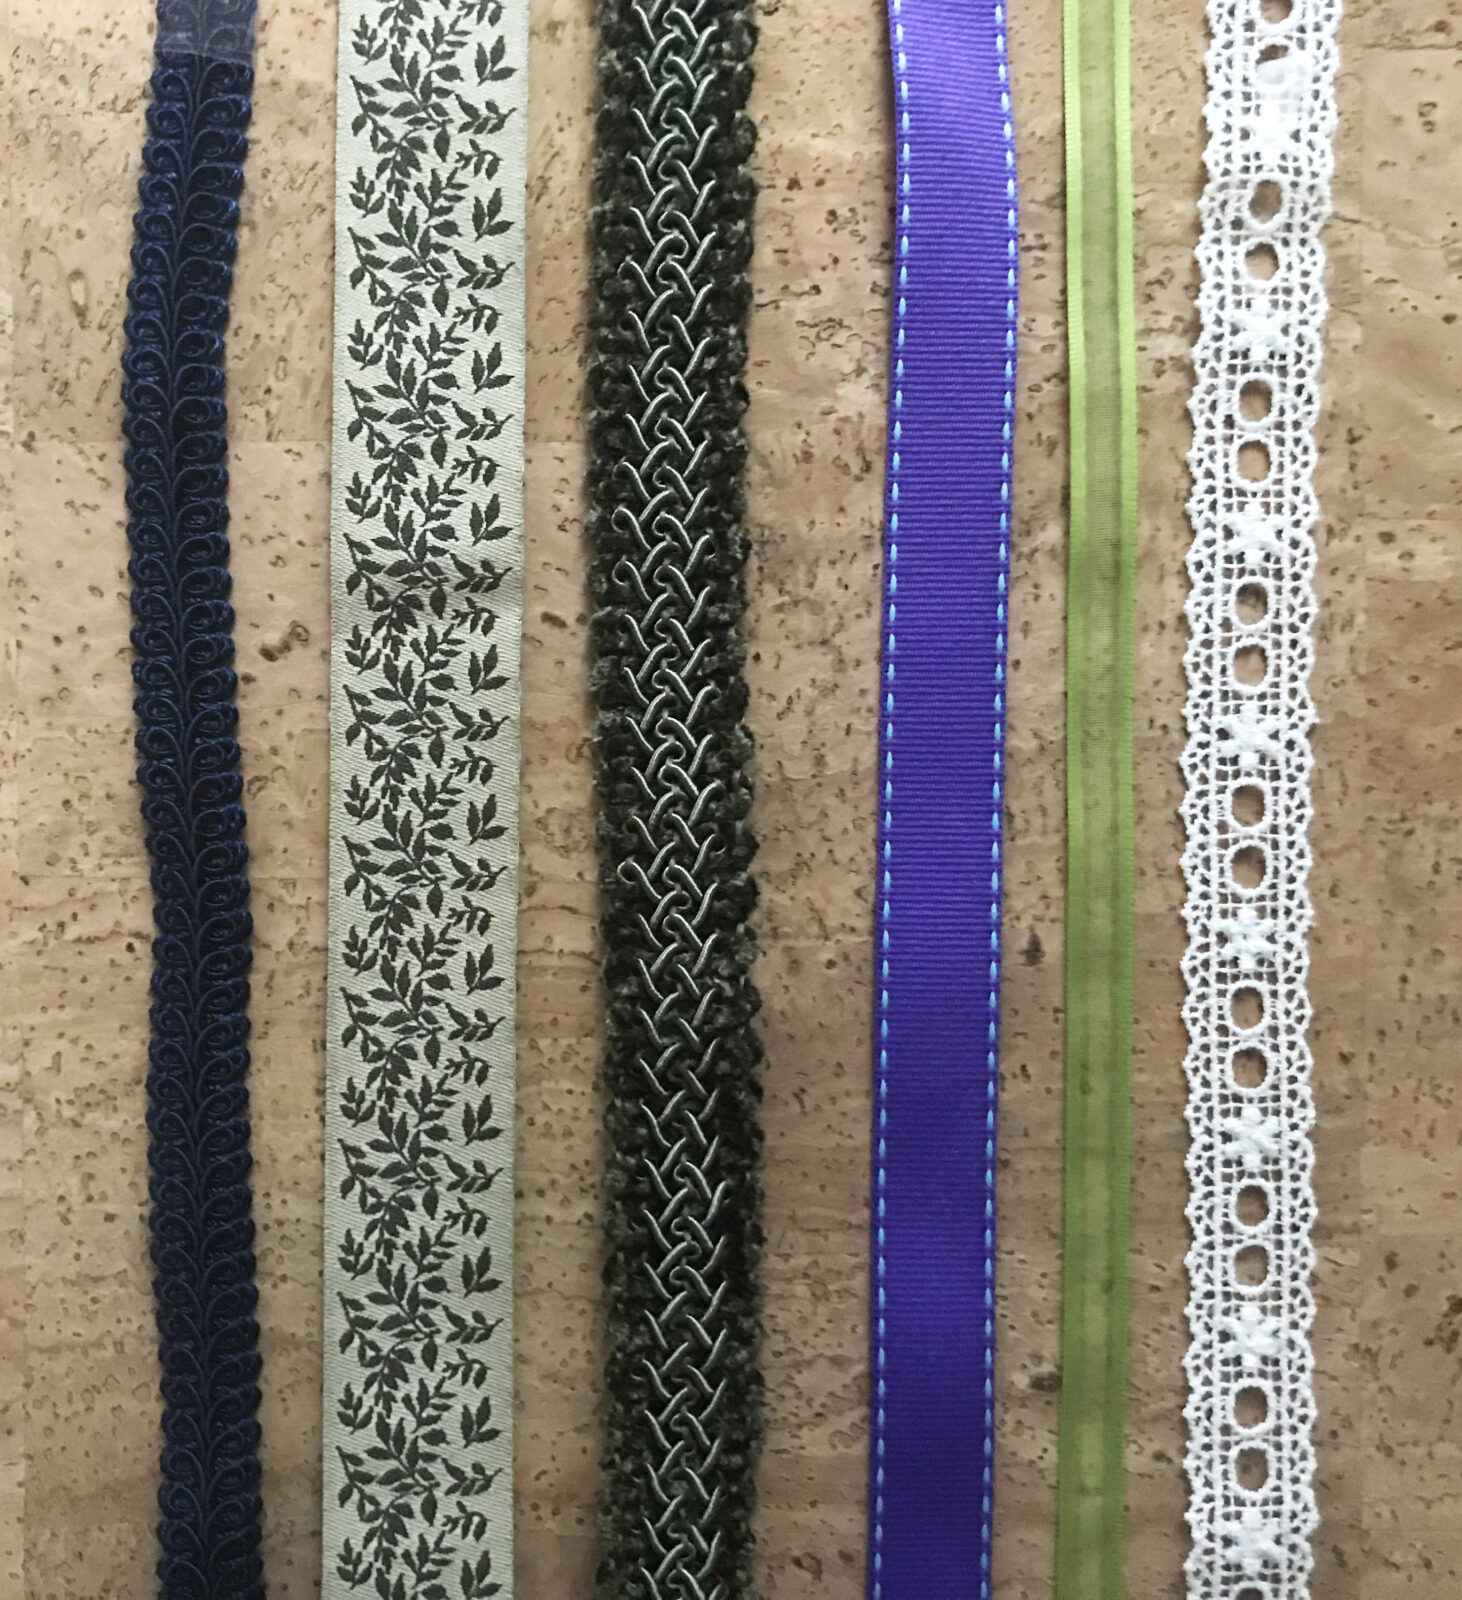
The basic concept is to embellish a strip of cork fabric, back it with another strip, trim, and add hardware! Yes, it really is that easy! It takes more time to plan how you want to decorate the key fob because the possibilities are endless and the creative juices will just start flowing! An interesting braid, ribbon, or lace can be stitched to the cork strip…
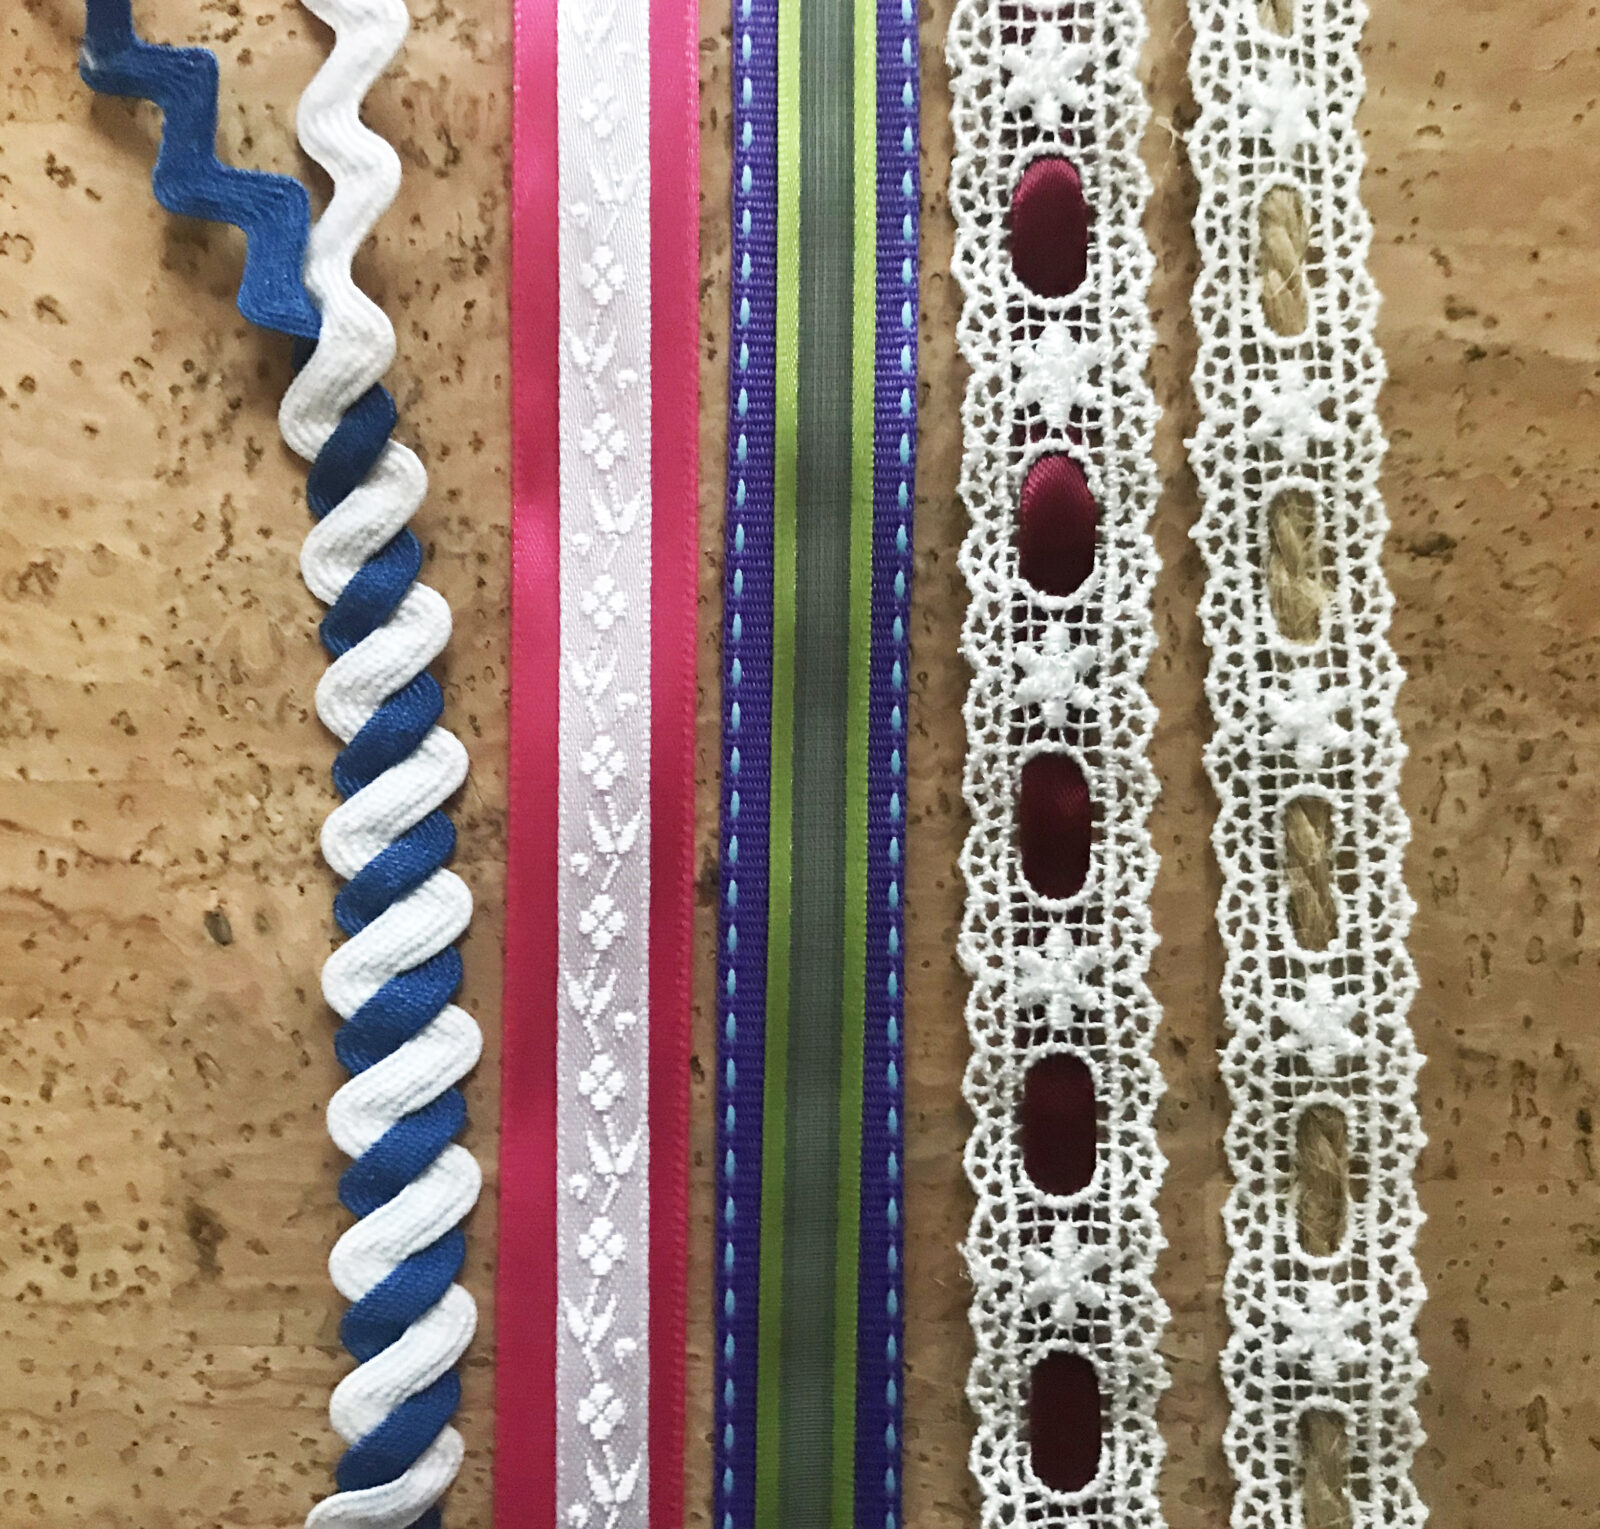
Or, twist together two colors of rick-rack. Or layer trims for the accent.
Built-in decorative stitches can also serve as striking center designs thanks to the diverse selection of threads available from Sulky®. Place the cork fabric on top of a piece of Sulky Tear-Easy™ stabilizer. After embellishing the fabric, gently tear the stabilizer away.
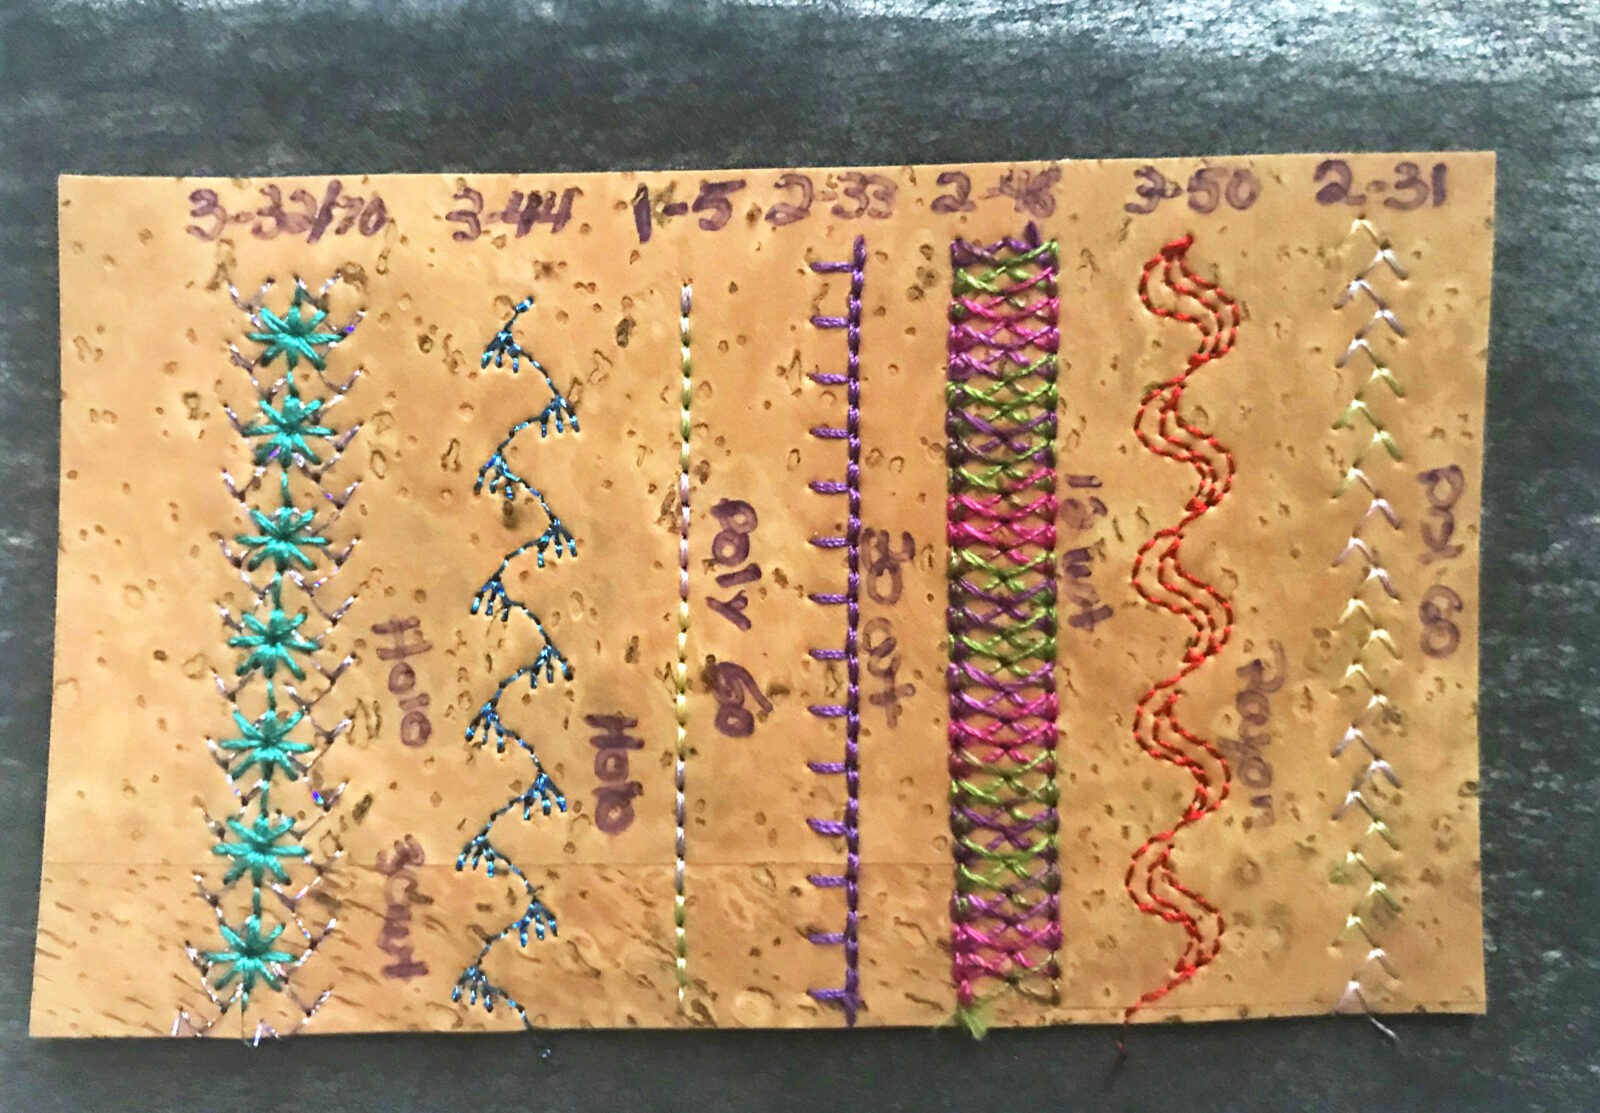
Have fun by first stitching a “sample”, experimenting with distinctive stitches in different thread colors and types.
Decorative stitches can also be layered as seen in the first sample row. One stitch was done in Sulky Holoshimmer™ Metallic Thread, topped with a second decorative stitch using Sulky 30 wt. Cotton Thread.
Label your sample, identifying the stitch as well as the thread used so you can refer to it later.
Oh, and by the way, don’t forget Sulky’s Glowy thread! By day, the design shows in pastel colors. But at night, the design glows and might just help in locating those misplaced keys!

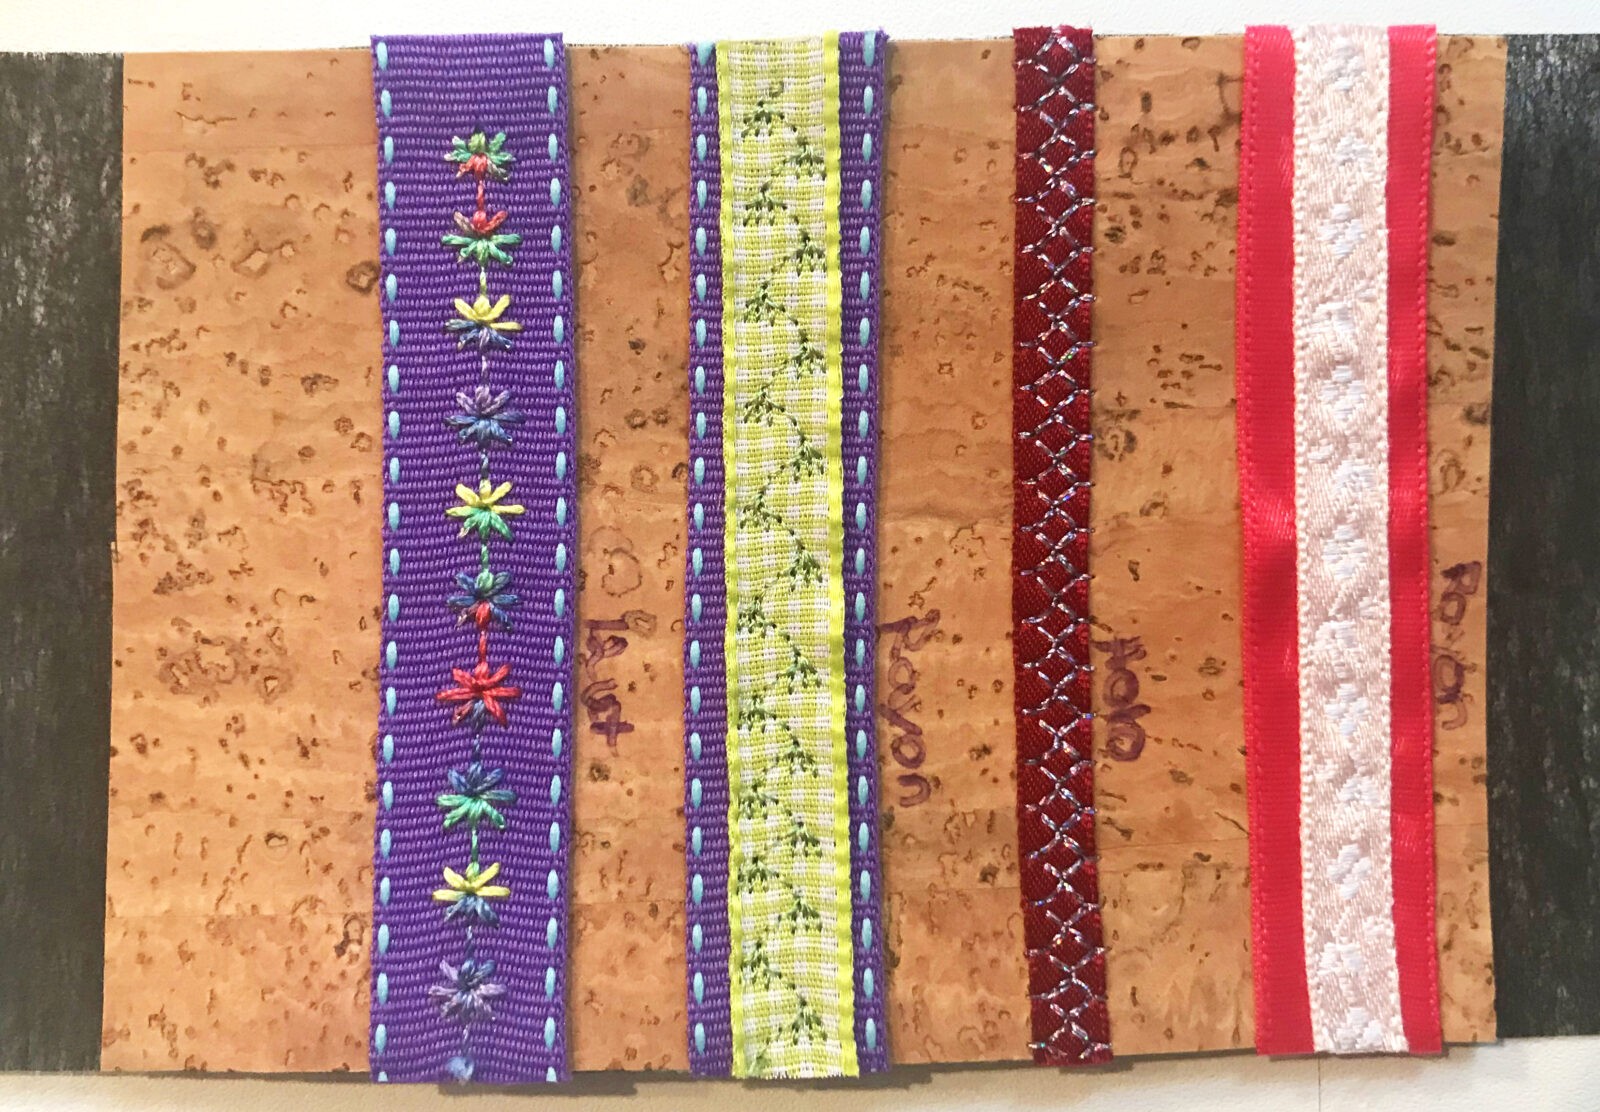
And the possibilities continue when decorative stitches combine with trims!
Gather Supplies
- 2 strips of cork fabric 1½” x 9½” per key fob
- 1” Hardware designed to secure fabric ends and to accept keys
- 90/14 Top-stitch needle
- Sulky Stabilizers:
- Accent materials such as scraps of ribbon, lace, braid, or rick-rack
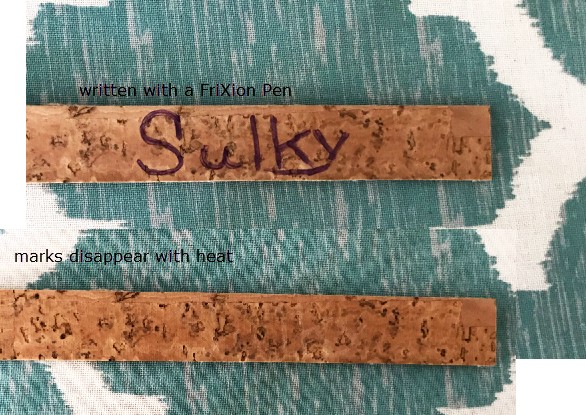
- Frixion Pen by Pilot – optional, but very helpful – Pen markings disappear when exposed to heat. Simply hover the hot steam iron over the strip of cork to remove guide lines.
Considering all the trims and decorative stitches that are available and found in many different widths, it is up to you to plan your own layout.
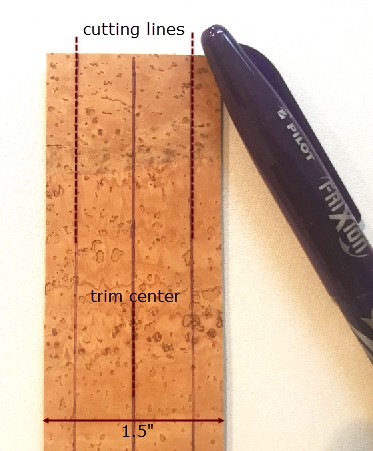
Cut two cork strips each 1½” wide and 9½” long. Using a Frixion Pen, draw a line down the center (¾” from one side) of one strip. Draw a line ½” away from the center line on each side. All accents are centered on the middle line. All stitching to join the two layers of cork fabric together must have their outer points inside the side cutting lines by at least 1/16”.

Step 1.
Center the accent material on the right side of one of the cork strips.
Use the Frixion Pen to draw a center straight line. Lightly spray the wrong side of the accent material with KK 2000™ Temporary Spray Adhesive. Center the trim by rolling it down the line and press firmly to the cork fabric. The adhesive will keep the accent in place during the stitching process.

Step 2.
Top-stitch the accent in place with thread and stitch of choice.
Anchoring stitches can be invisible by using a straight stitch in a thread matching color and texture (for satin ribbon, you might choose Sulky 40 wt. Rayon or Poly Deco™, while Sulky 30 wt. Cotton thread might be best for a cotton lace).
However, creative inspiration might dictate using a contrasting thread color and/or texture including a decorative stitch. This will allow the stitches to become part of the center design.
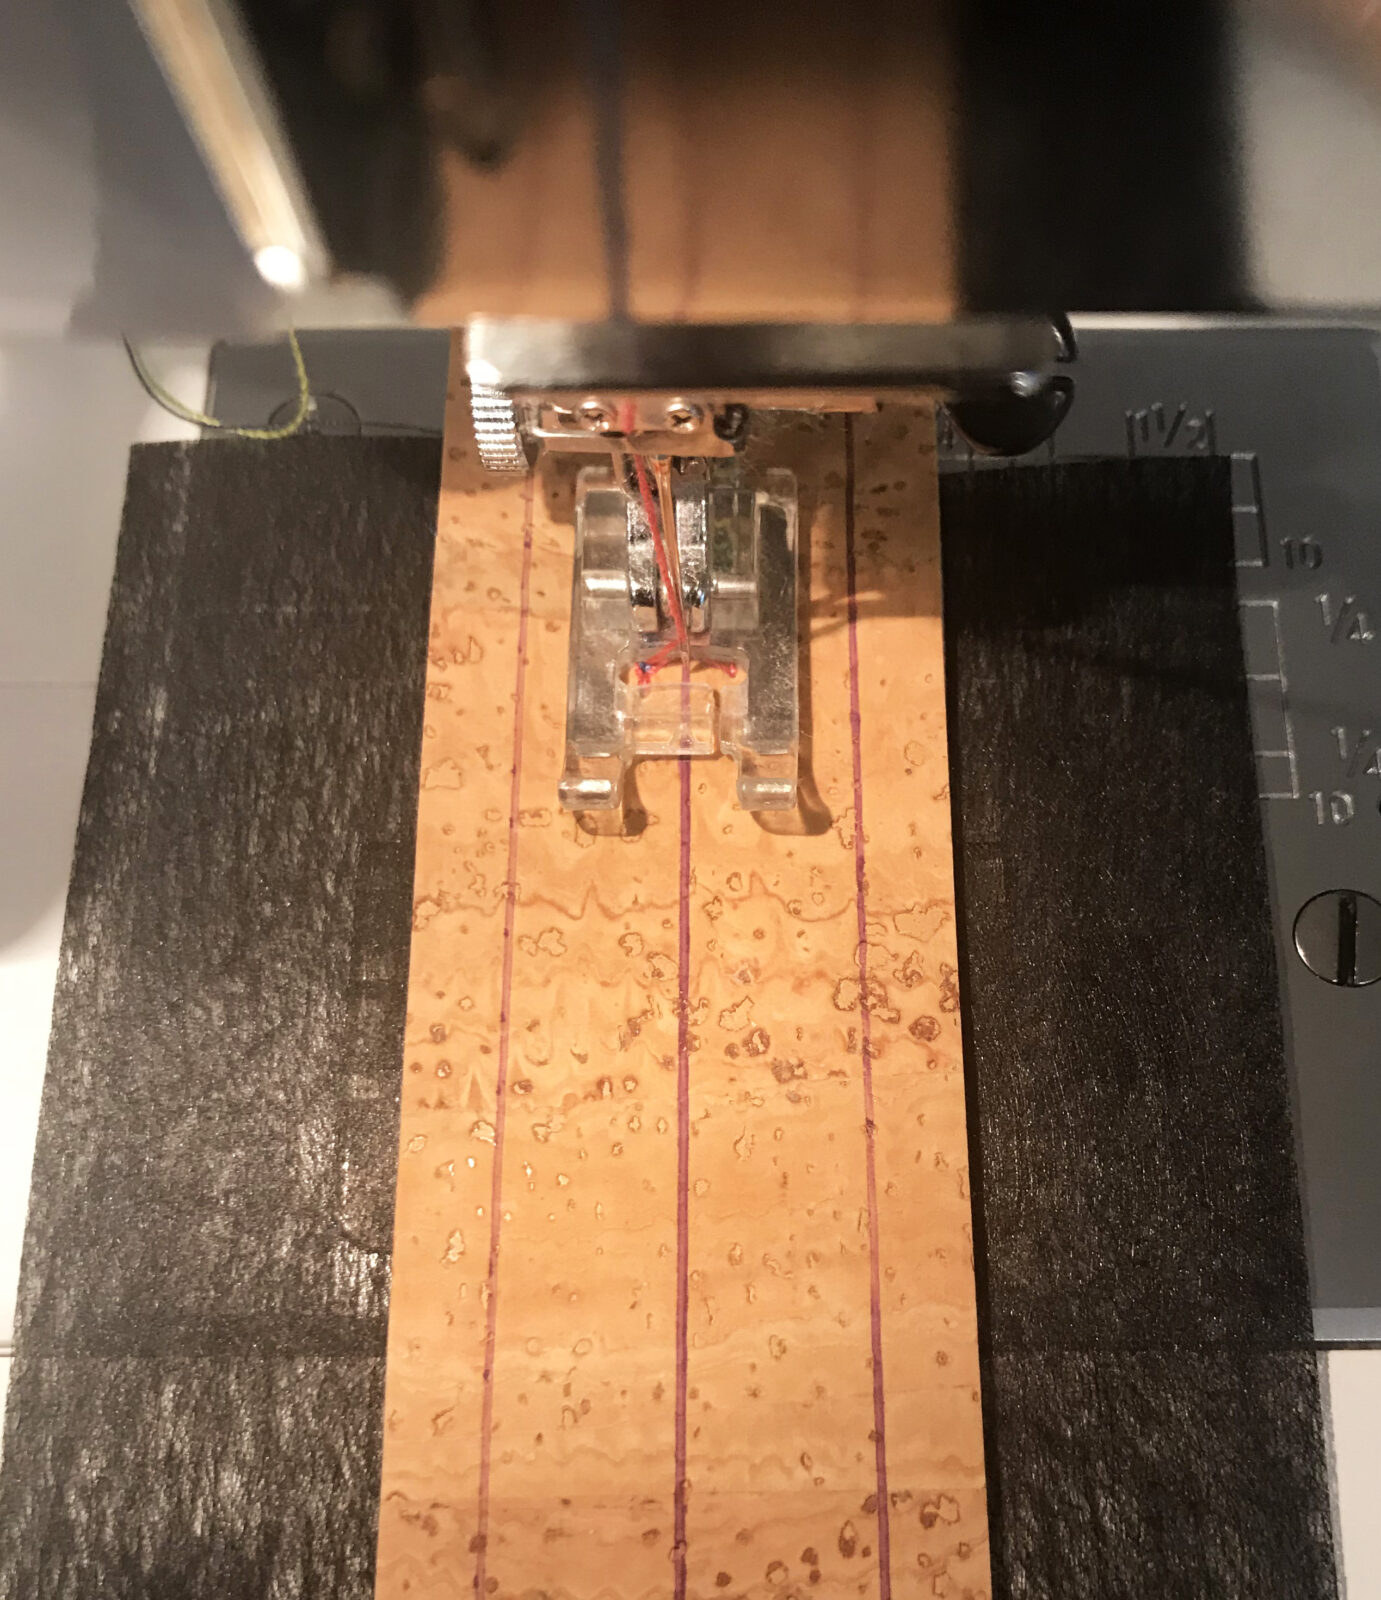
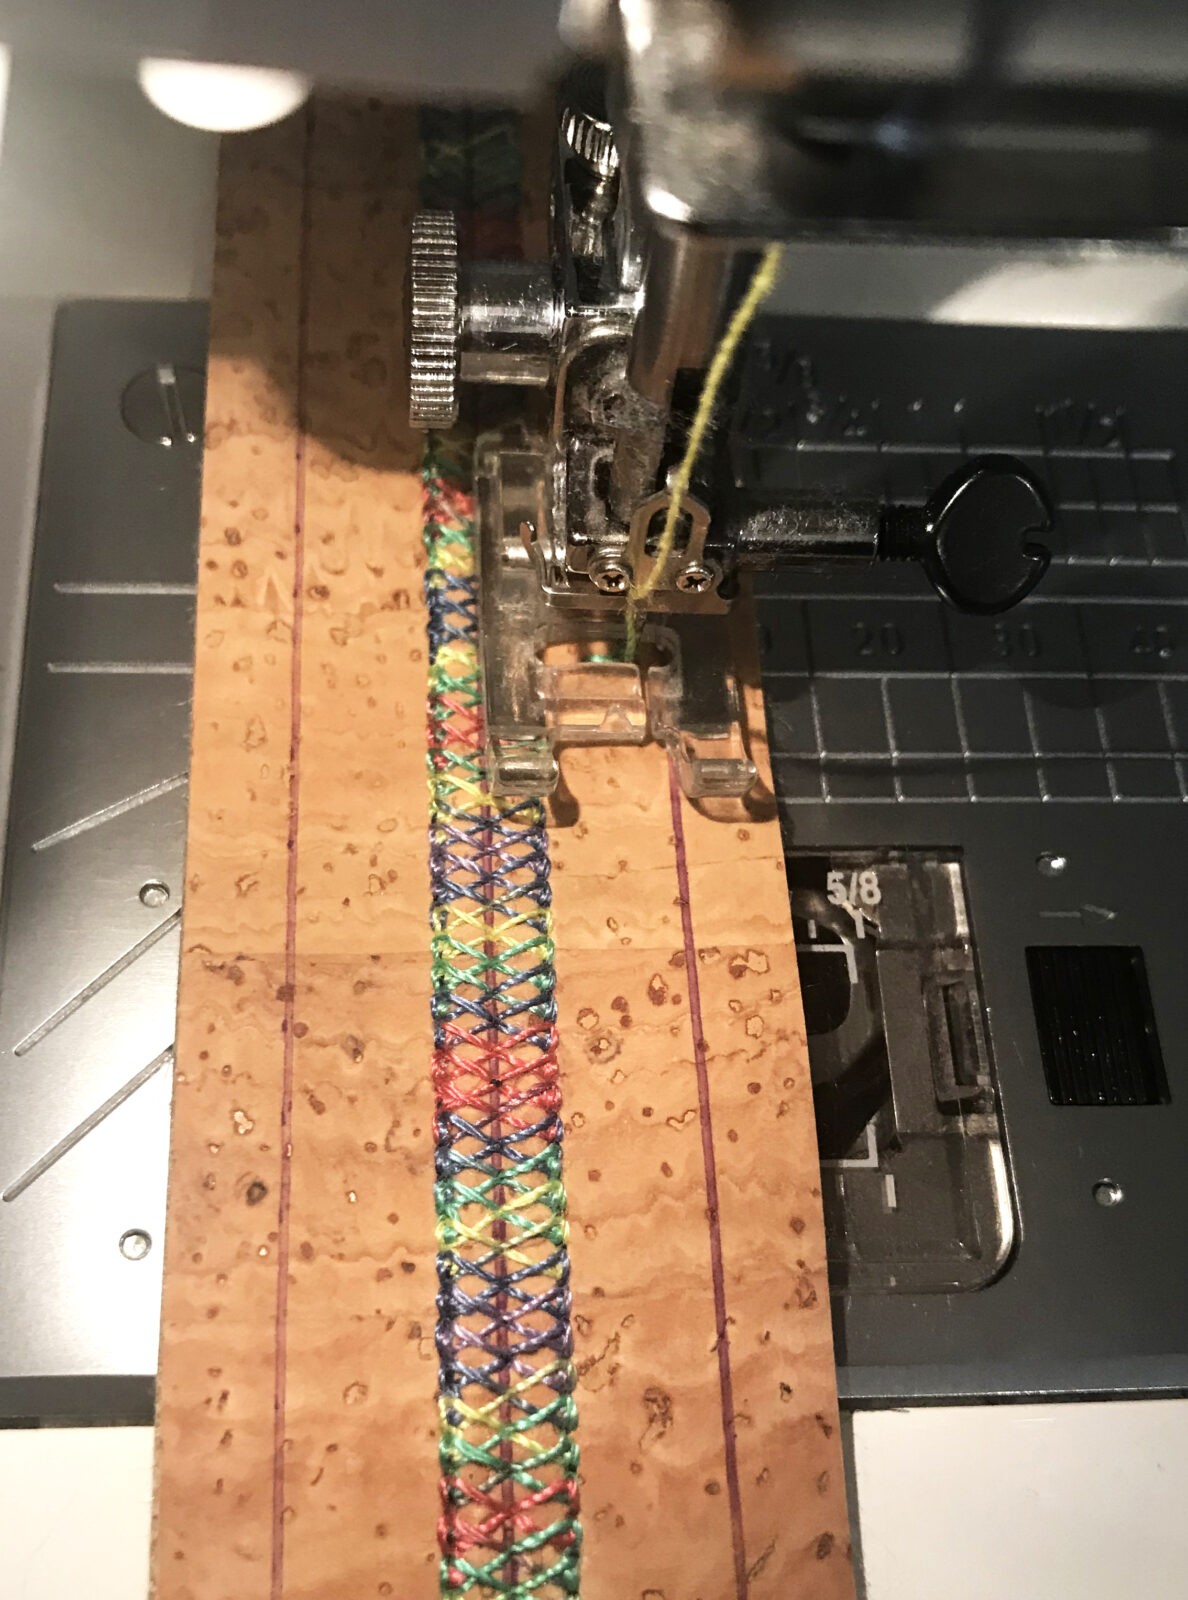
If directly embellishing the cork strip with decorative machine stitches, place the strip on a piece of Tear-Easy™ stabilizer. Be guided by the center line in keeping stitches straight.
Step 3.
Stitch the two strips of cork fabric together.
Lightly spray the wrong side of the second strip of cork with KK 2000™ Temporary Spray Adhesive and firmly press the two strips together with wrong sides facing each other. Keep edges as even as possible, but don’t stress about it. The key fob will be re-cut to size after all stitching is done.
Joining stitches can simply be a straight stitch, a heavier top-stitch, or a decorative stitch. Many stitches designed for applique or quilting are good choices. Make sure the outside edge of the stitch strikes inside the final 1” width, the same width as the key fob hardware.
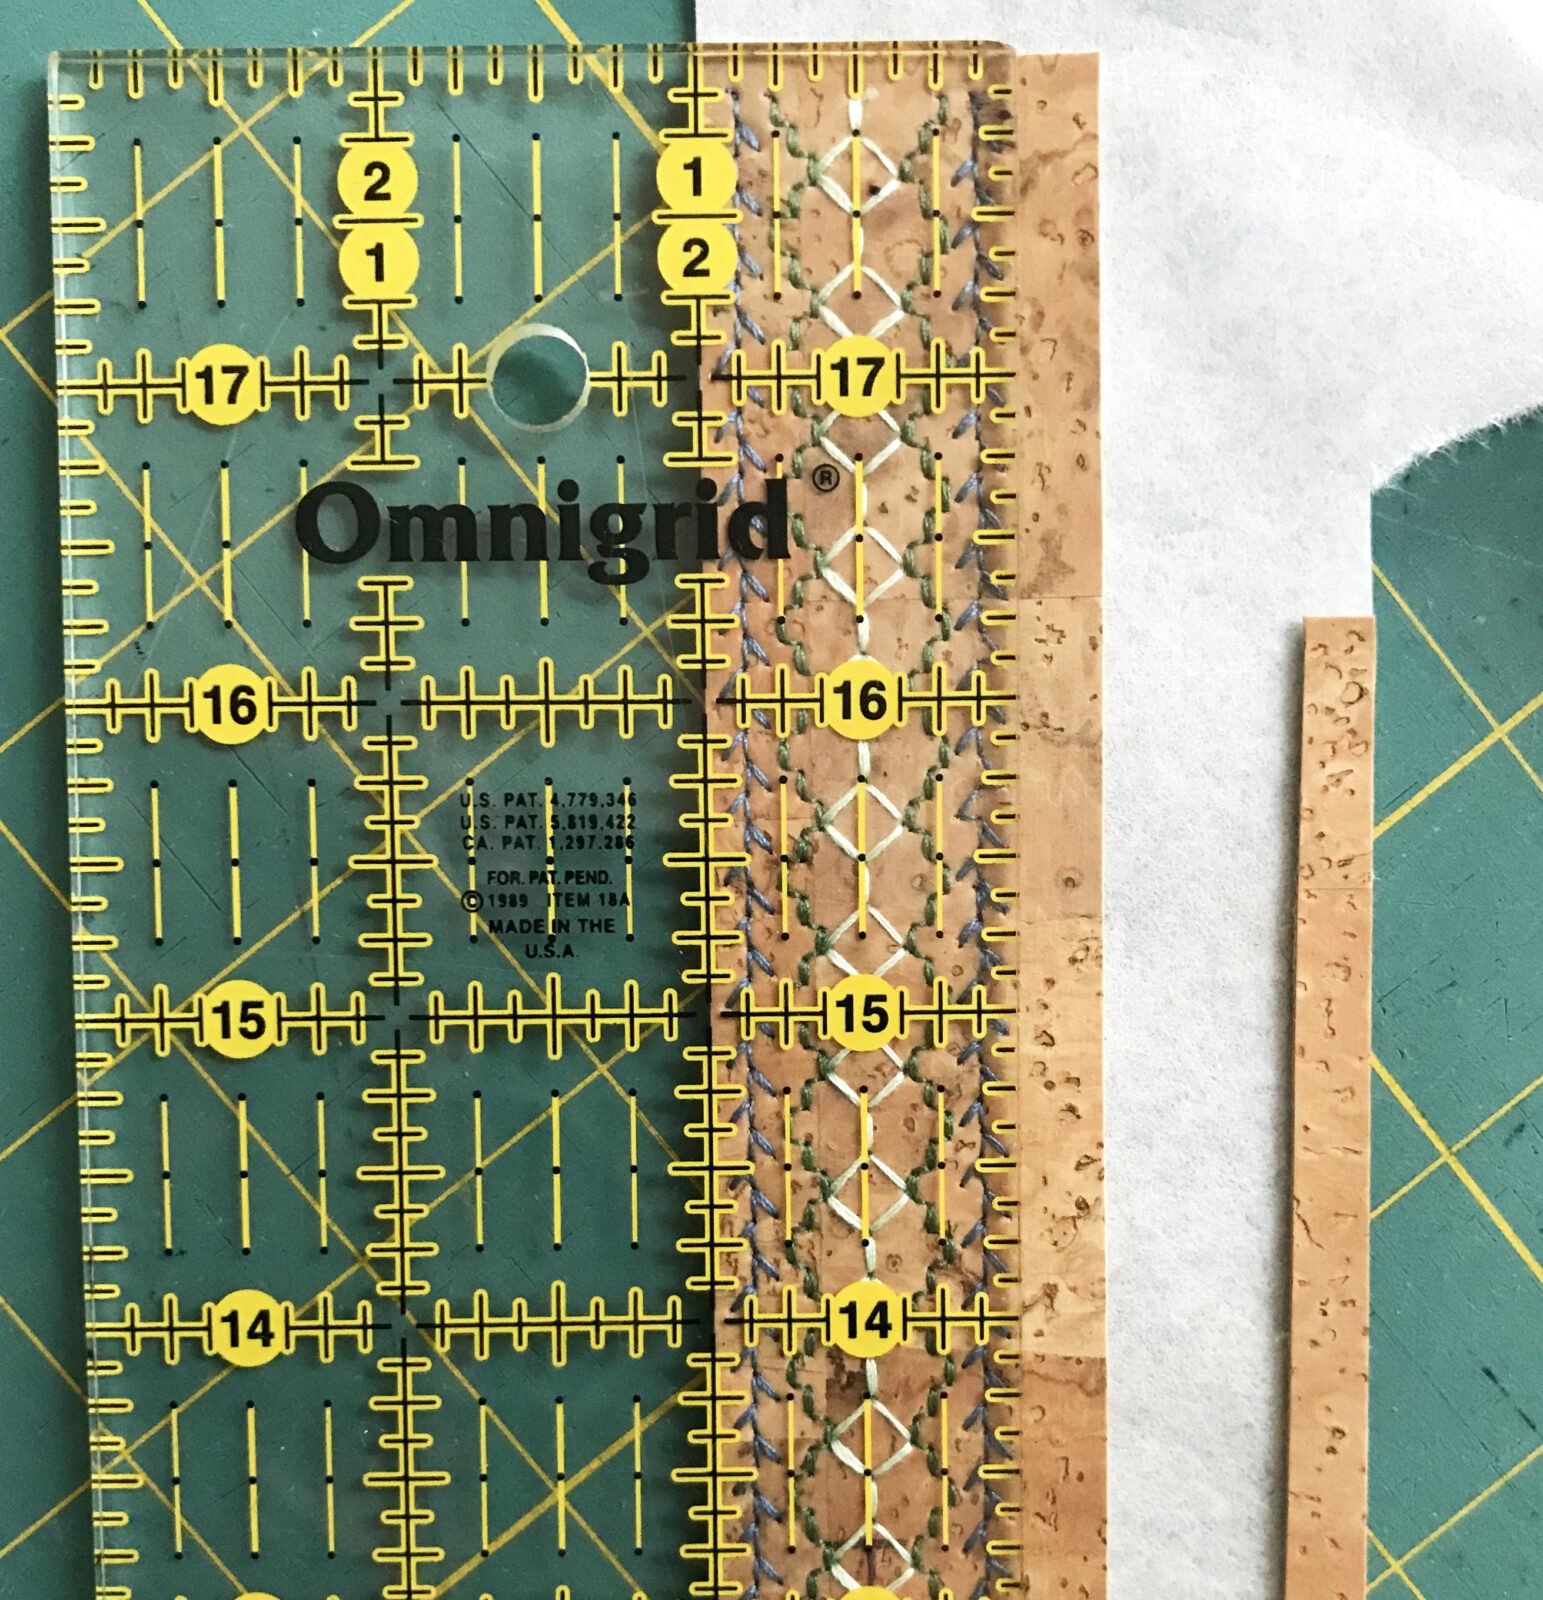
Step 4.
Keeping the embellishing accent centered, re-cut the strip to the final size of 1” wide and 9” long.
Step 5.
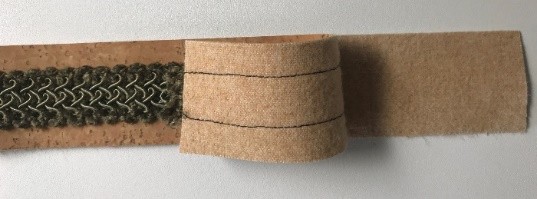
Bring the two ends together and add the hardware, following manufactures directions.
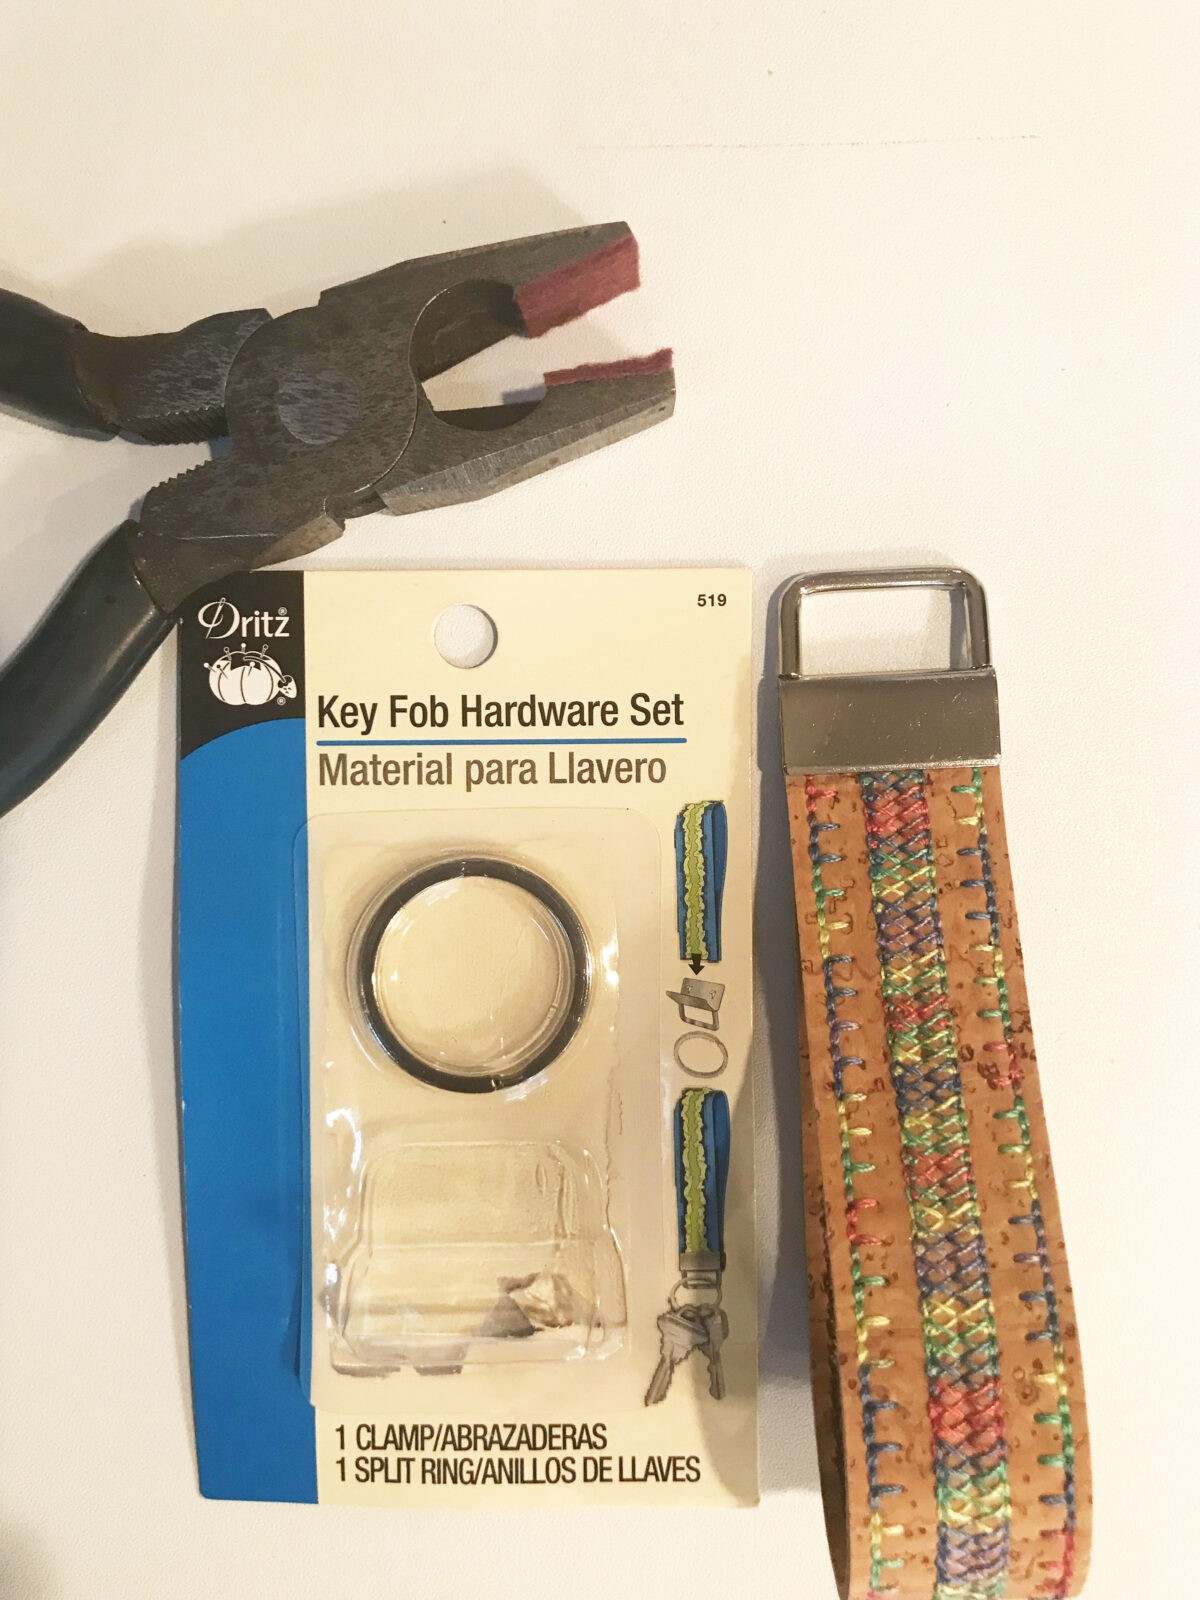
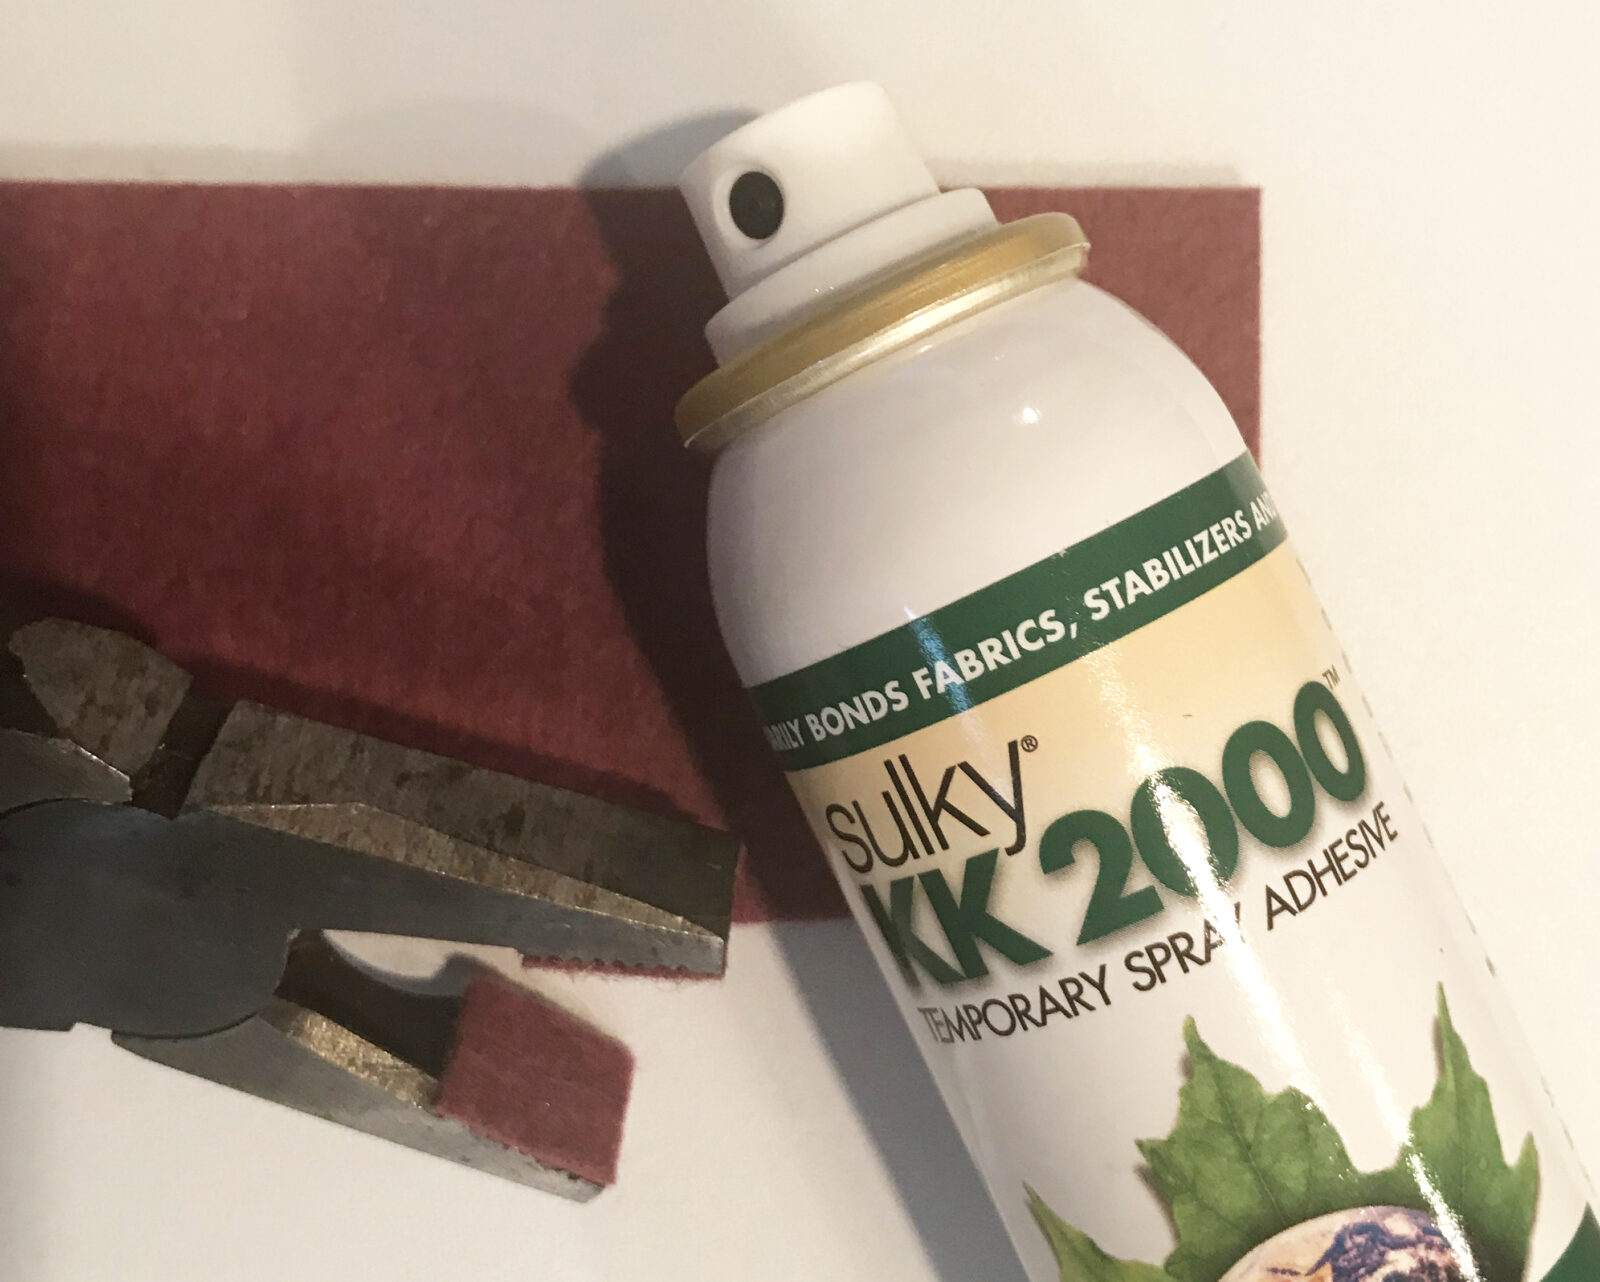
Helpful Hint: prevent scratching the hardware while squeezing the metal clip together by spraying a strip of felt with KK 2000™ and pressing them inside the pliers’s claws.
Yes, cork can be embroidered on! Therefore the entire key fob can be made in the embroidery hoop!

TIP: Beginner machine embroider enthusiasts who are not skilled in exact design placement or hooping fabric straight in the hoop, may want to cut the cork strips just a bit wider for additional “wiggle room”.

Step 1.
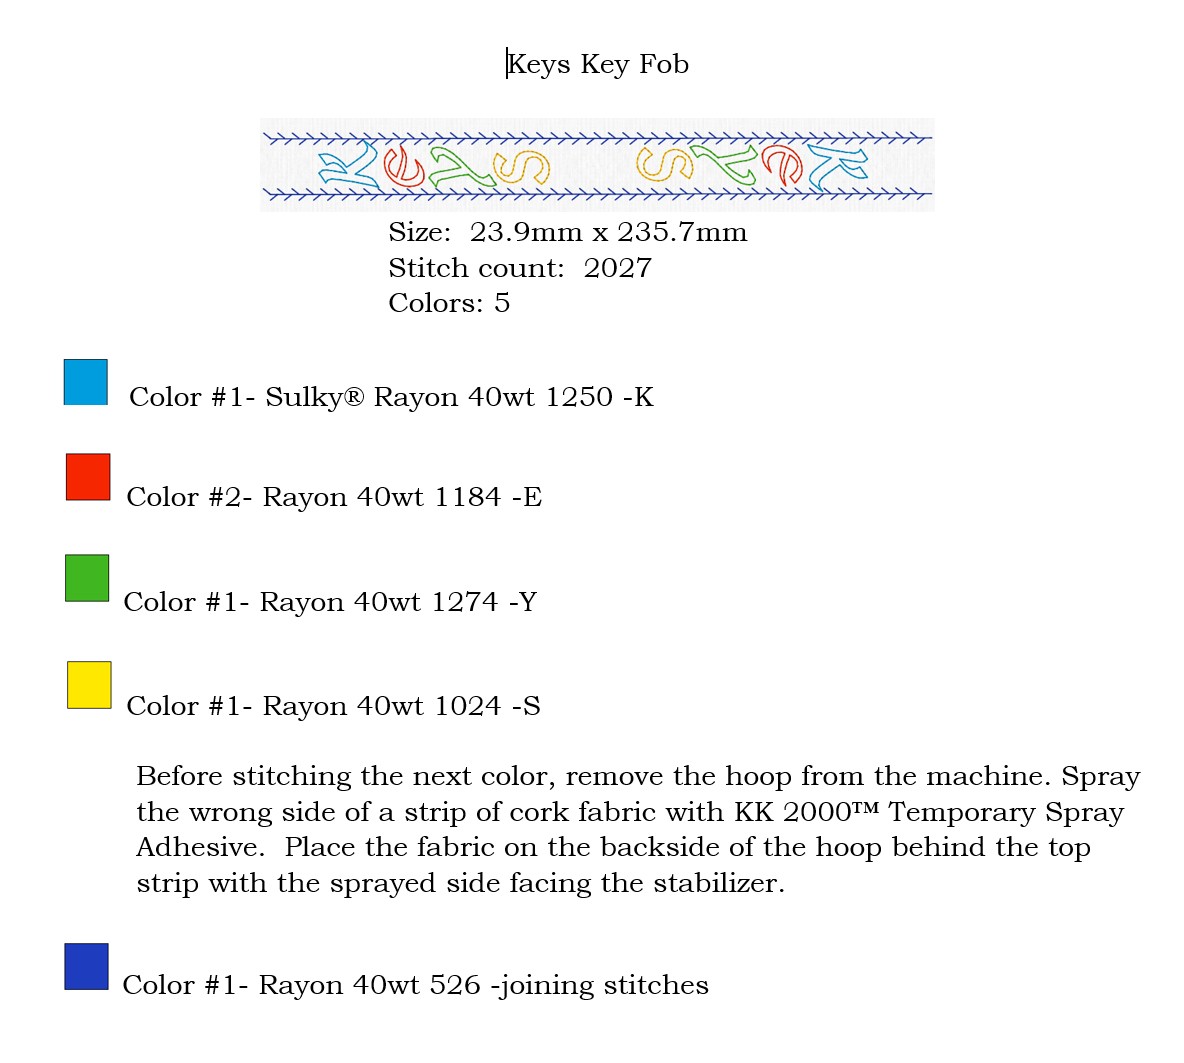
Download the free key fob designs here.
Select one and transfer to the embroidery machine. Please read the PDF file that comes with each design as it will state what each color stop stitches and when to apply the back fabric piece.
Step 2.
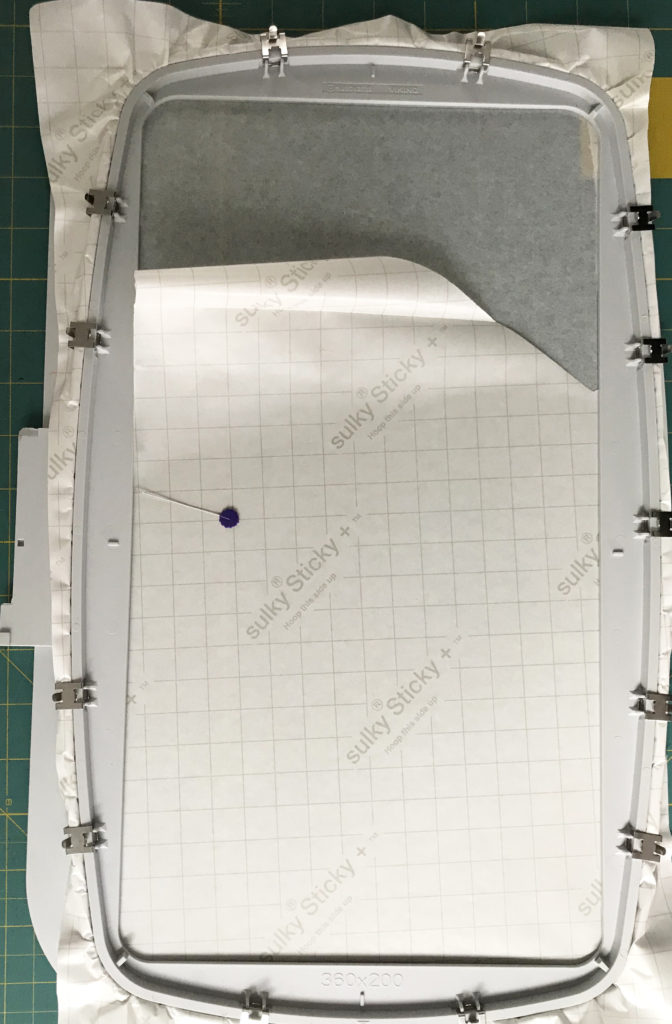
Secure Sulky Sticky Plus directly in the embroidery hoop with the shiny paper side facing up. Gently score the paper and remove it, exposing the sticky surface.
Step 3.
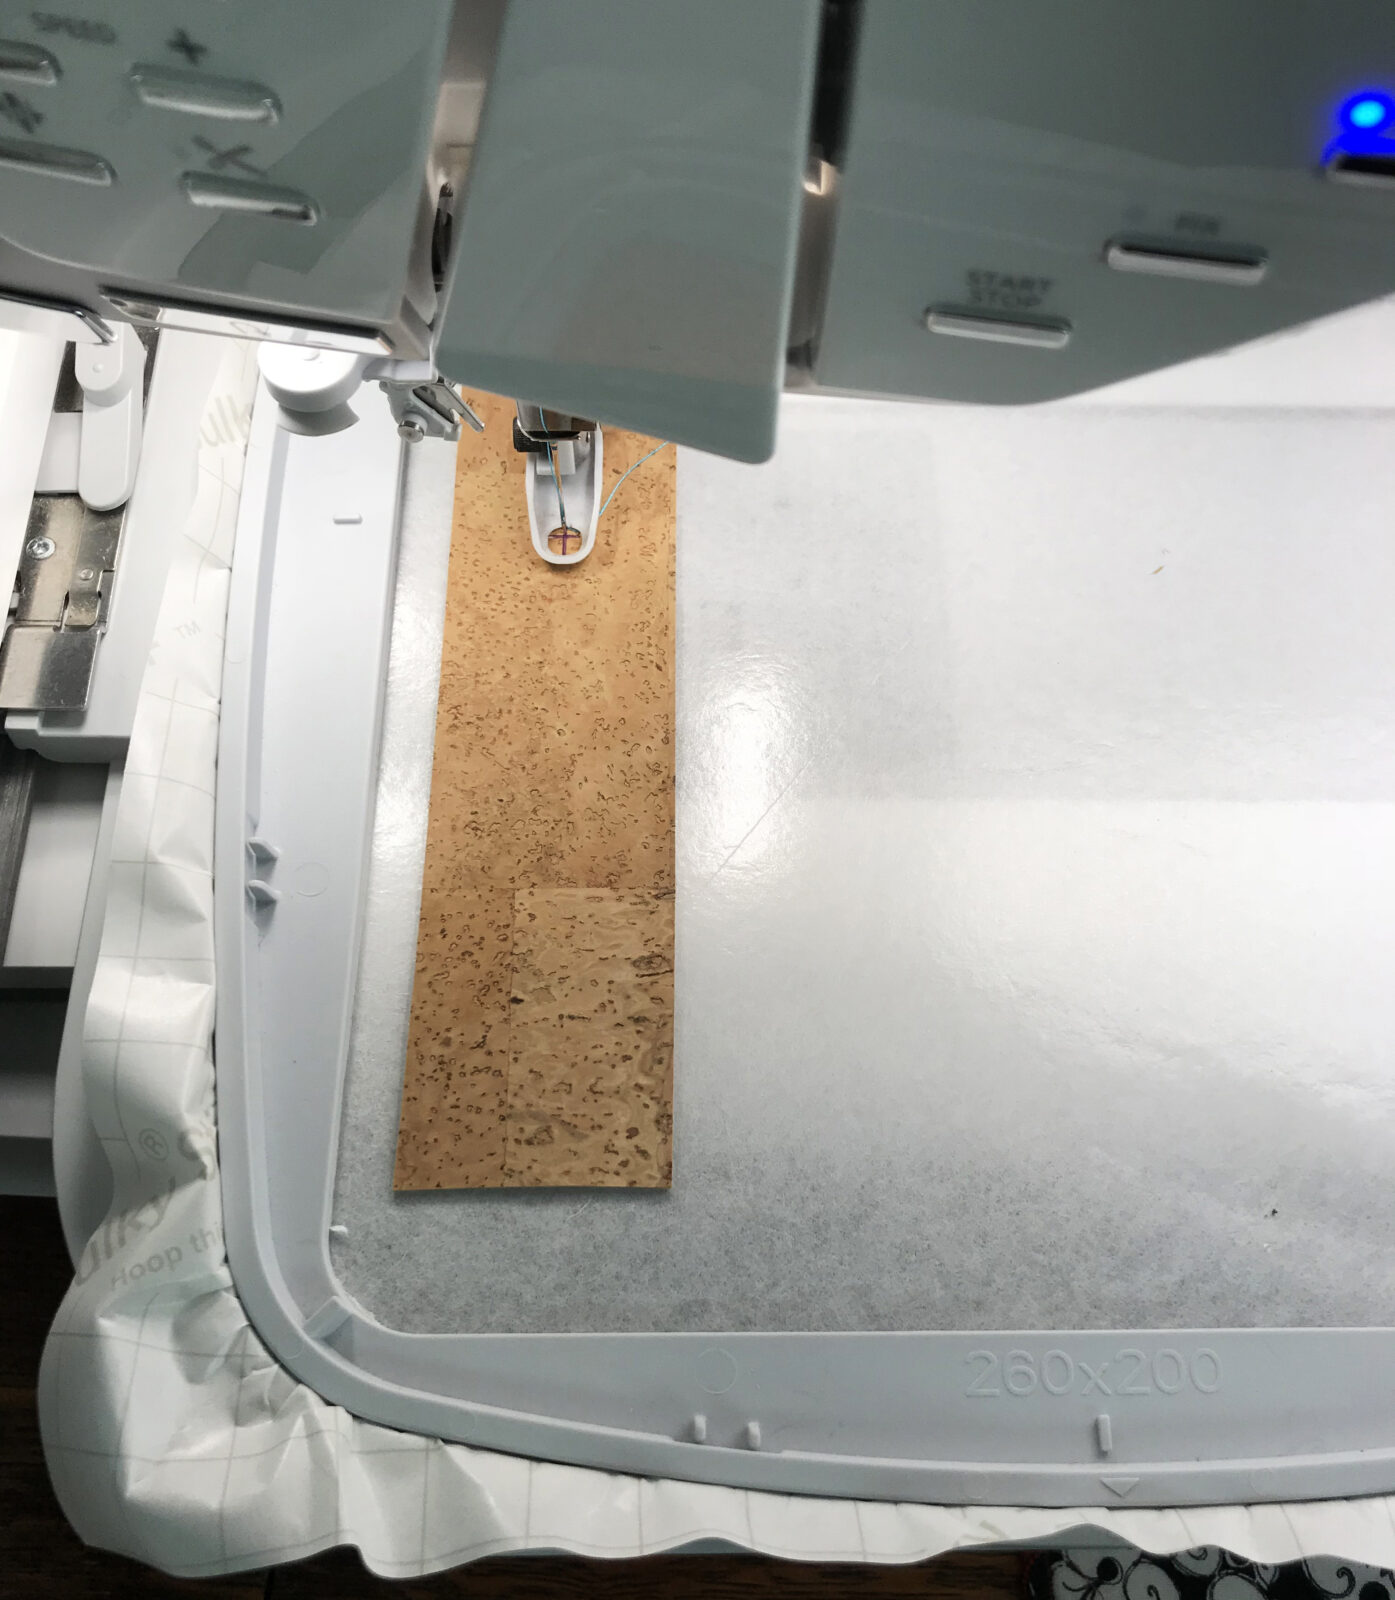
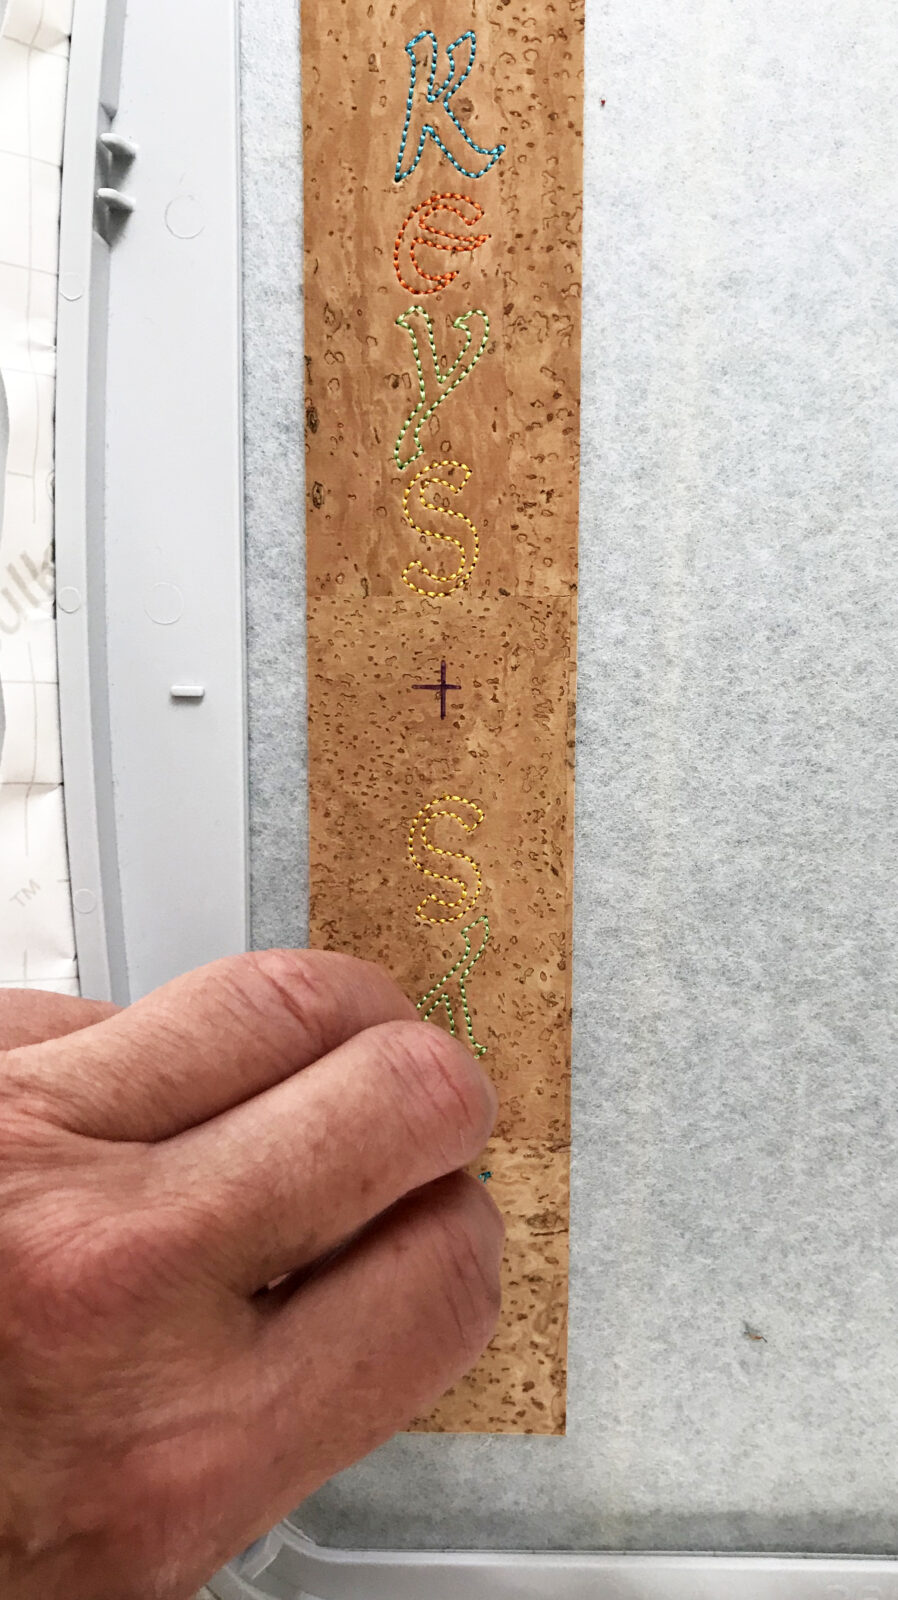
Mark the center of the cork strip with a Frixion Pen. Firmly press the strip of cork fabric to the sticky stabilizer surface keeping it as straight as possible.
Helpful Hint: If embroidering more than one key fob, place the strip off center. A 200mm wide hoop can stitch three to four key fobs using the same piece of stabilizer, depending on how close the strips are placed to each other. Just don’t allow the strips to overlap.
Step 4.
Stitch the center design following the PDF instructions to know how many color stops make up the center accent.
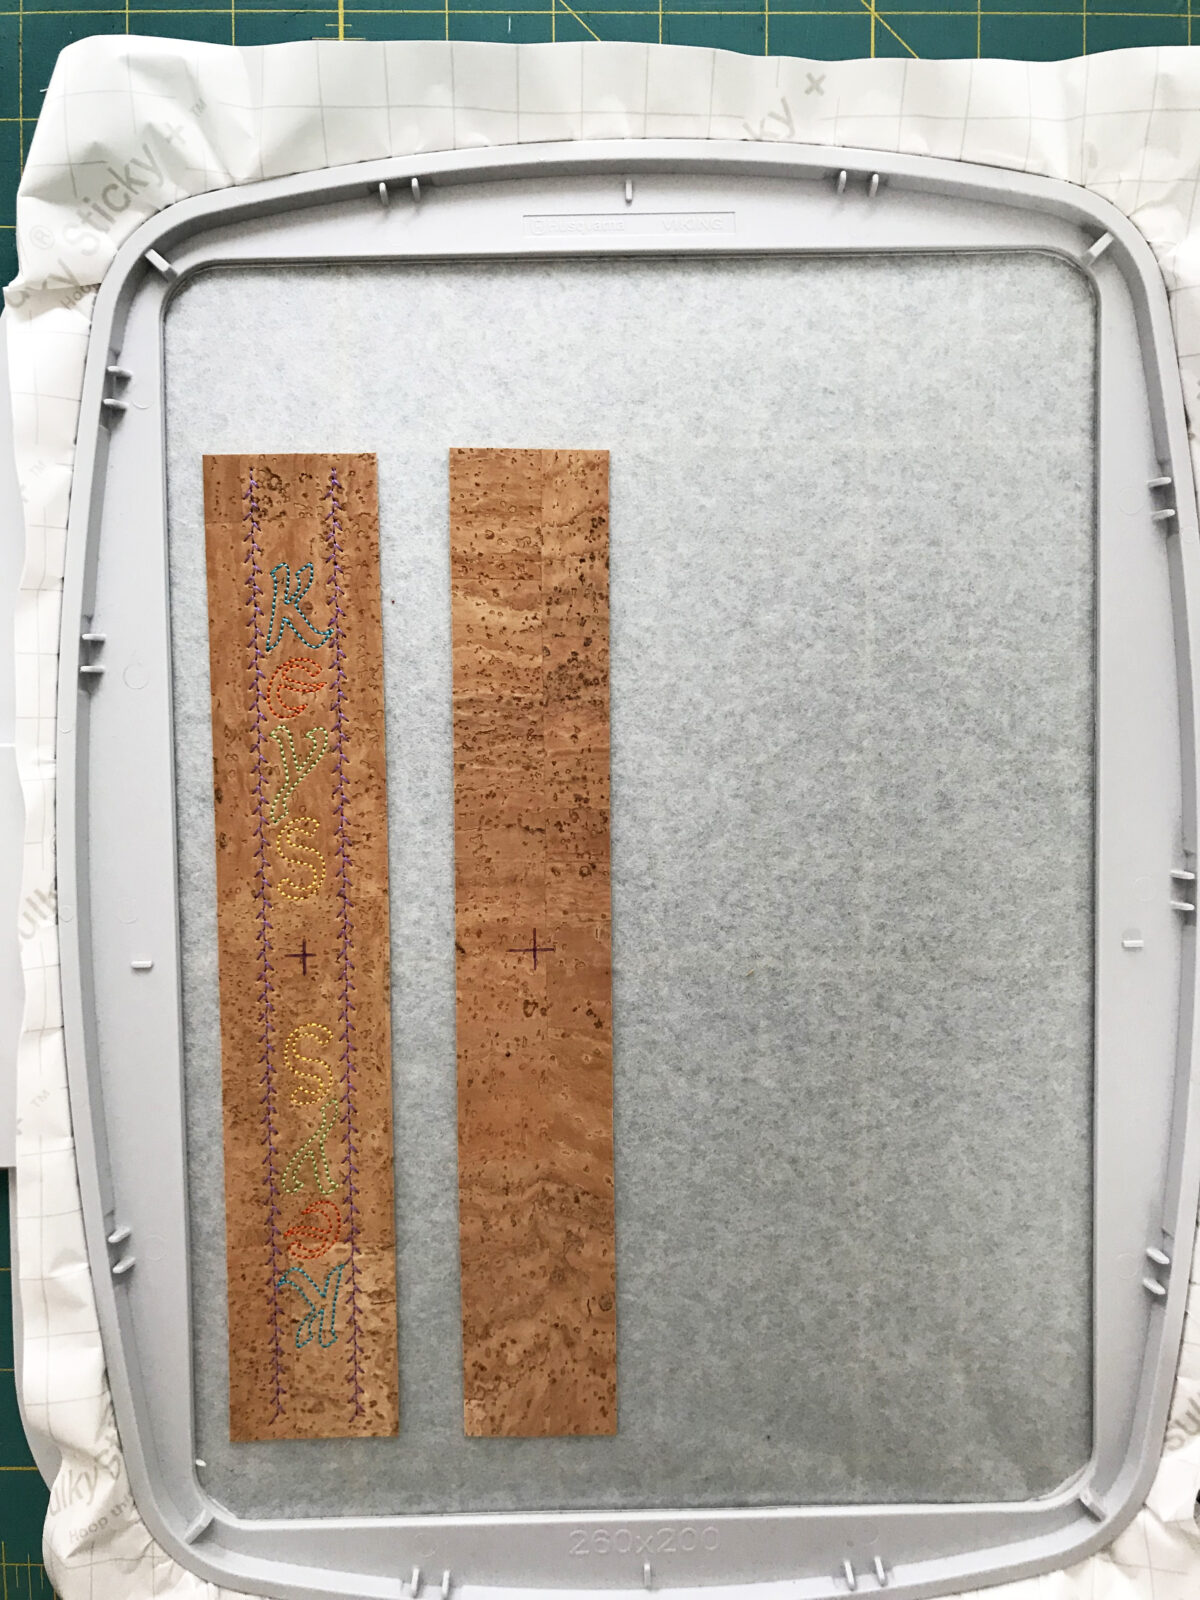
Step 5.
Before stitching the final color, Stop. Remove the hoop from the machine and add the back strip.
Place a strip of cork that has been lightly sprayed with KK 2000™ behind the embellished strip, underneath the hoop. Just touching the sticky strip to the backside of the stabilizer is enough to hold it in place as the hoop is turned right-side up.
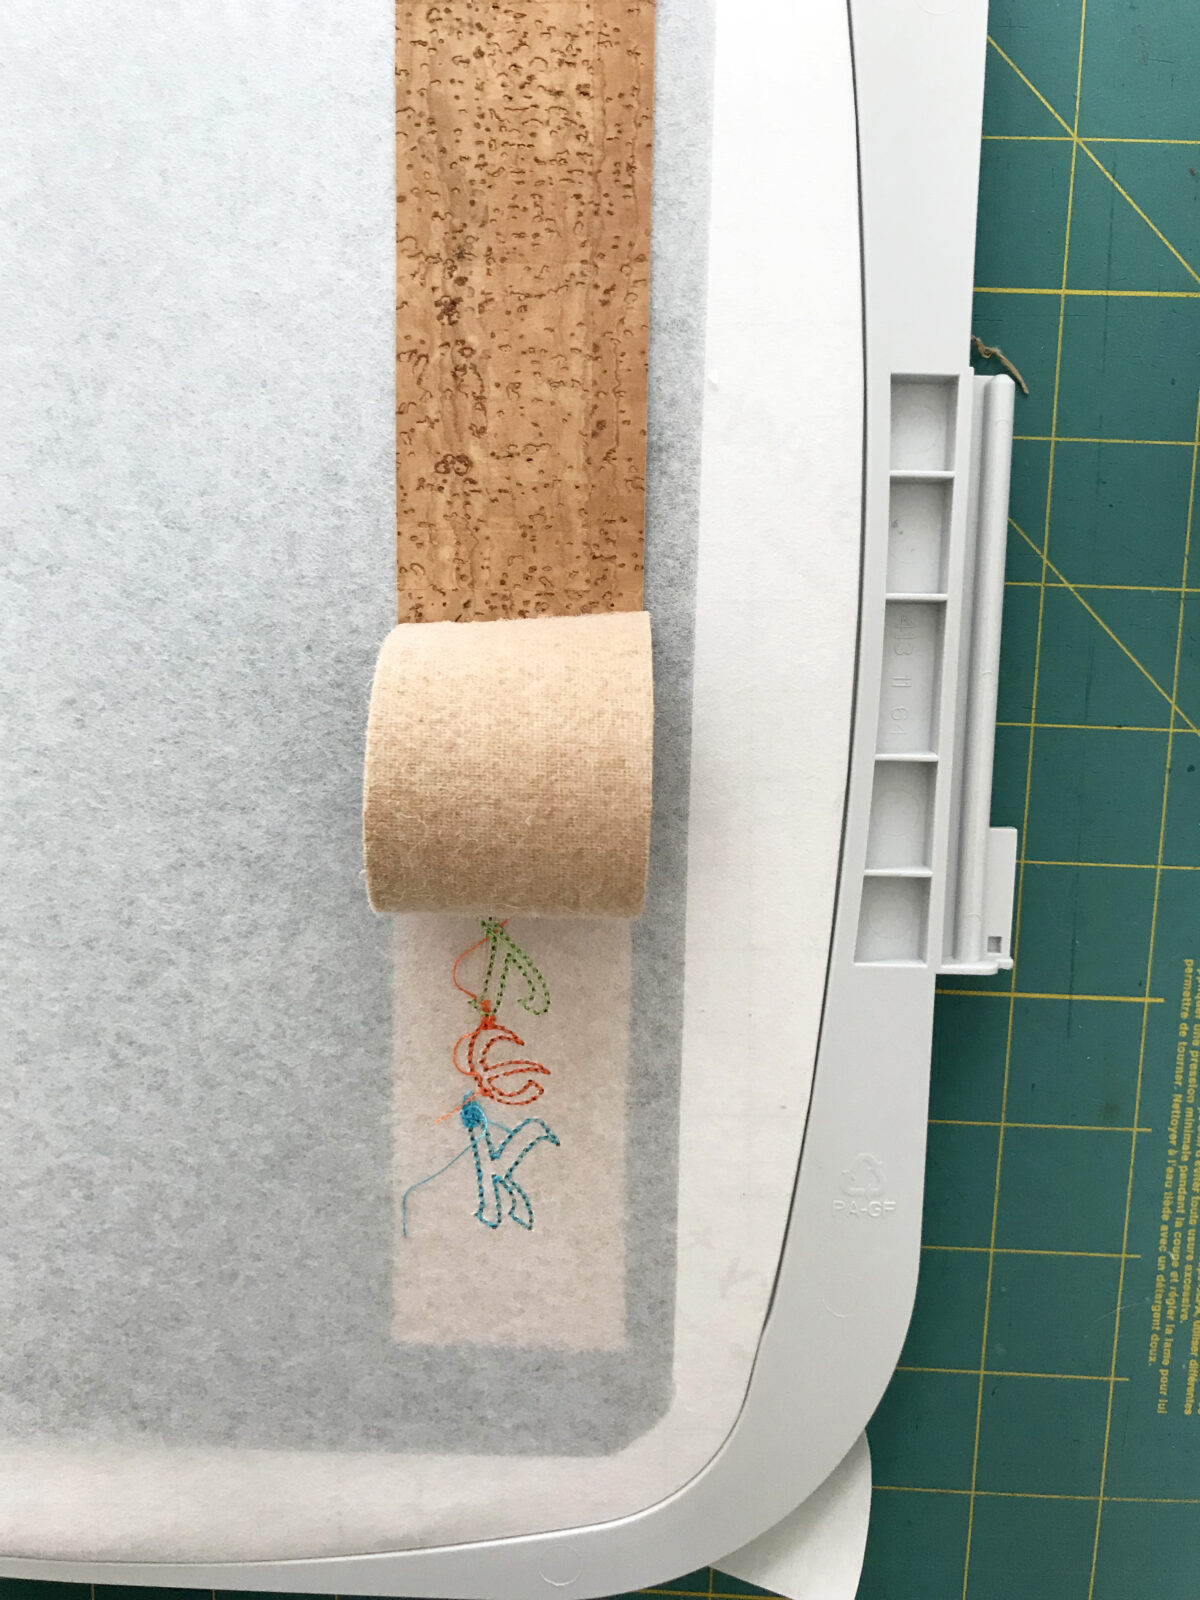
Firmly press, securing the back strip to the stabilizer from the right side.
Step 6.
Finish stitching design.
If doing more than one strip at a time, repeat the steps treating each key fob as an individual stitching.
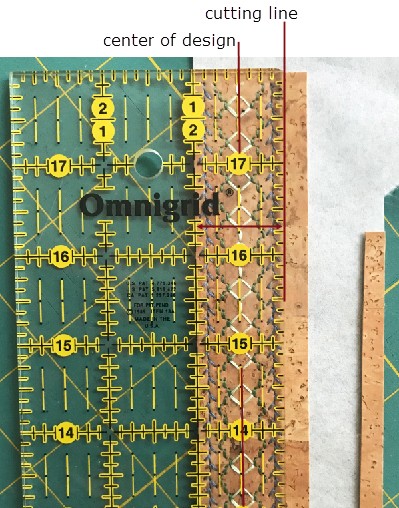
Step 7.
Cut the strip to its final width keeping the design centered. Final cut should be just outside the joining stitch and match the width of the hardware.
Step 8.
Add the hardware.

That’s all there is to it! Whether the key fob is made in the hoop or on a regular sewing machine, trust me, your imagination will go wild!

What thickness of cork do you use?