Machine Embroidery Appliqué is Super Fun & Easy!
Create a fuzzy quilt featuring machine embroidery appliqué using an easy-to-make quilt kit.
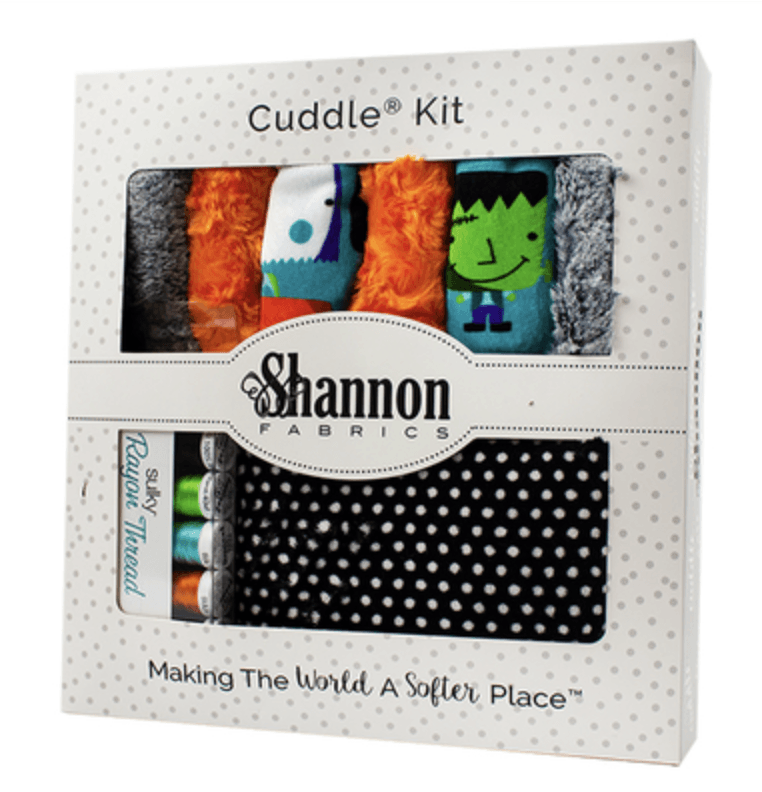
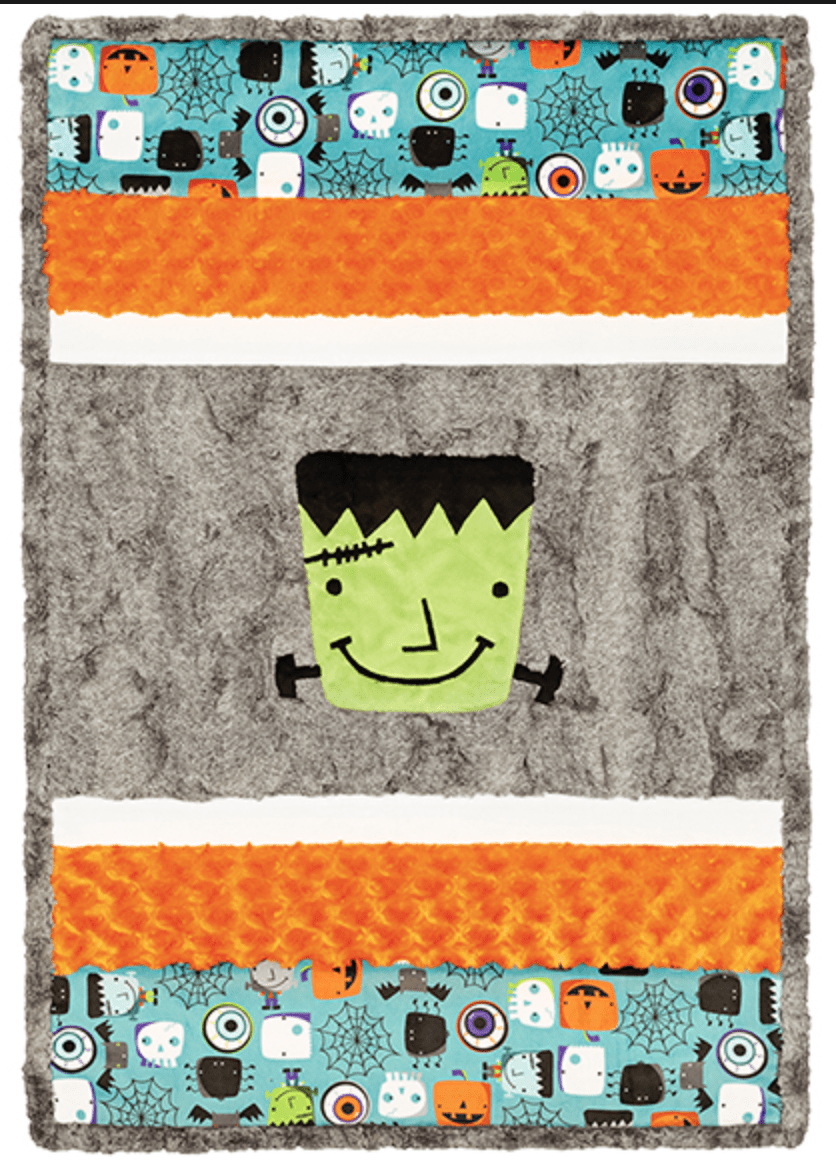
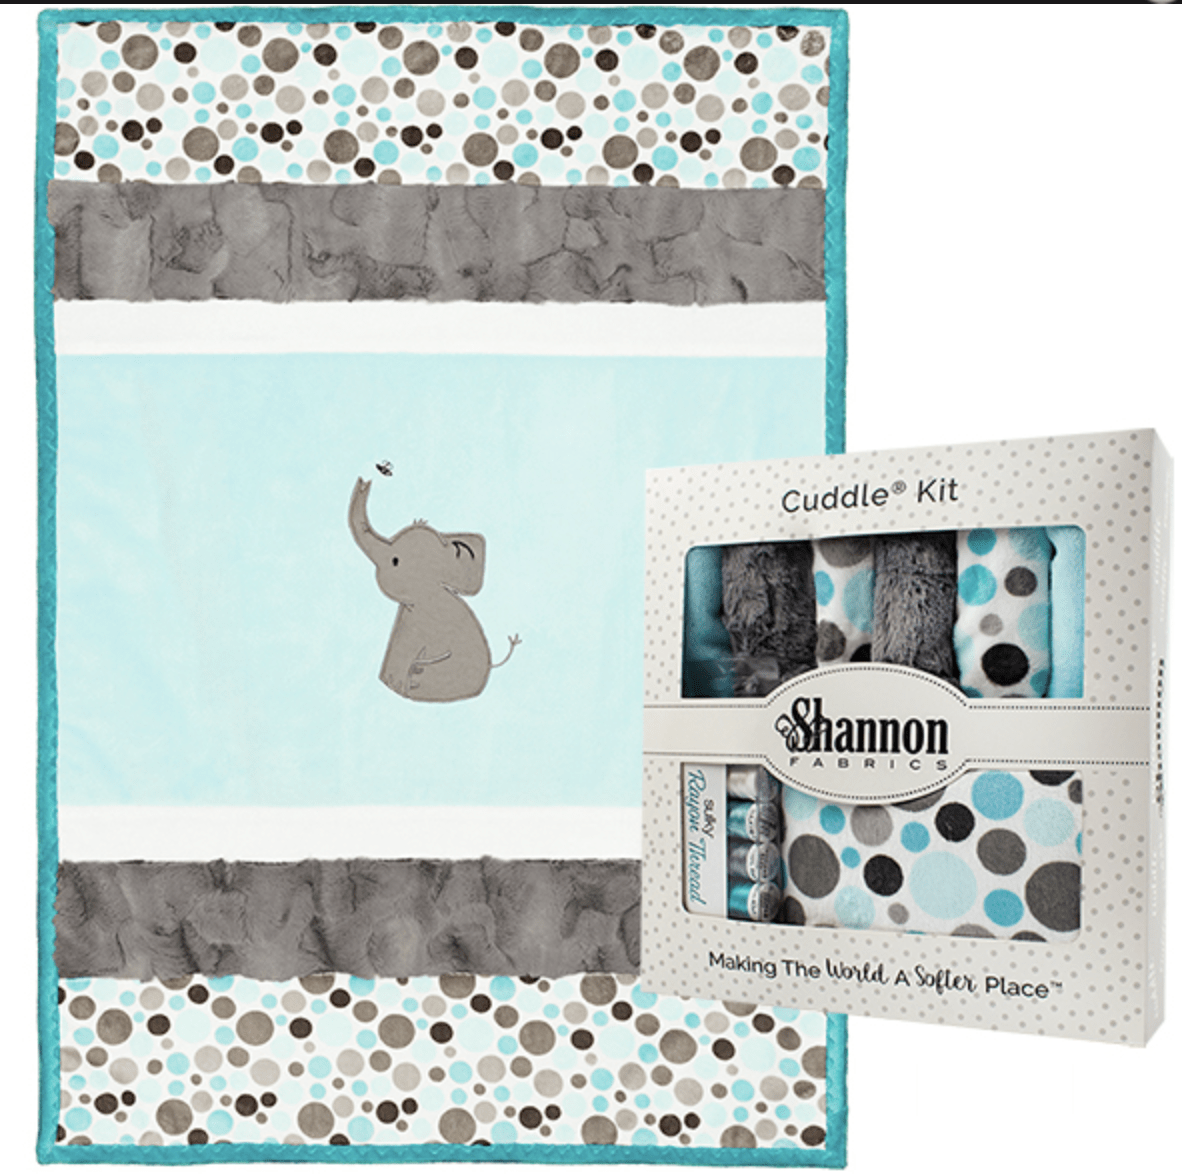
Don’t you just love a cozy quilt? Using Cuddle fabric is always a go-to when making a baby quilt or holiday-themed throw, amirite?These kits include Cuddle fabrics by Shannon Fabrics, precut (so you don’t have to shed-proof your sewing area) and ready to sew and embellish with machine embroidery appliqué. Also included is the Tear-Easy and Ultra Solvy stabilizer you need to create a fun motif, either the Frankie or Elephant.
What is Machine Embroidery Appliqué?
If you’ve never tried appliqué in an embroidery machine, you’re in for a real treat. The machine makes sure the fabric edges are all neatly concealed with thread, leaving no chance for shedding or raveling over time. Plus, the machine-stitched satin edge is precision sewn, leaving a professional finish that’s as easy as it is beautiful.
To Hoop or Not to Hoop?
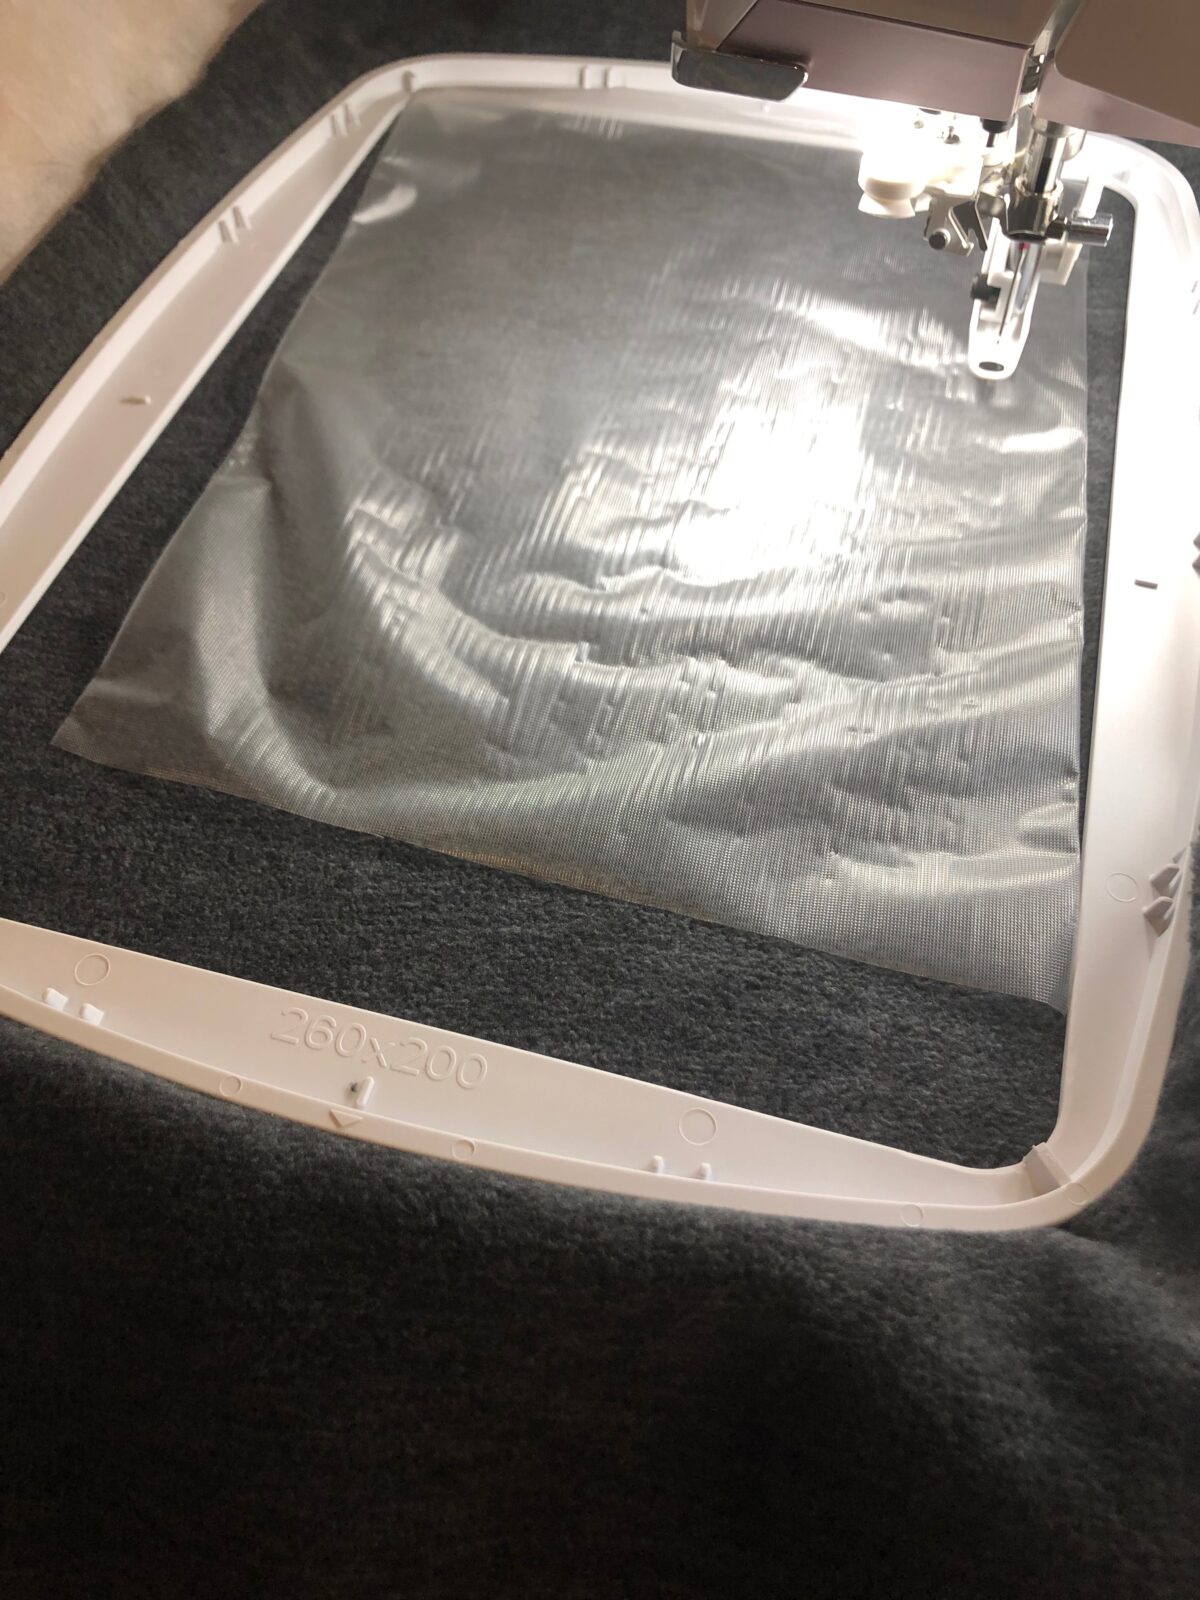
Step one is to hoop the fabric. The great thing about Shannon Fabrics Cuddle is that it’s not marred by hooping. Many plush fabrics require “hoopless embroidery,” meaning the fabric is temporarily affixed to the stabilizer in the hoop. The stabilizer is the ONLY thing in the hoop! To secure the fabric to the stabilizer, there are many options.
- Use Sulky KK 2000 Temporary Spray Adhesive and lightly spray the fabric wrong side. Then position it in the hoop, centering the embroidery area. Use your fingers to lightly press the fabric to the stabilizer, ensuring a good bond.
- Choose the baste-in-the-hoop option on your embroidery machine prior to the first color stop. This is also handy in addition to KK 2000. The basting ensures no shifting during embroidery and also outlines either the hoop perimeter or the design perimeter (depending on your preference).
- Use Sulky Sticky + stabilizer, which is an adhesive-backed sticky stabilizer. Hoop only the stabilizer in the hoop with the paper side facing up. Score the paper within thee hoop ring using a pin, and then gently tear away the paper backing within the inner hoop ring. Now place the fabric right side up over the hoop, gently pressing with your hand to secure it.

To Hoop!
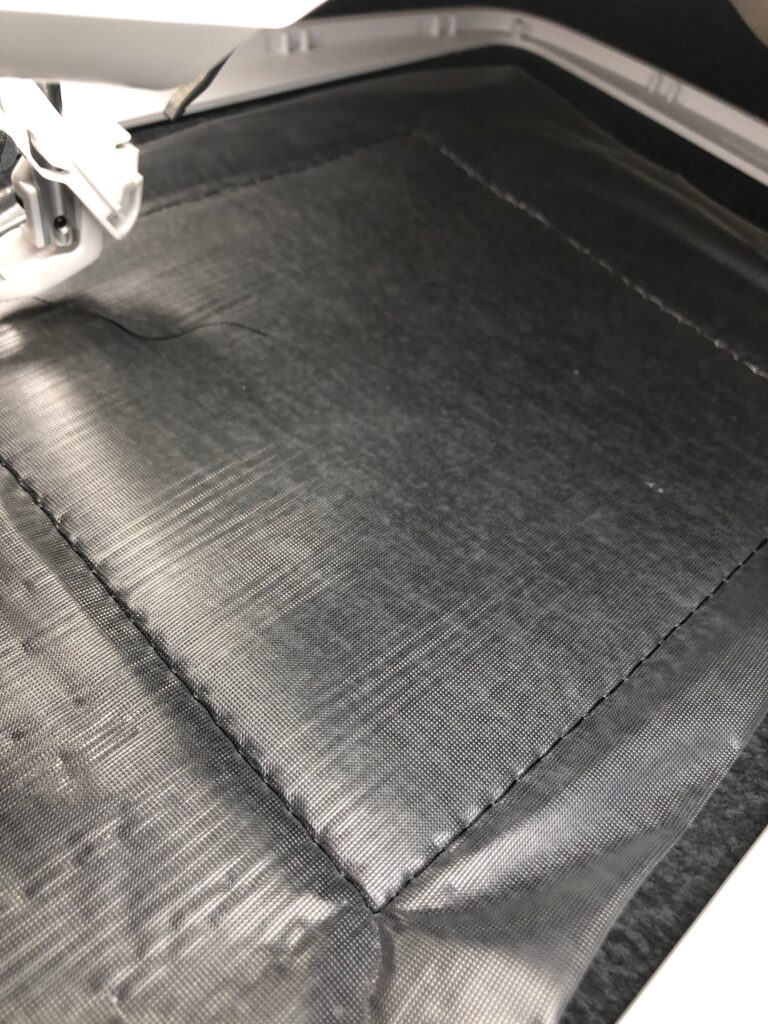
I always do hoopless machine embroidery with anything plush or with a nap. But using Tear-Easy with Cuddle is a combo that has proven worthy of hooping! Just make sure you don’t tighten the hoop screw too much. With every turn, the fabric will stretch, leaving puckers in the finished embroidery. Only tighten it enough to ensure the fabric won’t shift or pop out of the hoop.
First, place a piece of Sulky Ultra Solvy over the appliqué fabric. The topper ensures that the stitches won’t get lost into the fabric pile. It will wash away completely when embroider is complete.
How to Do Machine Embroidery Appliqué
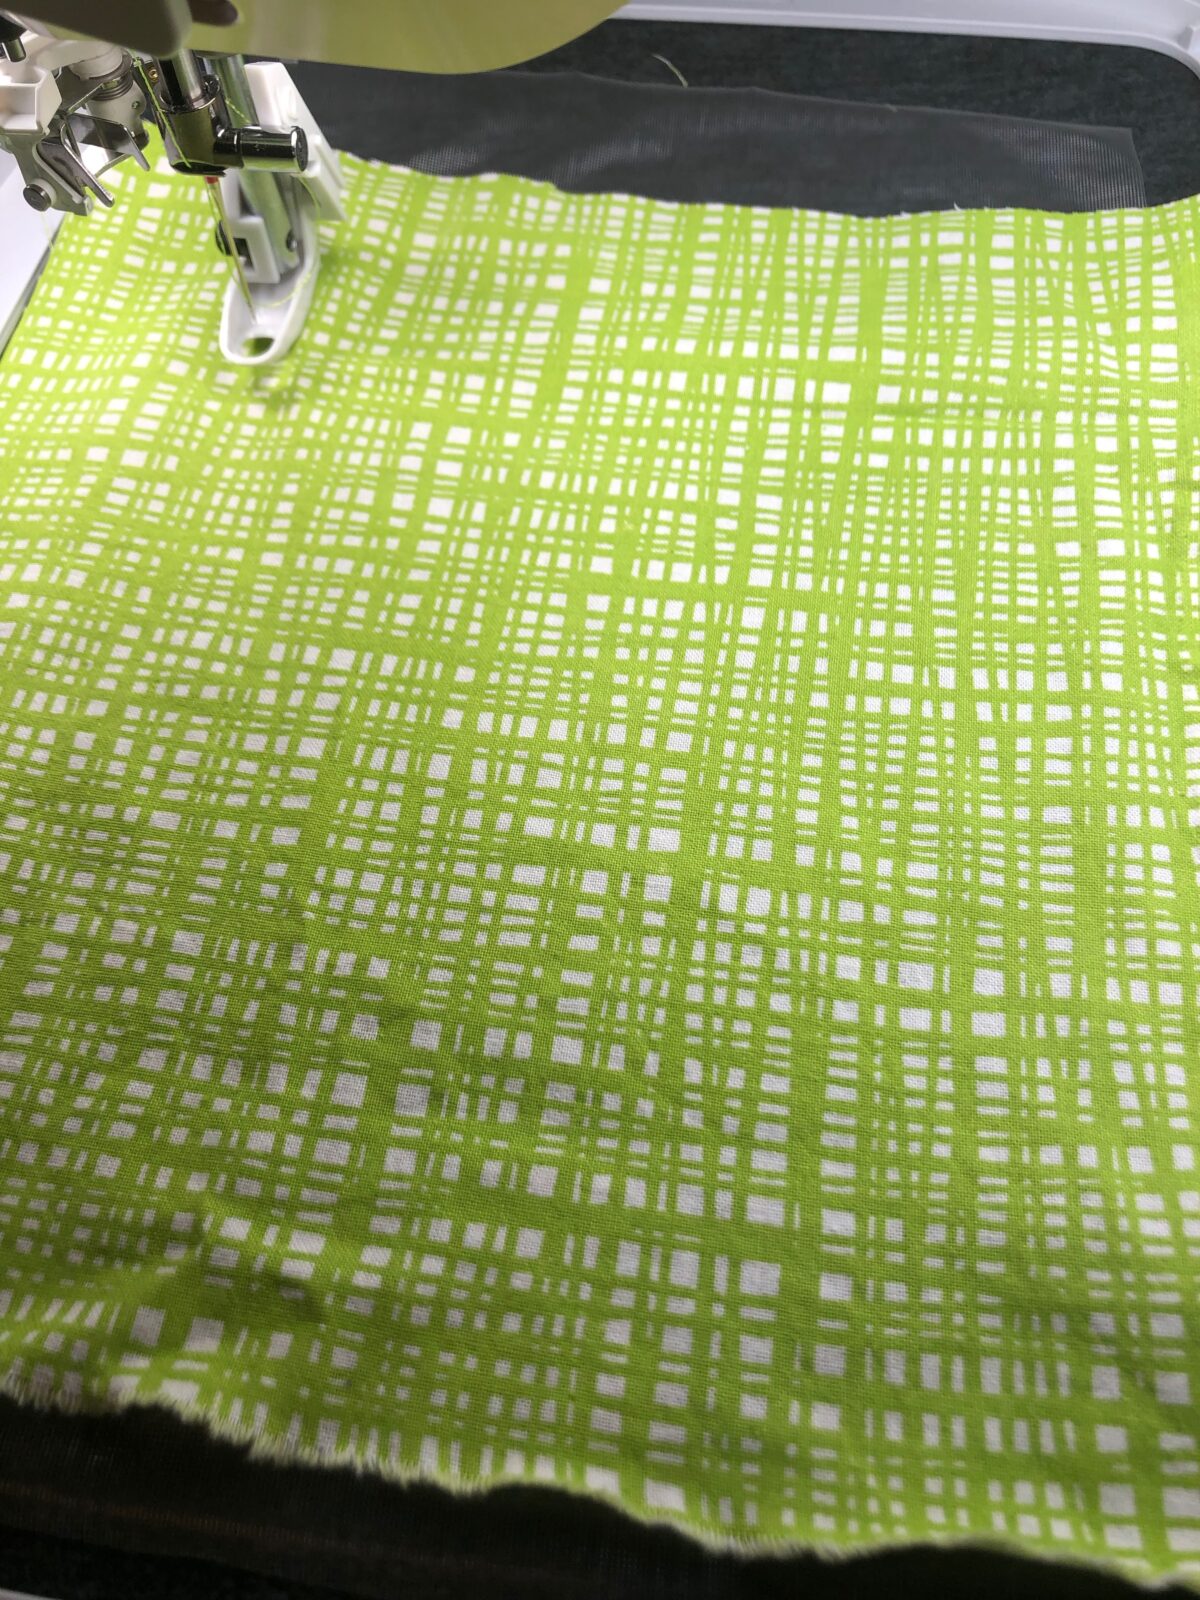
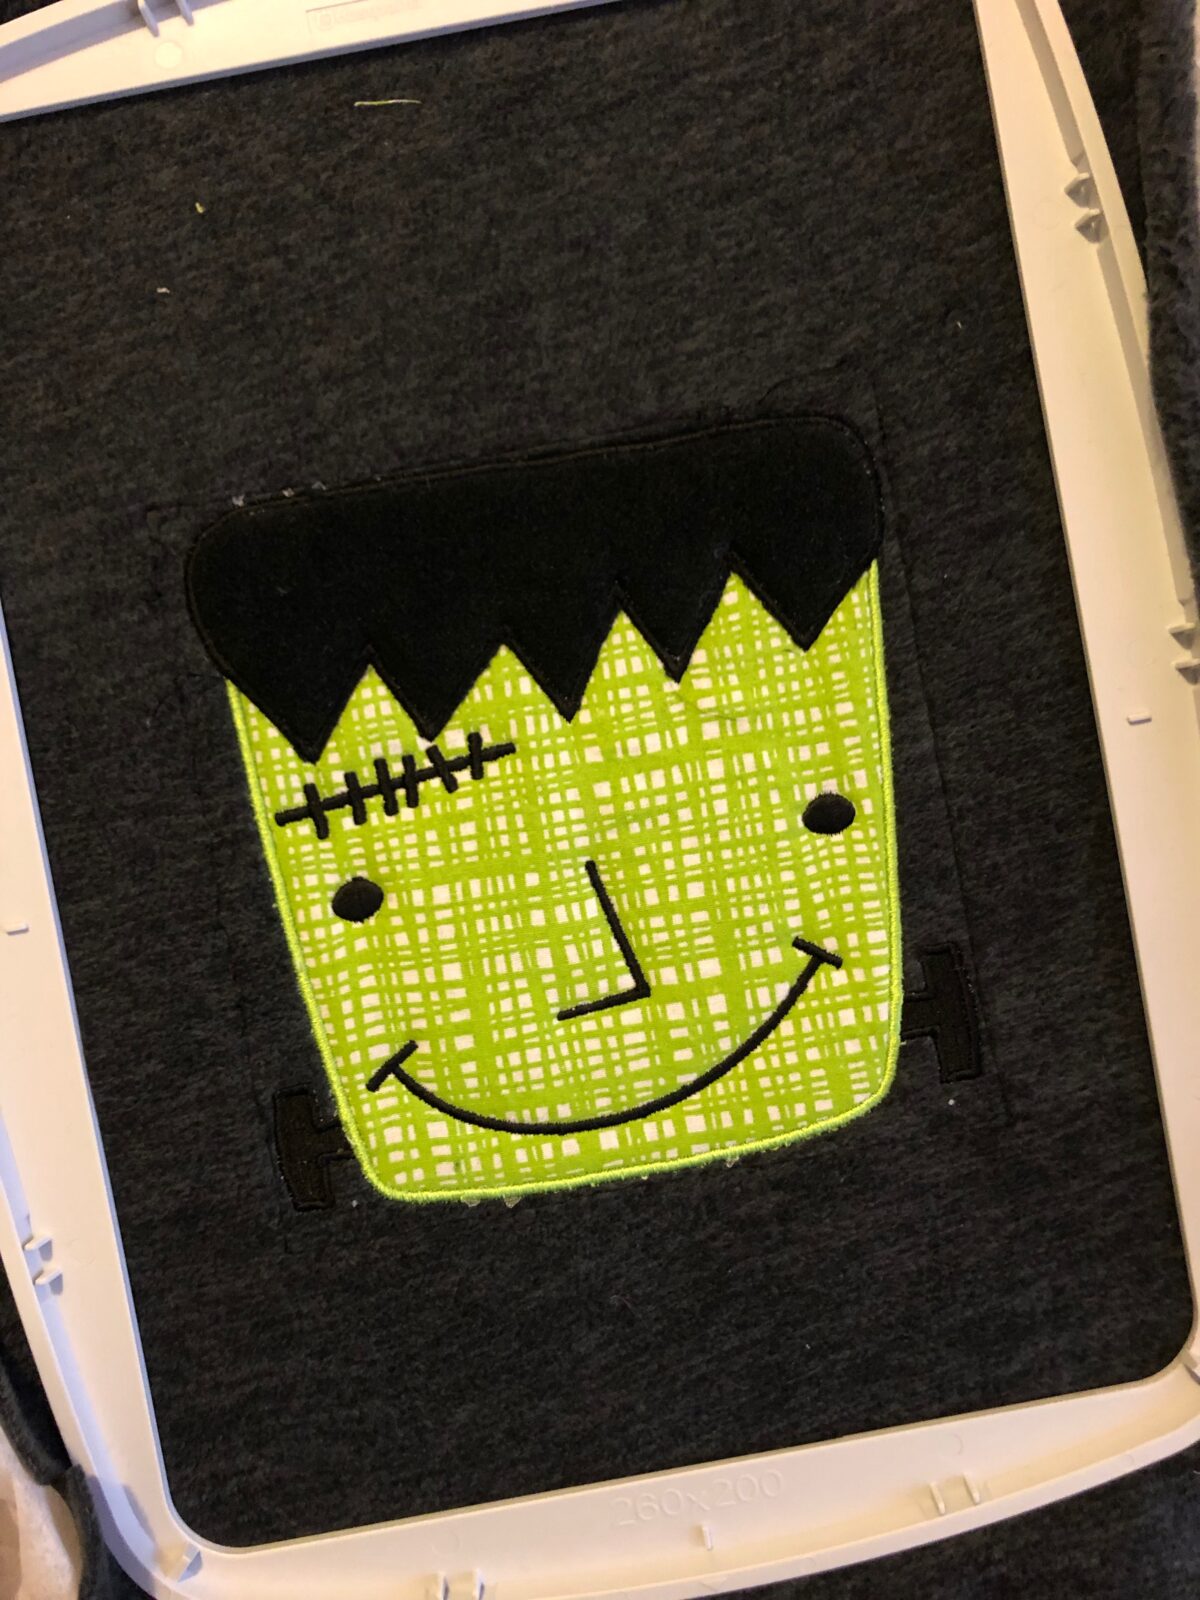
With these quilt kits comes six spools of coordinating Sulky rayon thread and six exclusive embroidery designs, one of which is a large-scale appliqué design. Make sure you choose the appliqué design for the quilt center so it fills the space and becomes the focal point of the quilt. Load the machine with the first thread color and Sulky bobbin thread in the bobbin. Make sure you install a size 90/14 Organ embroidery needle.
Step 2 is to stitch color stop 1, which is the placement stitch. This indicates where to position the appliqué fabric for embroidery. Center the machine embroidery appliqué fabric piece over the placement stitches, using KK 2000 to secure.
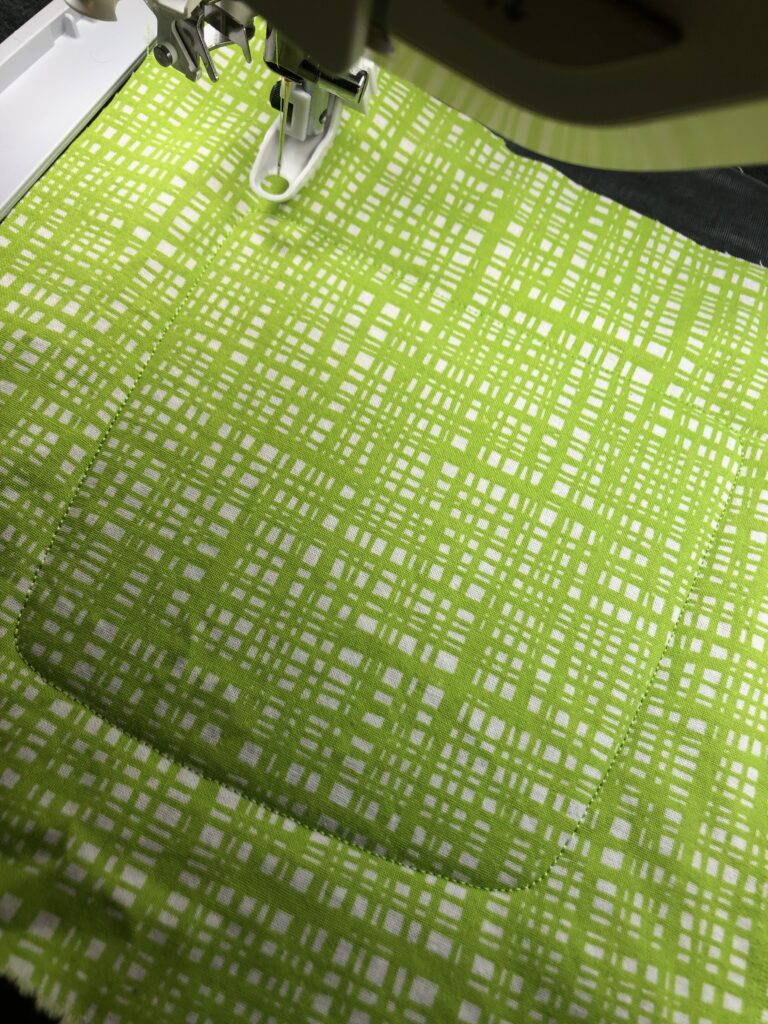
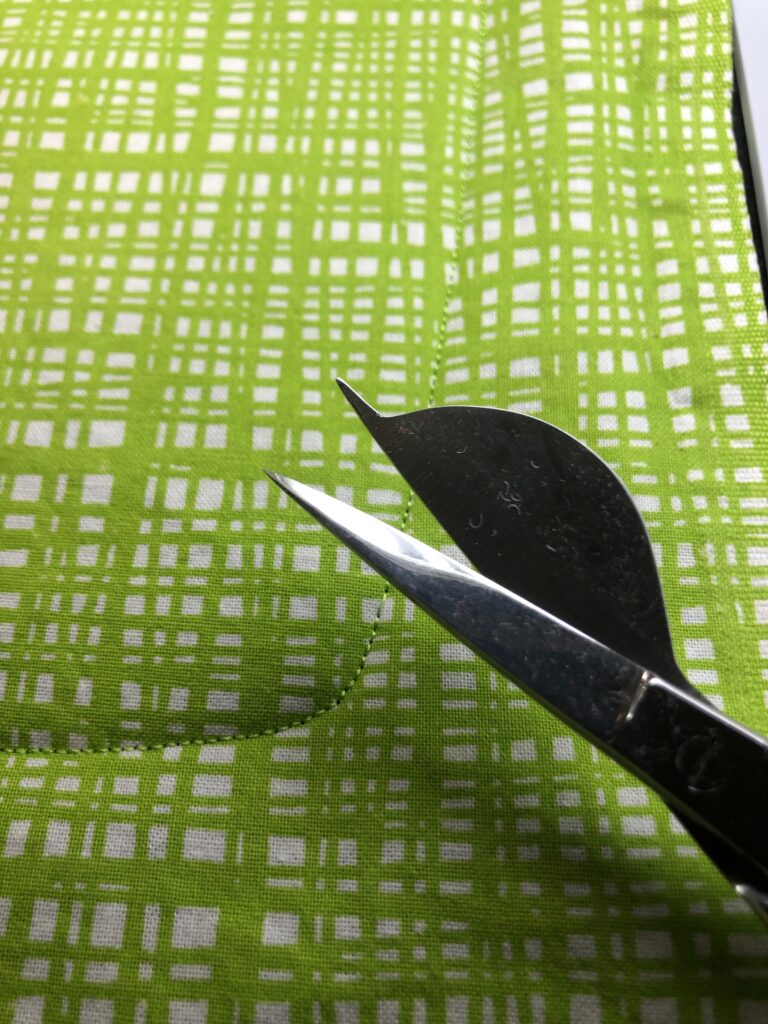
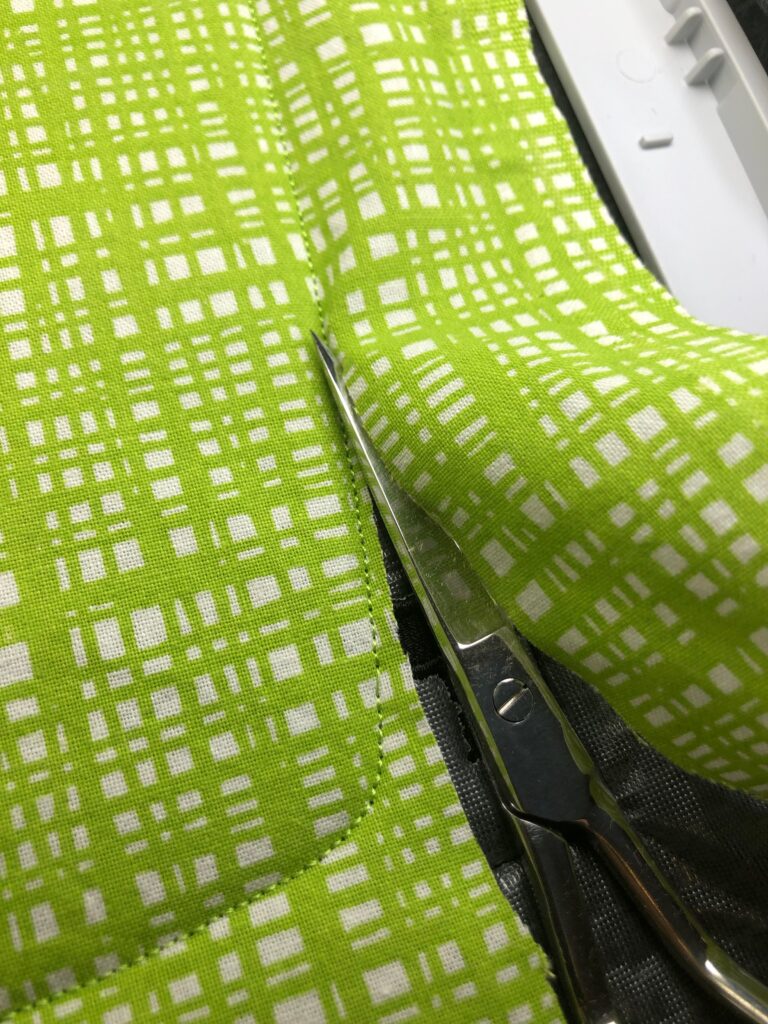
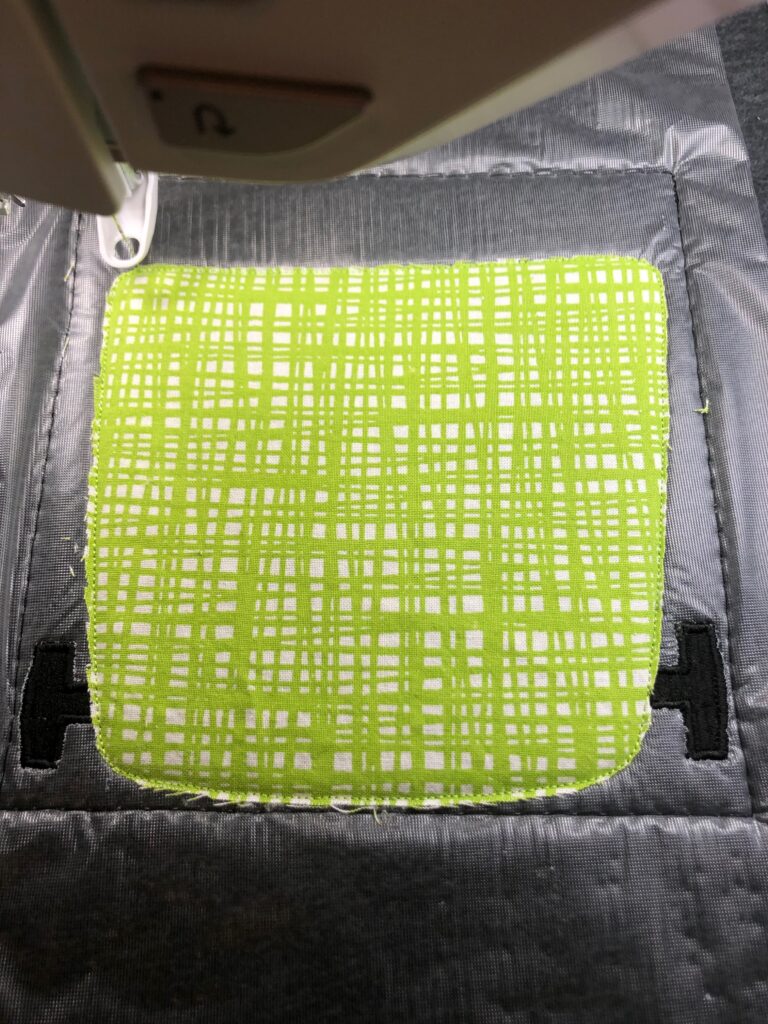
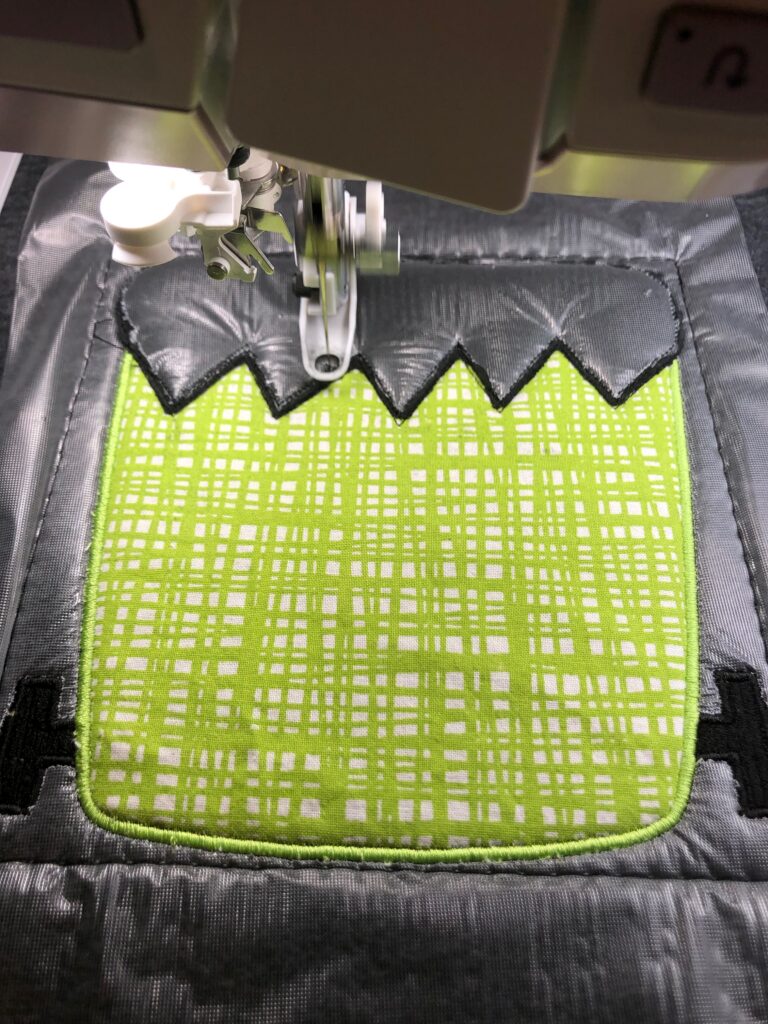
Step 3 is to stitch color stop 2, which is the tacking stitch. This is an outline stitch for the design, indicating where to trim the appliqué fabric. After the tacking stitch is complete, remove the hoop from the machine. DON’T remove the fabric from the hoop or adjust the hoop in any way. You want the fabric to stay n the exact same place so the remaining embroidery is aligned. Then, using a pair of applique scissors, trim the appliqué fabric just beyond the tacking stitches. Don’t cut through the backing fabric!
Finishing the Appliqué
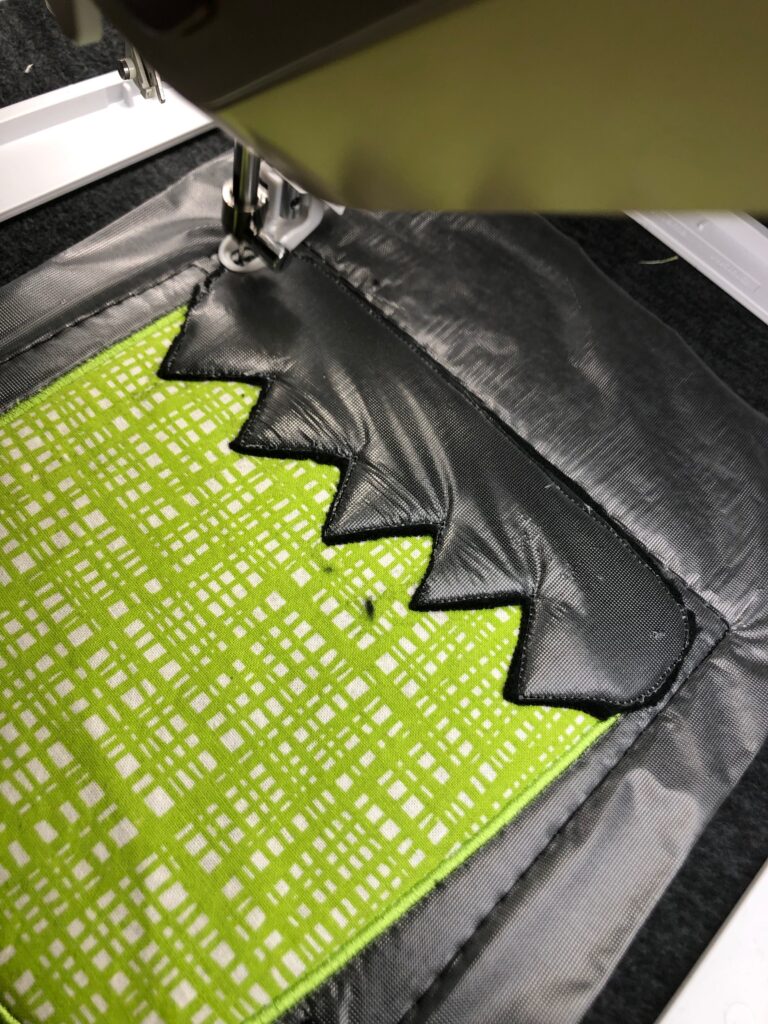
The rest of the stitches will complete the design. Make sure to clip jump threads with each color change. Next, place the hoop back onto the machine and follow the steps to complete the stitching, switching thread colors as indicated by the machine and/or thread chart.

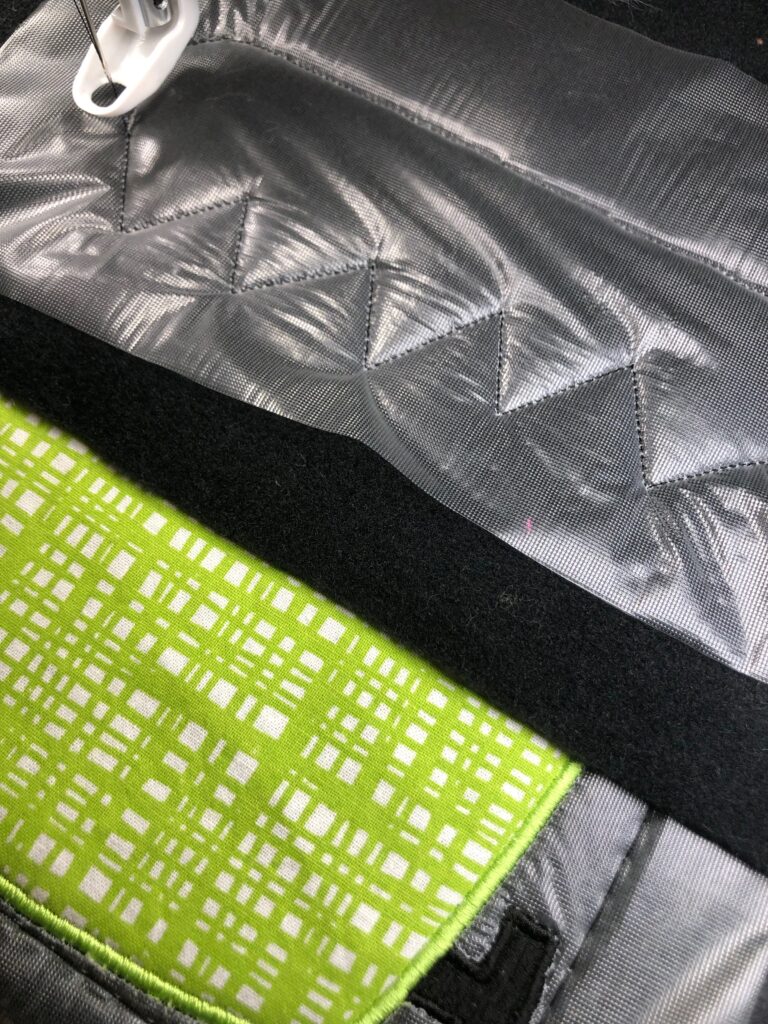
If there are additional lofty or plush appliqué layers that require more topper, place more on top and continue the embroidery.
When the embroidery is complete, remove the hoop from the machine and the fabric from the hoop. Then tear away the stabilizer from the fabric wrong side. Finally, trim away as much of the Ultra Solvy as possible from the fabric right side.
Run water or a damp cotton swab over the remaining Ultra Solvy until dissolved.
Once embroidery is complete, finish constructing the quilt. Add more of the embroidery designs from the collection to the quilt by placing them as desired.
These quilts make great new-baby gifts, holiday presents and décor! Plus, you get to learn a new technique: machine embroidery appliqué.
