Quilted Coasters Make Great Quick Gifts
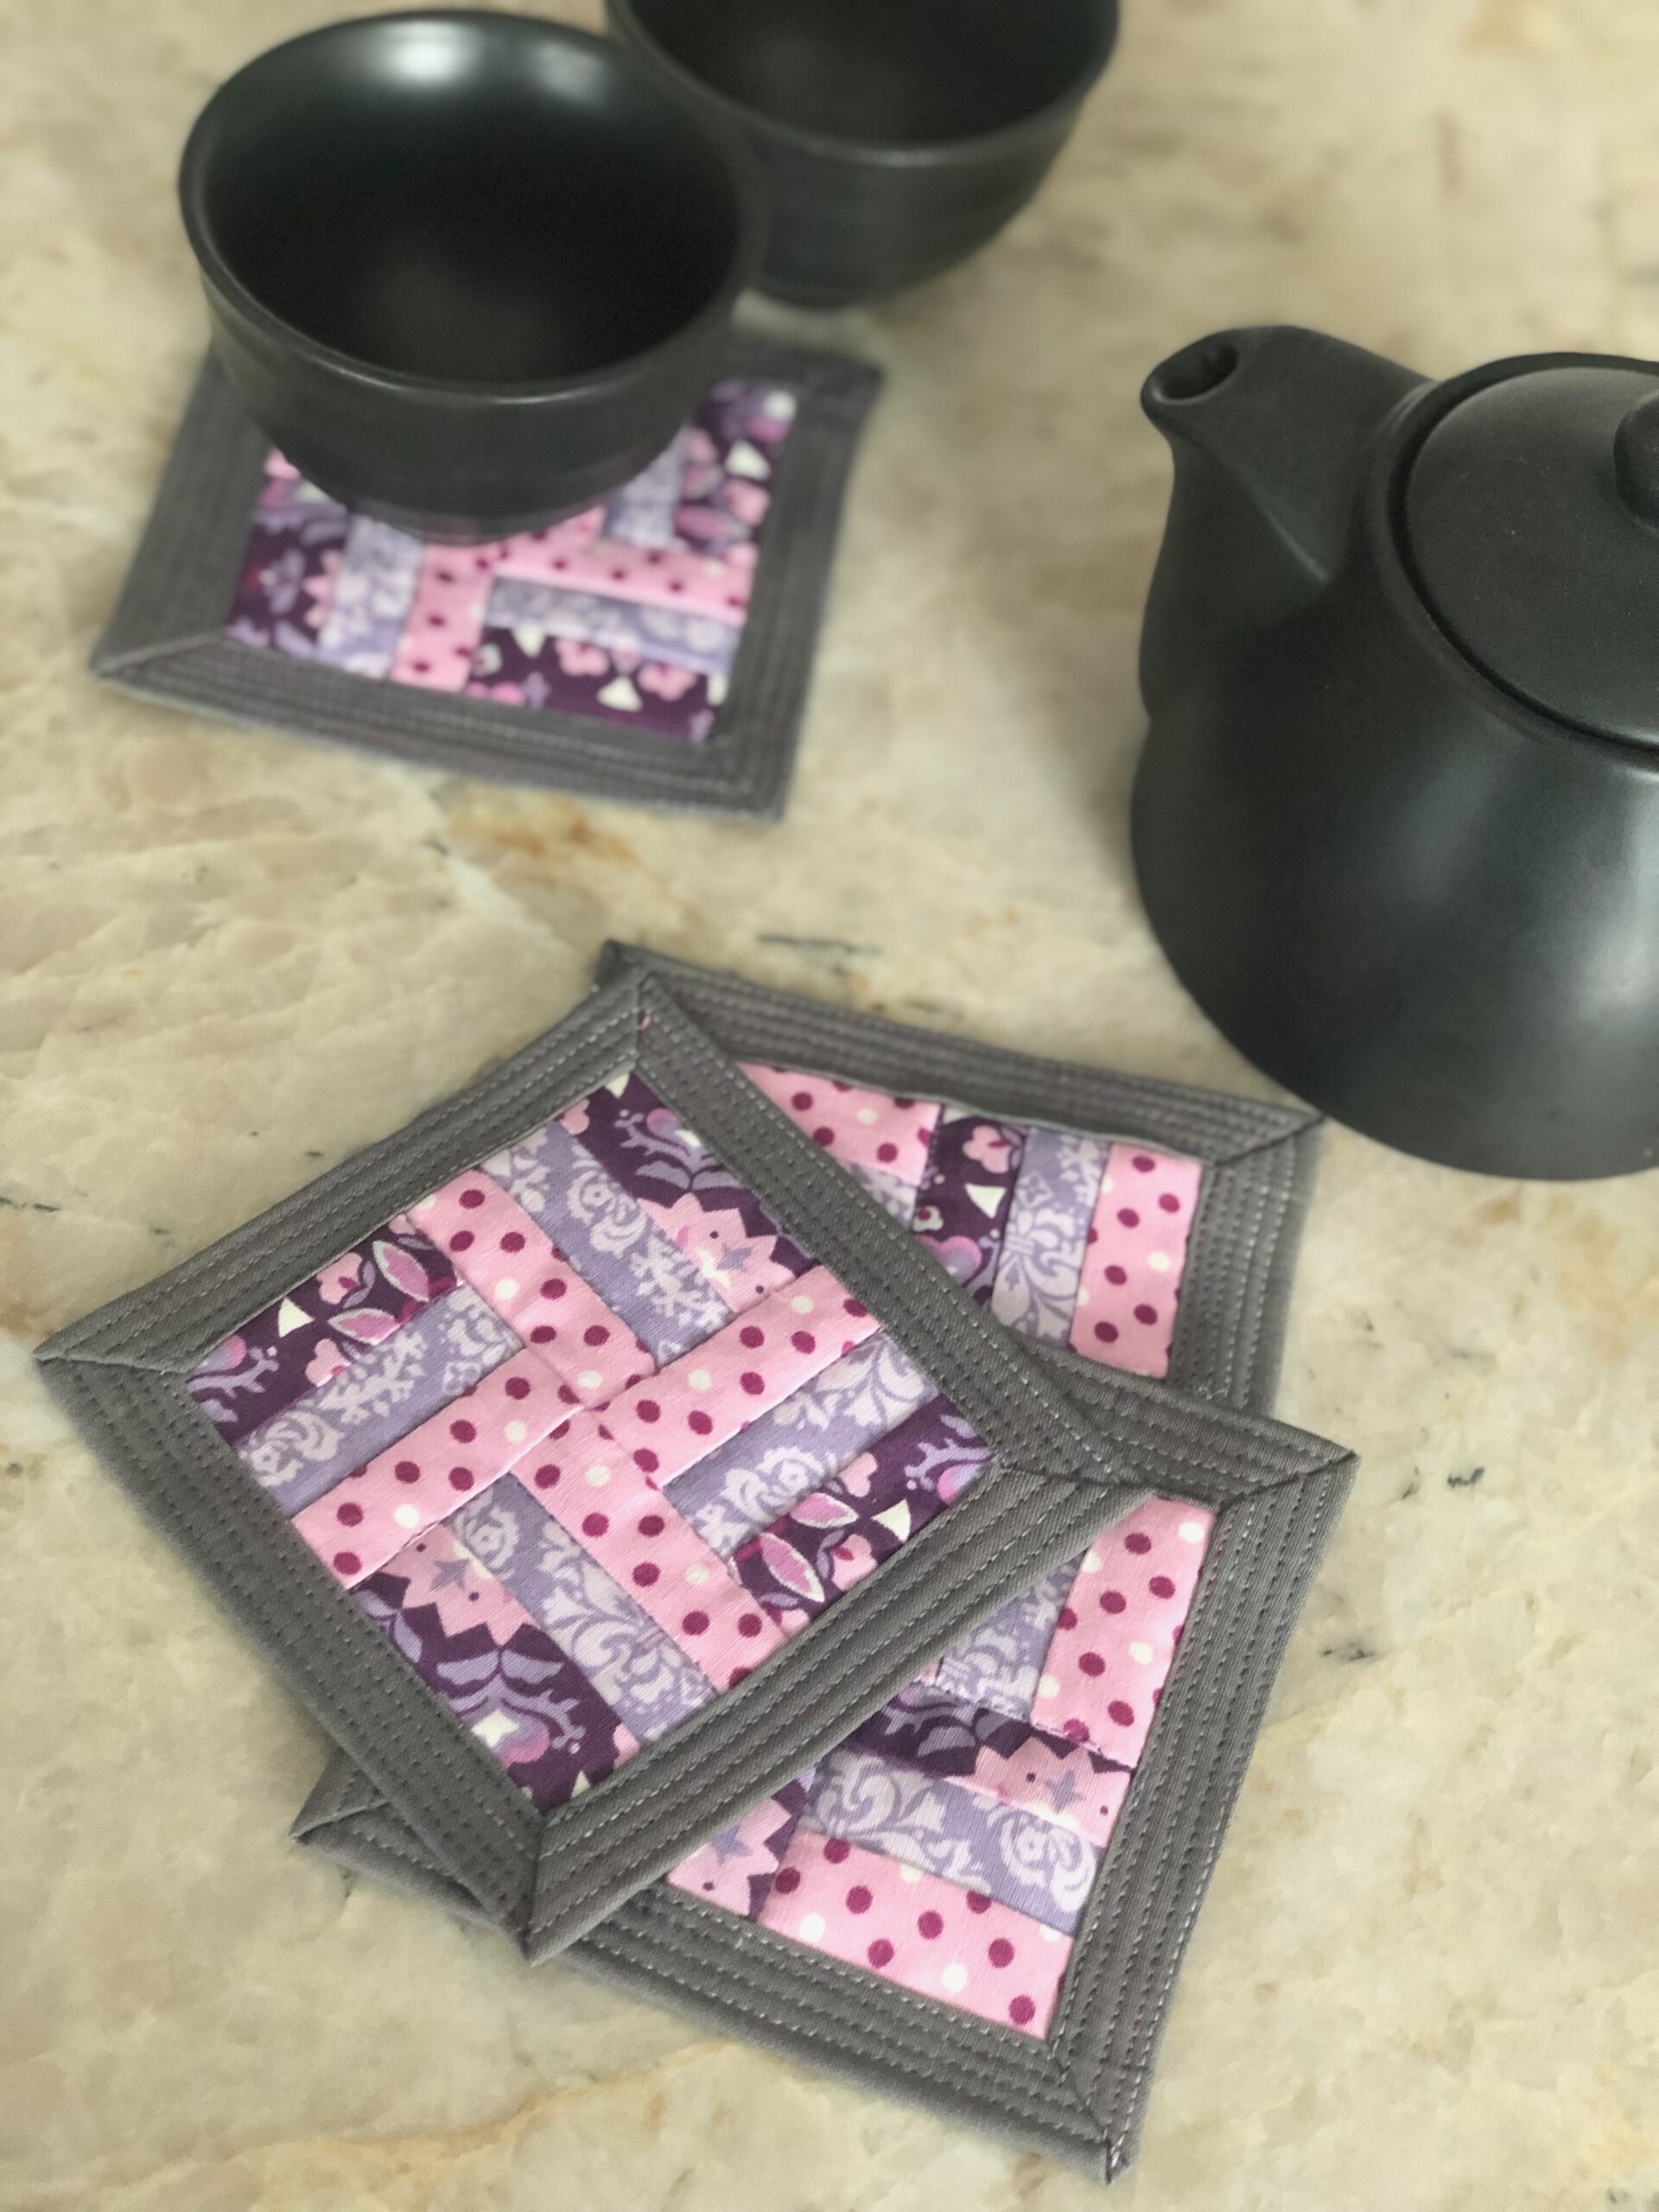
Quilted coasters are great scrap-buster projects. If you have leftover quilt blocks from a larger project, those are easily transformed into coasters, too. Stitch a set of four to gift for Mother’s Day or any holiday. These finished coasters measure 4 1/2″ square.

QUILTED COASTER SUPPLIES
Supplies listed are enough to make one coaster.
- Matching 50 wt. Cotton Thread (piecing) (Featured colors from the Plums & Purples Thread Palette)
- Coordinating 30 wt. Cotton Blendables® Thread (quilting)
- Organ® Needles: size 70/10 Universal & 90/14 Quilting
- Sulky KK 2000™ Temporary Spray Adhesive
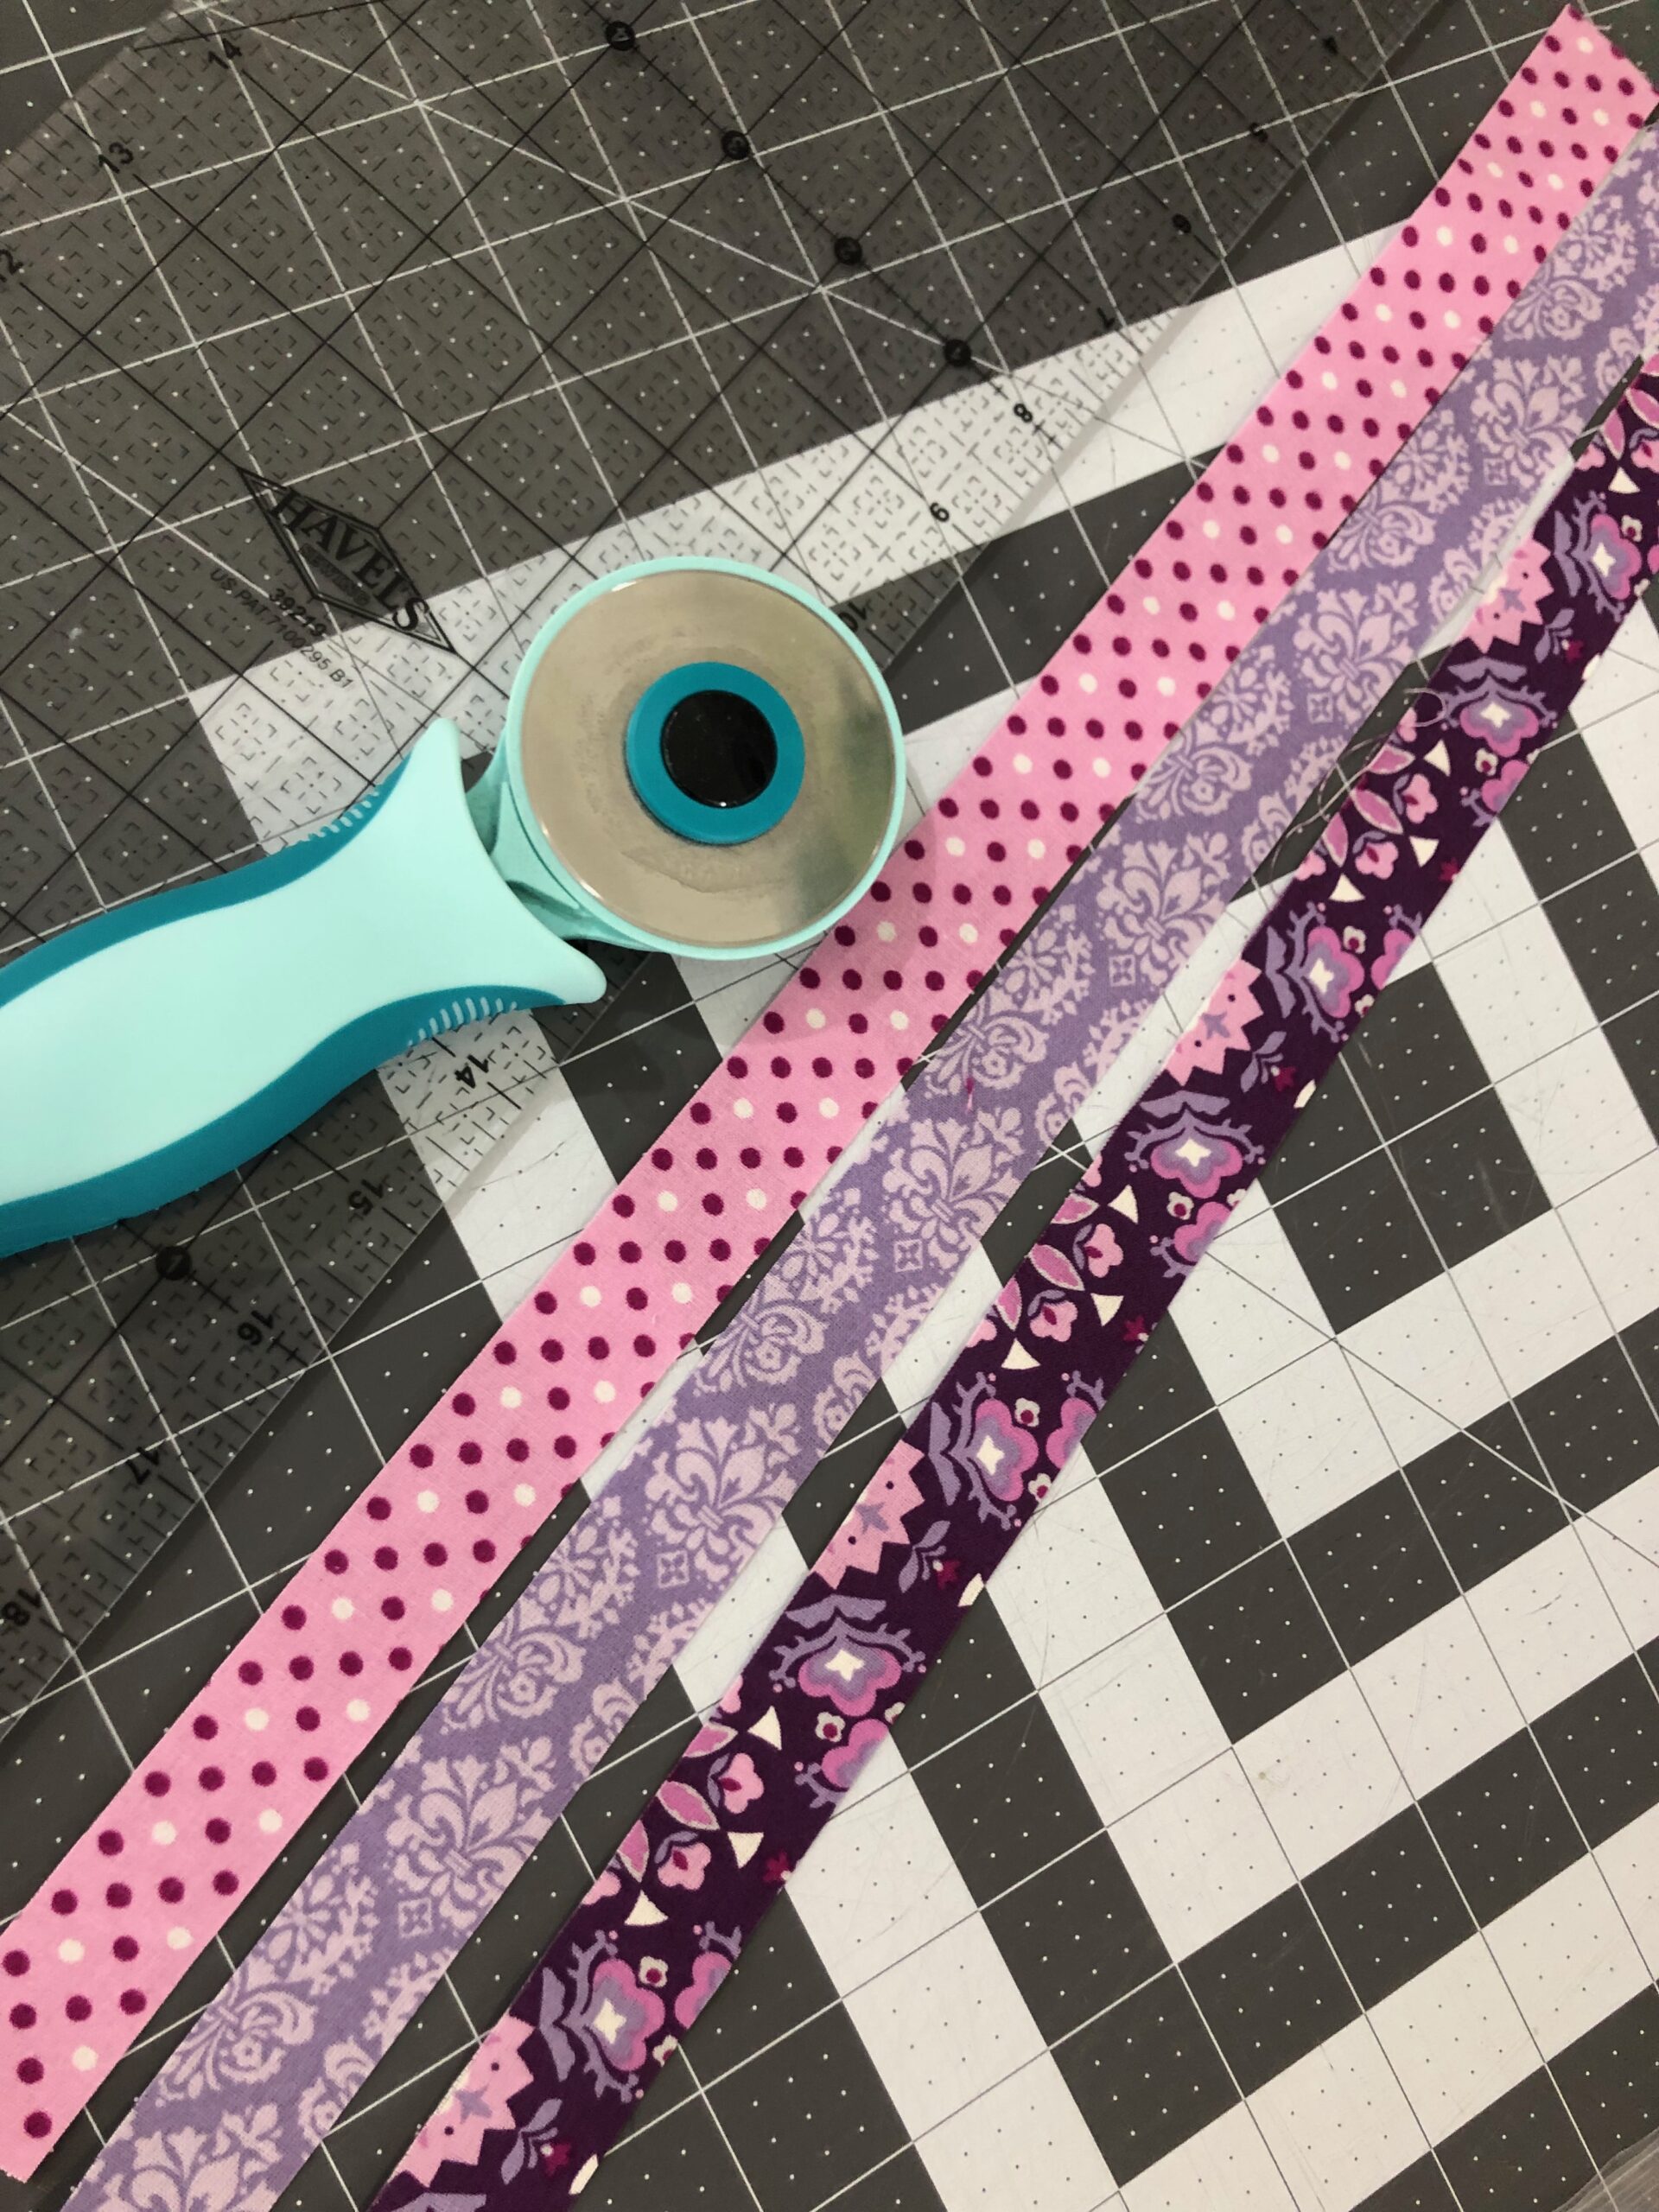
- 3 coordinating fabric prints (each measuring approximately 1″ x 10″)
- 4 3/8″ square of batting
- 6 1/2″ square of backing fabric
PIECING THE COASTER TOP
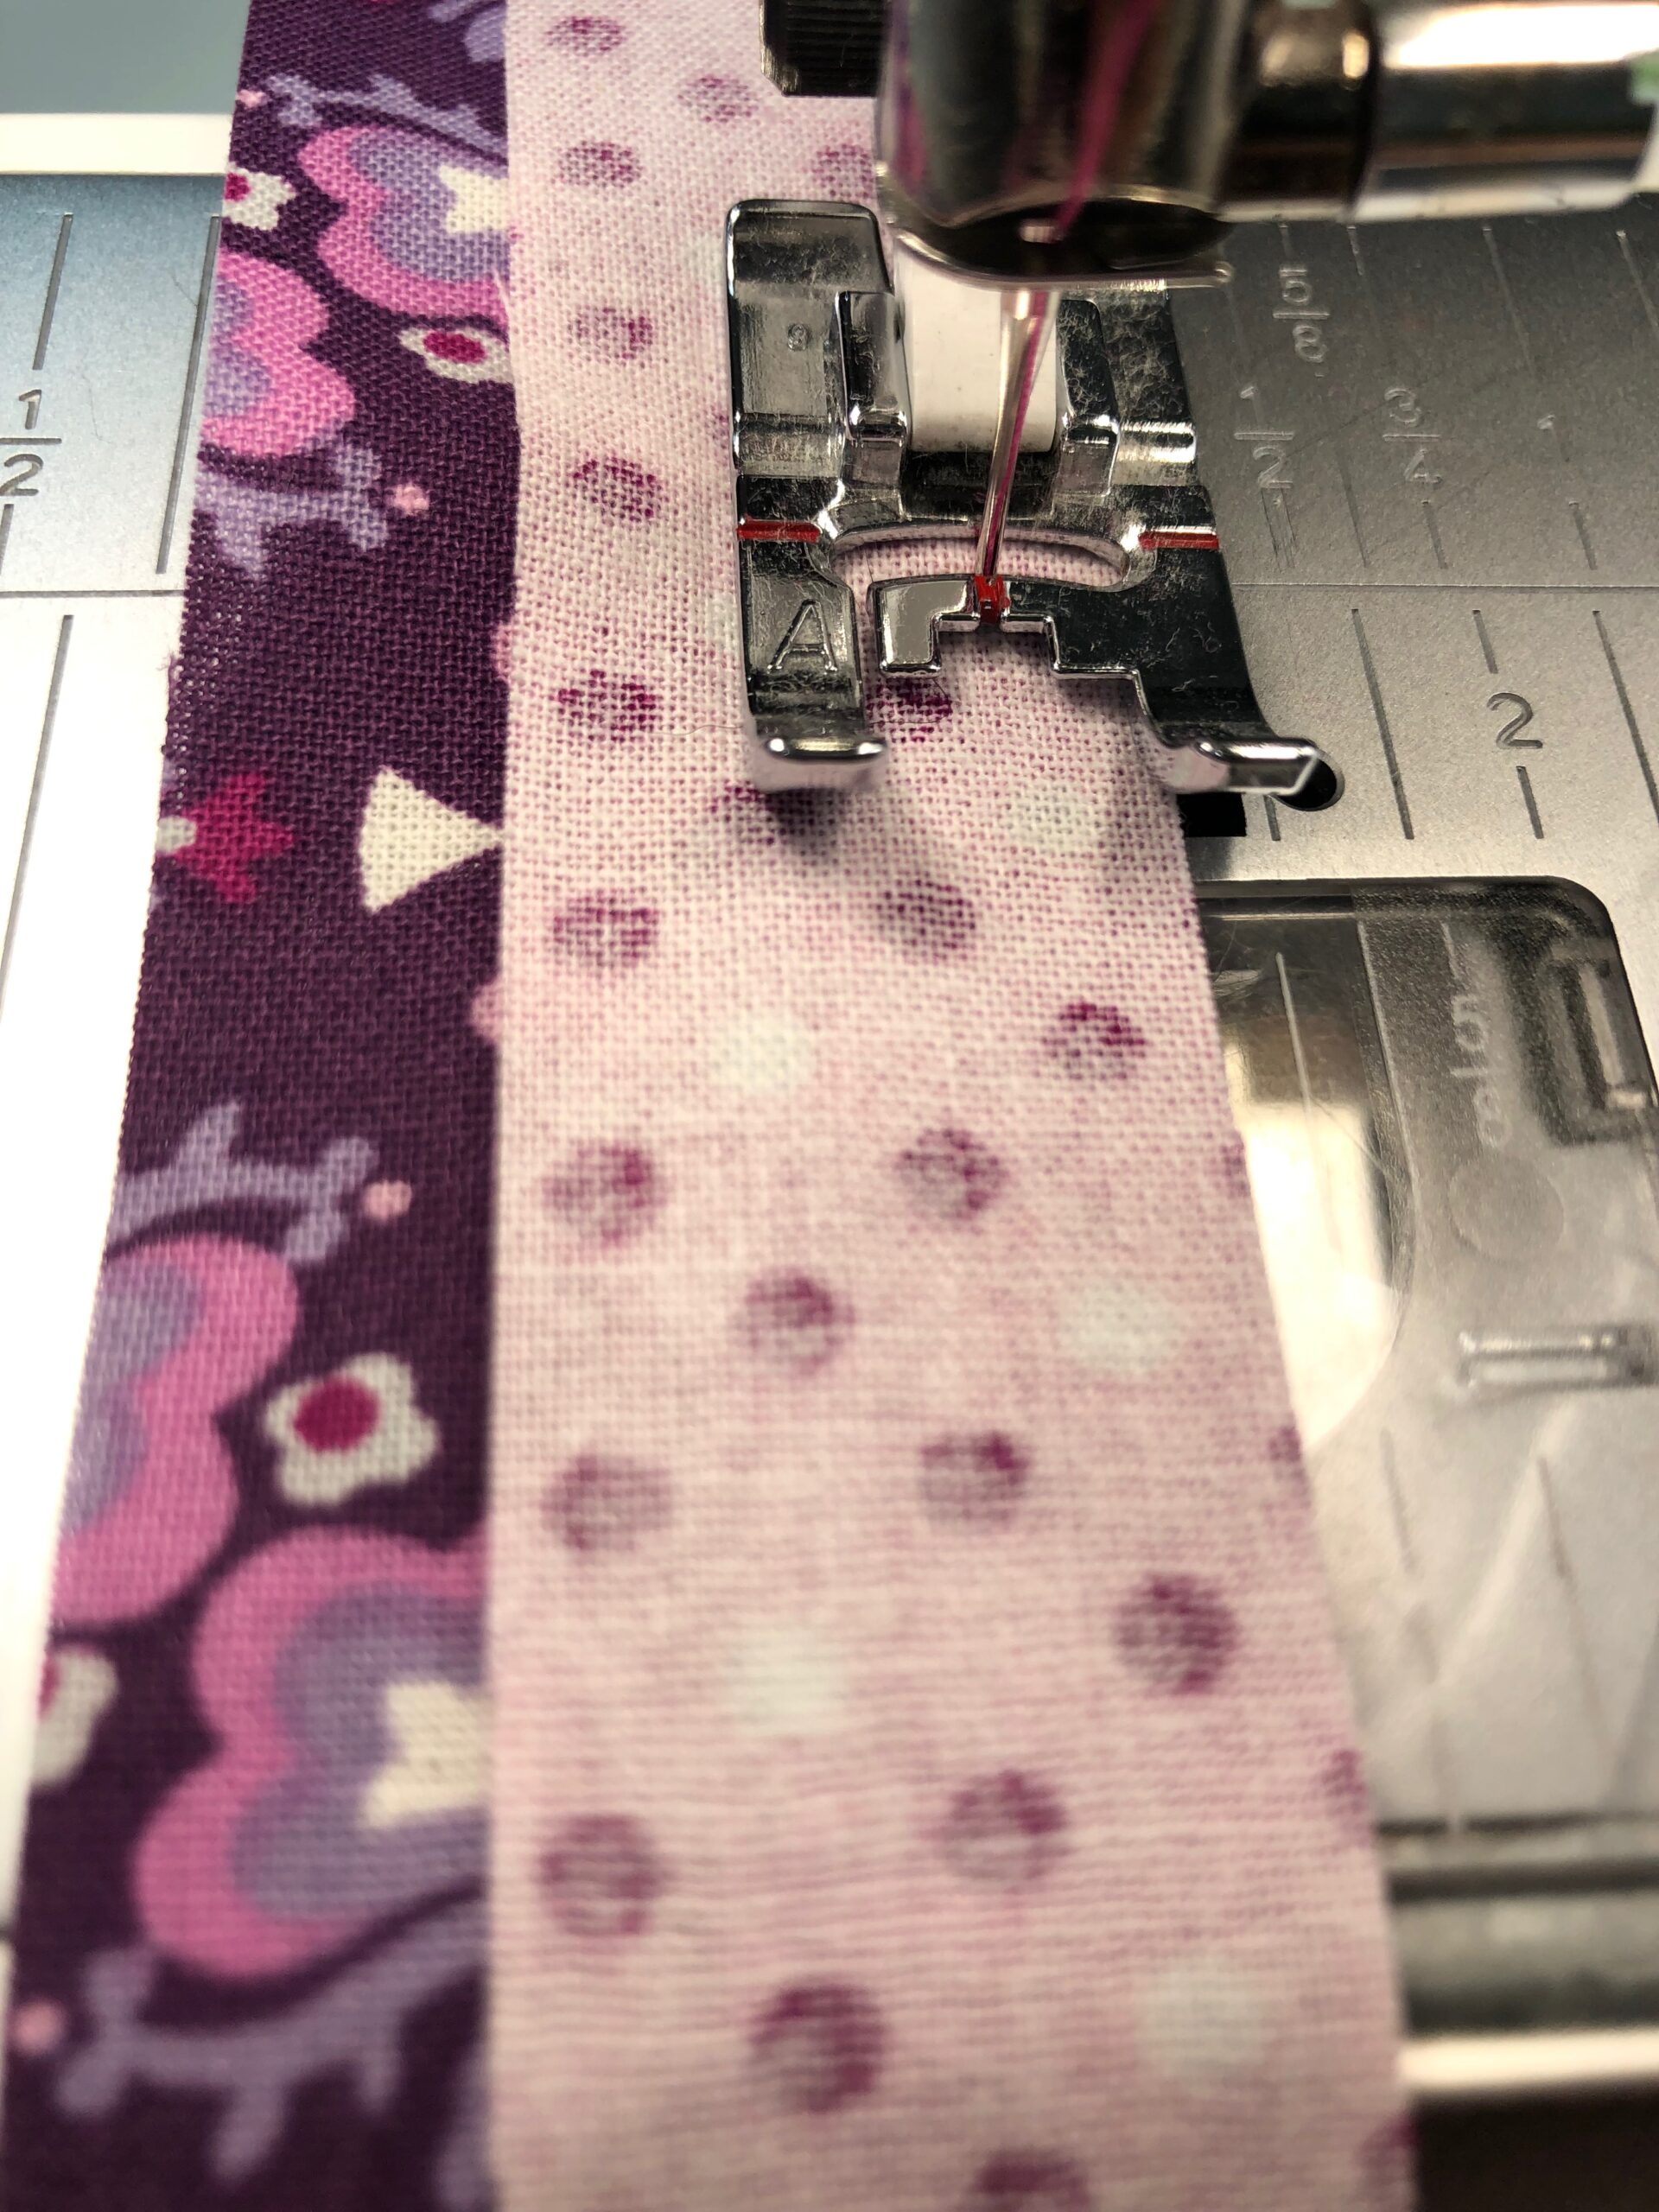
Use 1/4″ seams.
Install a size 70/10 Universal Needle. Wind a bobbin and thread the needle with 50 wt. Cotton Thread. Next, set the stitch length to 2.5mm.
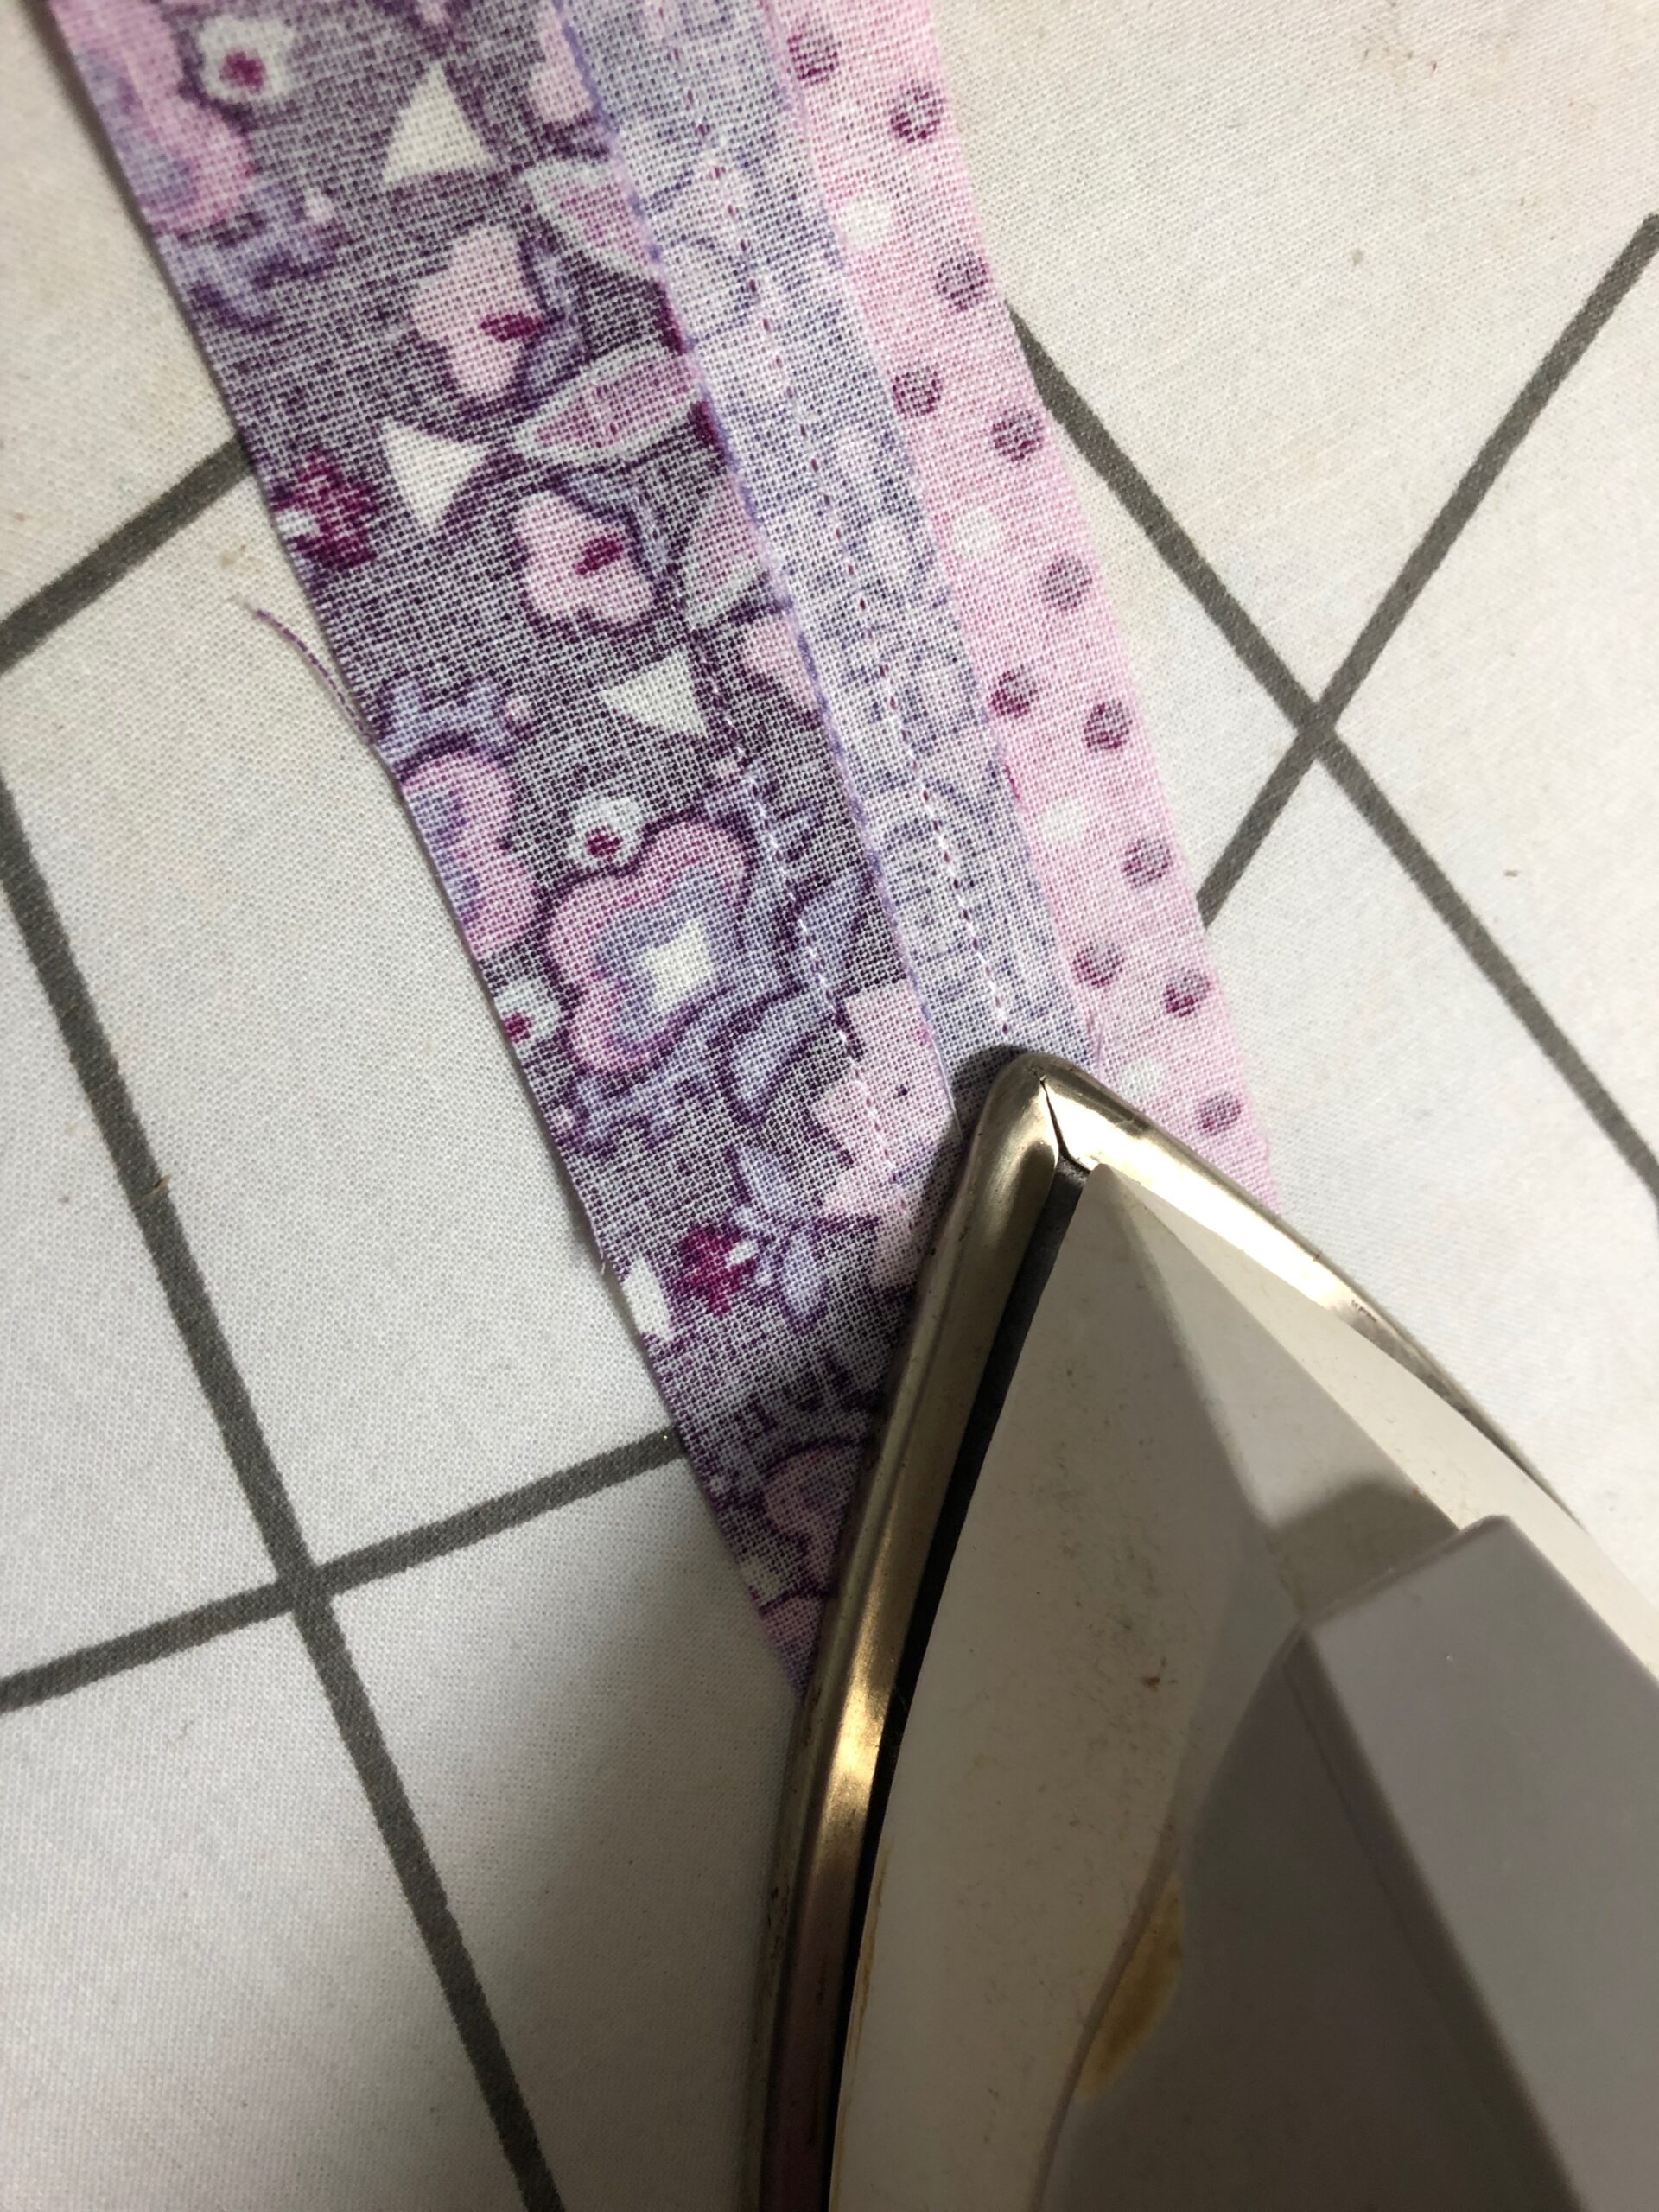
Stitch two fabric strips together along one long edge, with right sides together and edges and corners aligned. Press the seam toward the darker fabric.
Then, stitch the remaining fabric strip to one long edge of the previous strips.
Press the seam toward the darker fabric.
Cut the pieced strip into four equal lengths measuring 2″ square.
Arrange the four pieced squares as desired, placing two horizontally and two vertically to create the windmill shape shown.
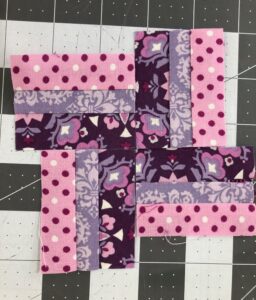

TIP: Any mini quilt block makes a great coaster. Try a Granny Square, Half-square Triangle, Pinwheel or Log Cabin block to create different coasters for different recipients, and practice your piecing skills, too!
QUILTING THE COASTER
Center the pieced coaster top on the batting, using KK 2000 to secure.
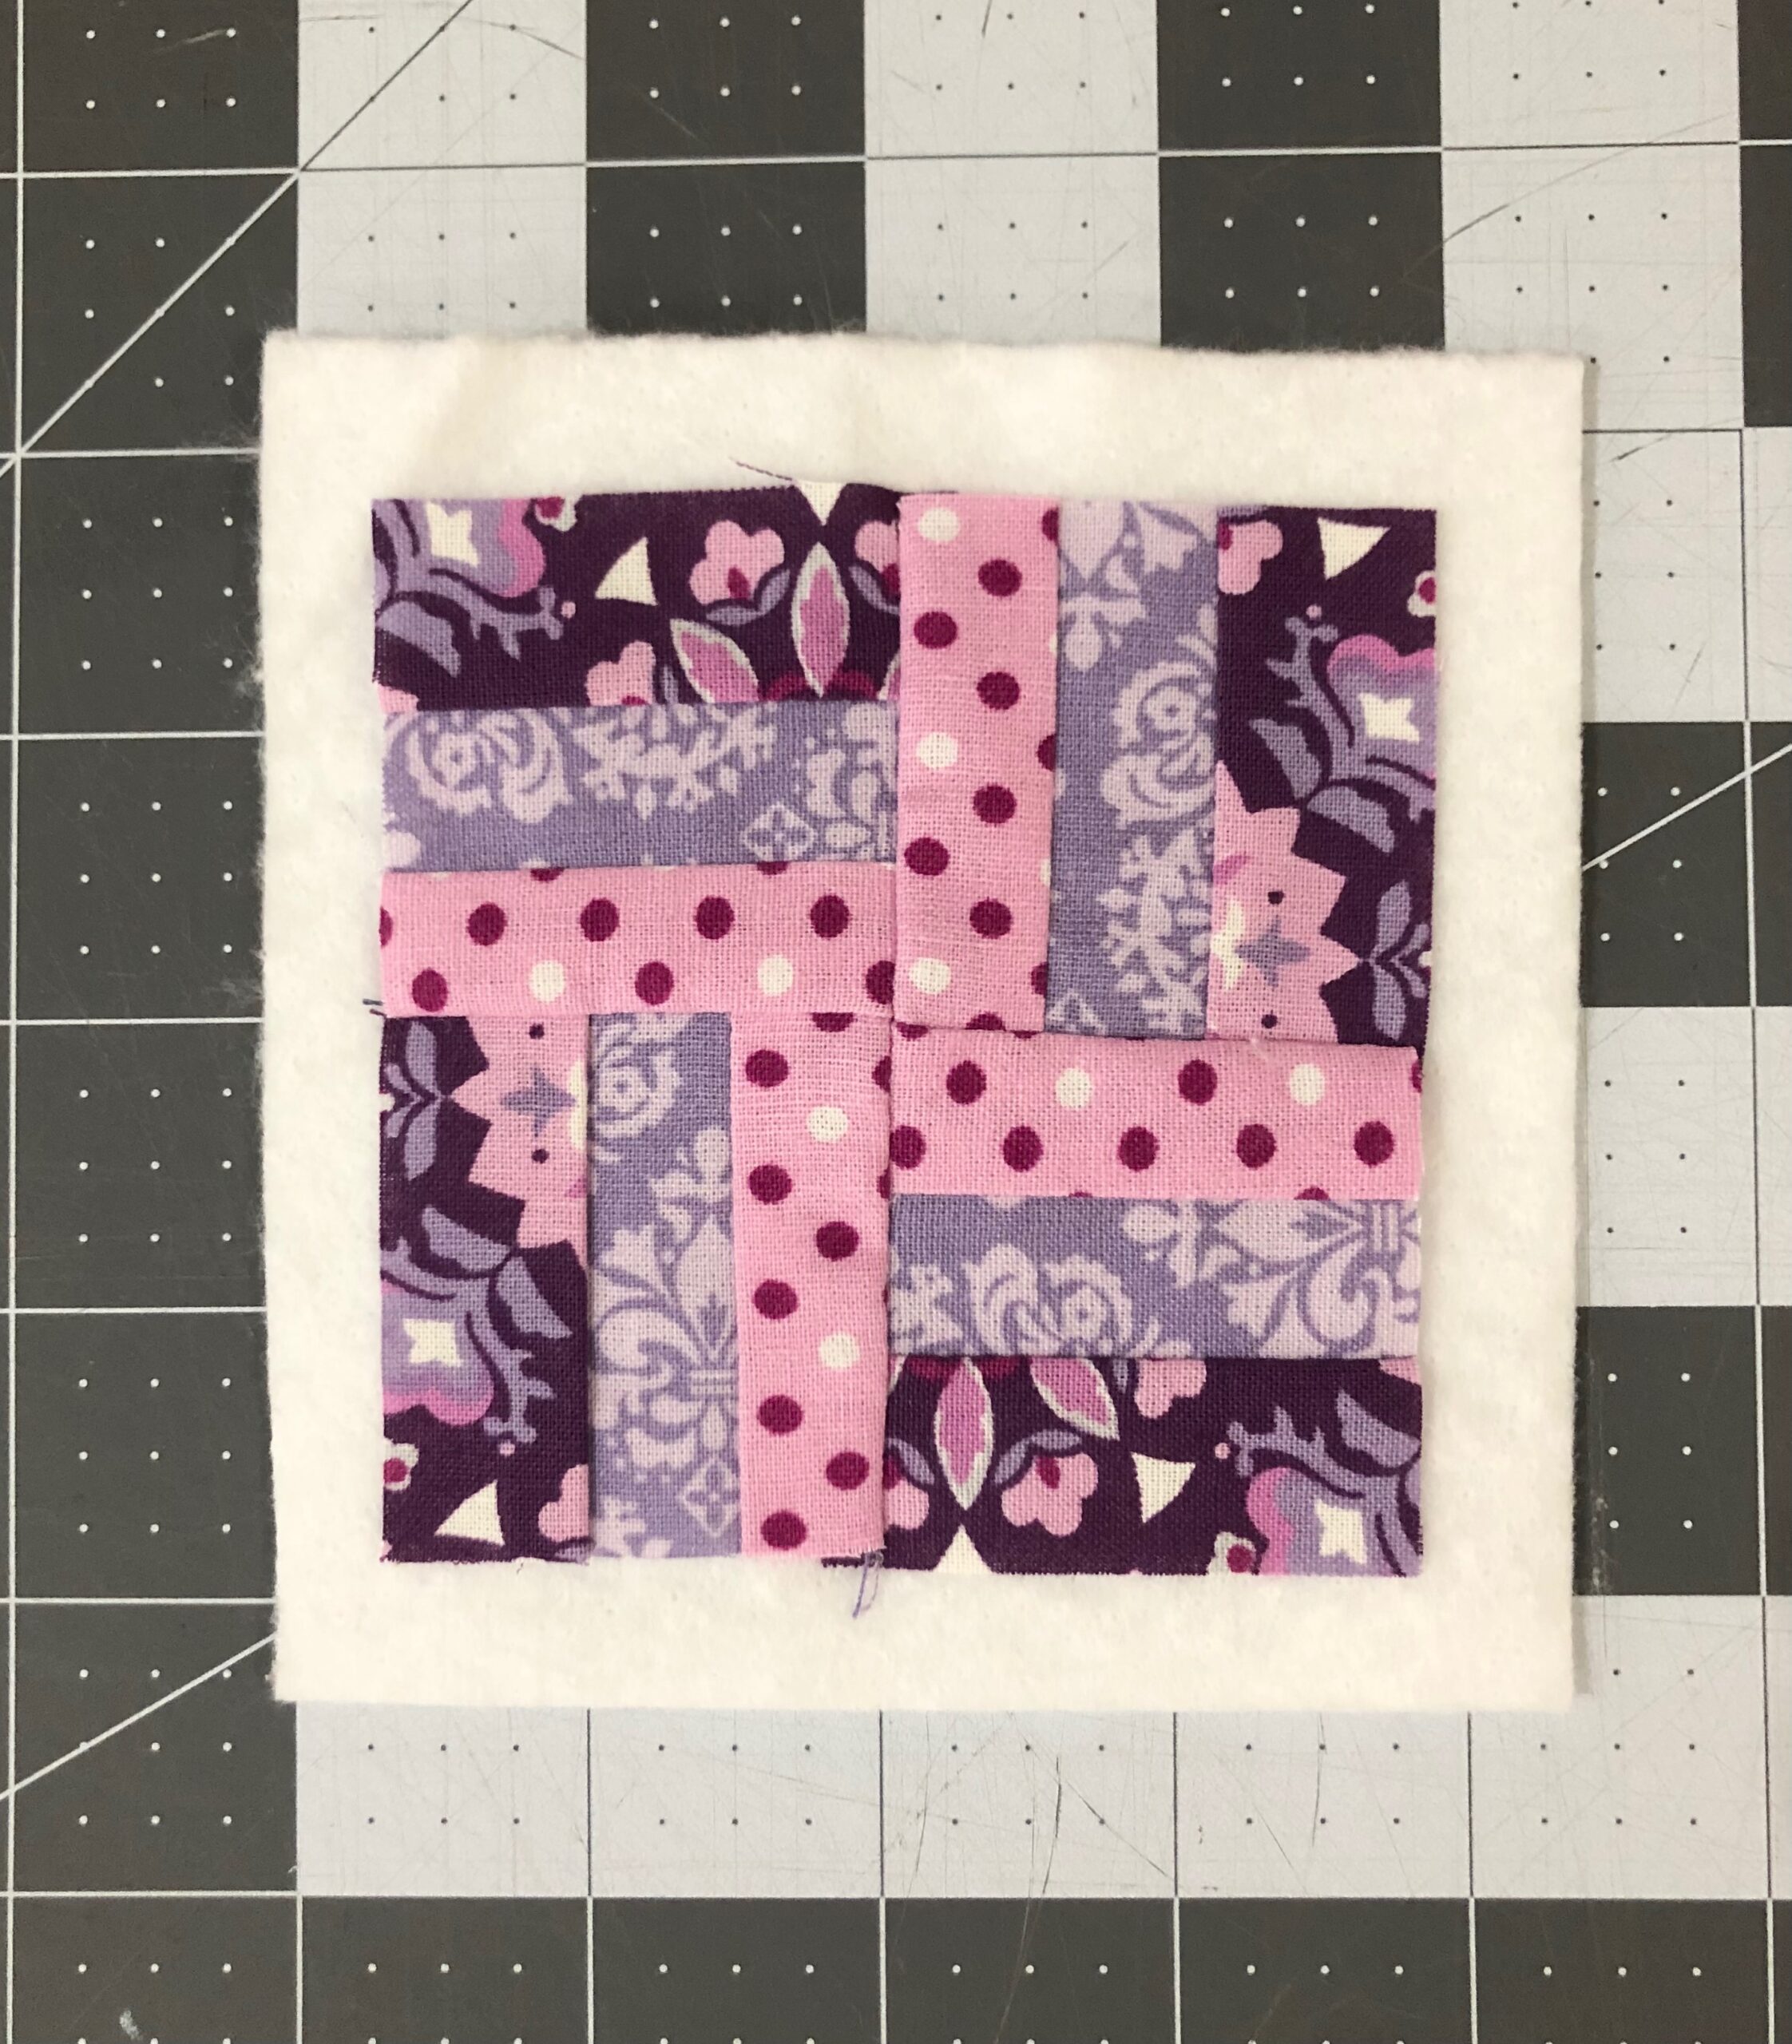
Then, center the batting square over the backing, using KK 2000 Temporary Spray Adhesive to secure.

Install a size 90/14 Quilting Needle and thread it with 30 wt. Cotton Blendables Thread. Wind a bobbin with the same thread.
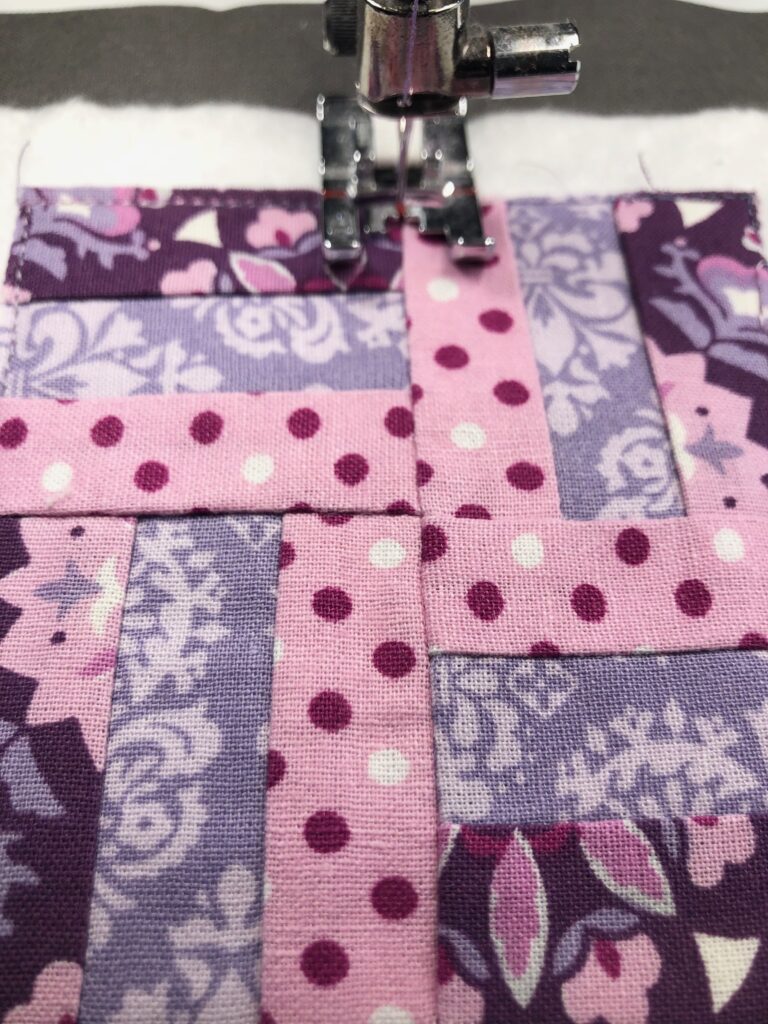
Decide on the desired quilting stitches. For the featured coaster, a straight stitch is used. Experiment with decorative stitches to sew along the seamlines for a different look.
Edgestitch along the coaster-top raw edges to “outline” the coaster. Quilt along the coaster top where desired. Quilt in the ditch of each seam or only the center windmill shape seams. Begin/end the quilting at the outline stitching. Don’t go beyond or the quilting will show on the faux binding.
FINISHING THE COASTER
After quilting is complete, double-fold the upper and lower edges of the backing toward the coaster top, placing the first foldline just beyond the coaster-top outline stitching. Use Wonder Clips to secure. TIP: Use a bit of KK 2000 to secure the faux binding folds.
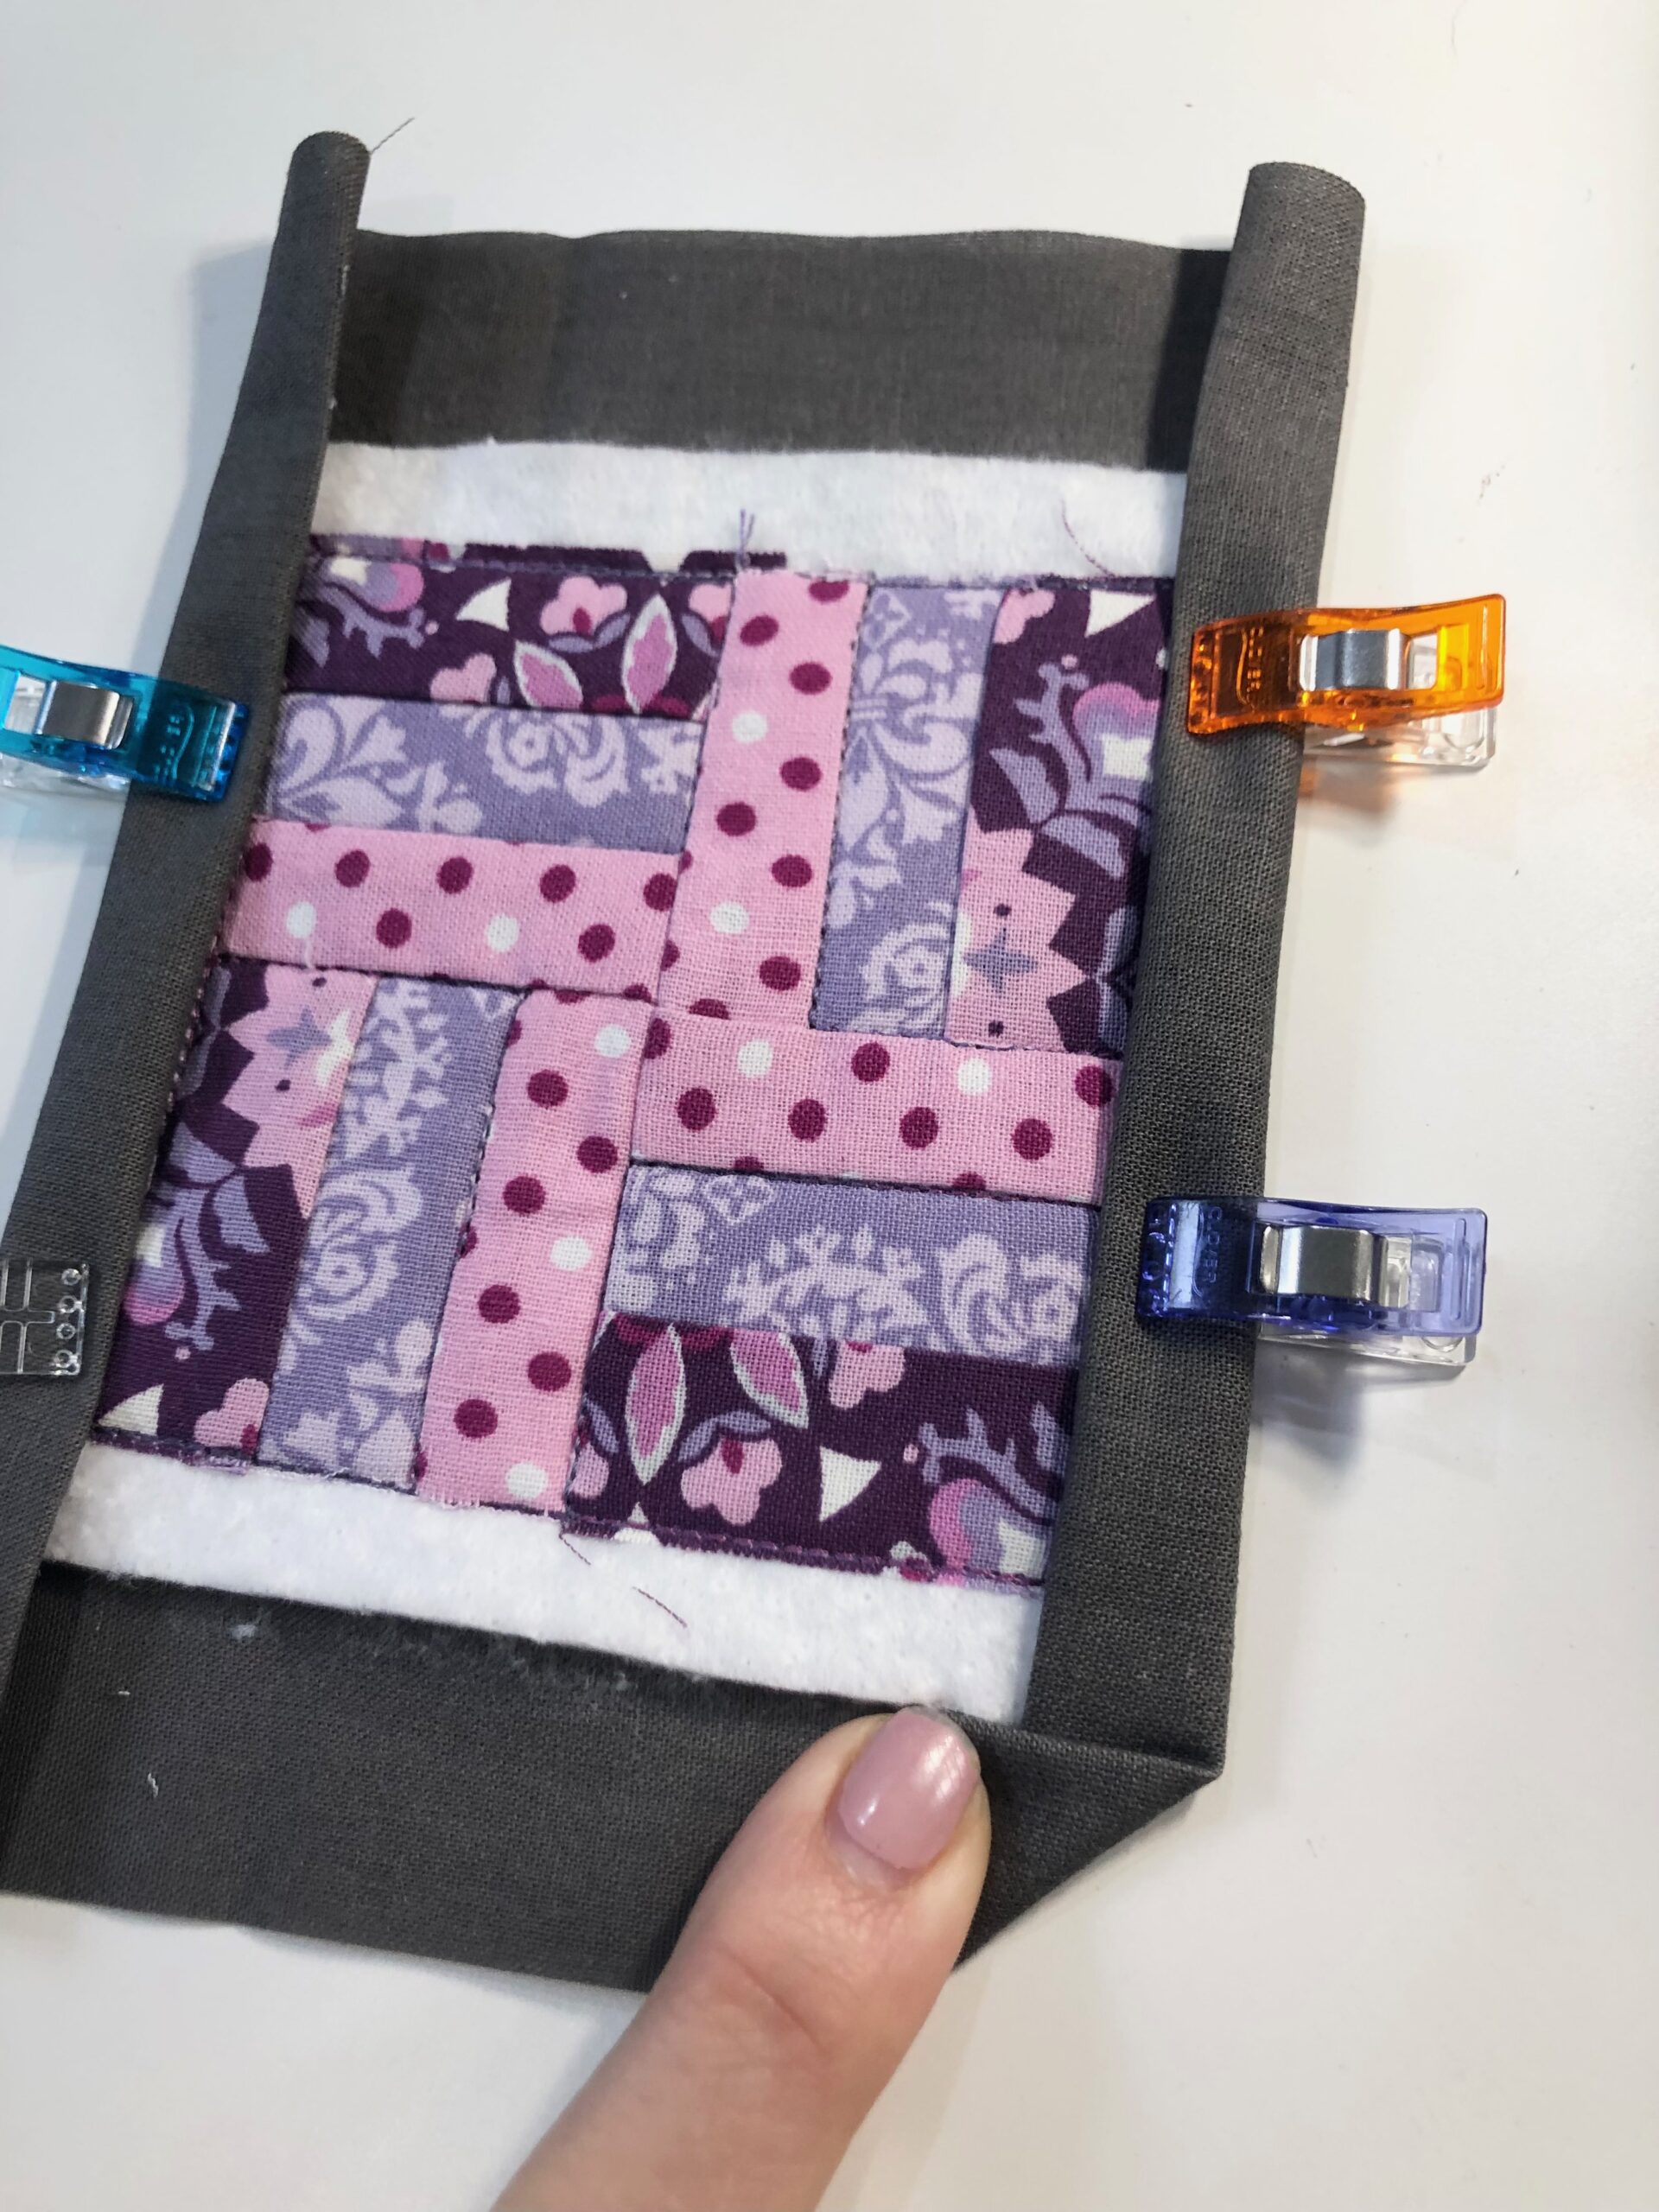
At the top-right corner, fold the corner to meet the adjacent batting edge. Repeat to fold the lower-right corner.

Then, double-fold the right edge, creating mitered corners on the right coaster edge.

Repeat to double-fold the left coaster edge, mitering the corners. Use Wonder Clips to secure the corners and edges.

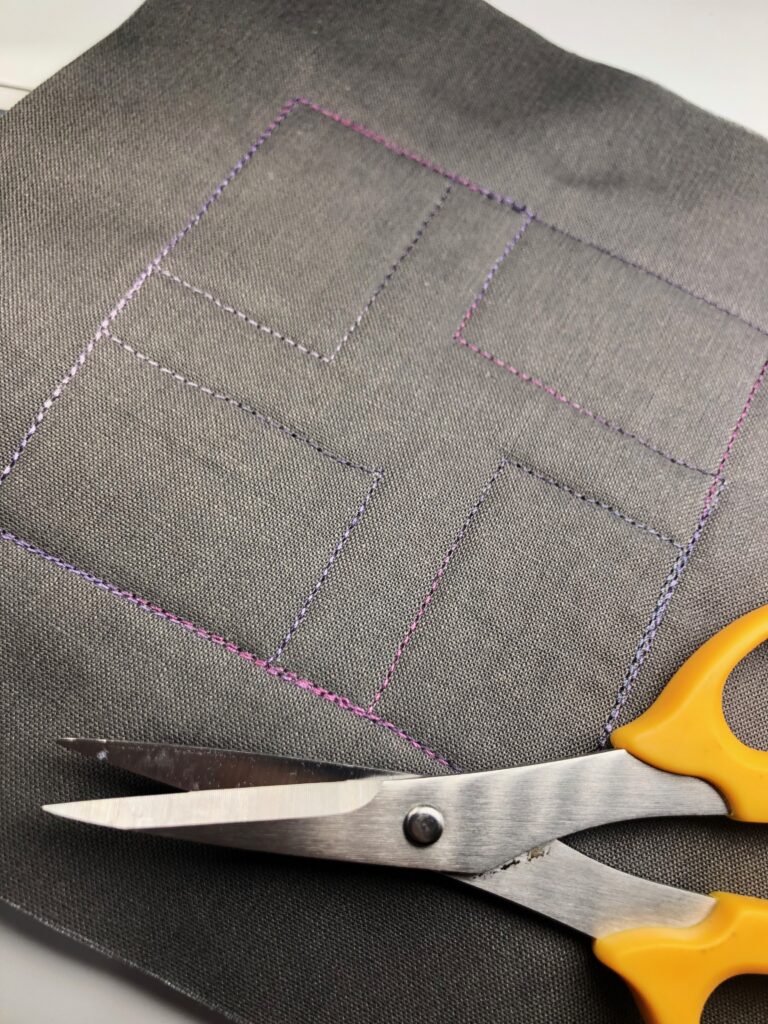
Edgestitch the faux binding.
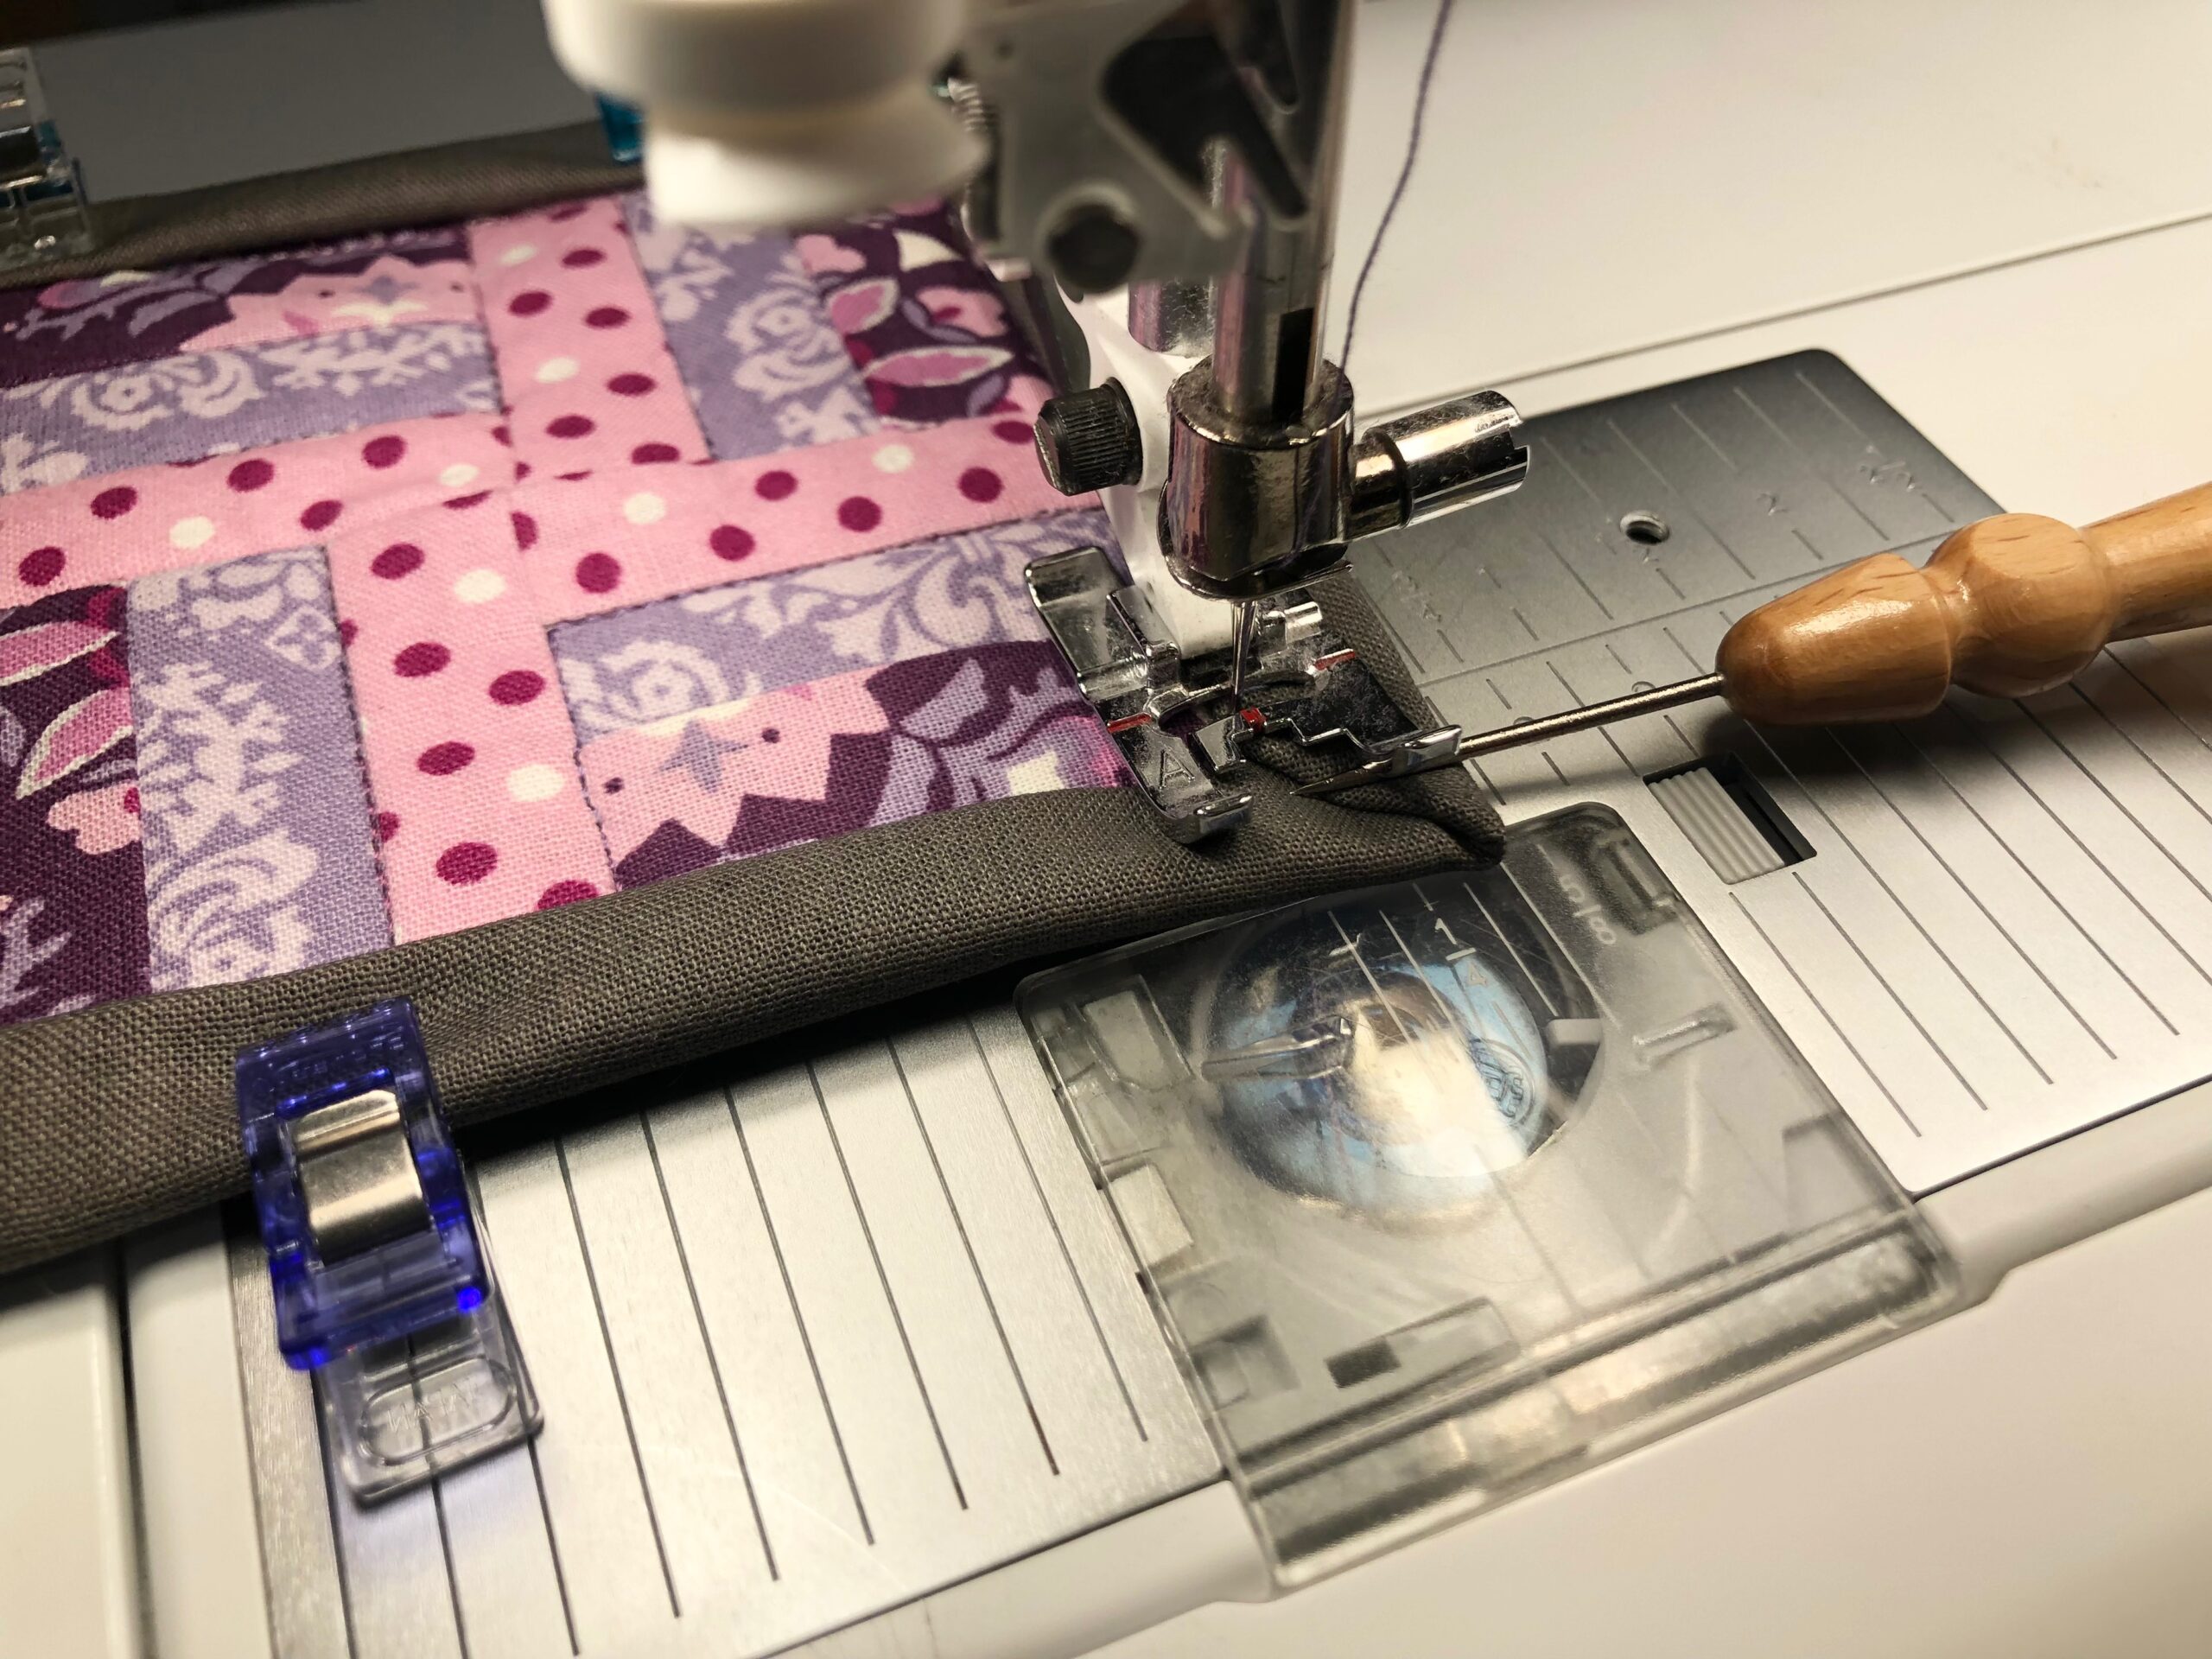
If desired, add more stitching lines to the binding, placing them 1/8″ apart. This shows off the pretty Blendables thread, especially if the backing fabric is a solid color.


Create more quilted coasters to package a set of four, tie with a ribbon and gift to a special someone!


Pingback: Decorative Binding Techniques for Custom Quilts - Sulky