
Quilted Flower Pillow with Dimensional Floral Embroidery
Quilted Flower Pillow with Sulky Pollen Designs
![]()
designed by Cherry Guidry, Cherry Blossoms Quilting
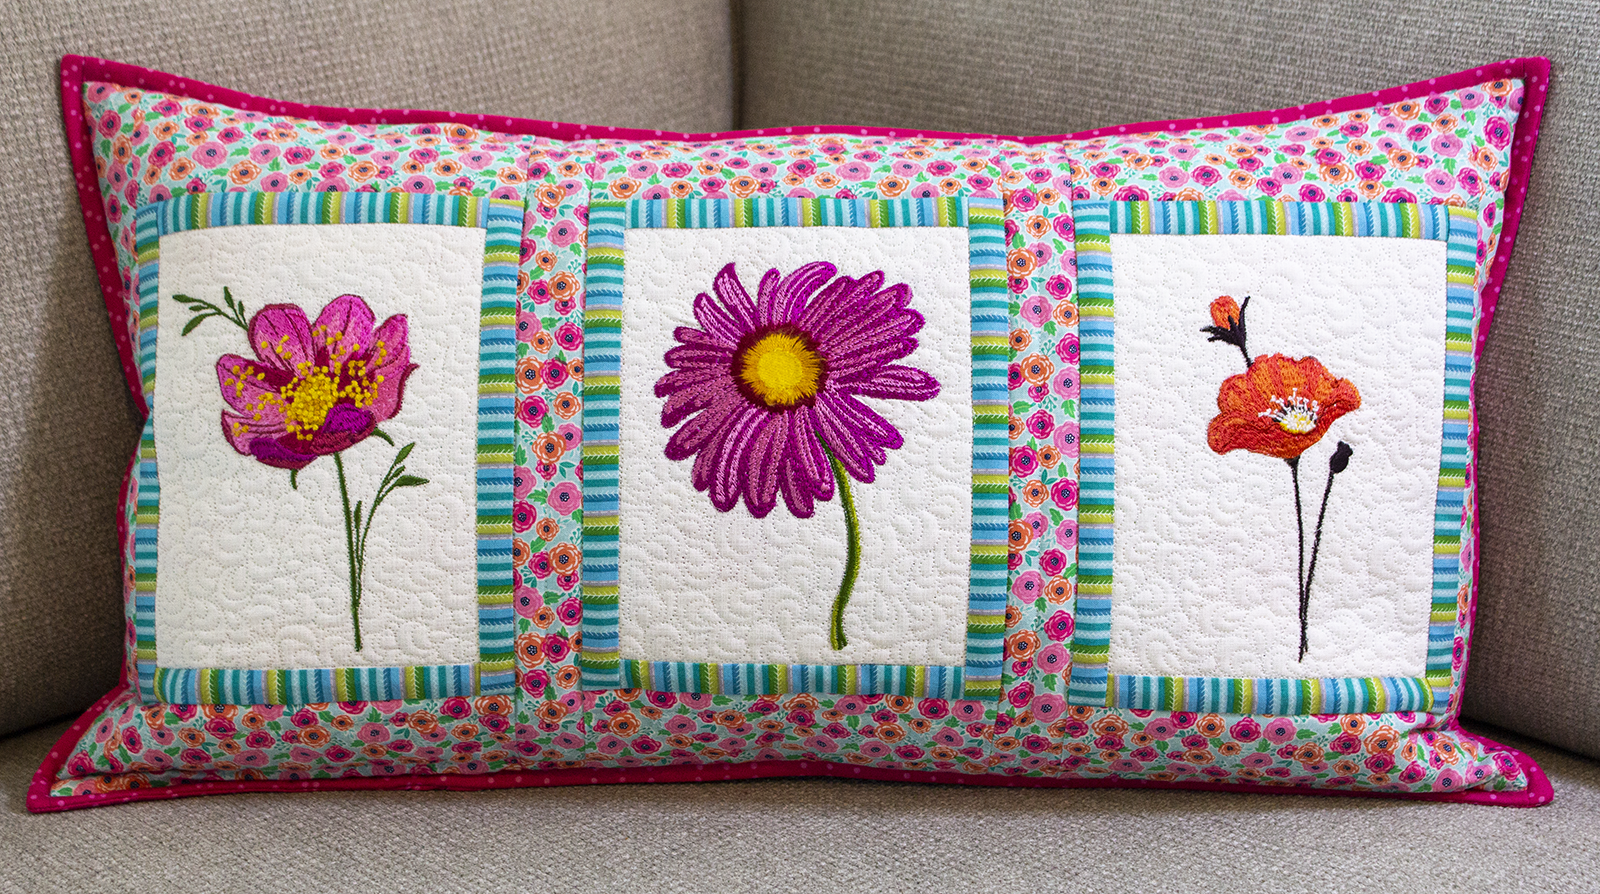
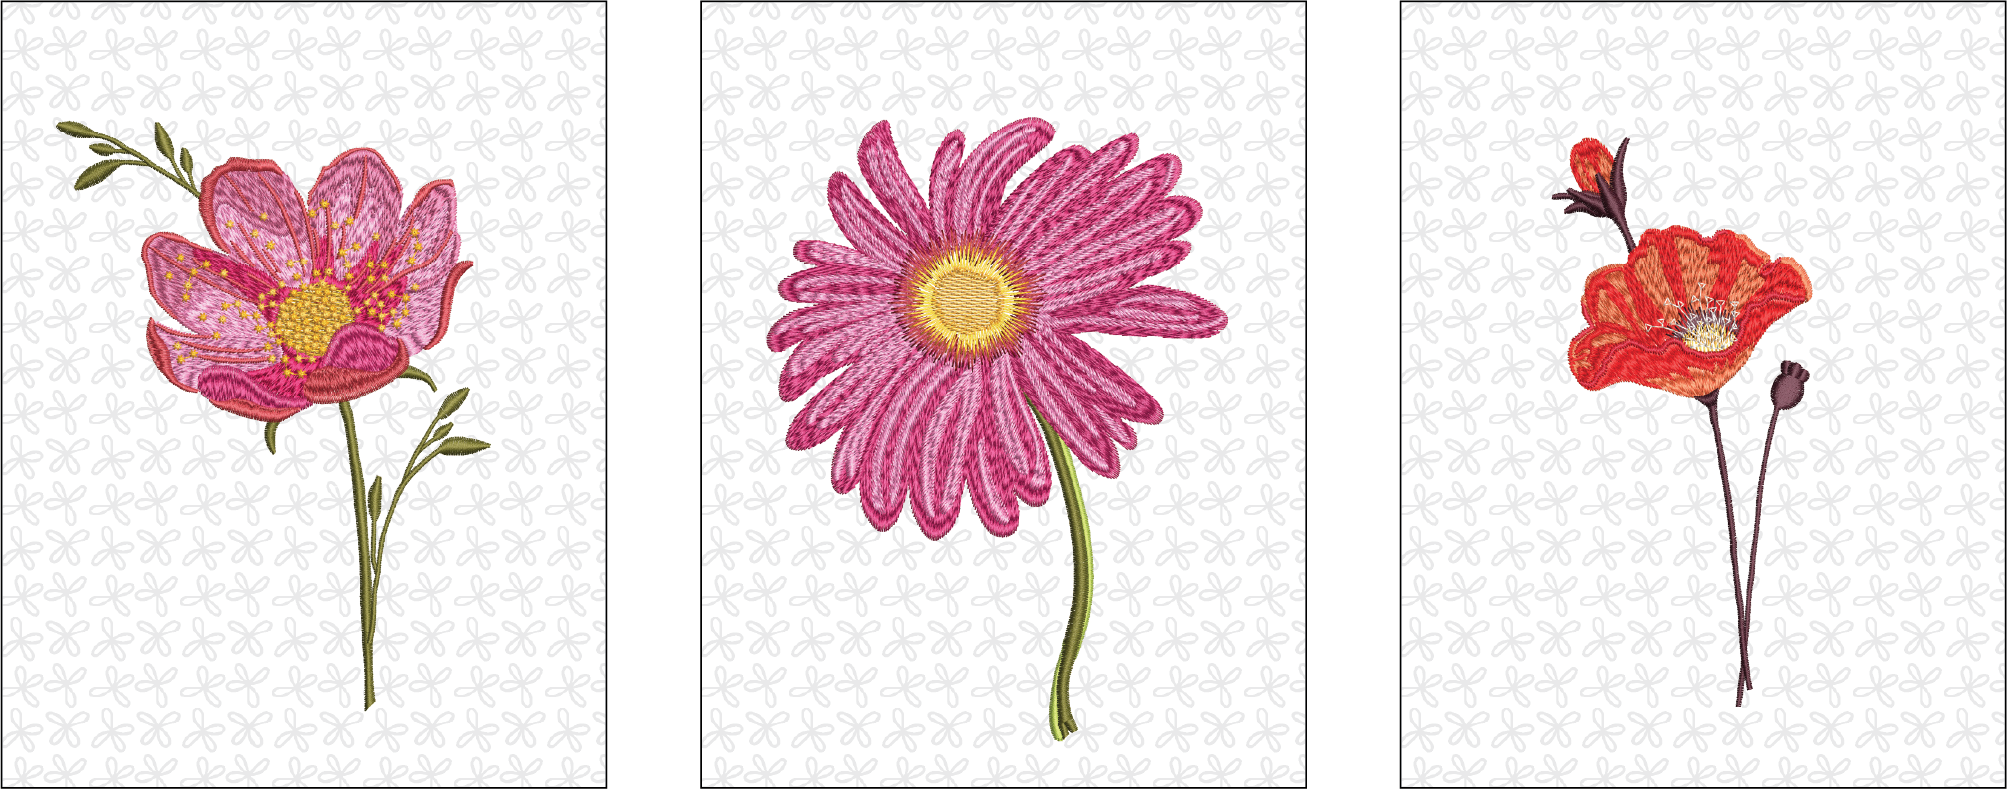
Create a quilted flower pillow featuring “Pollen” machine embroidery designs by Sulky. The designs feature Sulky Filaine™ Thread, which “blooms” when brushed with a Filaine™ Wire Brush, creating fuzzy texture that looks like the flowers come to life.
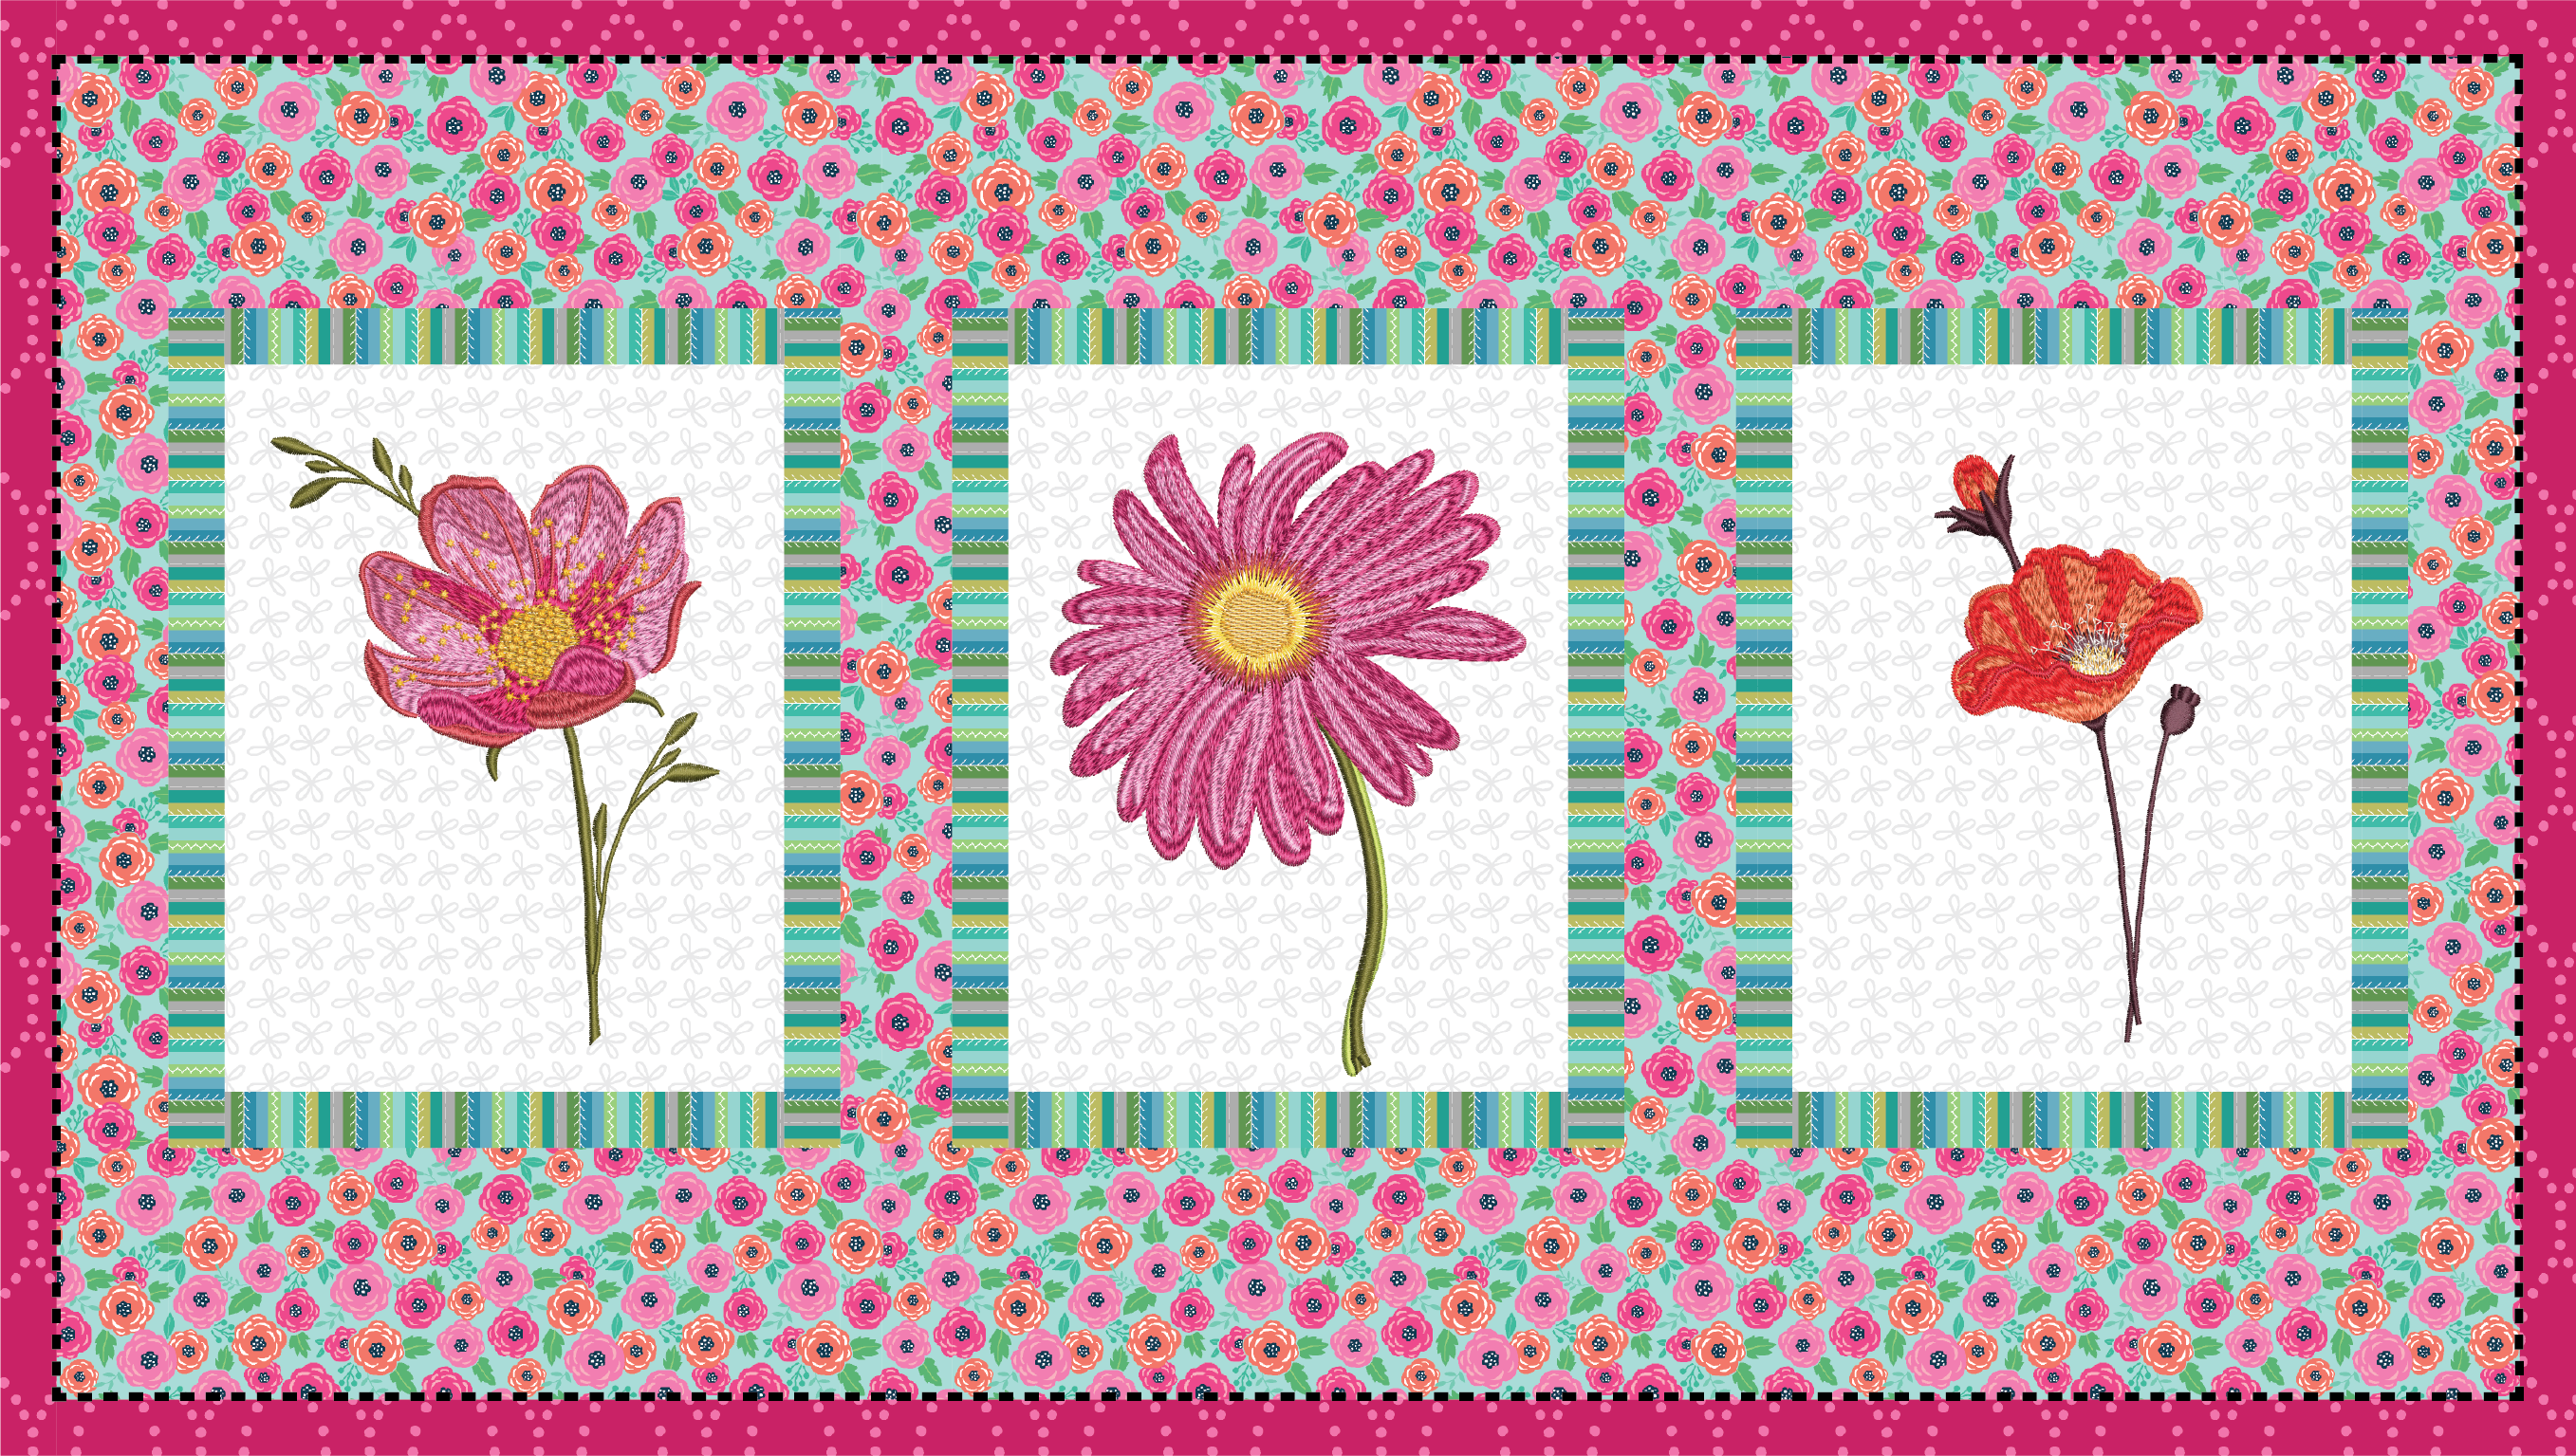
Quilted Pillow Finished size: 12” x 22”
PILLOW SUPPLIES
Pollen Machine Embroidery Design Collection (featured designs: Cosmo, Poppy & Gerbera Daisy)
Sulky Thread: Rayon 40 wt. & 12 wt. Filaine (colors per the embroidery design sequence charts), Bobbin 60 wt. white, 60 wt. PolyLite
Organ® Needles:
- Piecing: 70/10 Universal
- Embroidery – 80/12 Top Stitch & Topstitch Titanium 100/16
- Quilting: 75/11 Quilting
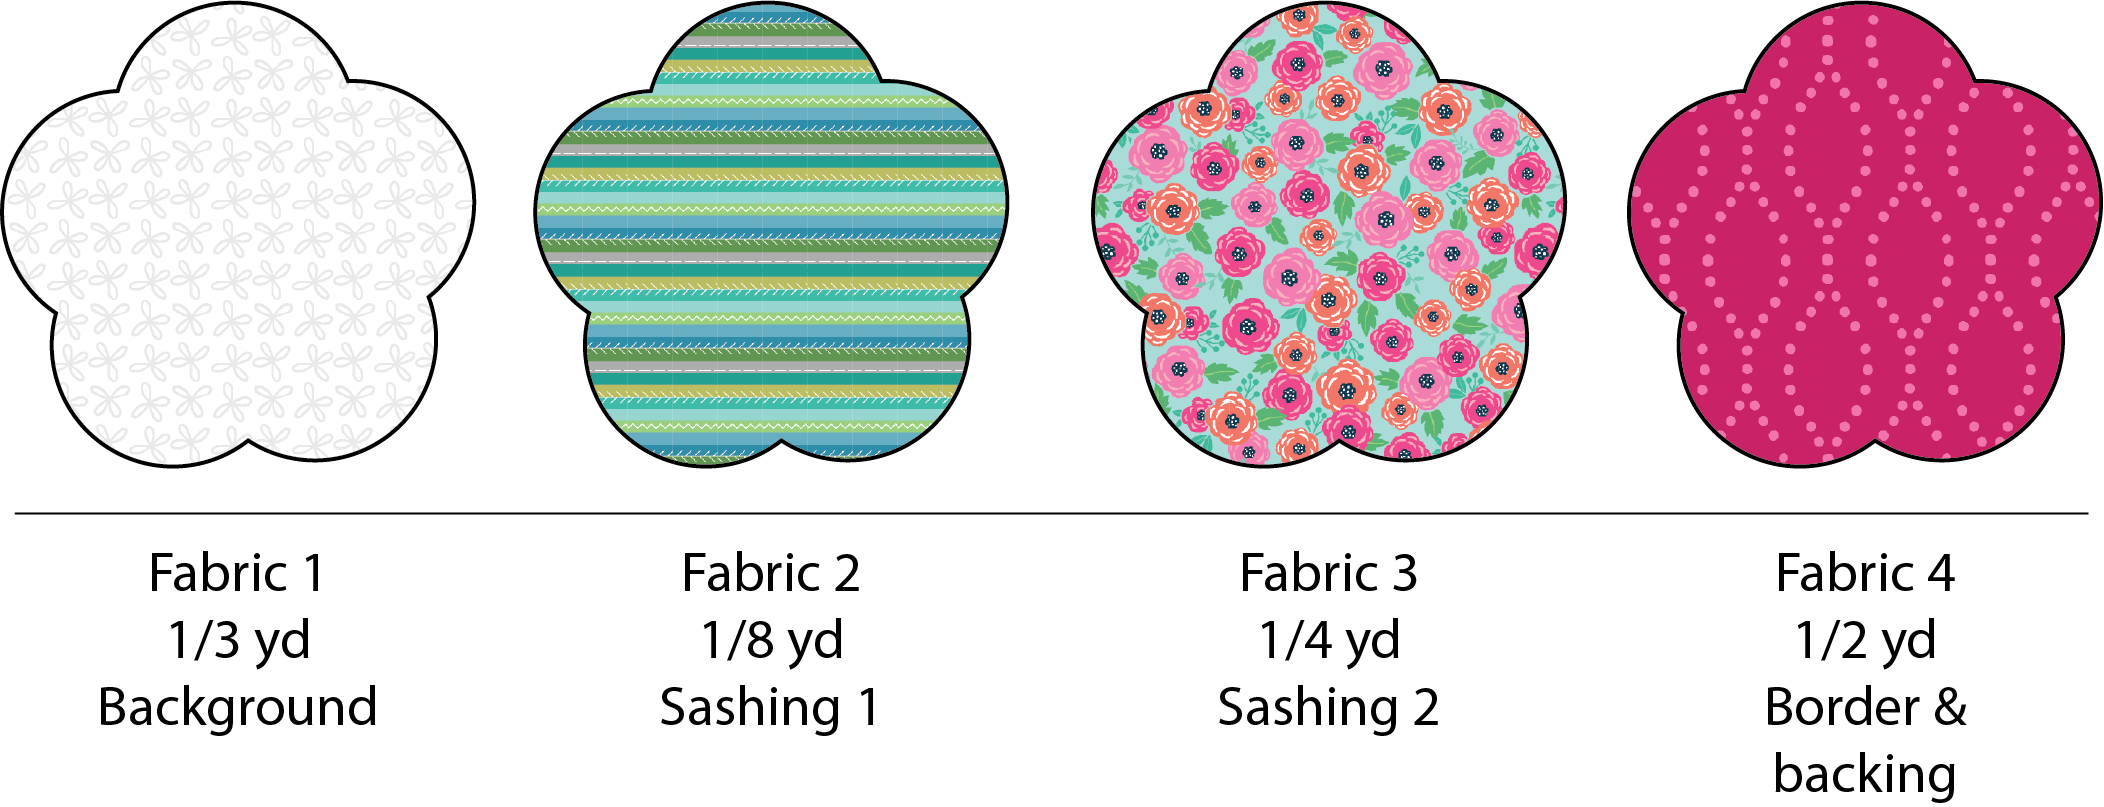
Fabrics:
- 1/3 yard of Fabric 1
- 1/8 yard of Sashing 1
- 1/4 yard of Sashing 2
- 1/2 yard of Border & Backing
- 12” x 22” Pillow Form
Project features Cherry’s Sew Bloom fabric collection for Contempo Studio of Benartex.
PATTERN NOTES
- Please read all instructions before beginning.
- Cutting instructions are based on fabric that is at least 42” wide selvage-to-selvage.
- WOF = Width of Fabric folded selvage-to-selvage
- Press fabrics before cutting.
- All seam allowances are ¼”.
- Press seams to the darkest fabric.
PILLOW PREP
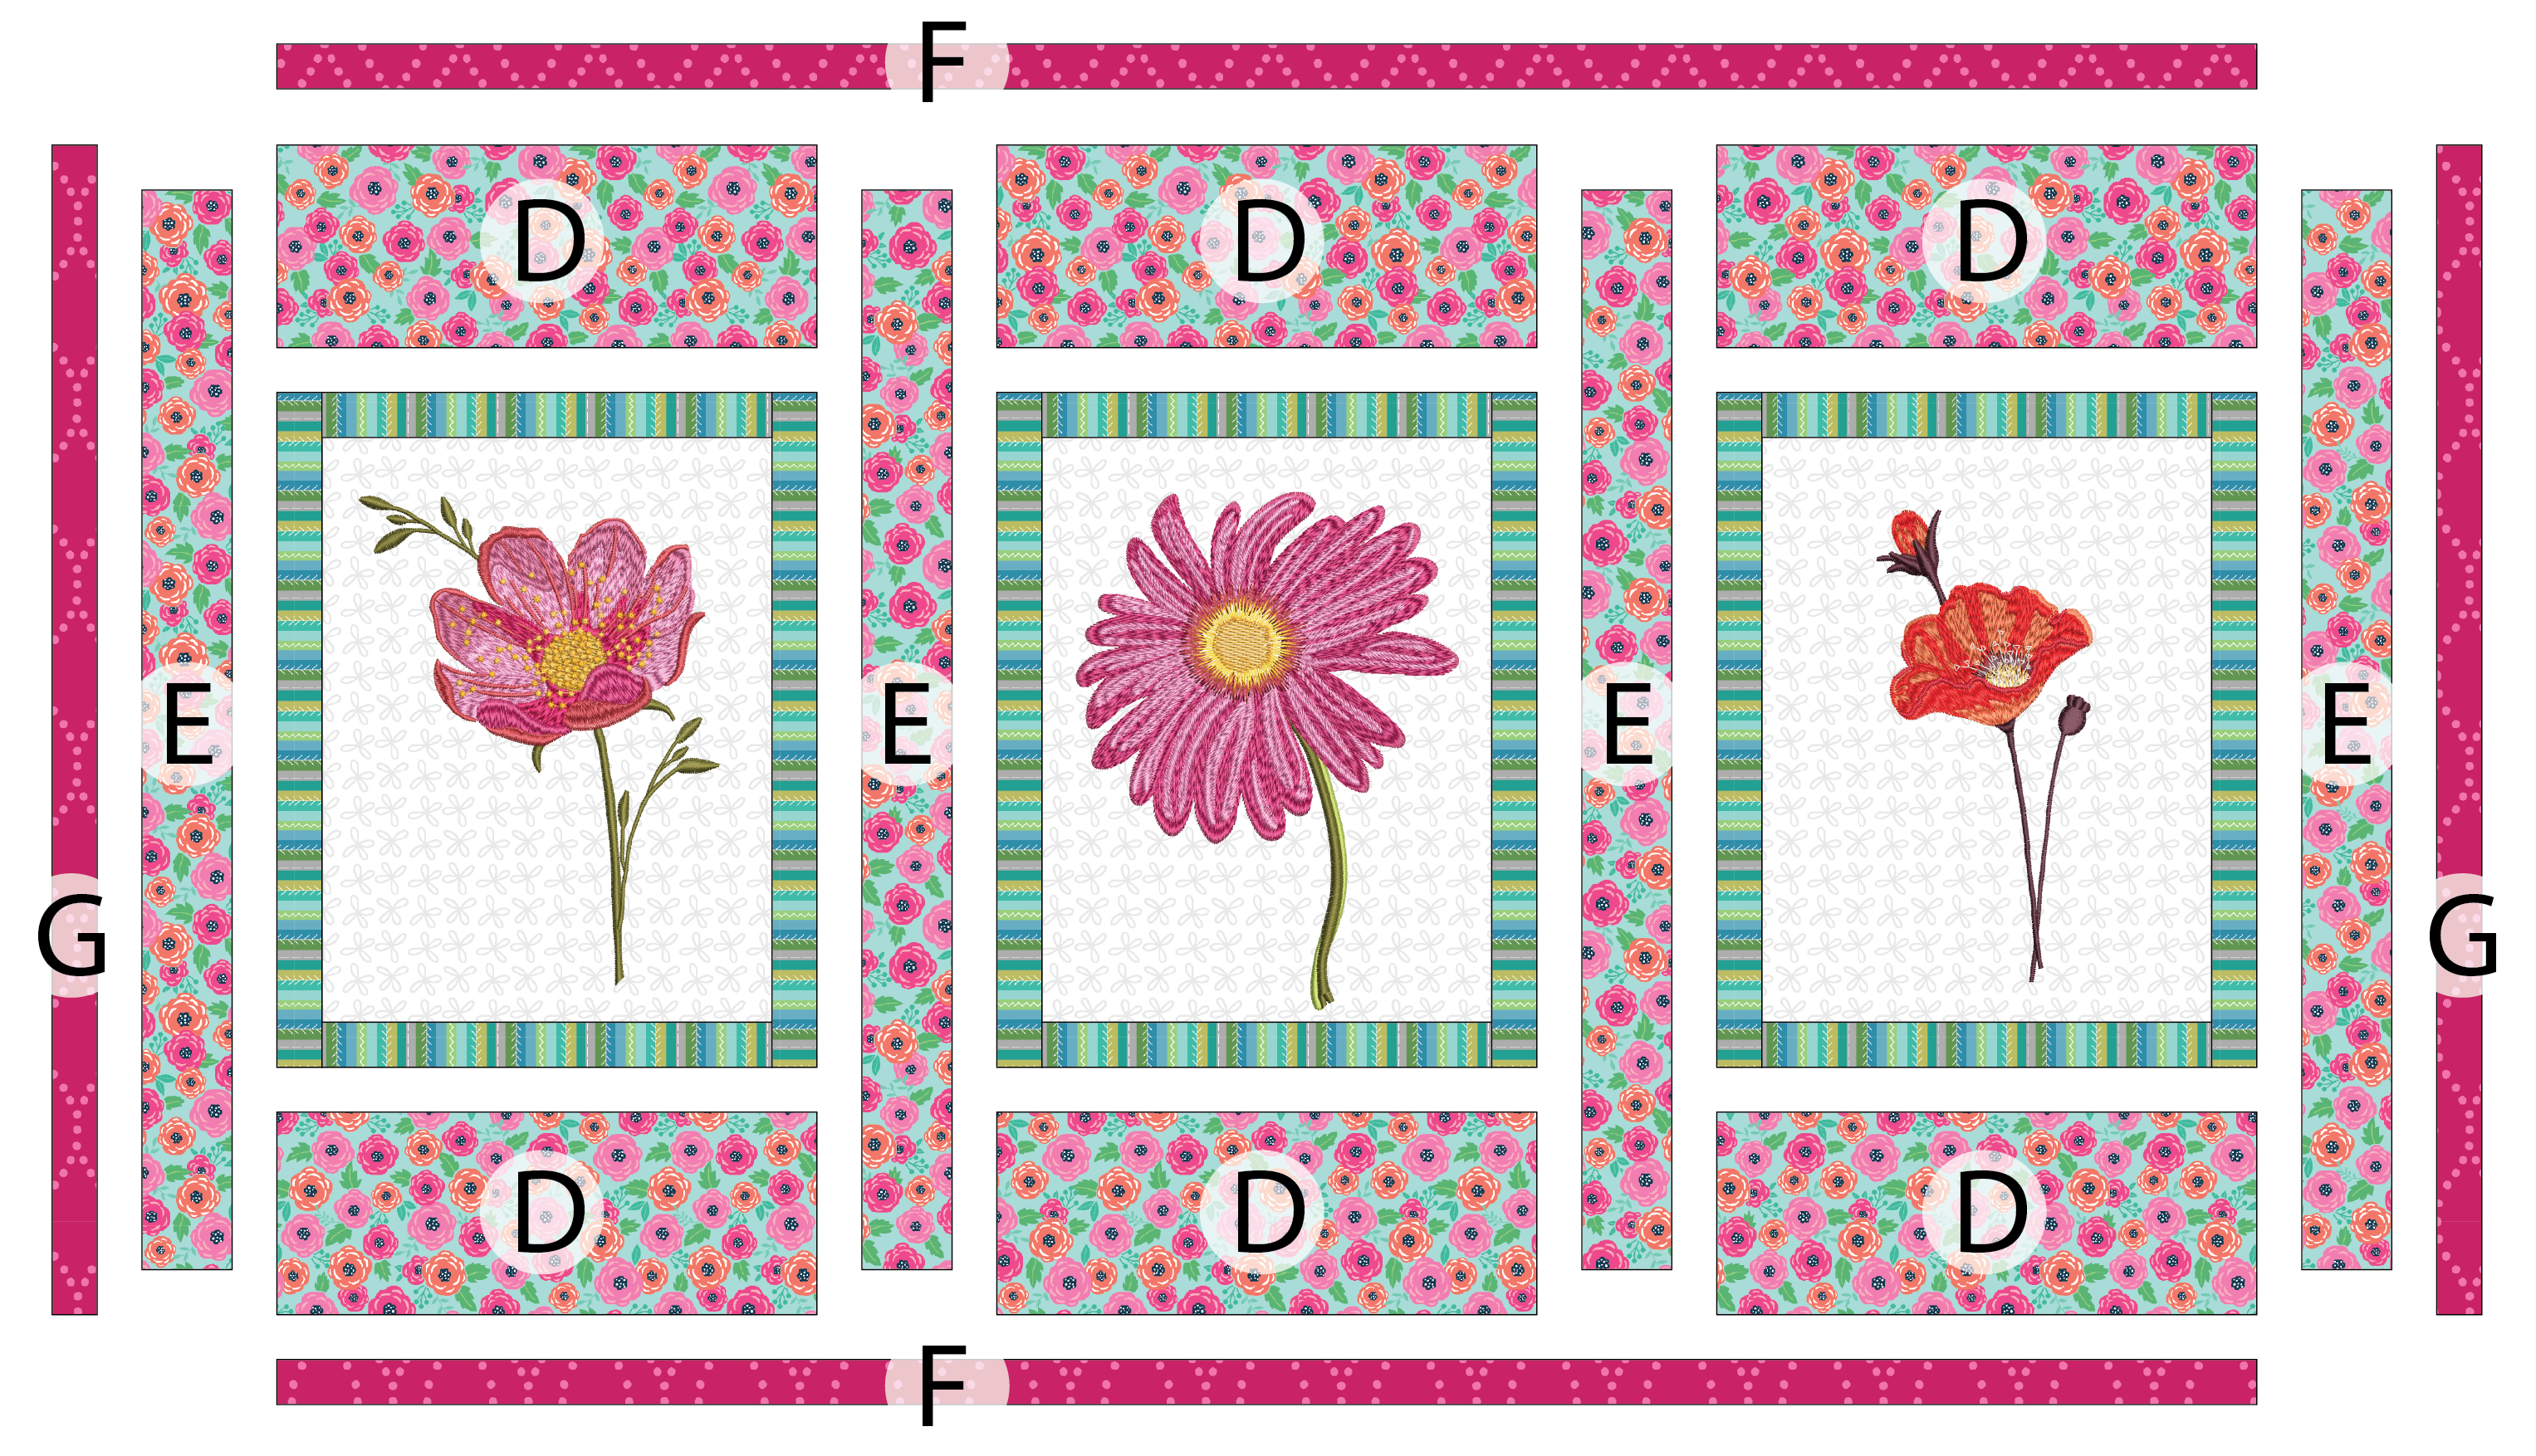
Cut the fabrics as follows:
| Fabric 1 | One 9½” x WOF strip sub-cut into:
(3) 9½” x 14”– A* (or cut large enough to fit your hoop) |
| Fabric 2 | Two 1” x WOF strips sub-cut into:
(6) 1” x 5½” – B (6) 1” x 8” – C |
| Fabric 3 | One 2¾” x WOF strip sub-cut into:
(6) 2¾” x 6½” – D (2) 1½” x WOF strips sub-cut into: (4) 1½” x 12½” – E |
| Fabric 4 | Two 1” x WOF strips sub-cut into:
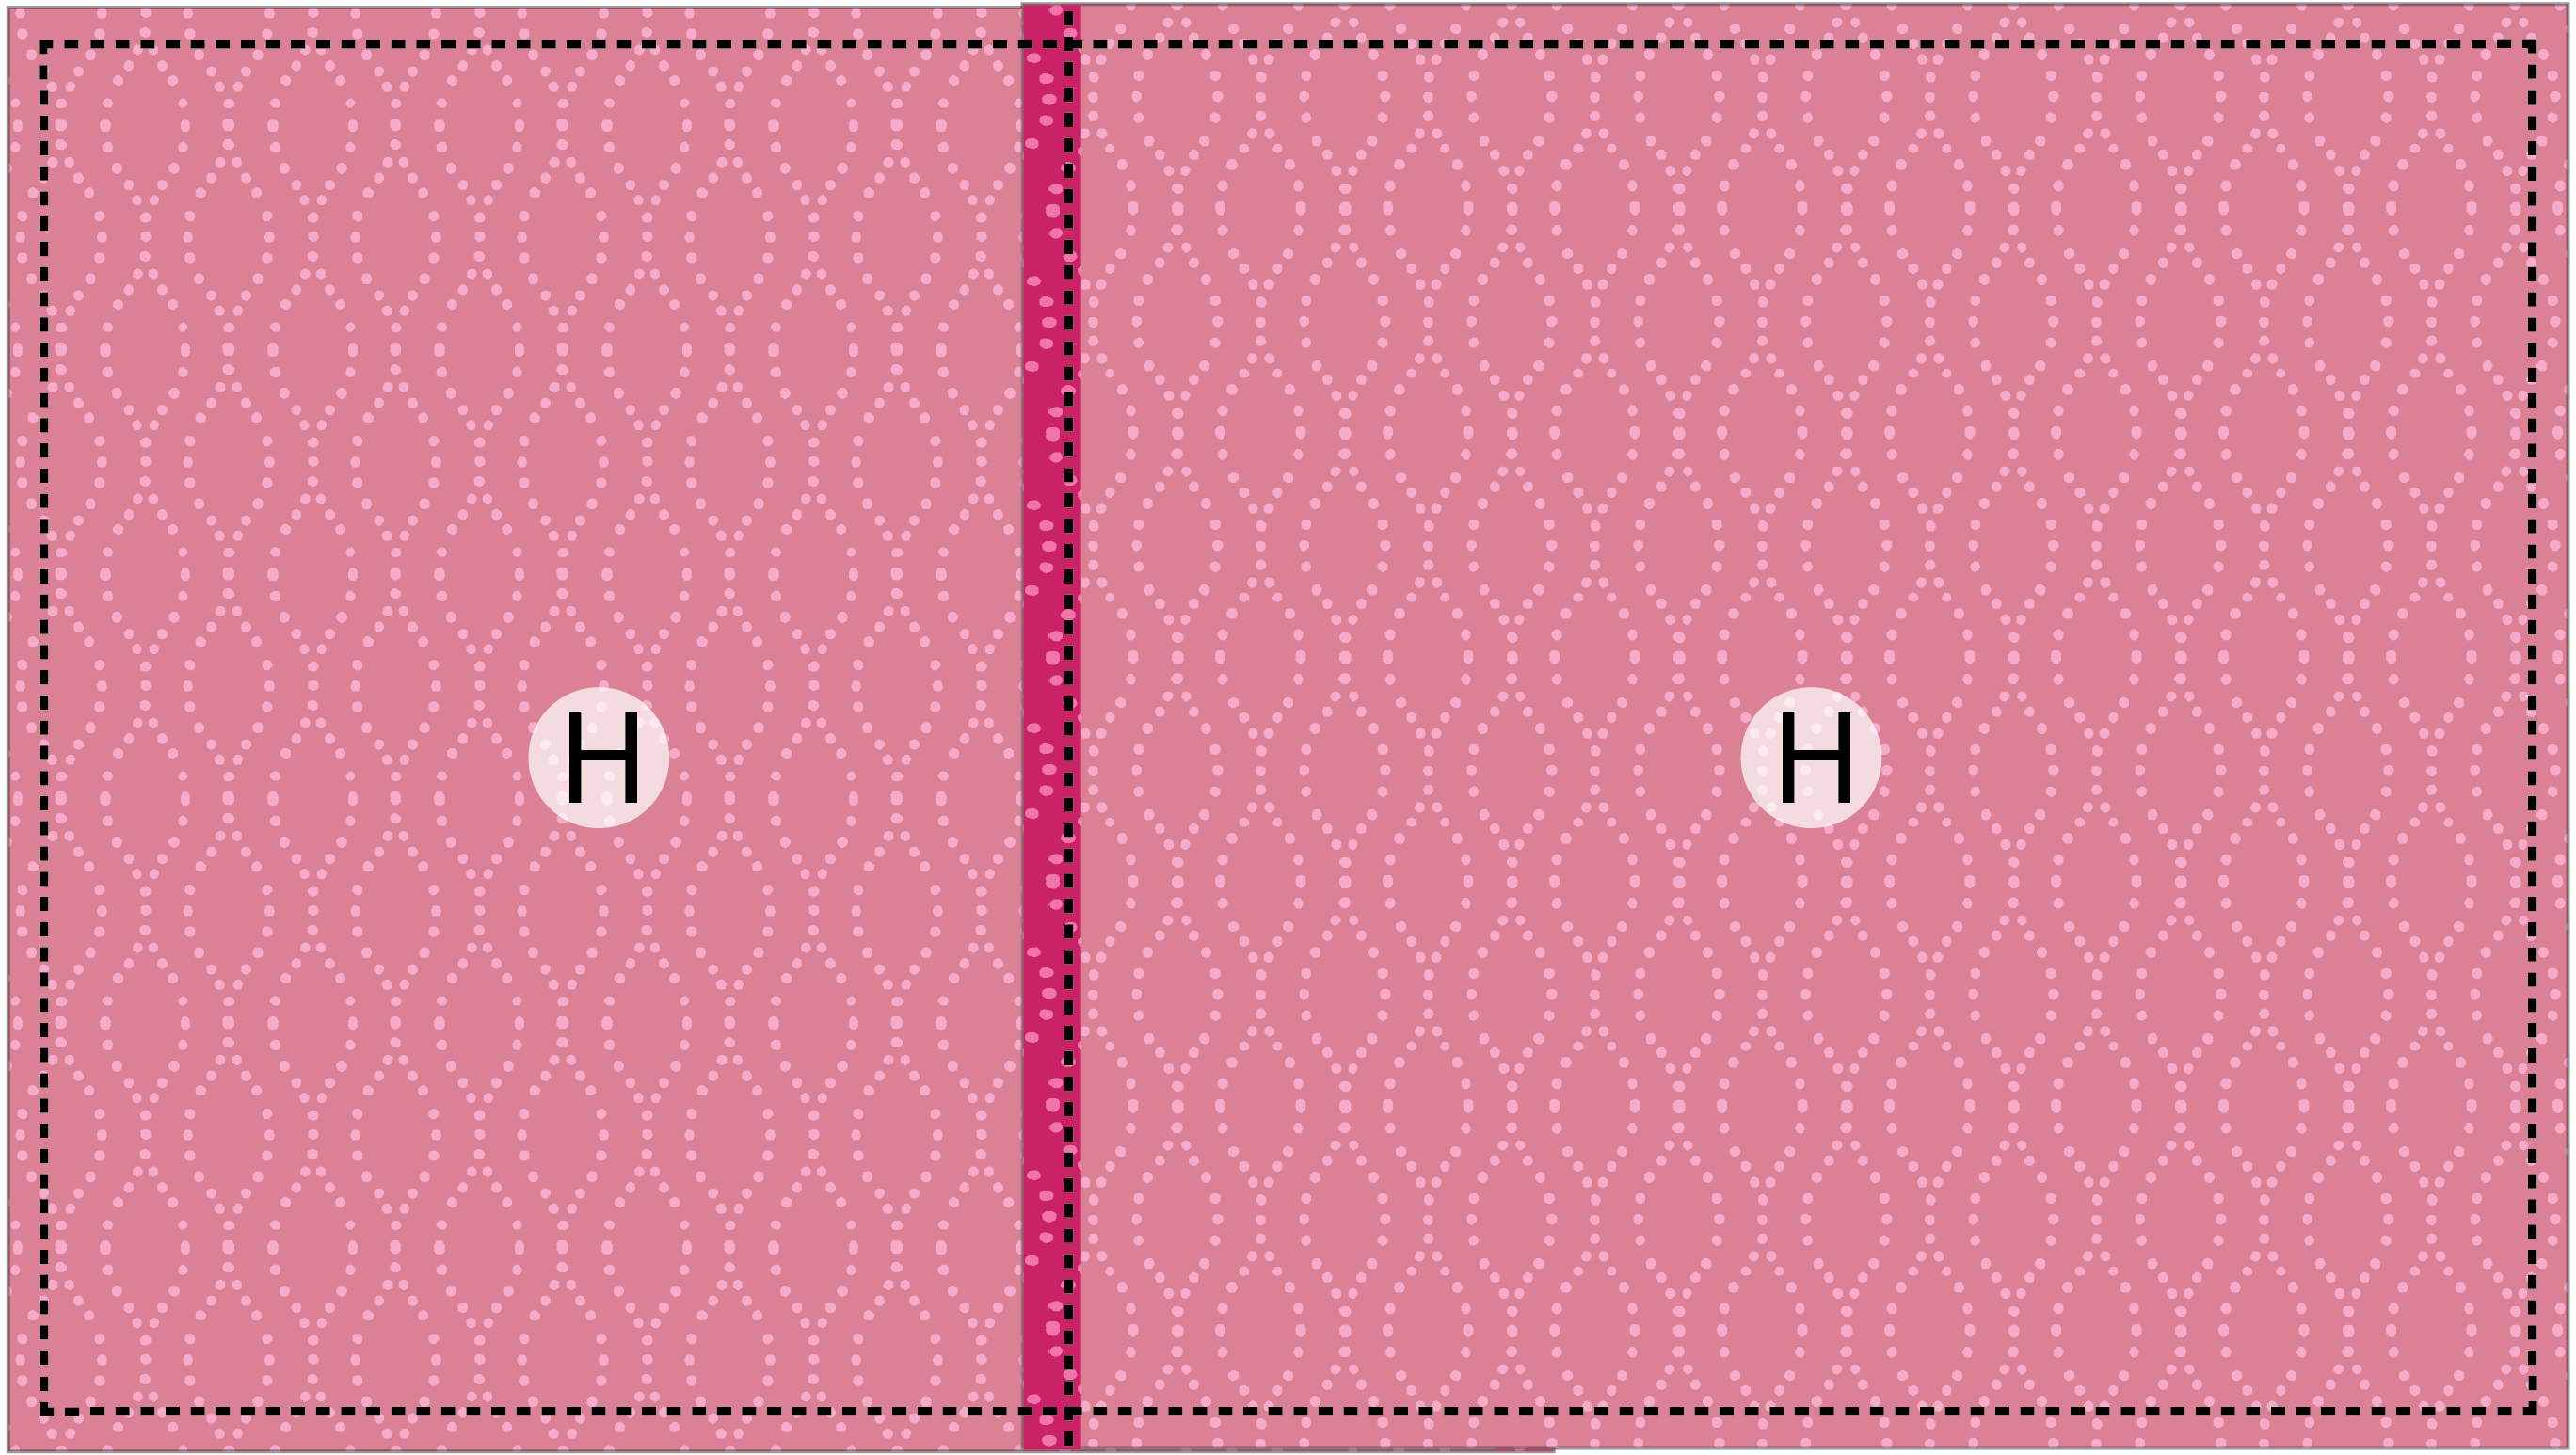
(2) 1” x 13½” – F (2) 1” x 22½” – G (1) 13½” x WOF strip sub-cut into: (2) 13½” x 17” – H |
| Batting | 16” x 24 |
| Lining fabric | 18” x 26” |
*To add a bit more stability to the background fabric, spray with a heavy starch and press dry before cutting.
MACHINE EMBROIDERY
First, hoop three layers of Stiffy Stabilizer with a fabric 1 background A fabric right side up.
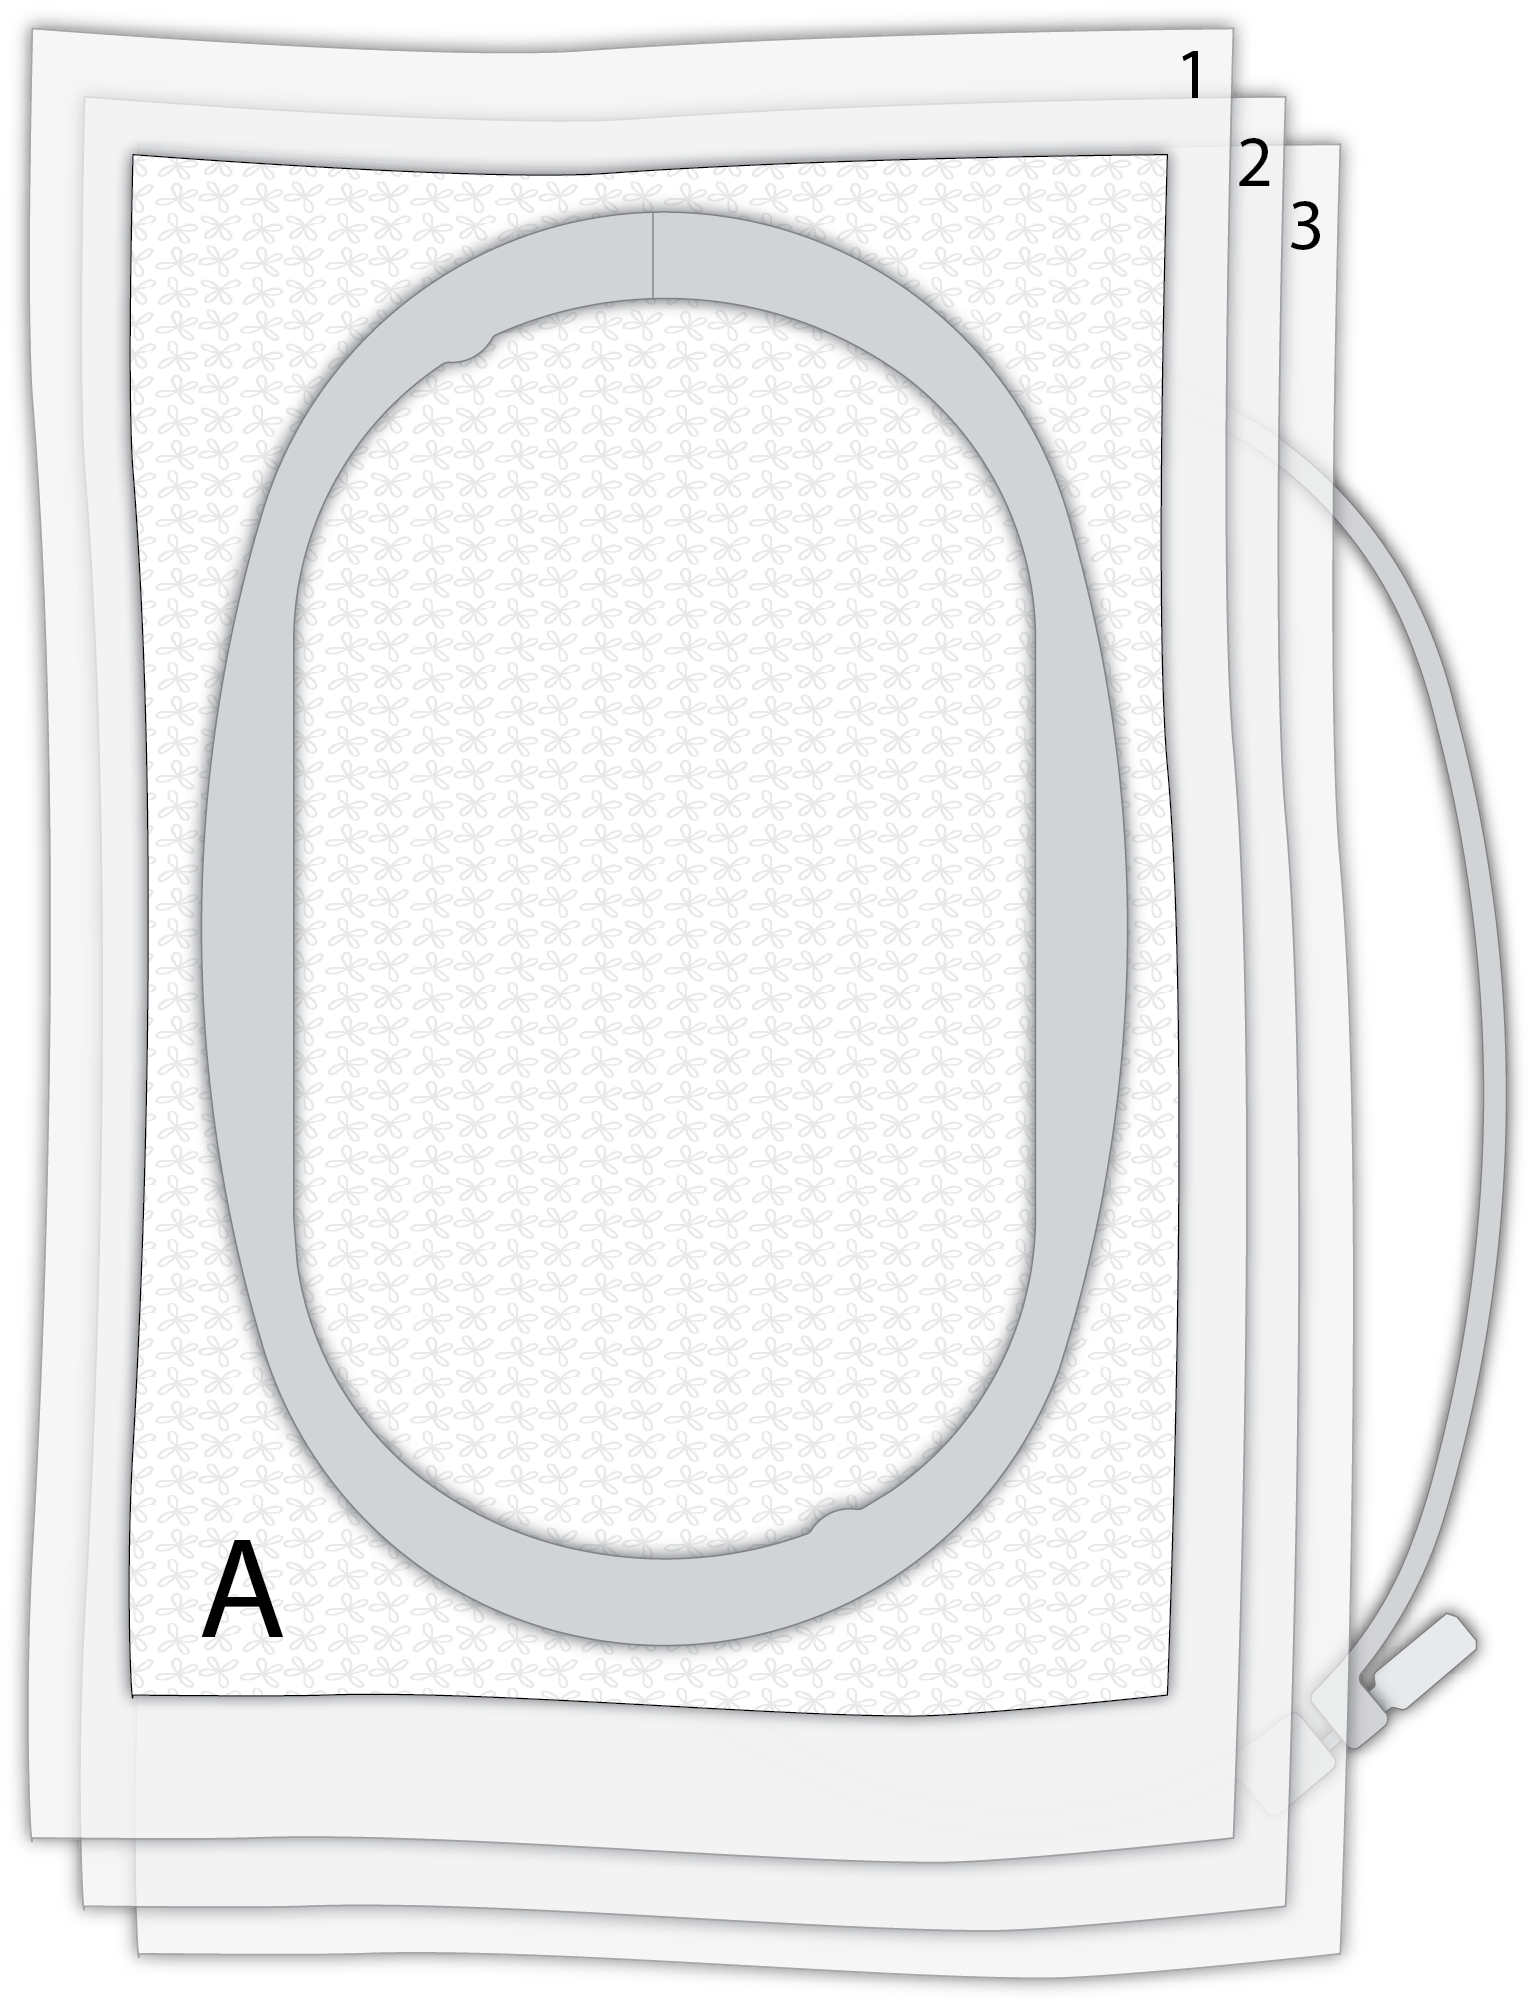
EMBROIDERY
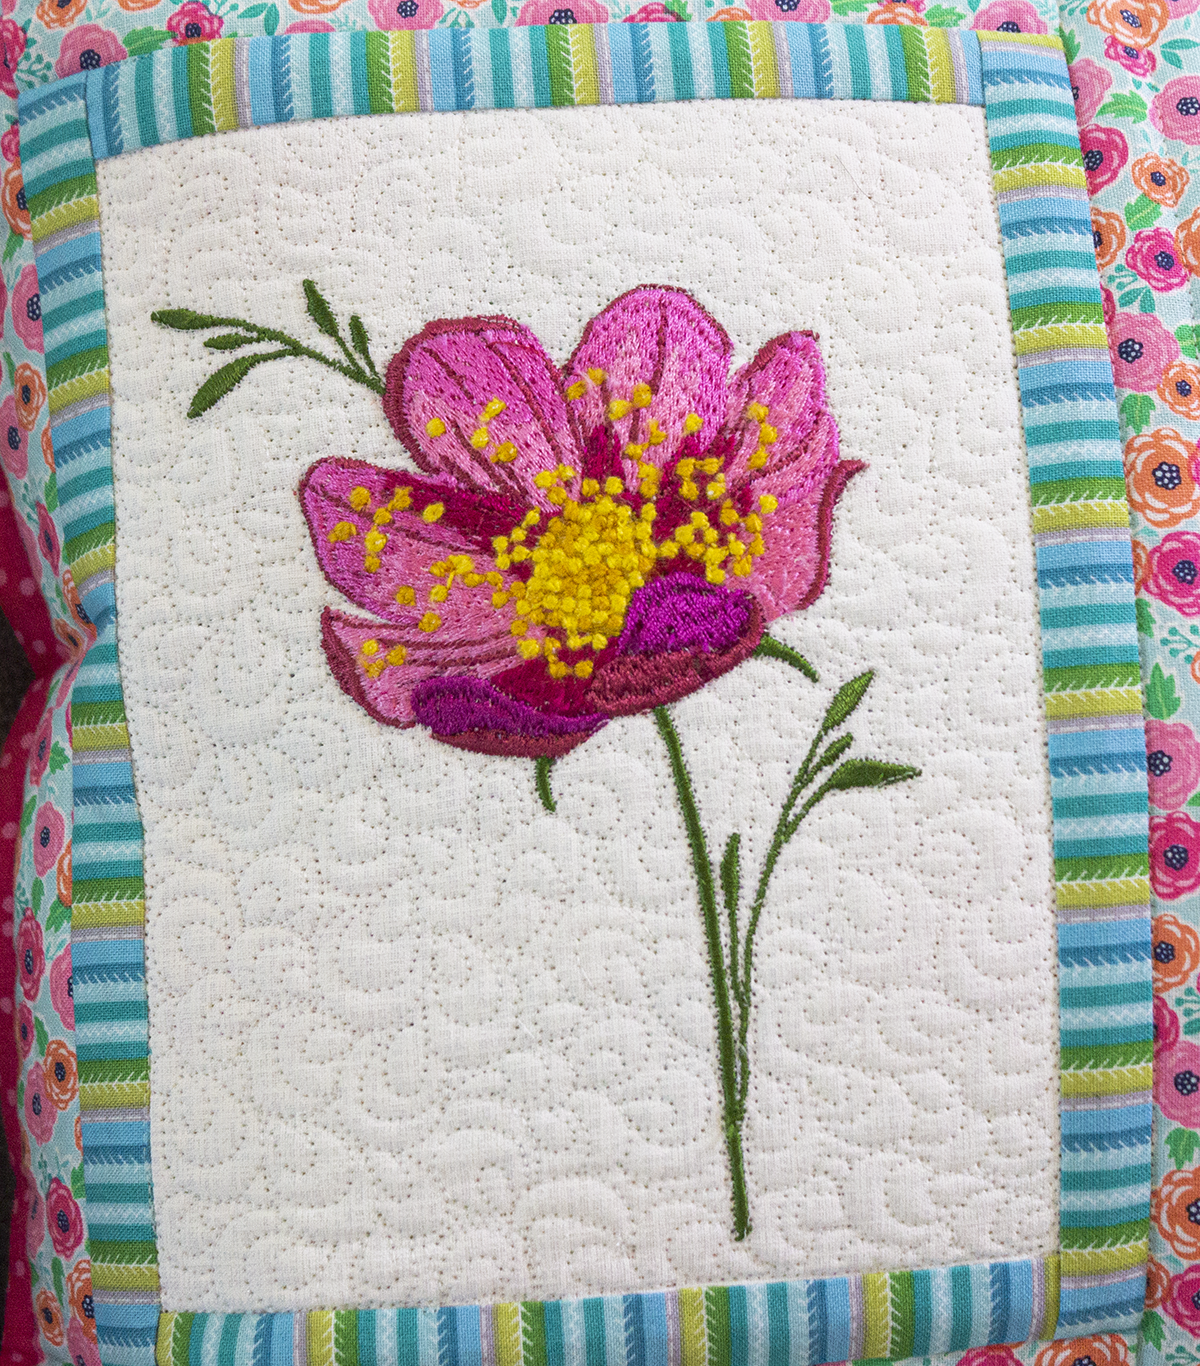
Download the Pollen embroidery collection and/or the individual designs you’d like to feature on the pillow blocks. Then, load the files into your embroidery machine. The Pollen designs use both 40 wt. Rayon and 12 wt. Filaine Threads. Pay close attention to the color sequence chart for each design to ensure you’re using the correct thread weight for the correct portions of the design.
When embroidering with the 40 wt. Rayon, use a size 80/12 Top Stitch Needle. When embroidering with the Filaine Thread, use a Top Stitch Titanium 100/16 needle.
Use 60 wt. Bobbin Thread for both top threads.
When stitching the Filaine portions of the design, slow the machine speed to the lowest setting. Make sure to turn the auto-thread-cutting feature OFF on your machine to avoid having excess bulk for the needle to penetrate. Instead, bring the bobbin thread up to the fabric surface before stitching, and then bring both threads to the fabric wrong side when embroidery is complete. This thread is VERY heavyweight and needs special handling to stitch out properly.
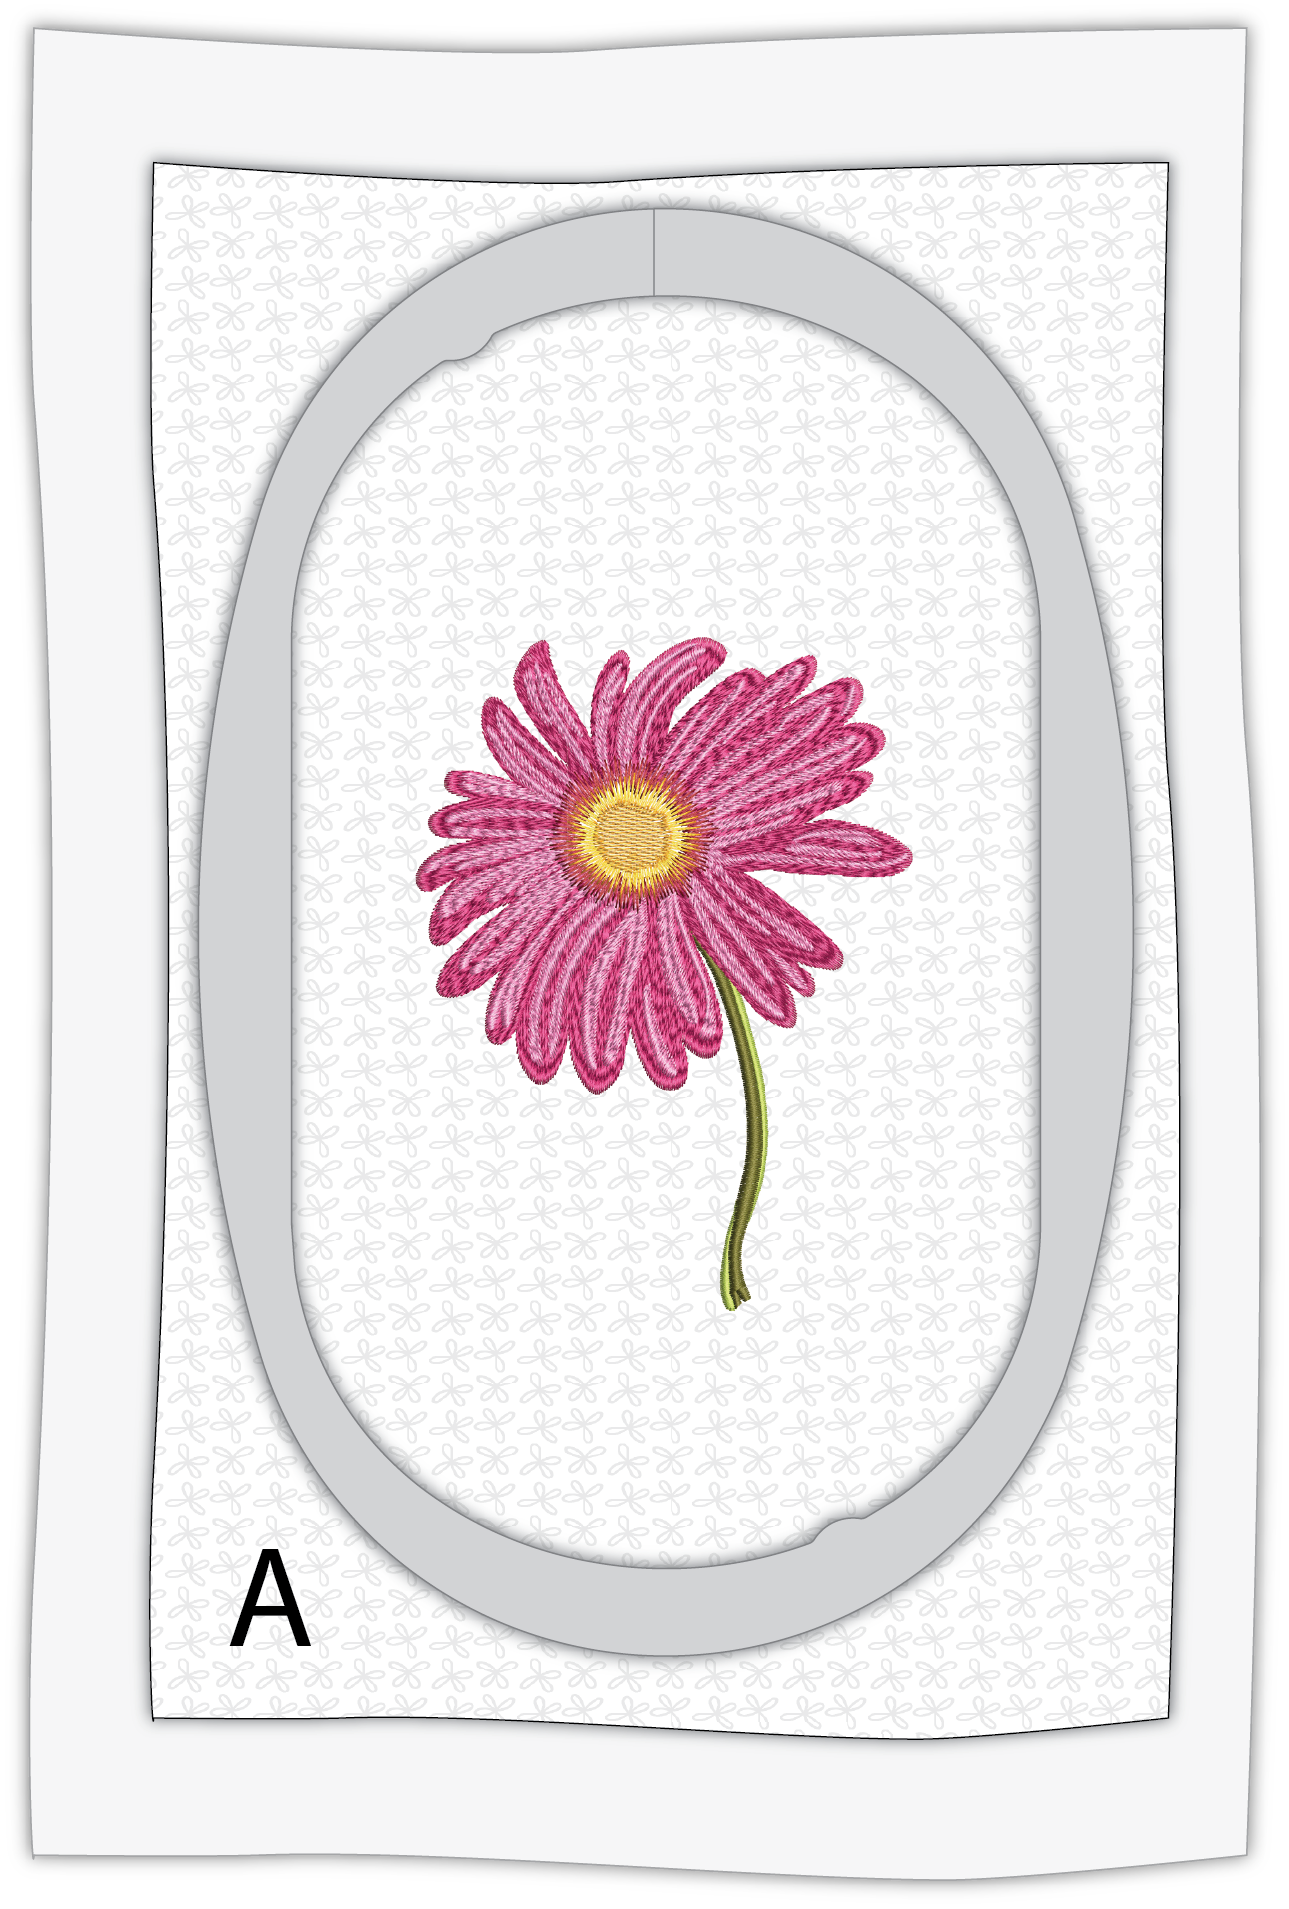
Next, remove the design from the hoop. Then, trim the jump stitches from the top and any excess threads from the back. Next, remove the tear-away stabilizer one layer at a time. Repeat to embroider a total of three Pollen designs.
Use the Filaine wire brush to “fluff” the Filaine portions of the designs, making each flower “bloom.” Or, choose to leave the thread un-brushed for a different look, if desired.
PILLOW CONSTRUCTION
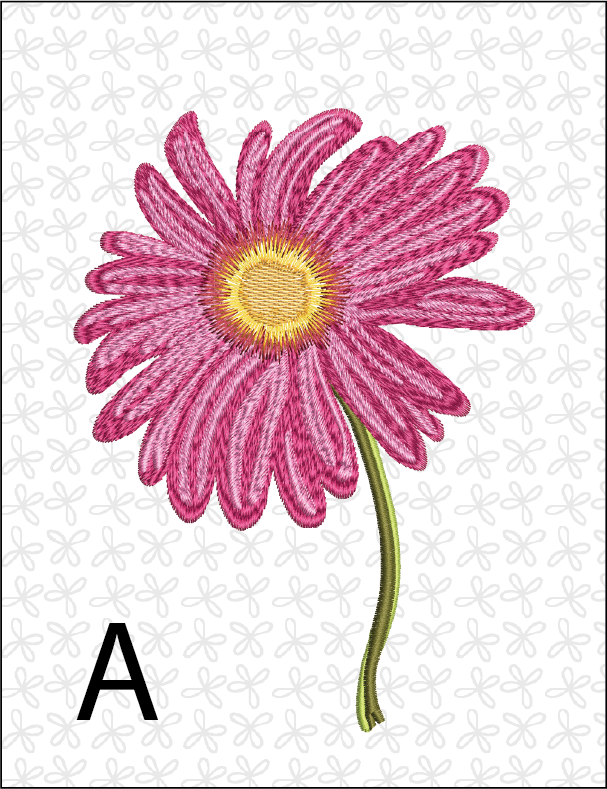
First, trim the embroidered A rectangles to measure 5½” wide x 7” high.
Then, sew fabric 2 1” x 5½” B strips to the top and bottom edges of A; press to B.
Next, sew fabric 2 1” x 8” C strips to the left and right edges of A; press to C.
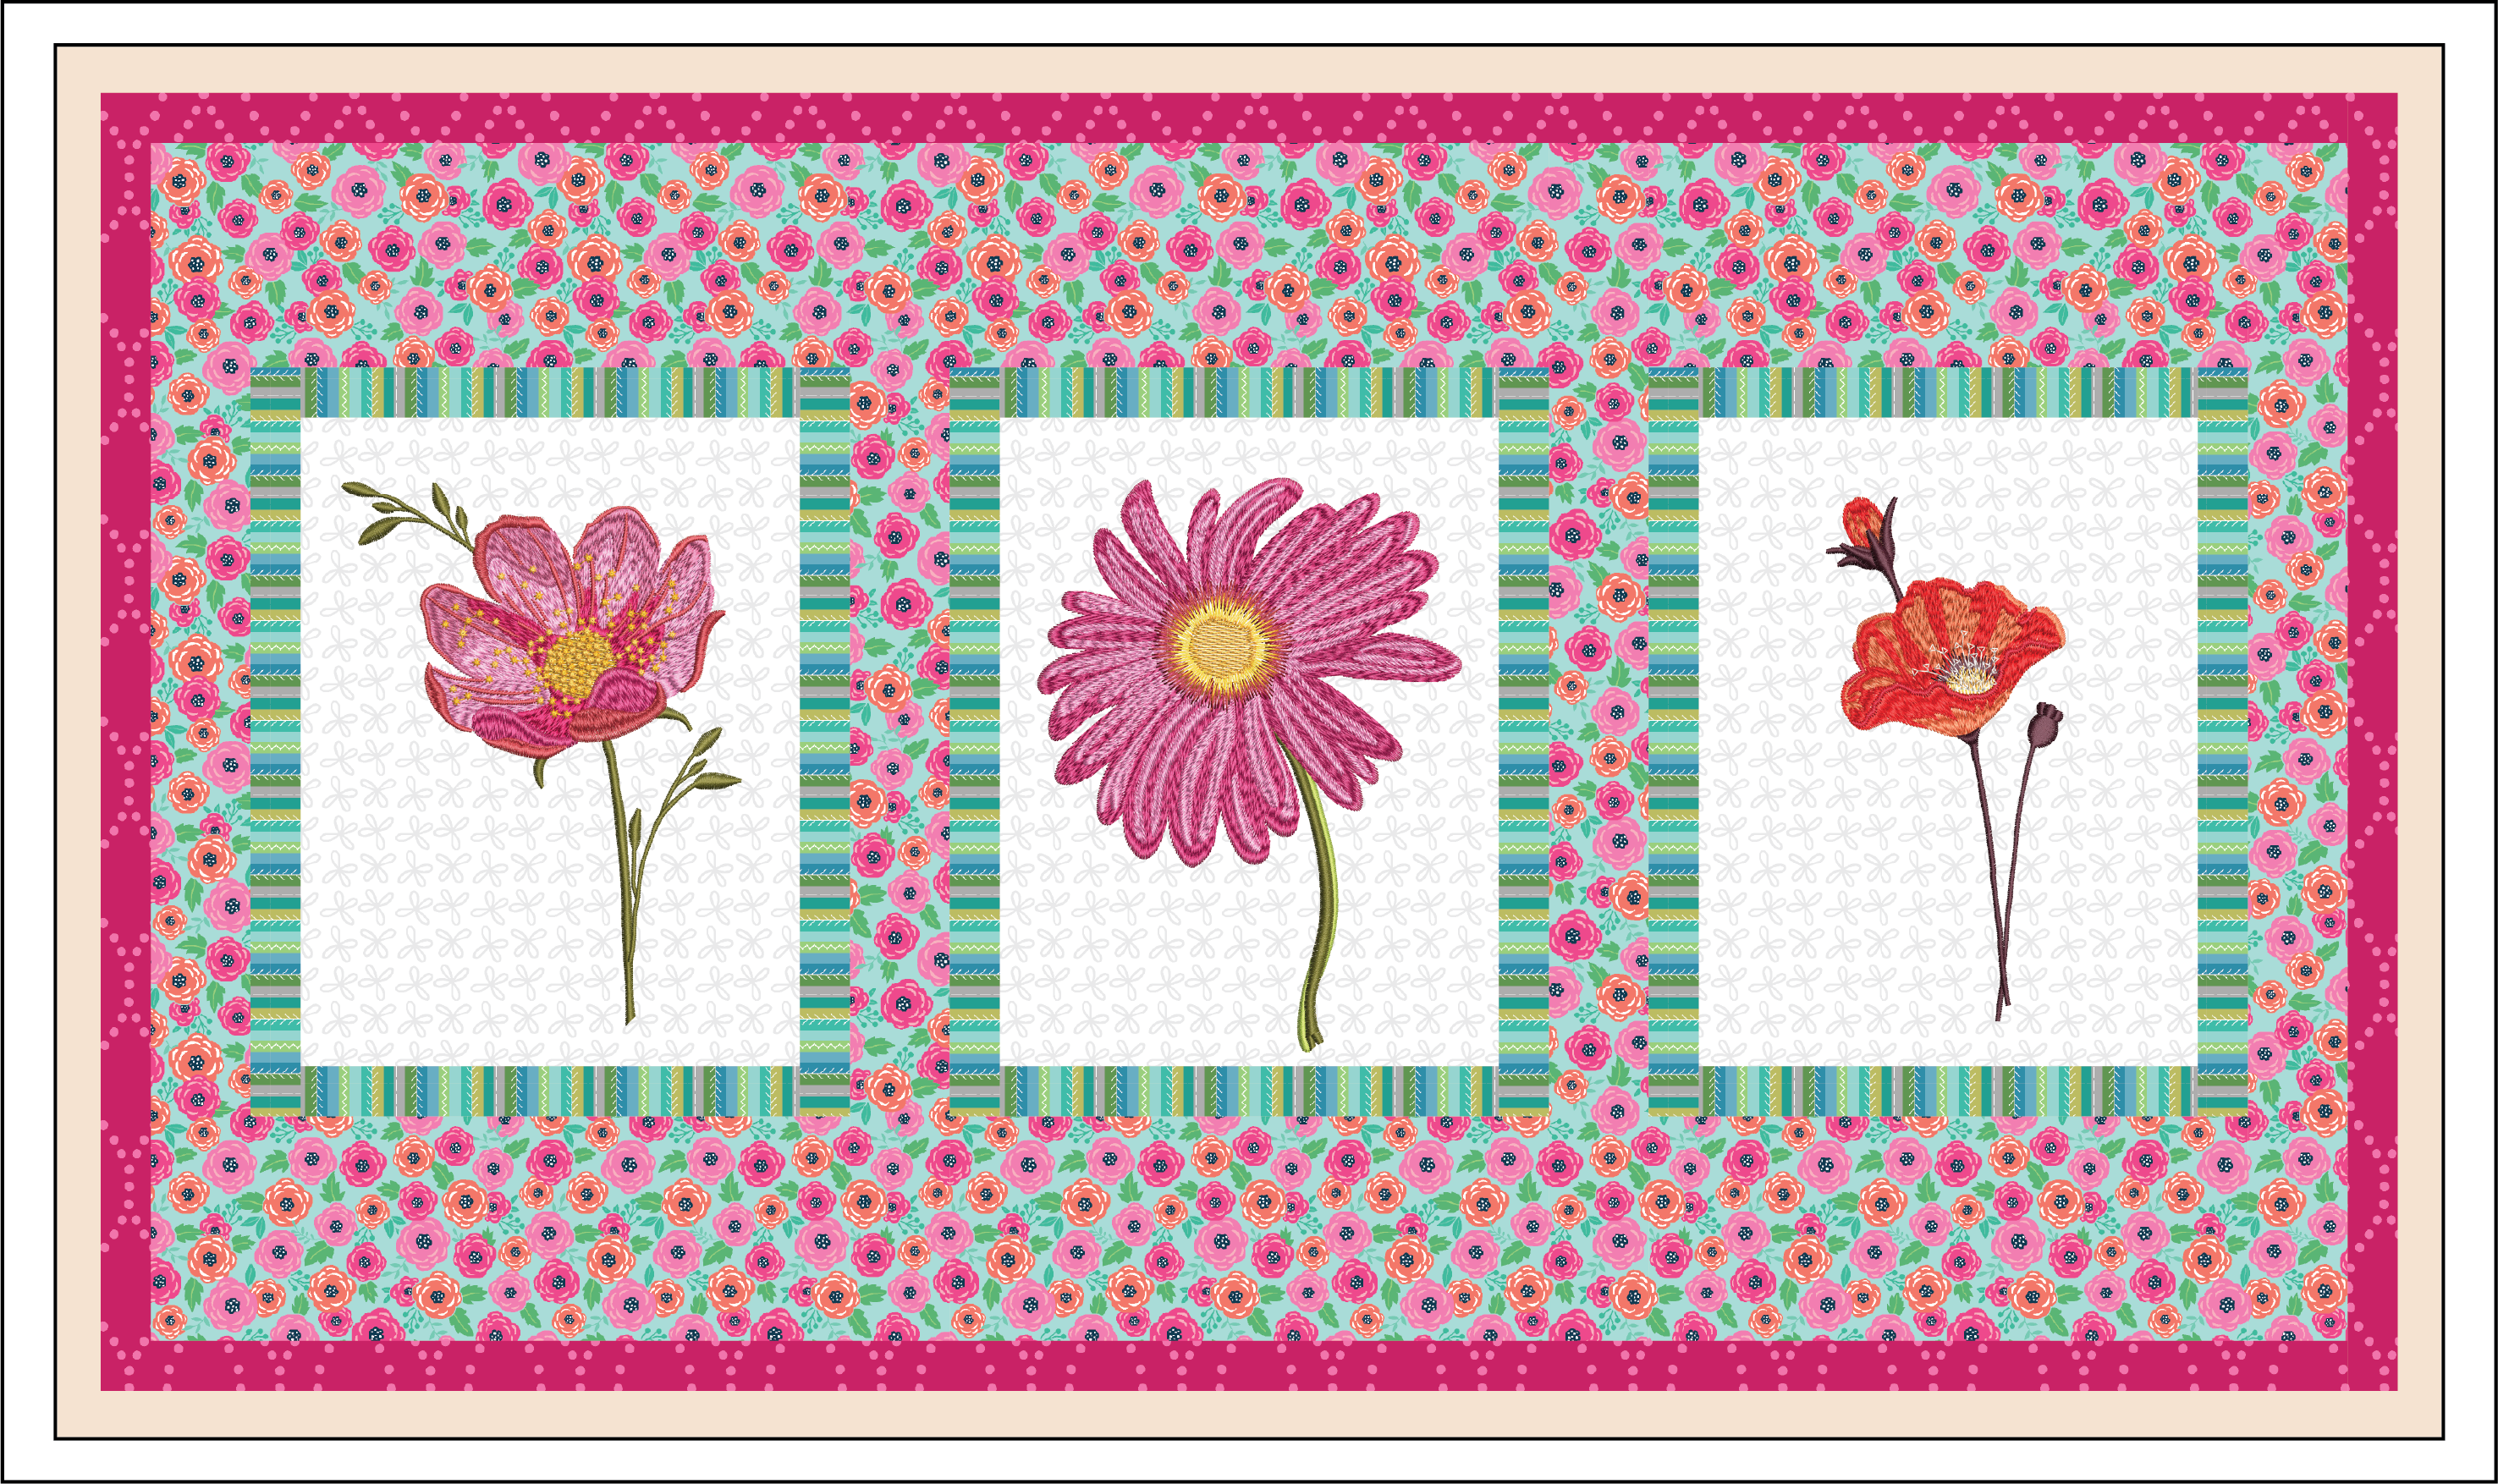
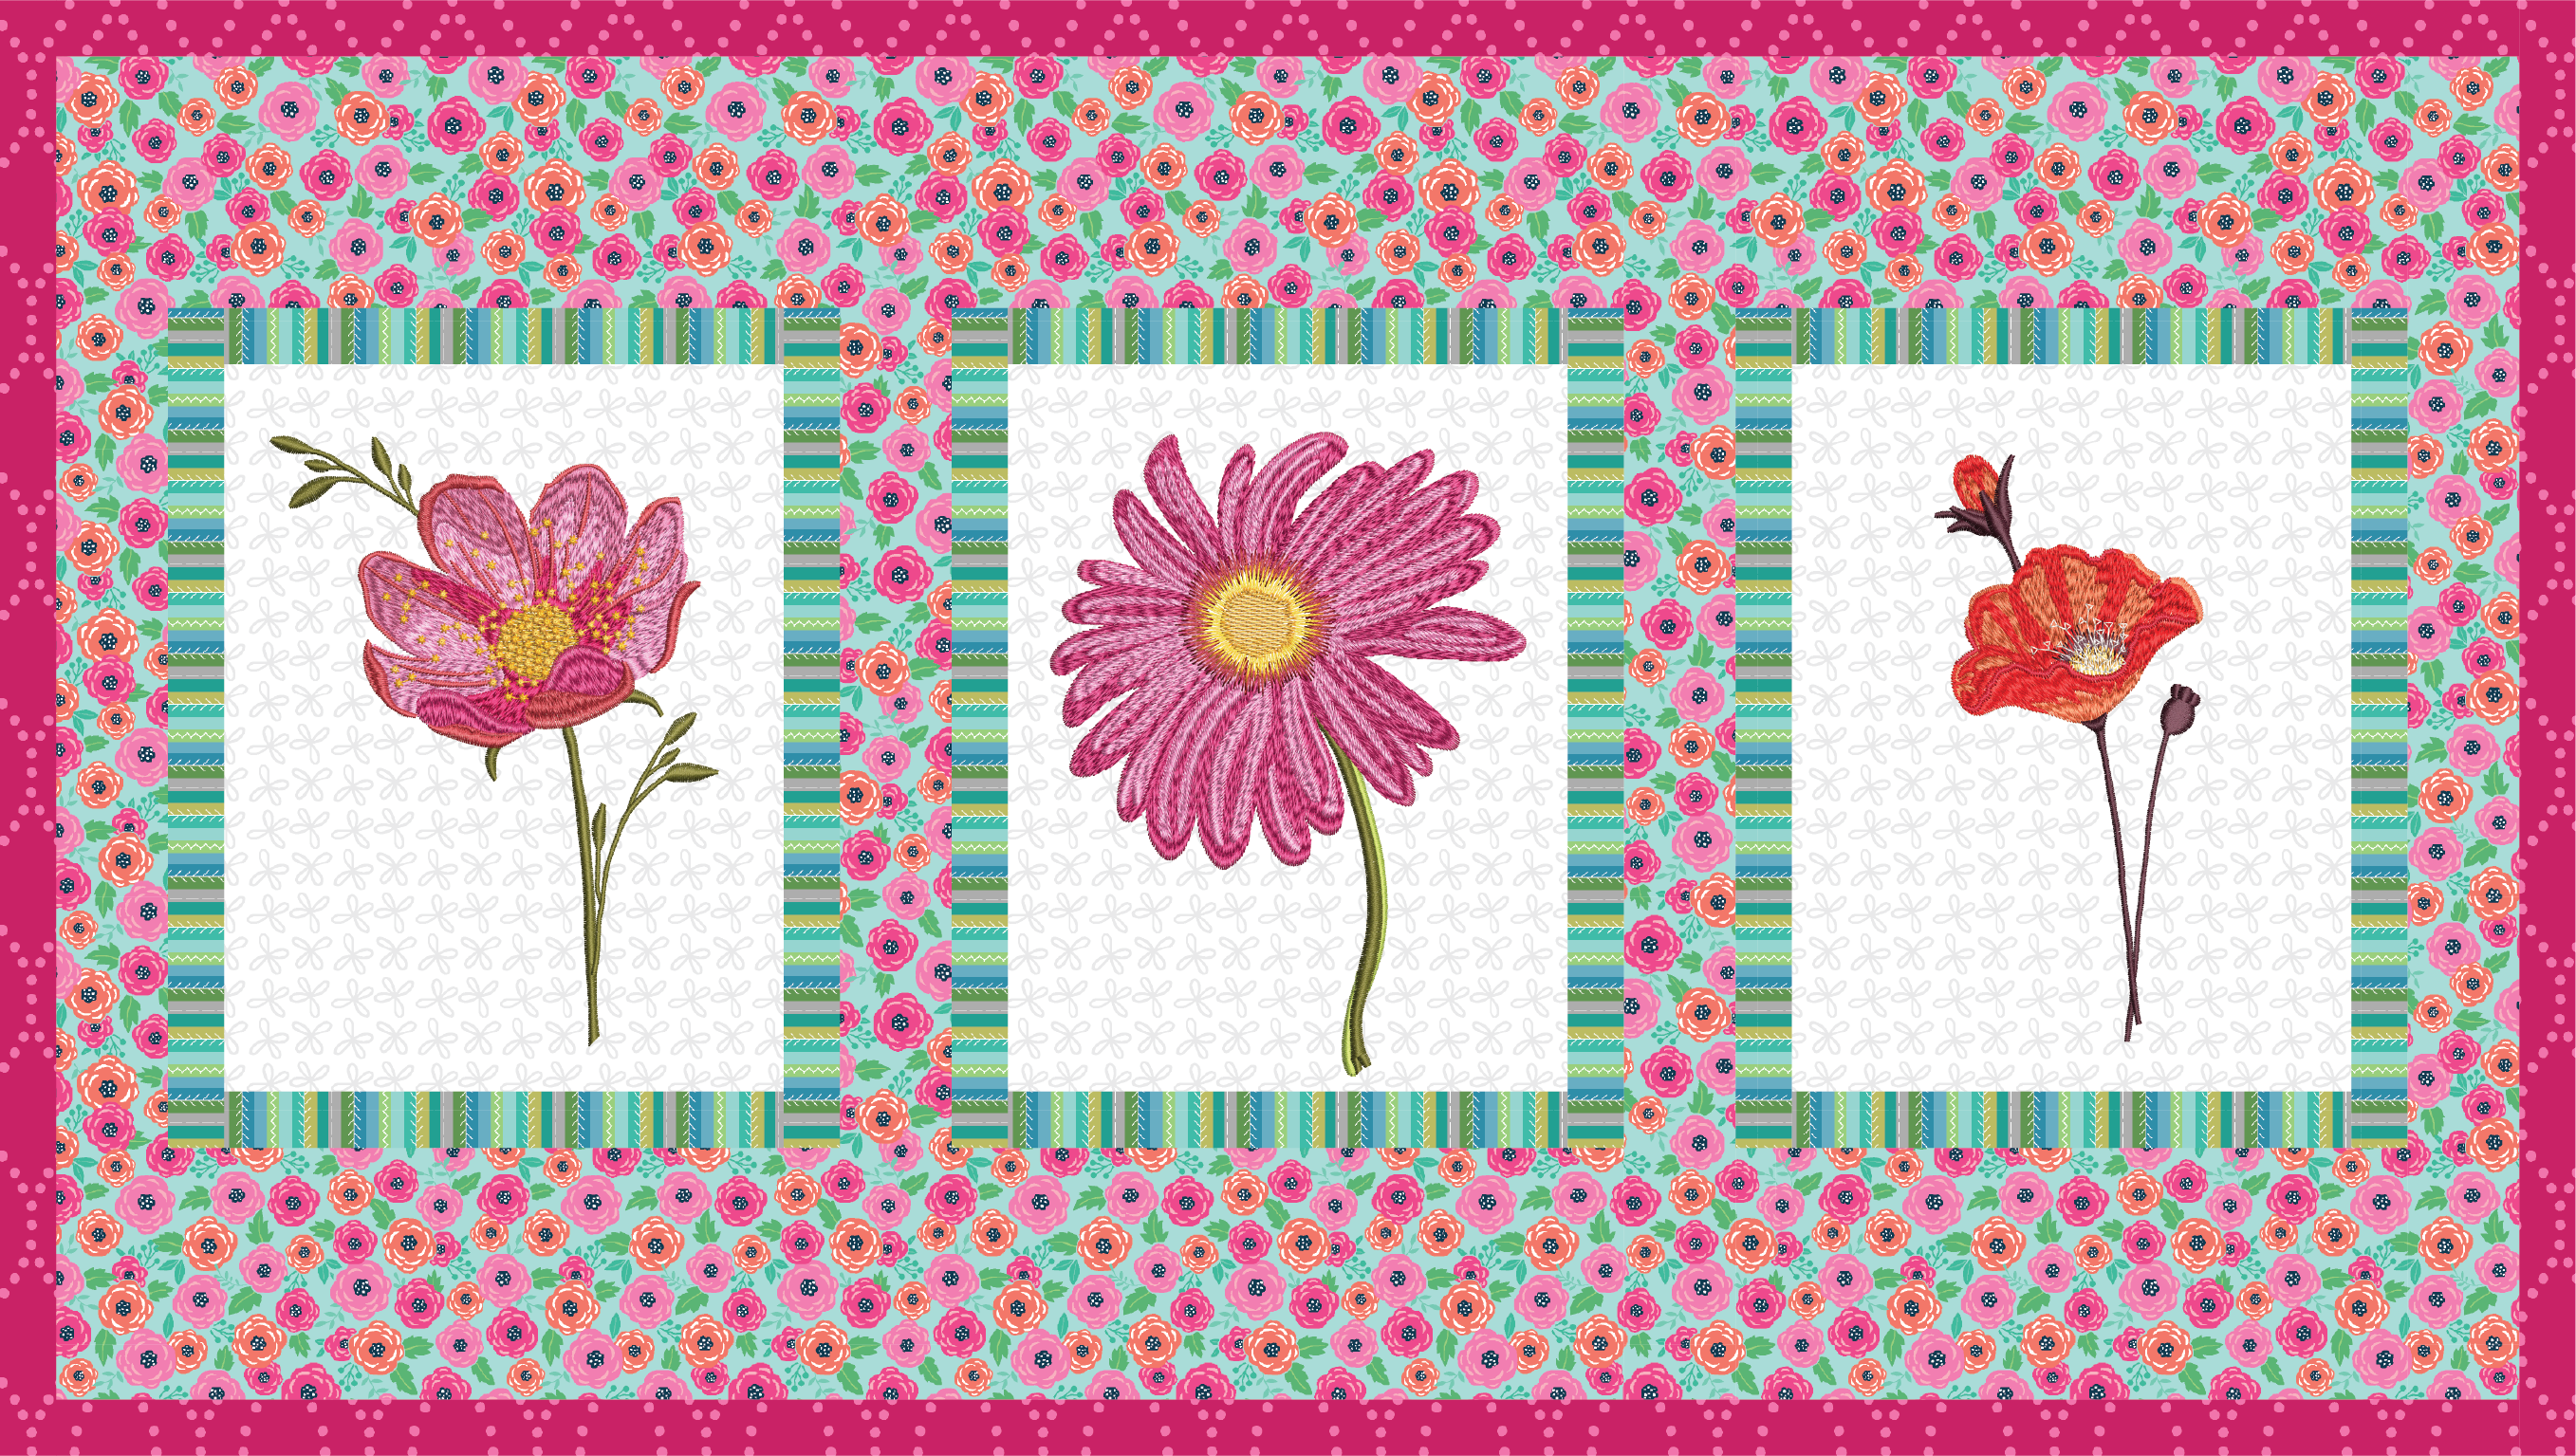
FLOWER PILLOW ASSEMBLY
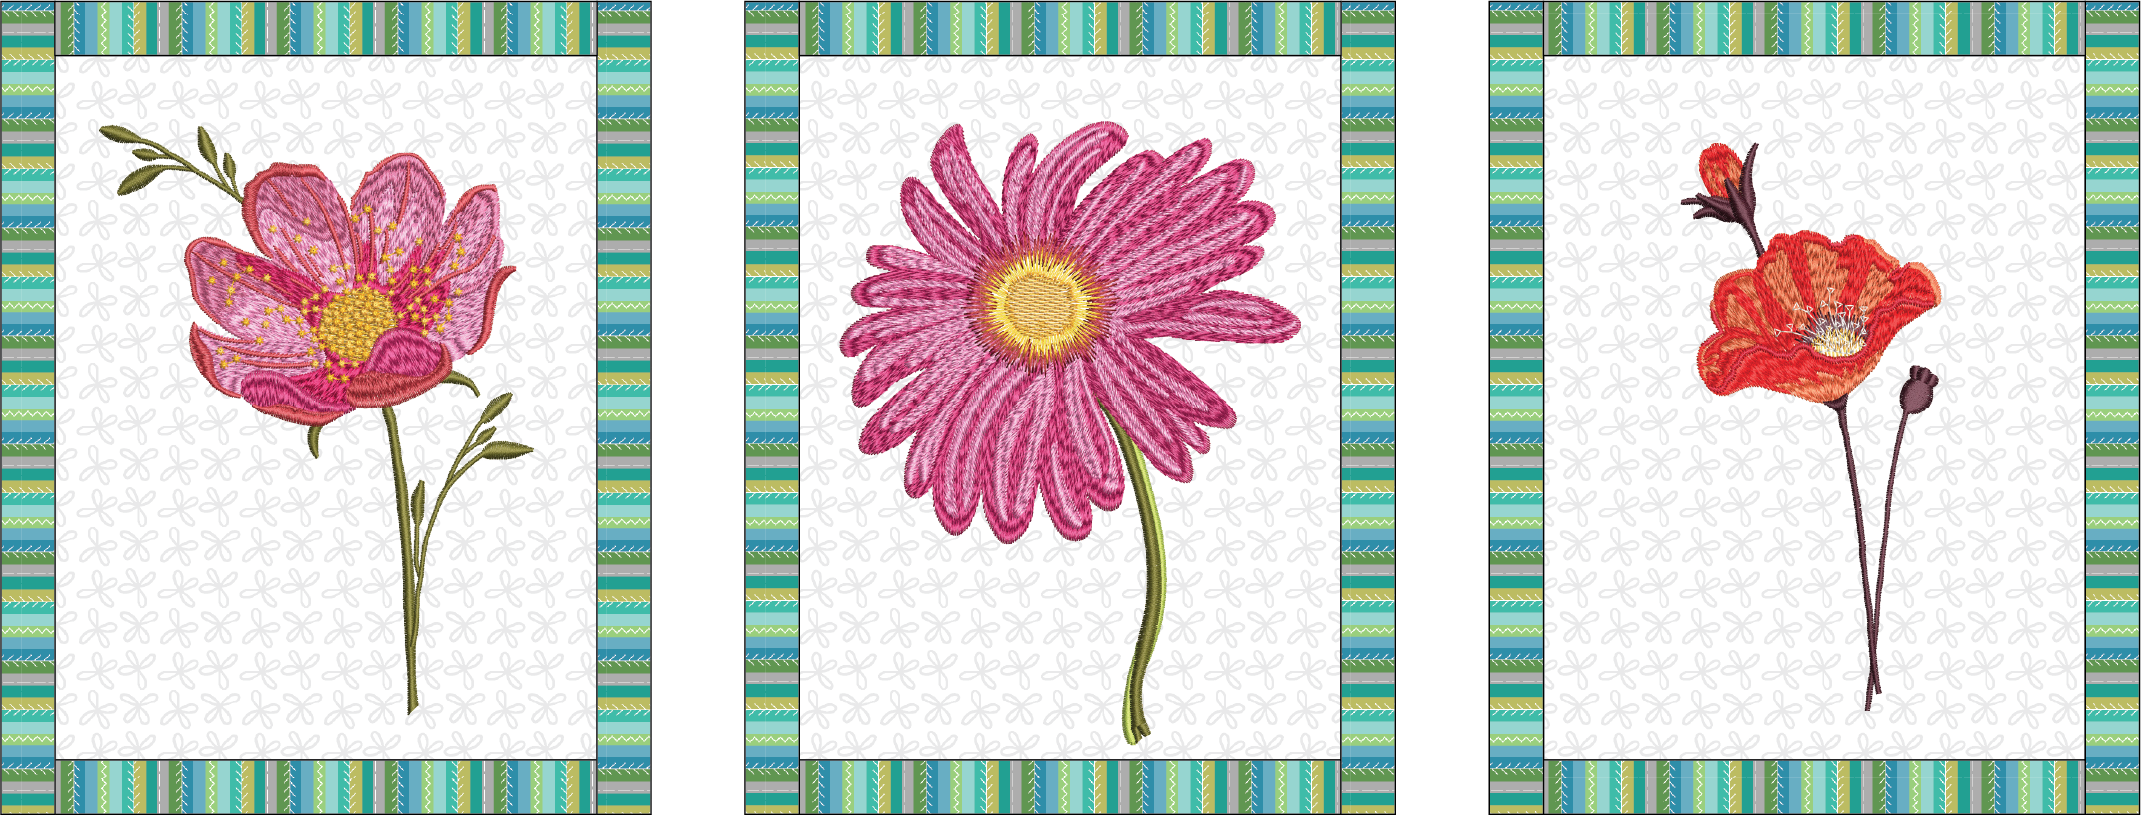
First, sew fabric 3 2¾” x 6½” D strips to the top and bottom edges of the sashed blocks; press to D.
Following the diagram as a placement guide, sew the sashed blocks and the (4) fabric 3 1½” x 12½” E strips; press to E.
Next, sew the fabric 4 1” x 13½” F strips to the top and bottom and the 1” x 22½” G strips to the left and right edges; press to F/G.
QUILTING FLOWER PILLOW
First, layer the top, batting and lining fabric and quilt as desired using Sulky Poly Lite Thread in the needle and bobbin. For best results, use a size 75/11 or 70/10 Quilting Needle.
Then, trim the excess batting/lining.
FINISHING THE FLOWER PILLOW
To finish the pillow, create an envelope pillow back. First, double-fold the short edge of both fabric 4 13½” x 17” H rectangles 1/2″. Then, topstitch using a ¼” seam allowance.

With the trimmed pillow top right side up, place the H rectangles wrong side up over the pillow top, overlapping the sewn edges in the center.
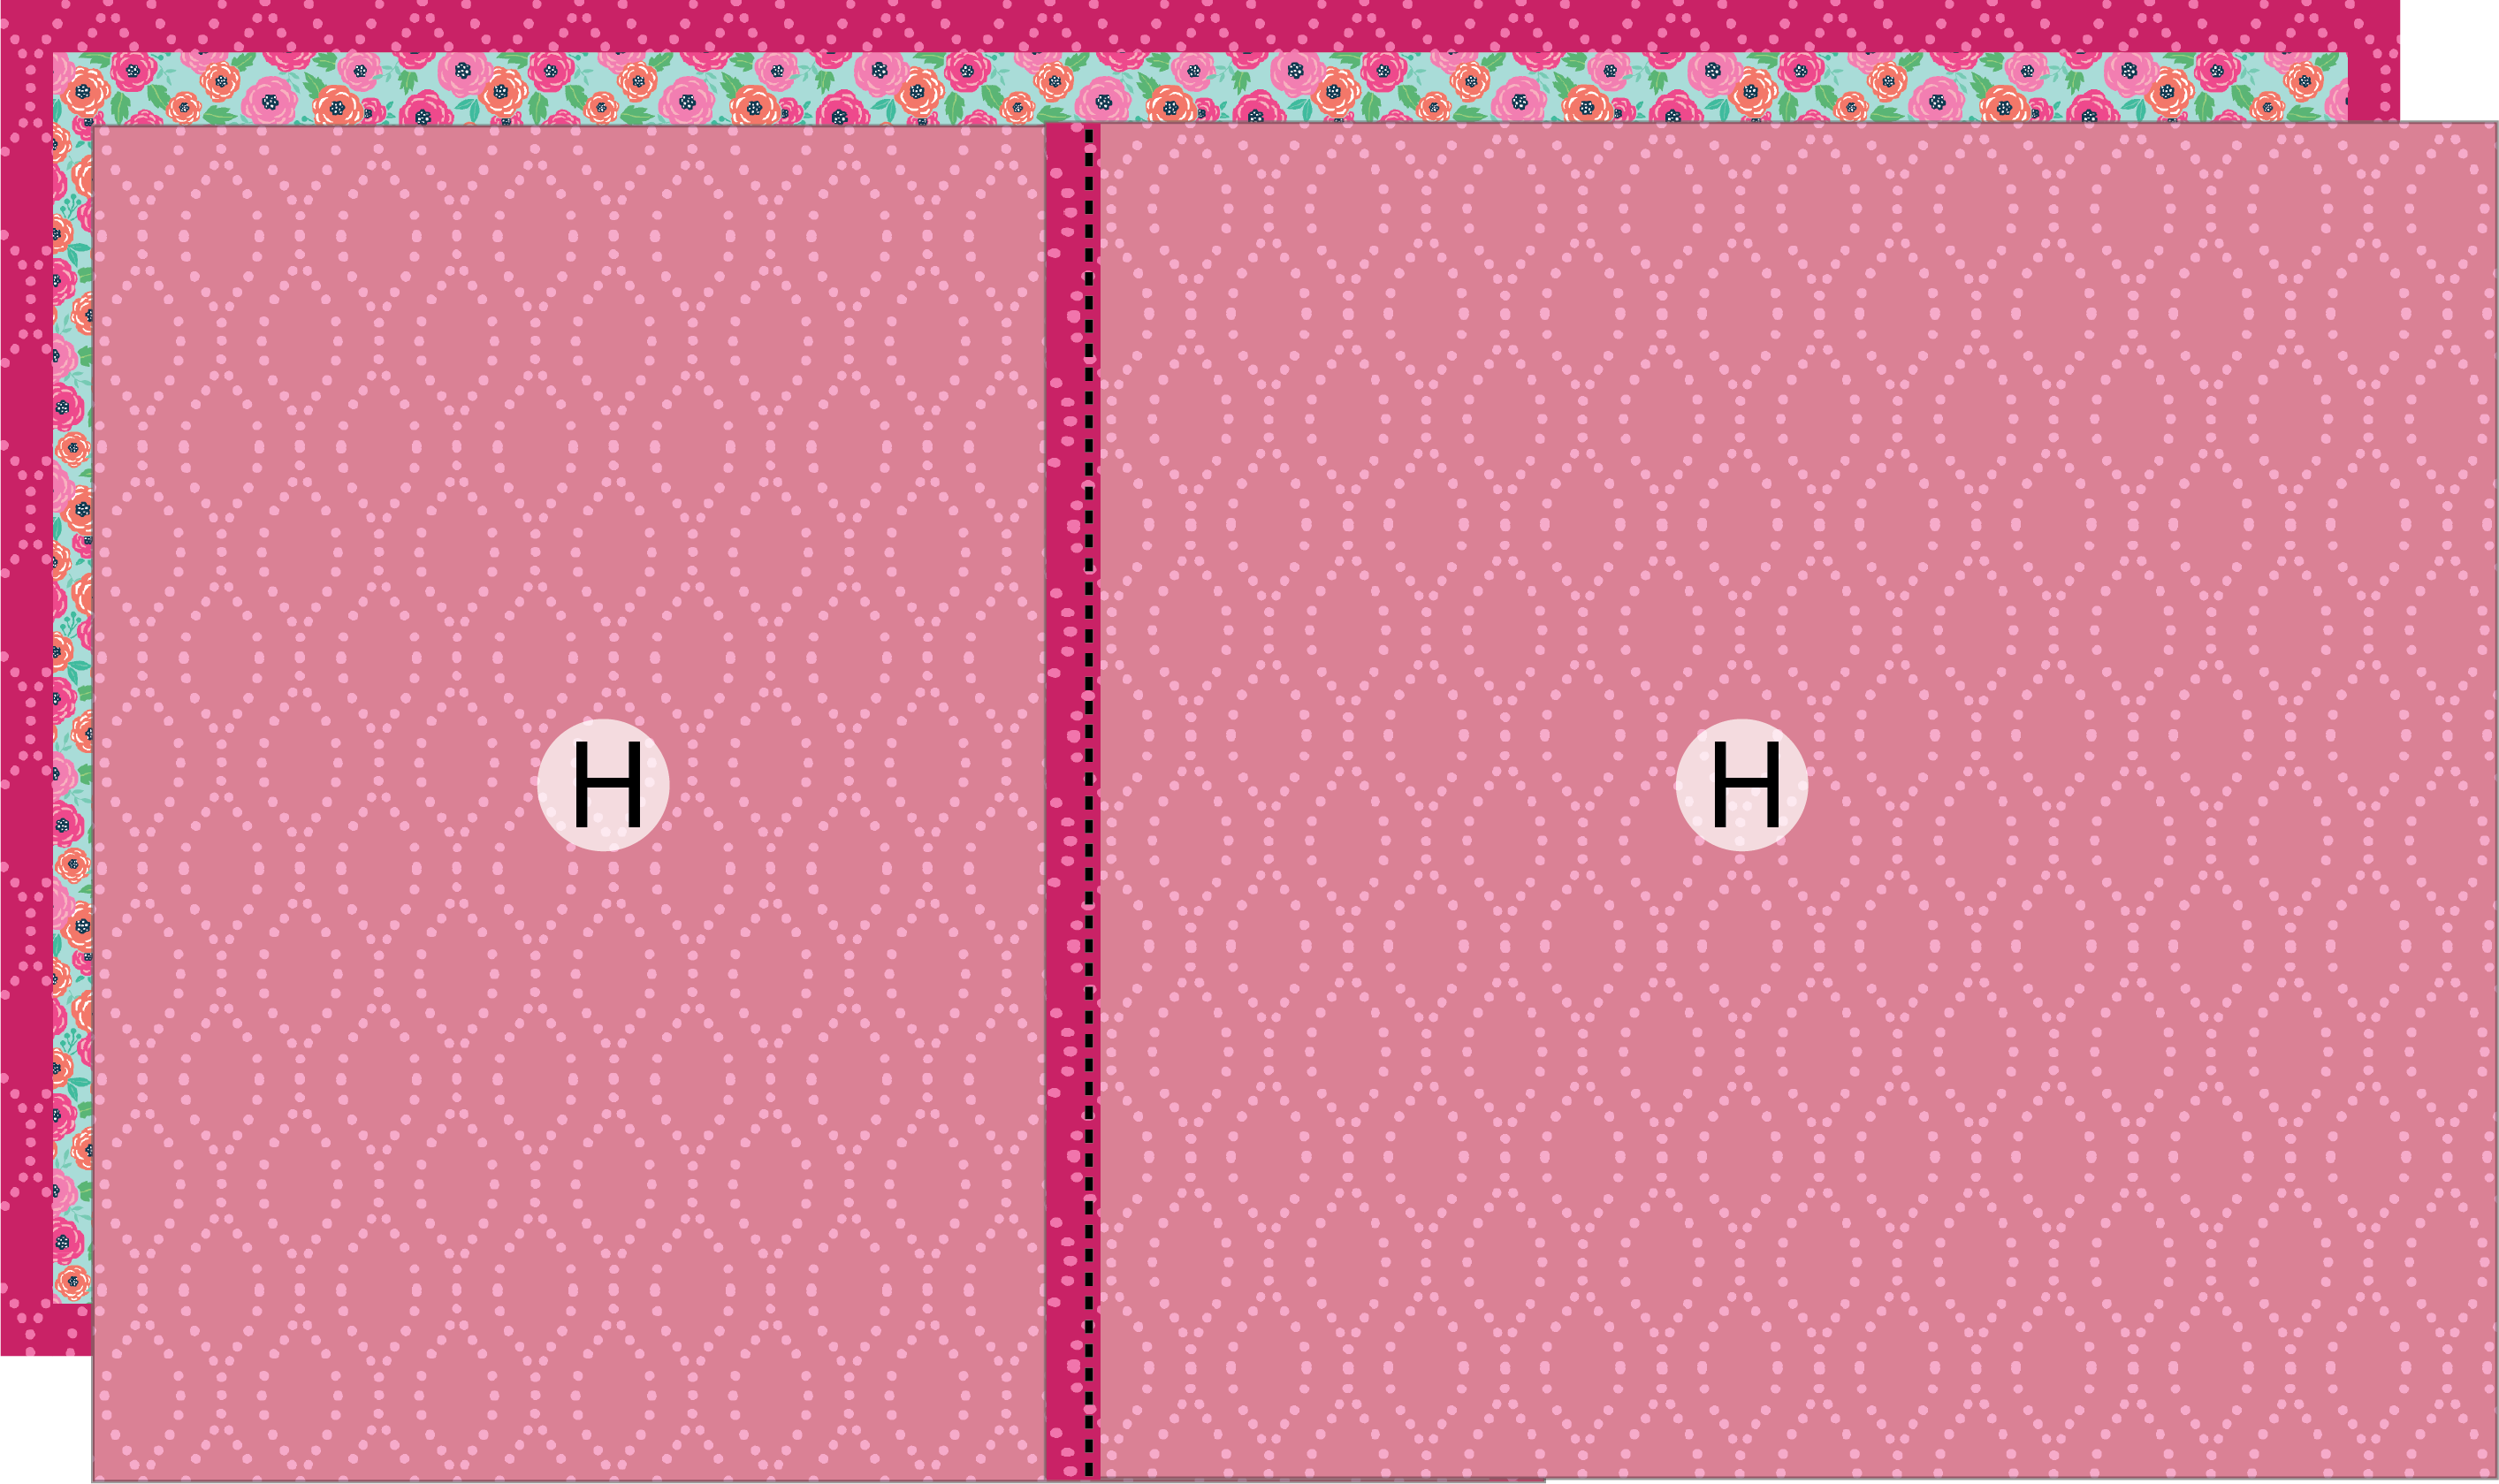
Pin in place, and then stitch on all four sides with a ¼” seam allowance.
Clip the corners and turn the flower pillow right side out.
Then, stitch in the ditch between fabric 3 and fabric 4 to make the “piping” trim.
Lastly, insert the pillow form through the envelope closure.

Ellen March
I am the Director of Content for Sulky of America. The former Editor in Chief of Sew News and Creative Machine Embroidery magazines, I hosted Sew it All TV on PBS for nine seasons. I've appeared on It's Sew Easy on PBS, DIY Network's Uncommon Threads, Hallmark's Marie Osmond Show, MacPhee Workshop and more! Come sew with me!


4 Comments
Eunice Brown
Thank you for a wonderful tutorial and beautiful step-by-step pictures.
Yvonne J Bluthardt
Can a list of the Filaine threads used for these 3 designs in the project be listed please? I have the fur collection of them already and a few other colors so I don’t want to buy the designs first and then order the threads afterwards if needed. I like to save on the shipping costs whenever possible. Thanks!
Ellen March
For the Cosmo & Gerbera Daisy: 862-3129 (Golden Yellow) & 862-3978 (Amber)
For the Poppy: 862-3129 (Golden Yellow) & 862-3976 (Light Mist)
Yvonne Bluthardt
Thanks so very much Ellen! I look forward to seeing you on Sew What tomorrow! Have a blessed week!