Teacher Mug Rug

Designed by Melanie Call, of A Bit of Scrap Stuff
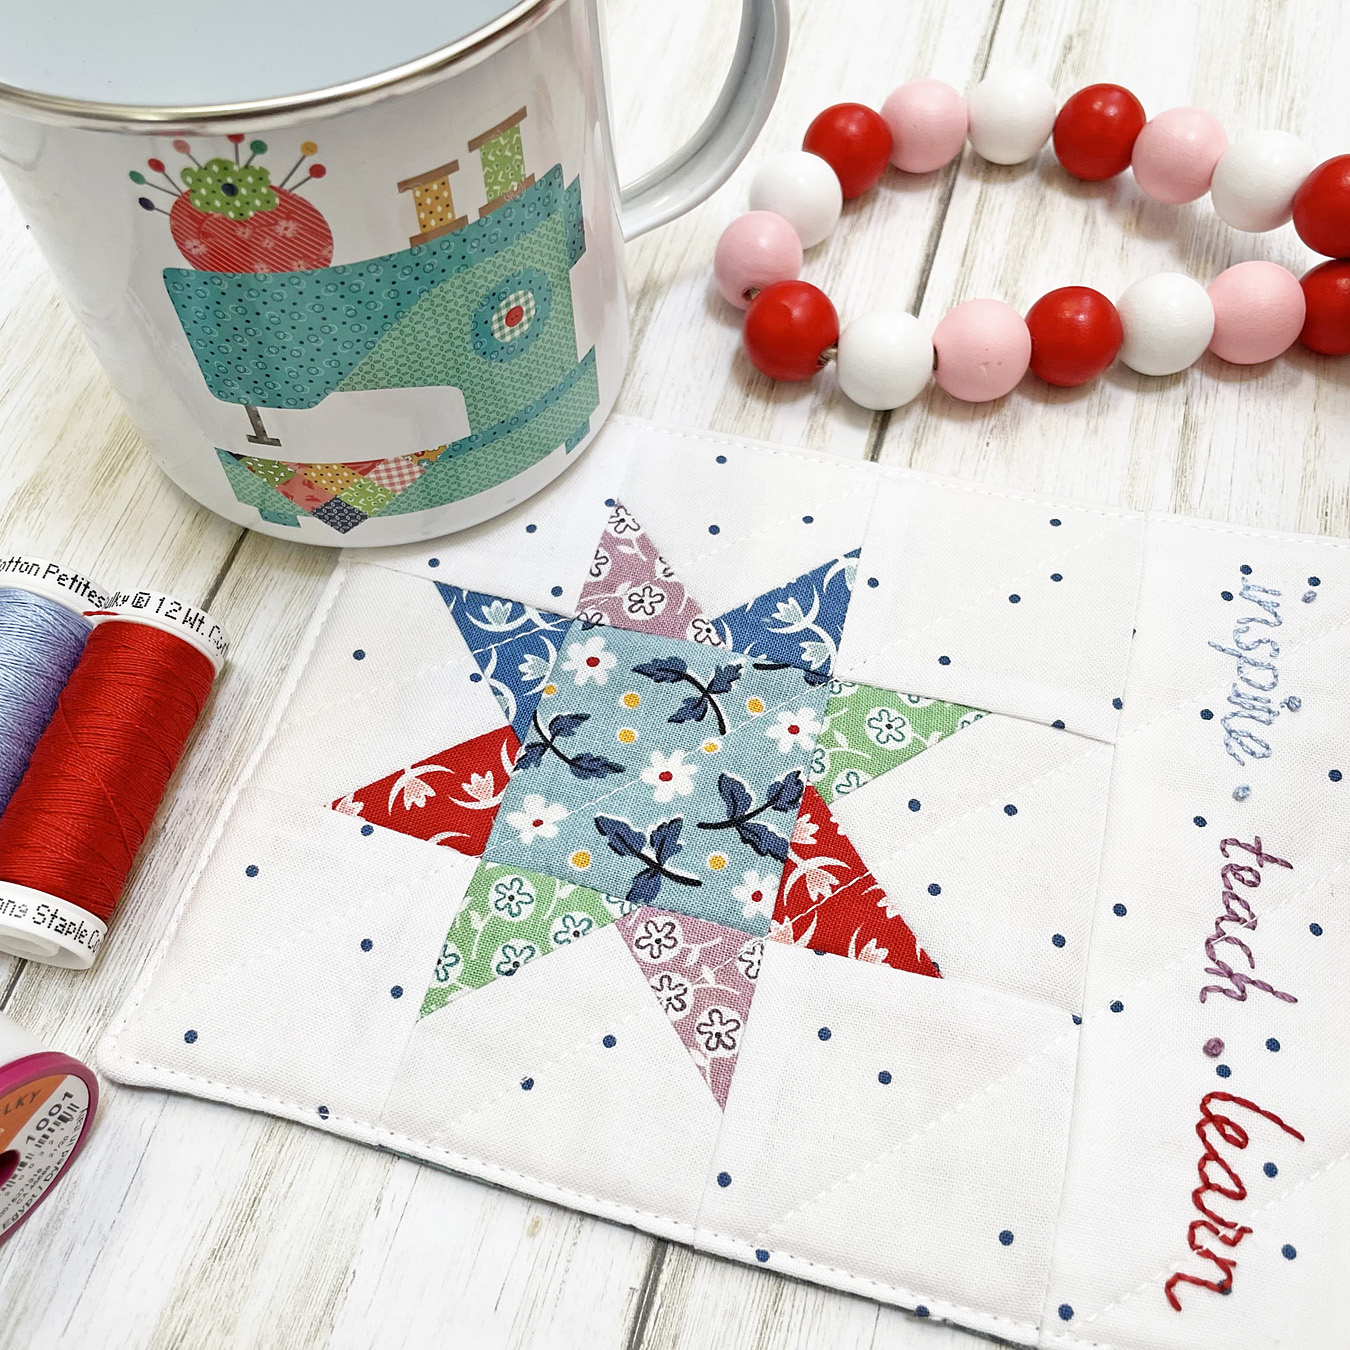
A teacher mug rug makes a great back-to-school gift. This design featured piecing, quilting and a bit of hand embroidery. Change up the words to suit the teacher(s) in your life, or personalize the teacher mug rug with a name or phrase, such as “welcome back,” “teachers rule” or something clever like “2+2=4” for a math teacher, for example.
MUG RUG PATTERN NOTES
- Finished size: 5 1/4 x 7
- Please read all instructions prior to beginning. Seam allowances are ¼.
- WOF = Width of Fabric
- RST= Right Sides Together
TEACHER MUG RUG SUPPLIES
Fabric
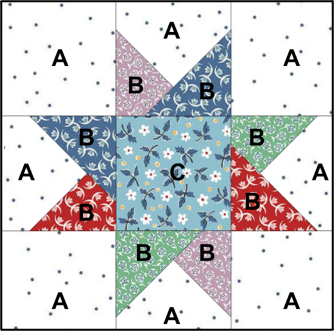
- Star Background: (8) 2 1/4 x 2 1/4 squares. Label A
- Star Points: (8) 1 1/2 x 1 1/2 squares. Label B
- Star Center: (1) 2 1/4 x 2 1/4 square. Label C
- Background for hand embroidery: (1) 8 x 8 * larger size to allow for placing in hoop for hand embroidery plus optional plain white fabric (1) 8 x 8 if you like to hand embroider with 2 layers of fabric
- Teacher Mug Rug Backing: 5 3/4 x 7 1/2 rectangle
*Fabric shown is Prairie and Denim Pin Dot designed by Lori Holt for Riley Blake Designs
Sulky Thread
- 50 wt. Cotton #753-1001 *Piecing, quilting, and assembly
- 12 wt. Cotton Petites #1039 *Hand embroidery
- 12 wt. Cotton Petites #1292 *Hand embroidery
- 12 wt. Cotton Petites #1830 *Hand embroidery
Needles
- Organ® 80/12 Top Stitch (piecing, quilting & assembly)
- Tulip® Embroidery (hand embroidery)
Preferred transfer tool for Hand embroidering (choose one of the following)
Other
- Sulky KK2000 Temporary Spray Adhesive
- 5 x 8 rectangle of batting
- That Purple Thang turning tool
MUG RUG ASSEMBLY
- Instal a size 80/12 Top Stitch Needle. Thread the machine with Sulky 50 wt. Cotton in the needle and bobbin.
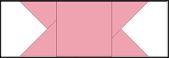
- Draw diagonal line on wrong side of each B 1 1/2 x 1 1/2 square. Place (1) B 1 1/2 x 1 1/2 square along bottom left corner of (1) A 2 1/4 x 2 1/4 square. Stitch along diagonal drawn line from corner to corner. Trim ¼ away from sewn line. Fold over and press. Block should measure 2 1/4x 2 1/4. Repeat to make 4 blocks.

- Place (1) B 1 1/2 x 1 1/2 square along bottom right corner of (1) A 2 1/4 x 2 1/4 square. Stitch along diagonal drawn line from corner to corner. Trim ¼ away from sewn line. Fold over and press. Block should measure 2 1/4x 2 1/4. Repeat to make 4 blocks. Label A/B.


- Sew together (1) A 2 1/4 x 2 1/4 square to each side of A/B block. Press toward the A square. Make 2 rows. Label Row 1.

- Sew together (1) A/B block to each side of (1) C 2 1/4 x 2 1/4 square. Press toward the C square. Make 1 row. Label Row 2.
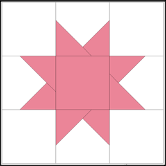
- Sew (1) Row 1 above and below Row 2 to form the Star Block. Press towards Row 2. The unfinished Star Block measures 5 3/4 x 5 3/4.
Hand Embroidery
- Transfer inspire . teach . learn provided pattern with preferred embroidery transfer method. Or choose your own phrase or pattern to embroider. Pattern/words should be smaller than 1 1/4 x 5. To use Stick ‘n Stitch, print the desired motif/words onto a sheet of the stabilizer with the fabric-like side facing up and on the draft or lowest ink setting. Cut out each part of the design (if there are multiple words/motifs), and then remove the paper backing. Stick the stabilizer on the fabric right side, and then stitch through it to form each embroidery.
Chosen words: inspire . teach . learn
Chosen Font: Savoye LET Size: 60
Note: Two fabric pieces were used for the embroidered fabric area to provide extra stability and prevent thread from shadowing on the front if traveling with the thread. Two strands of Sulky 12 wt. Cotton Petites Thread was used for the lettering.
- When the embroidery is complete, remove the transfer method, if applicable. To remove Stick ‘n Stitch, run the fabric under running water until it dissolves completely. Then, air dry flat on a towel. Sulky Iron-on Transfer Pens are permanent, so no removing is needed. Frixion pens are removed with heat from an iron.
- Trim the embroidery piece to 2 1/4 x 5 3/4. Make sure your embroidery is not within 1/4 of fabric edges or it will disappear into the seam.
- Stitch the embroidery piece to the right side of the Star Block. (The unfinished Teacher Mug Rug measures 5 3/4 x 7 1/2.)
Final Assembly
- Place the Teacher Mug Rug on top of a 6 1/2 x 8 rectangle of scrap batting. Use Sulky KK2000 to adhere.
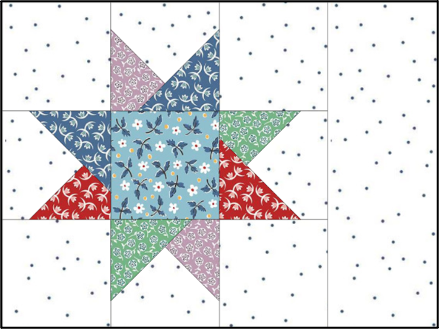
- Quilt the Teacher Mug Rug together with diagonal lines, as shown, or however desired.
- Trim the quilted Mug Rug to 5.75 x 7.5
- Place Mug Rug Front right side up on a flat work surface. Layer the Mug Rug Backing right side down (right sides together).
- Stitch the perimeter using a ¼ seam; leave a 2 1/2 opening for turning.
- Turn the project right side out. Use That Purple Thang Tool (or preferred turning tool) to poke out the corners of the Teacher Mug Rug. Press the project.
- Topstitch the perimeter to close the opening.
Gif the finished teacher mug rug to an educator of your choice! Or gift it to a college student along with a fun mug and sleeve of cookies.

Thank you for providing this Sew What blog along with your past Sew What programs. Can’t wait to make severe of this mug rug for my granddaughters teachers.