Back to School Sewing Series: How to Make a Drawstring Backpack
Hello, happy sewing people! Michelle from Serafina1973 here again with another fun project for you. Today we’re going to be making a drawstring backpack with an embroidered outside panel. Listed below are the supplies I used and the end result is a fabulously beautiful and sturdy backpack. If you’d like yours to be more soft-sided, you can substitute a lighter interfacing on the liner like Sulky® Soft ‘n Sheer Extra™ instead of the Sulky Fuse ‘n Stitch™, or forgo interfacing the liner altogether. I used Sulky 30 wt. Cotton Thread with a denim needle throughout for the assembly of this project.
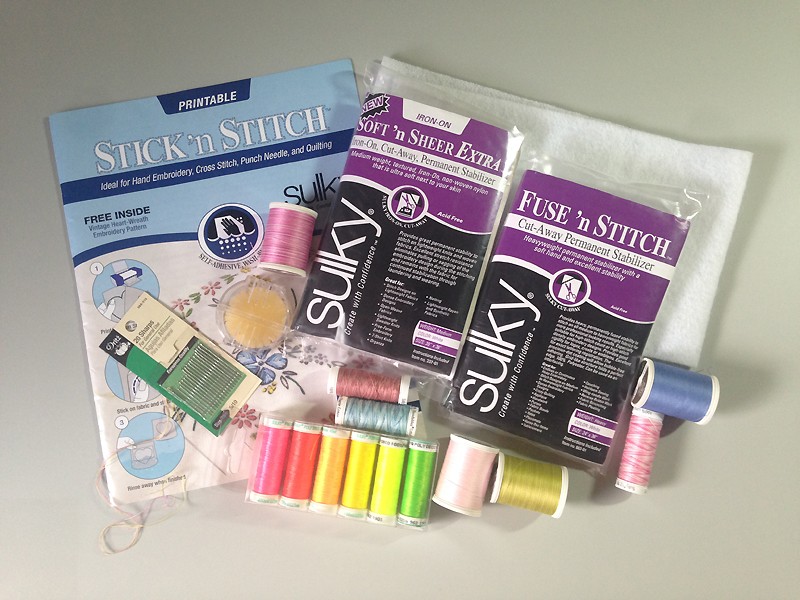
Supplies:
- Fabric – 1 yard pink stripes, 1/2 yard blue dots and 1/2 yard Kona in berry. The pink stripe and blue dots came from Desiree’s Designs.
- Sulky Stick ‘n Stitch™ Stabilizer
- Sulky Soft ‘n Sheer Extra™
- Sulky Fuse ‘n Stitch™
- Fusible Fleece
- Sulky 30 wt. Cotton Thread in colors – 1225, 4030, 4052, 4014, 1198, 1304, 4046 and 0192
- Sulky Poly Deco™ Threads – neon 6 pack item #962-05
- Embroidery needles
- Beeswax
- Top-stitch or denim needle for your sewing machine
STEP 1: Cutting your fabrics and interfacing pieces.
Pre-wash all your fabrics and give them a good press before you cut!

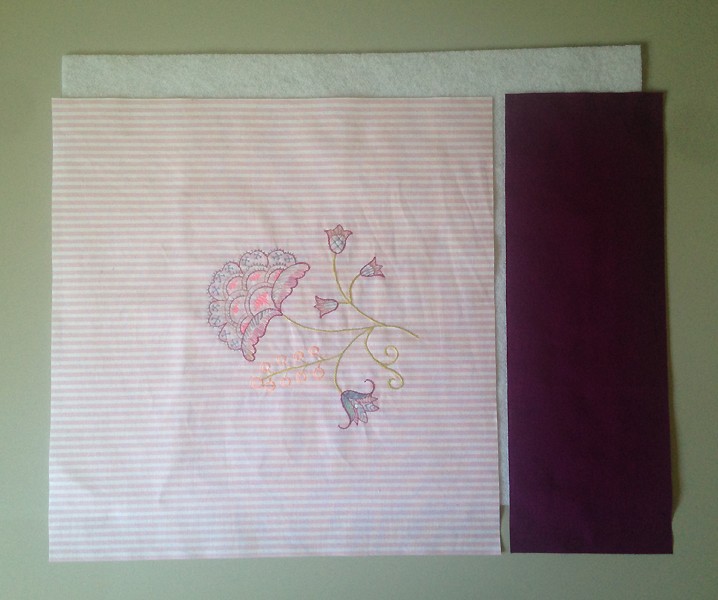
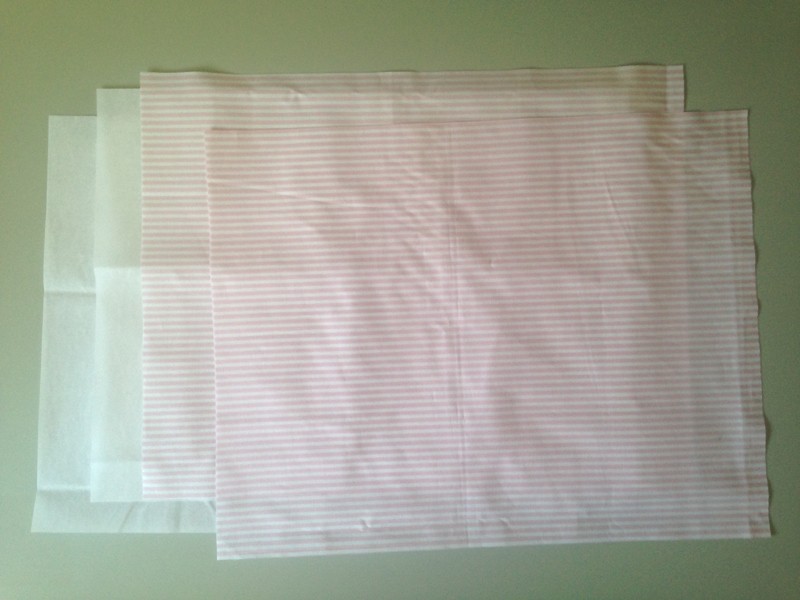

Cut from Pink Striped fabric:
- one exterior panel for embroidery – 16″W x 16″H
- two liner pieces – 14 1/2″W x 18 1/2″H
Cut from Blue Dots fabric:
- two strips for drawstring channel – 2″W x 14 1/2″L
- three strips for drawstring- 1 1/2″W x WOF (width of fabric)
Cut from Kona Berry fabric:
- one piece for back exterior- 14 1/2″W x 18 1/2″H
- one piece for front bottom accent – 5″W x 14 1/2″L
- two pieces for drawstring loops – 2″W x 2″L
Cut from Soft ‘n Stitch Extra
- two pieces for drawstring channel – 2″W x 14 1/2″L
Cut from Fuse ‘n Stitch
- two pieces for liner interfacing – 14 1/2″W x 18 1/2″H
- two pieces for drawstring loop interfacing – 1″H x 2″L
Cut from Fusible Fleece
- two pieces for exterior interfacing – 14 1/2″W x 18 1/2″H
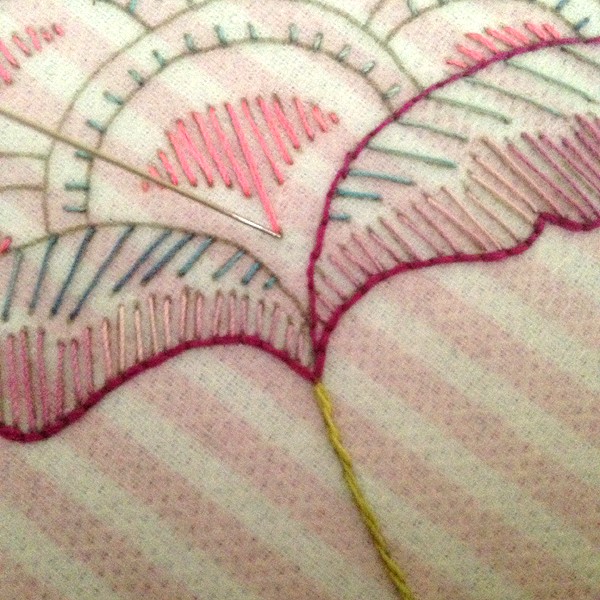
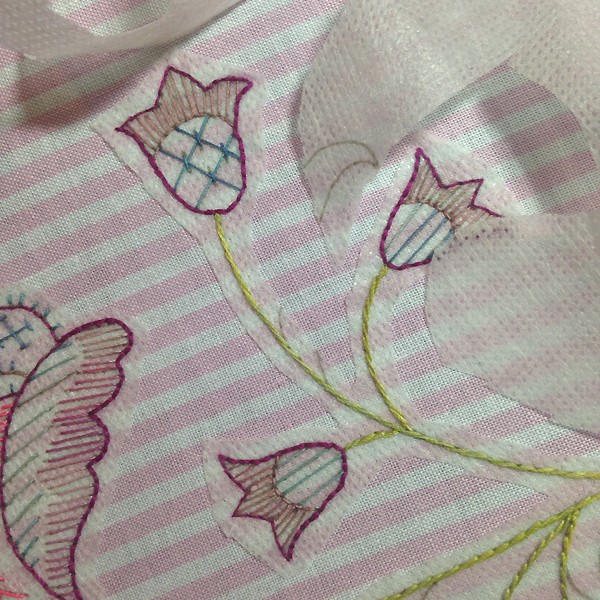
STEP 2: Making the Embroidery Panel
Just like the last project we did together, we’re going to start with the embroidery. Choose the image or multiple images you’d like to embroider. If the image is a digital image, put the Stick ‘n Stitch into your printer and print directly onto the Stick ‘n Stitch. If you have a drawing or some other non-digital art, put the image into your printer and copy it onto the Stick ‘n Stitch. I’ve heard success reports, but I don’t suggest anything other than using your printer to get the image onto the Stick ‘n Stitch. You know, like the directions tell you.

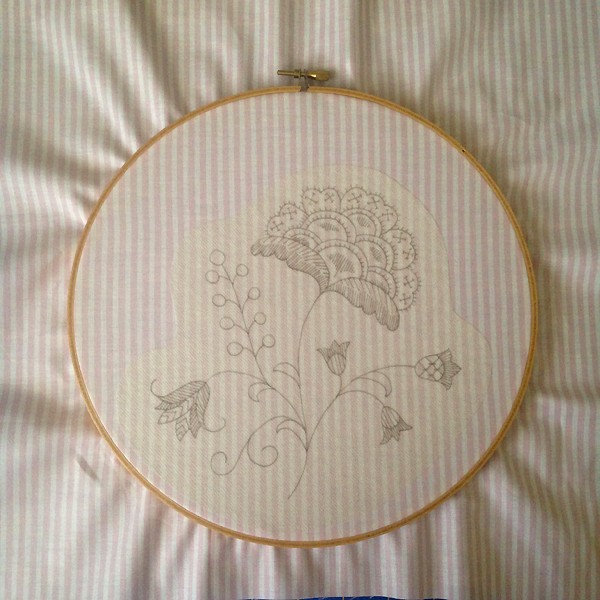 Once you’ve got your image(s) printed onto the Stick ‘n Stitch, cut it out, remove the paper backing, and smooth the image onto your fabric panel. You can use an embroidery hoop or not, but I found it helpful to use one when working on a larger embroidery panel. You’re now ready for the fun part. Embroider to your heart’s content.
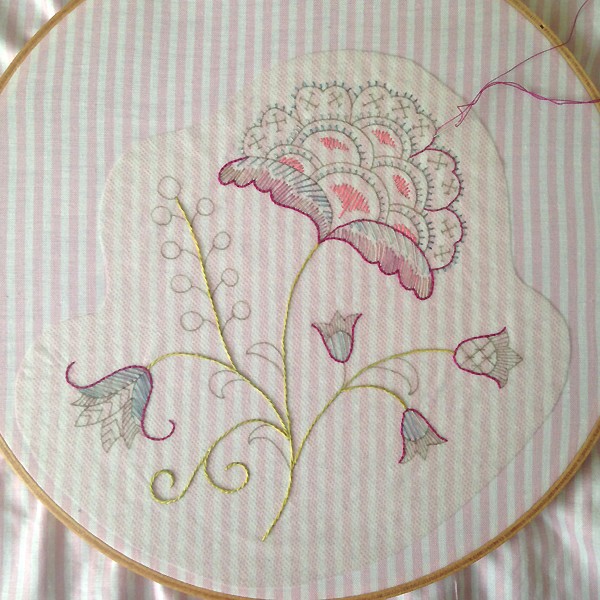

 When you are finished, carefully trim the excess Stick ‘n Stitch away and rinse the rest of the stabilizer off under running warm water. Blot the excess water off and leave lying flat until completely dry.
STEP 3: Assembling the Exterior
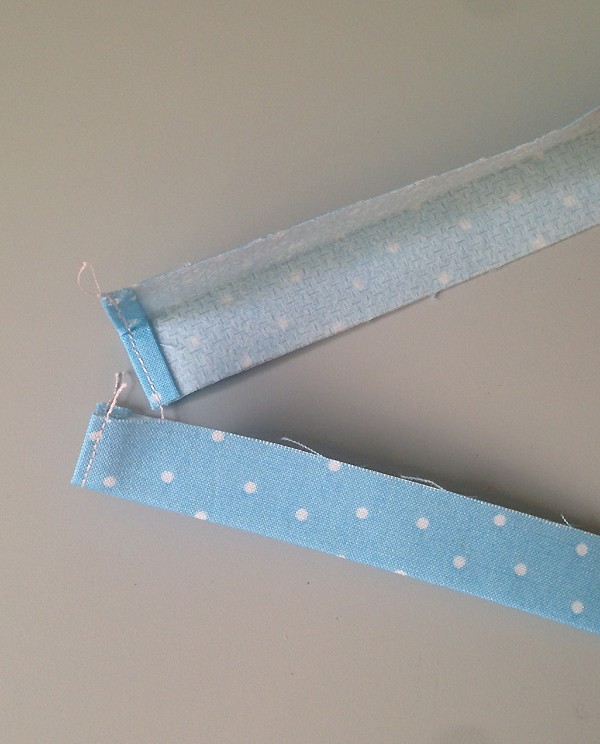
 Referring to the picture above, take your tab fabric pieces and iron the edges to the middle so you have two 1″W x 2″L long strips. Insert the 1″W x 2″L strip of Fuse ‘n Stitch under the folded in edges with the fusible side facing up. Iron to fuse and then set the tabs aside.
 Take your embroidery panel and trim it down to 14″H x 14 1/2″W. Now take the 5’H x 14 1/2″W strip of your bottom exterior contrast fabric and sew it to the bottom of your trimmed embroidery panel using a 1/4″ seam allowance. Fabrics should be right sides together. Iron the contrast panel down and top-stitch. Now fuse this completed exterior panel to one of the pieces of fusible fleece. Fuse your back panel of Kona to the other piece of fusible fleece.
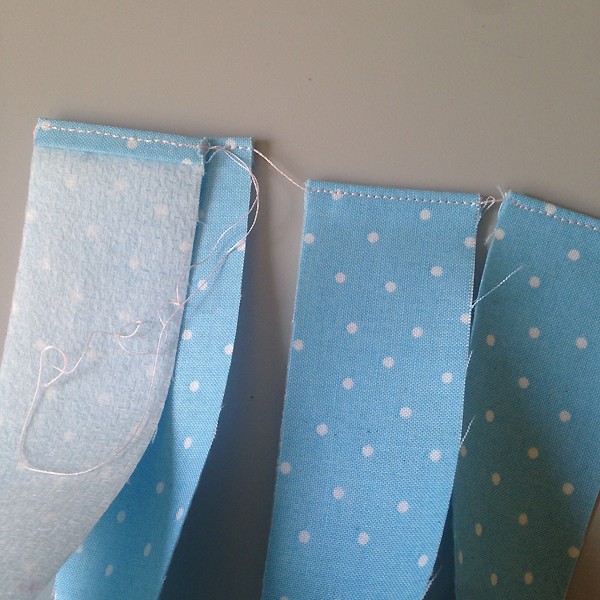
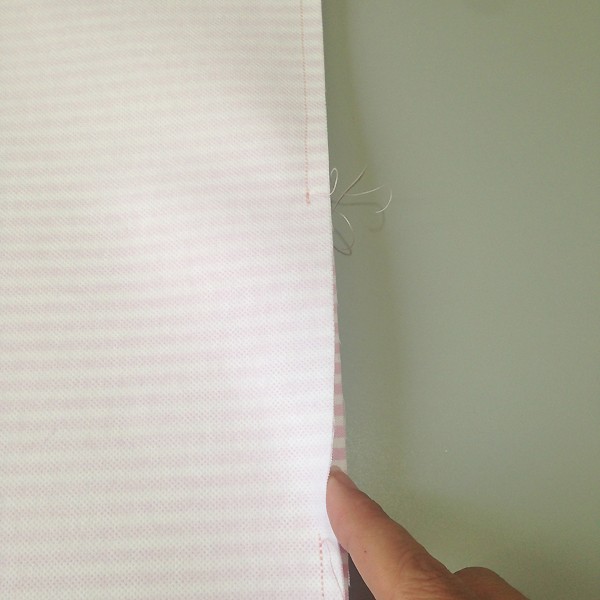
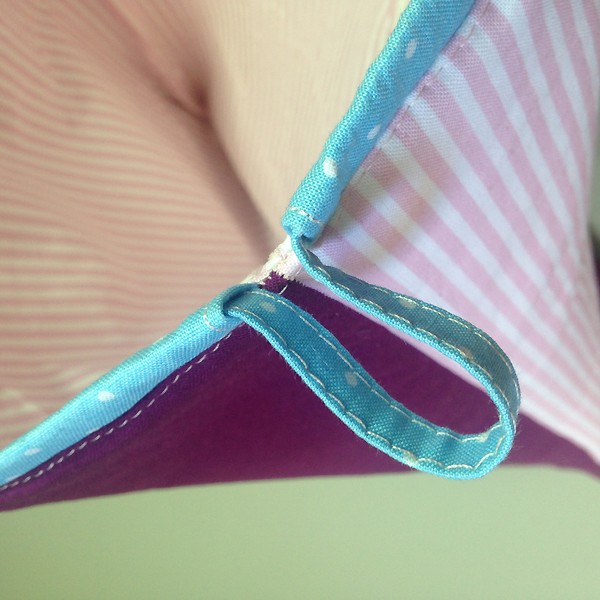
I forgot to take a picture of this step so I hope its very easy to understand by word and reference to the finished product. Grab those small tab strips you just fused and fold them in half lengthwise with the folded fused side towards the inside. Take either your front or back exterior panel, it really doesn’t matter which you chose, and measure 1 1/5″ up from the bottom on both sides. Do this on the right side of the fabric. Now place the folded tabs down on the panel with the loop laying towards the center and the bottom lined up with your marks. Pin or baste in place using a 1/8″ seam allowance. These are the loops at the bottom of your finished backpack that will keep the drawstrings secured.
 Place your other exterior panel on top of the panel with the tabs. Make sure your panels are oriented correctly and that your tabs are at the bottom edges. Pin and sew around both long sides and the bottom of your exterior using a 1/4″ seam allowance. Do not sew the top shut. Turn the exterior right side out and set aside.
STEP 4: Making and Attaching the Drawstring Channels
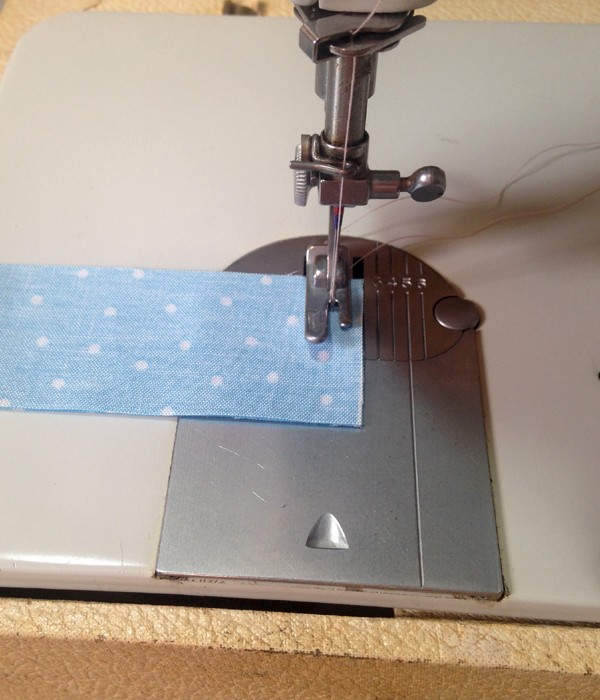
 Take your two strips of 2″W x 14 1/2″L fabric for the drawstring channels and fuse to the two 2″W x 14 1/2″L pieces of Soft ‘n Sheer Extra. Make a double rolled 1/4″ hem at both ends of each strip and then top-stitch.
 Fold each strip in half lengthwise, wrong side together, and press.
 Pin one strip to each side of your assembled exterior. Align the raw edges with the top edge, pin in place and baste using a 1/8″ seam allowance. Set aside.
STEP 5: Assembling the Liner
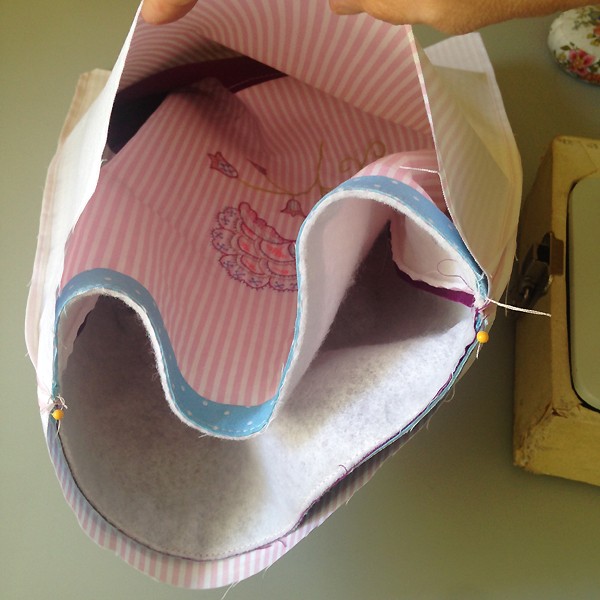
 Fuse your two fabric liner pieces to your two pieces of Fuse ‘n Stitch. Never mind in the photo that my interfacing doesn’t come all the way to the edges. I ran out of interfacing and had to make do. Your pieces should come to the edges all the way around. Pin and sew your two long edges together using a 1/4″ seam allowance. Now pin and sew your bottom closed but leave about a 5″ space in the center un-stitched. This is the opening through which you will later turn your bag right side out.
STEP 6: Assembling your Backpack
 Prepare your exterior piece and your liner for assembly by making sure your exterior piece is right side out and your liner is still inside out. Slip your exterior piece fully inside your liner, right sides should be facing each other. Line up your side seams and then pin around the entire top edge. Stitch around the top using a 1/4″ seam allowance.
 With the top edge stitched, you’re going to reach inside that hole you left in the middle of the bottom of your liner and carefully pull your exterior out through the opening. Take your time and be gentle working the bag right side out.
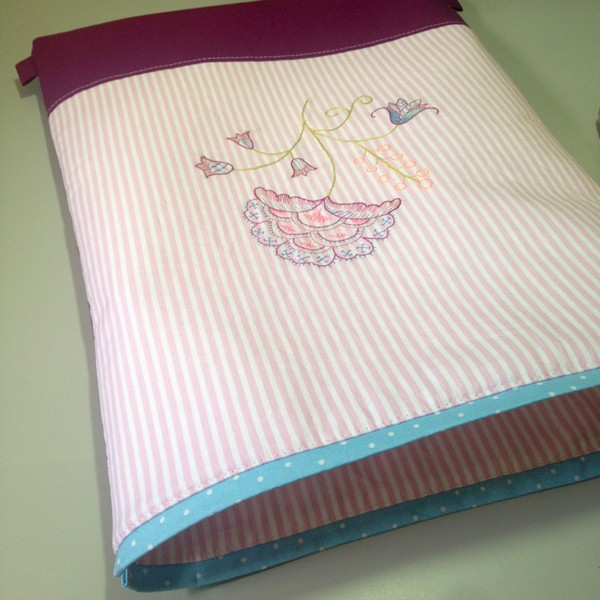 Tuck the liner down inside and make sure the drawstring channels extend up past the backpack opening. Give everything a good press and top-stitch around the top of the bag. Make sure to do this on the body of the backpack and not the channels or later you will possibly have a situation where your drawstrings don’t fit through the channels.
 Now that you’ve got your backpack righted, close the hole you left in your liner by folding in the seam allowance, lining up the edge and top-stitching along the entire opening.
STEP 7: Making and Inserting the Drawstrings
 Take your three 1 1/2″W x WOF (width of fabric) strips and sew them together to make one long strip. Use a 1/4″ seam allowance and press the seams open.
 Just like making binding or bias tape, you are going to iron the long edges of your strip towards the center. Then fold in half again and give a good press. You should have one long strip that is roughly 3/8″ wide by 63″ long.
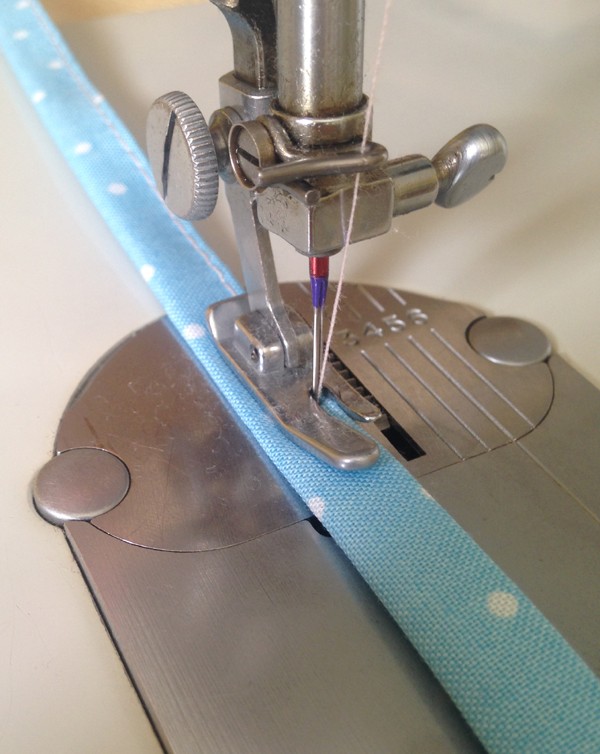 Top-stitch along both edges of your long strip. When this is done, cut the strip into two equal lengths. You don’t need to finish the edges but if you wish to do so, do that now.

You are going to repeat the next steps twice, once for each drawstring. Put a sturdy safety pin in the end of one of your fabric strings and insert it through one of the top channels. Cross over the opening and straight into the next channel. You should have both loose ends on the same side of the bag. Now repeat this step but start on the other side so you have a set of loose ends on each side of your backpack.
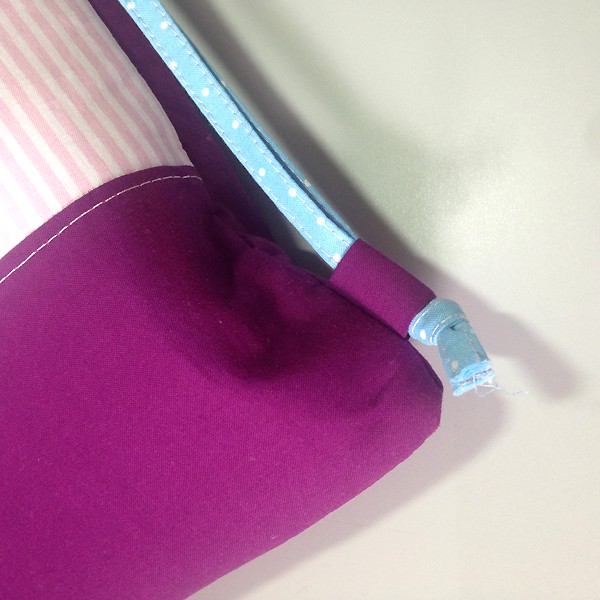 Pass each set of loose ends through the tab at the bottom and tie in an overhand knot.
That’s it!
Now fill your backpack with school supplies, or let’s fill it with EPP supplies and a snack, sling it over your shoulders, and head on out.

Sigh… This was my last stop on the Back to School Sewing Series and I want to say thank you for joining me. I hope you enjoyed my projects and take the time to click around and visit the other posts in the series. There are other cute projects already up and I think there are one or two more to come after this.
Thank you so much to Sulky for this fun series. I really can’t speak highly enough about their products and what a joy the employees are. If you haven’t tried them out yet, I’d beeline for the nearest shop and grab you some Sulky anything. You will not be disappointed. I haven’t been yet and no, they aren’t paying me to say that.

Comments are closed.