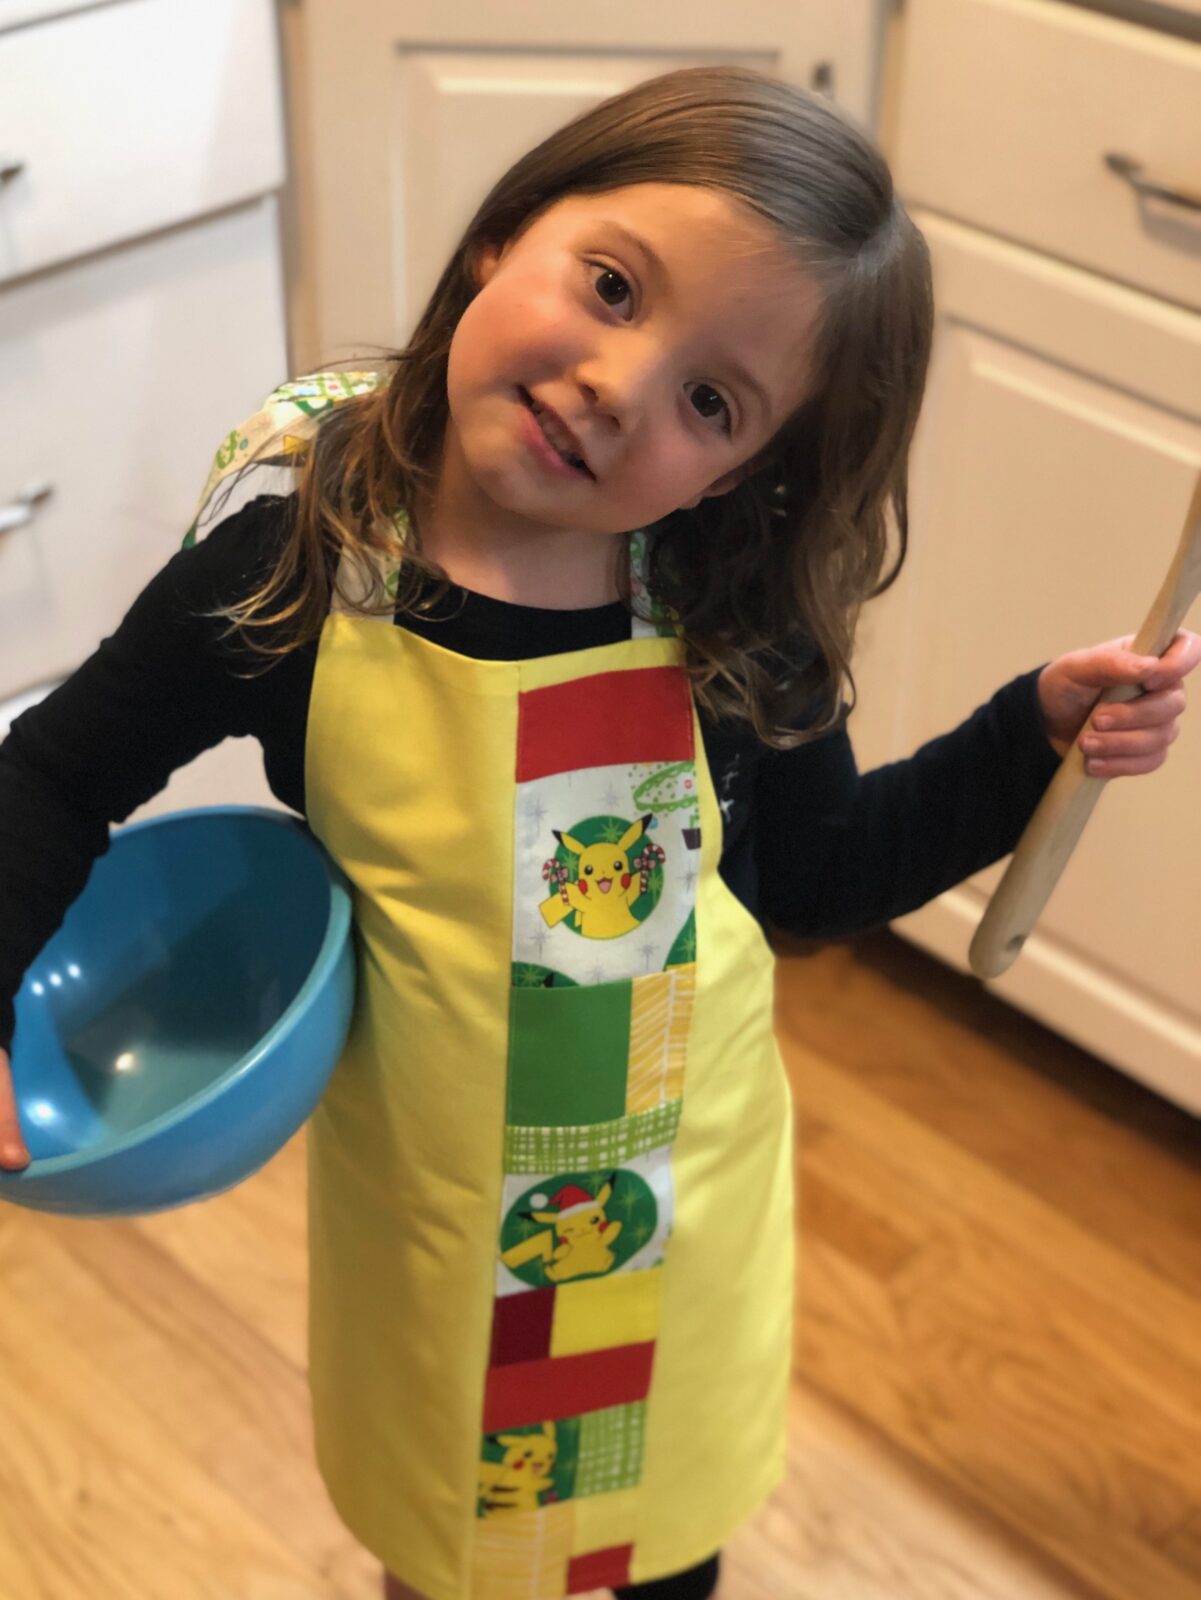
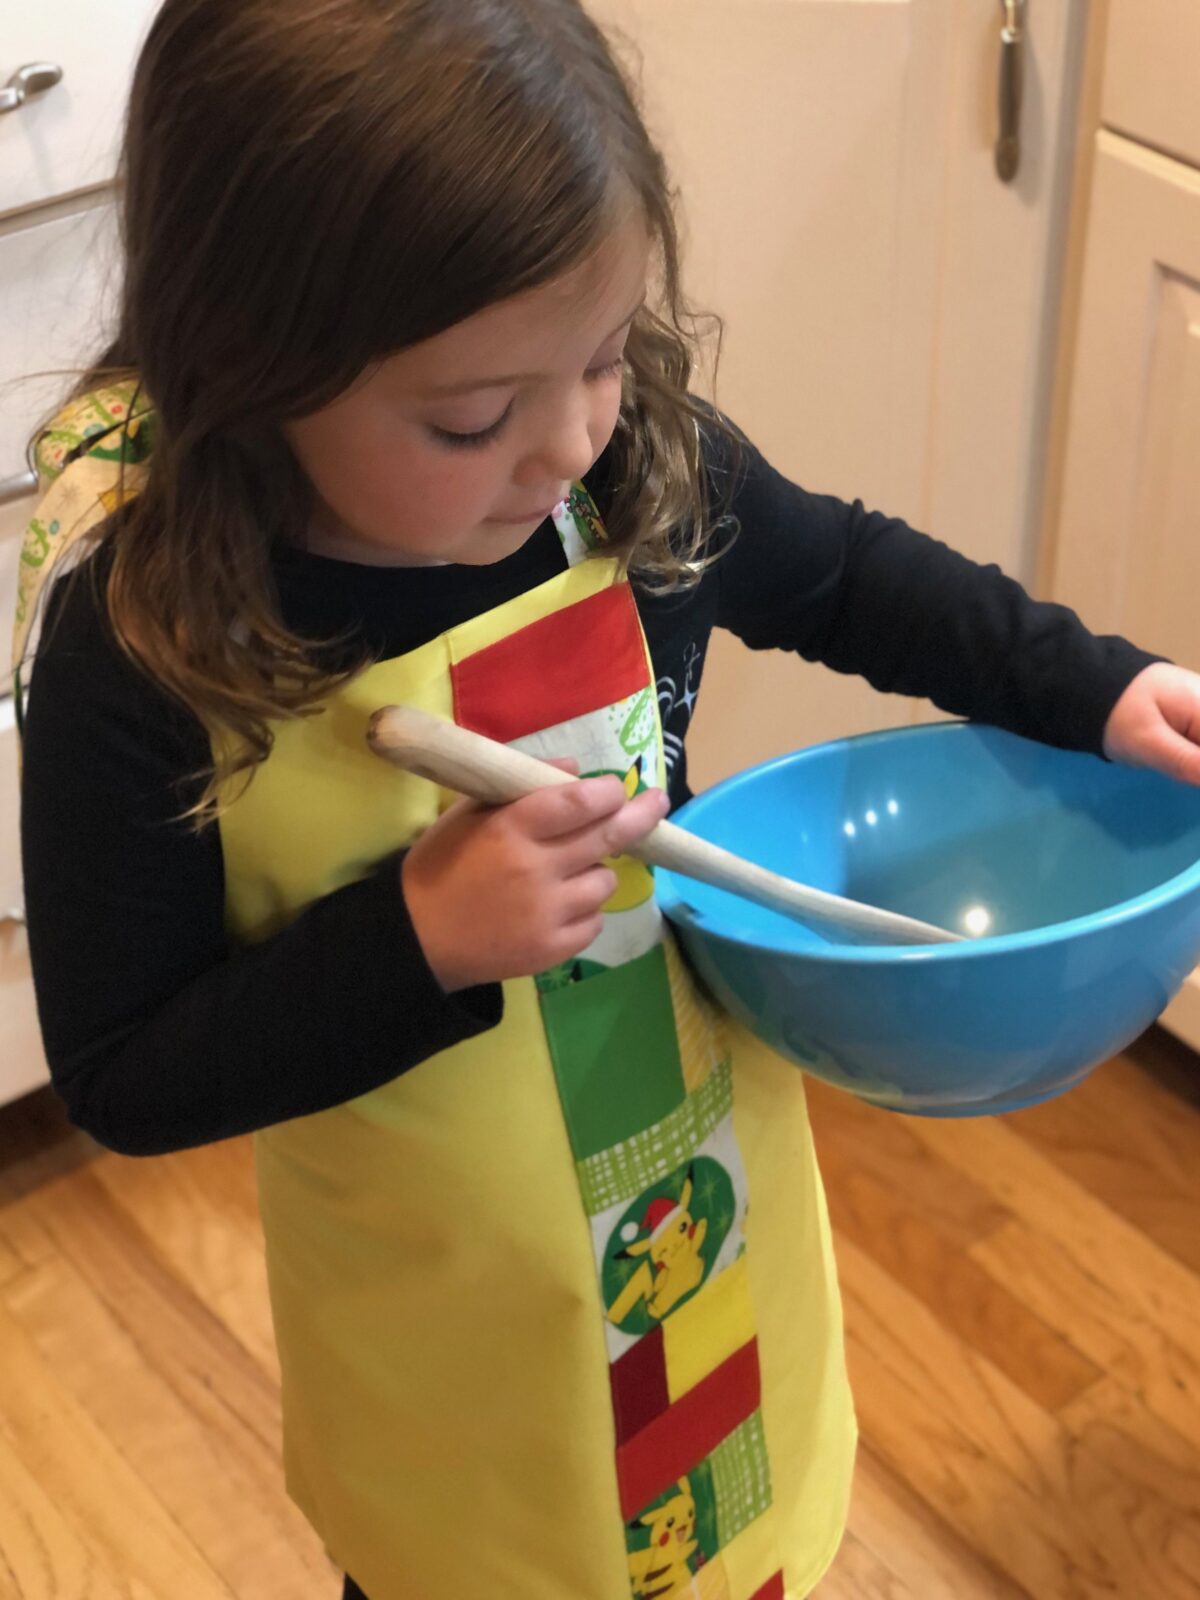
Stitch a Fun Holiday Apron for a Great Gift Idea
A holiday apron makes a great pre-Christmas gift for kiddos as well as adults. Change the fabric to suit the recipient and give it as a holiday gift, personalized with embroidery, if desired.
Create an easy pattern and use and reuse it for different recipients. Incorporate machine embroidery for a fun embellishment, using designs from our Christmas, Poinsettia or Holly thread palette. Add a name or monogram for the ultimate personalization.
SUPPLIES (for kid’s holiday apron)
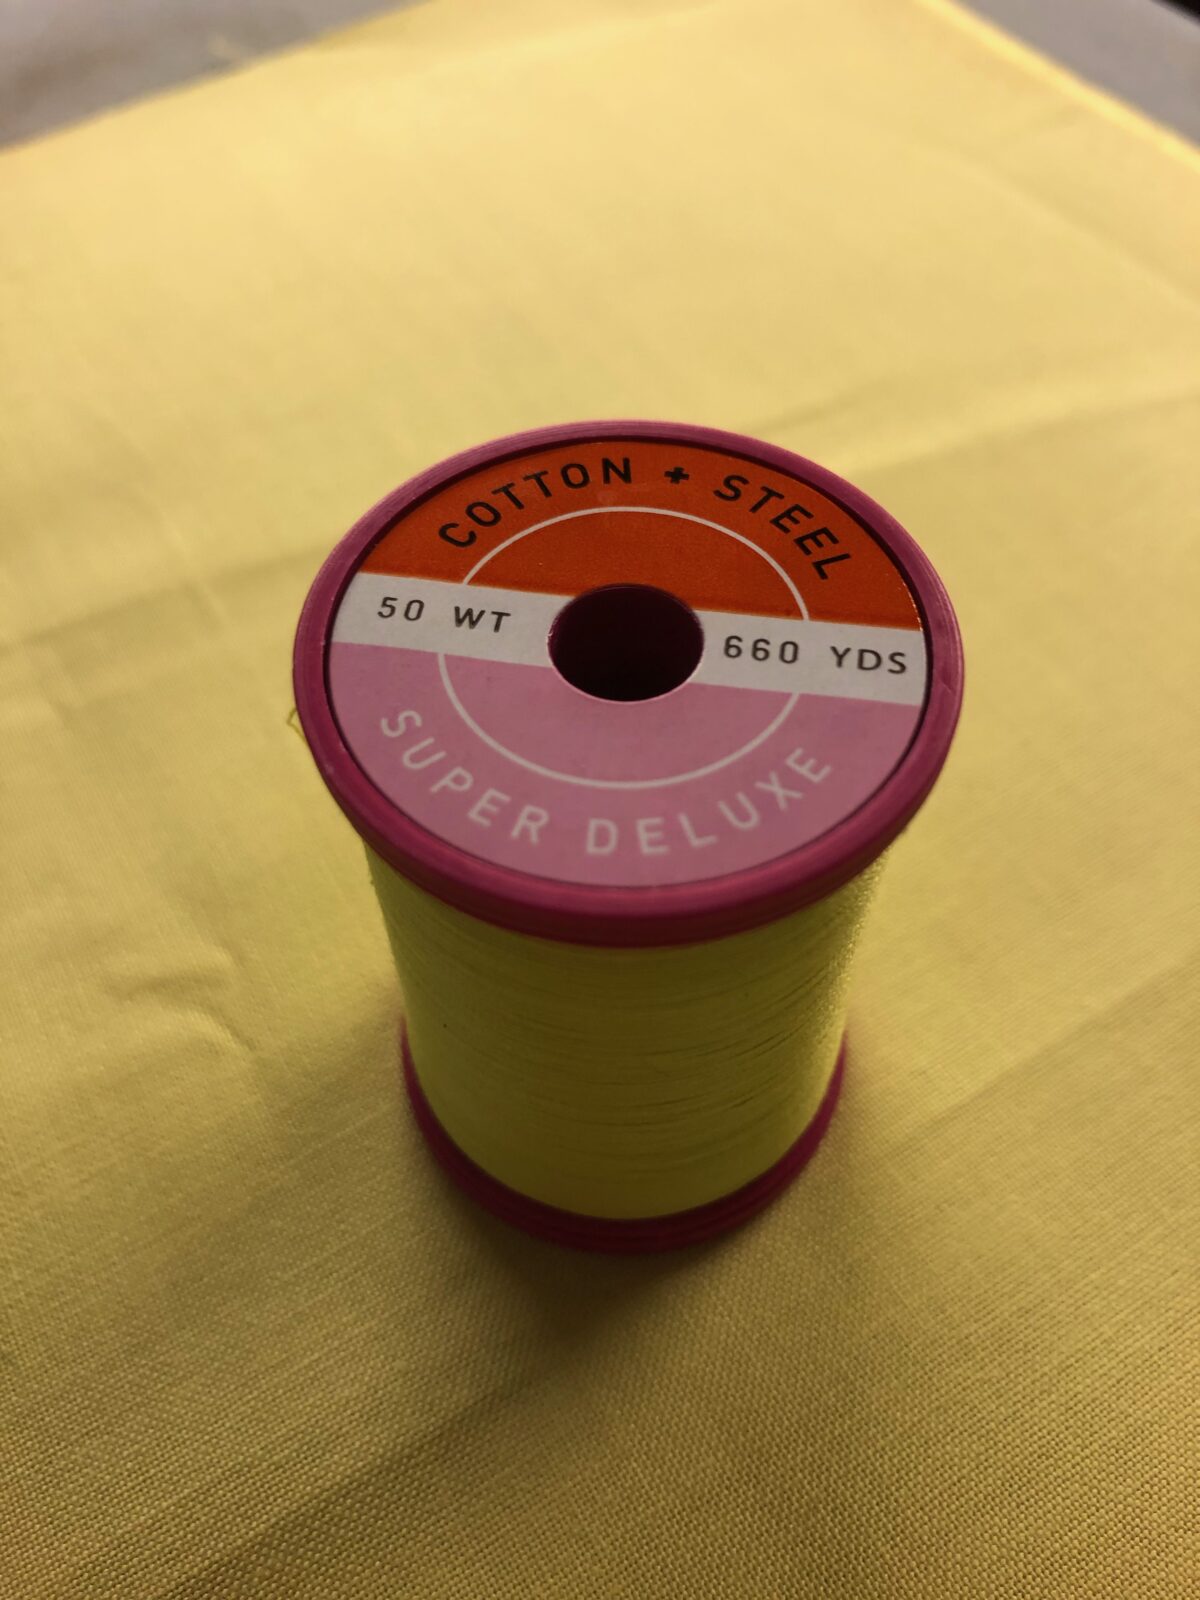
- Cotton + Steel thread by Sulky to match main fabric
- Sulky Machine Embroidery Palette (optional)
- Tear-Easy Stabilizer (optional; for machine embroidery)
- Sulky bobbin thread (optional; for machine embroidery)
- Organ sewing machine needles (80/12 for construction, 90/14 for optional embroidery)
- Approximately 1/2 yard of fabric (for toddler to 8-year-old size)
- (2) 2 1/2″ x 35″ rectangles of coordinating fabric (waist ties)
- (2) 2 1/2″ x 25″ rectangles of coordinating fabric (neck ties)
- Fabric scraps for patchwork applique
- Pattern paper
HOLIDAY APRON PATTERN
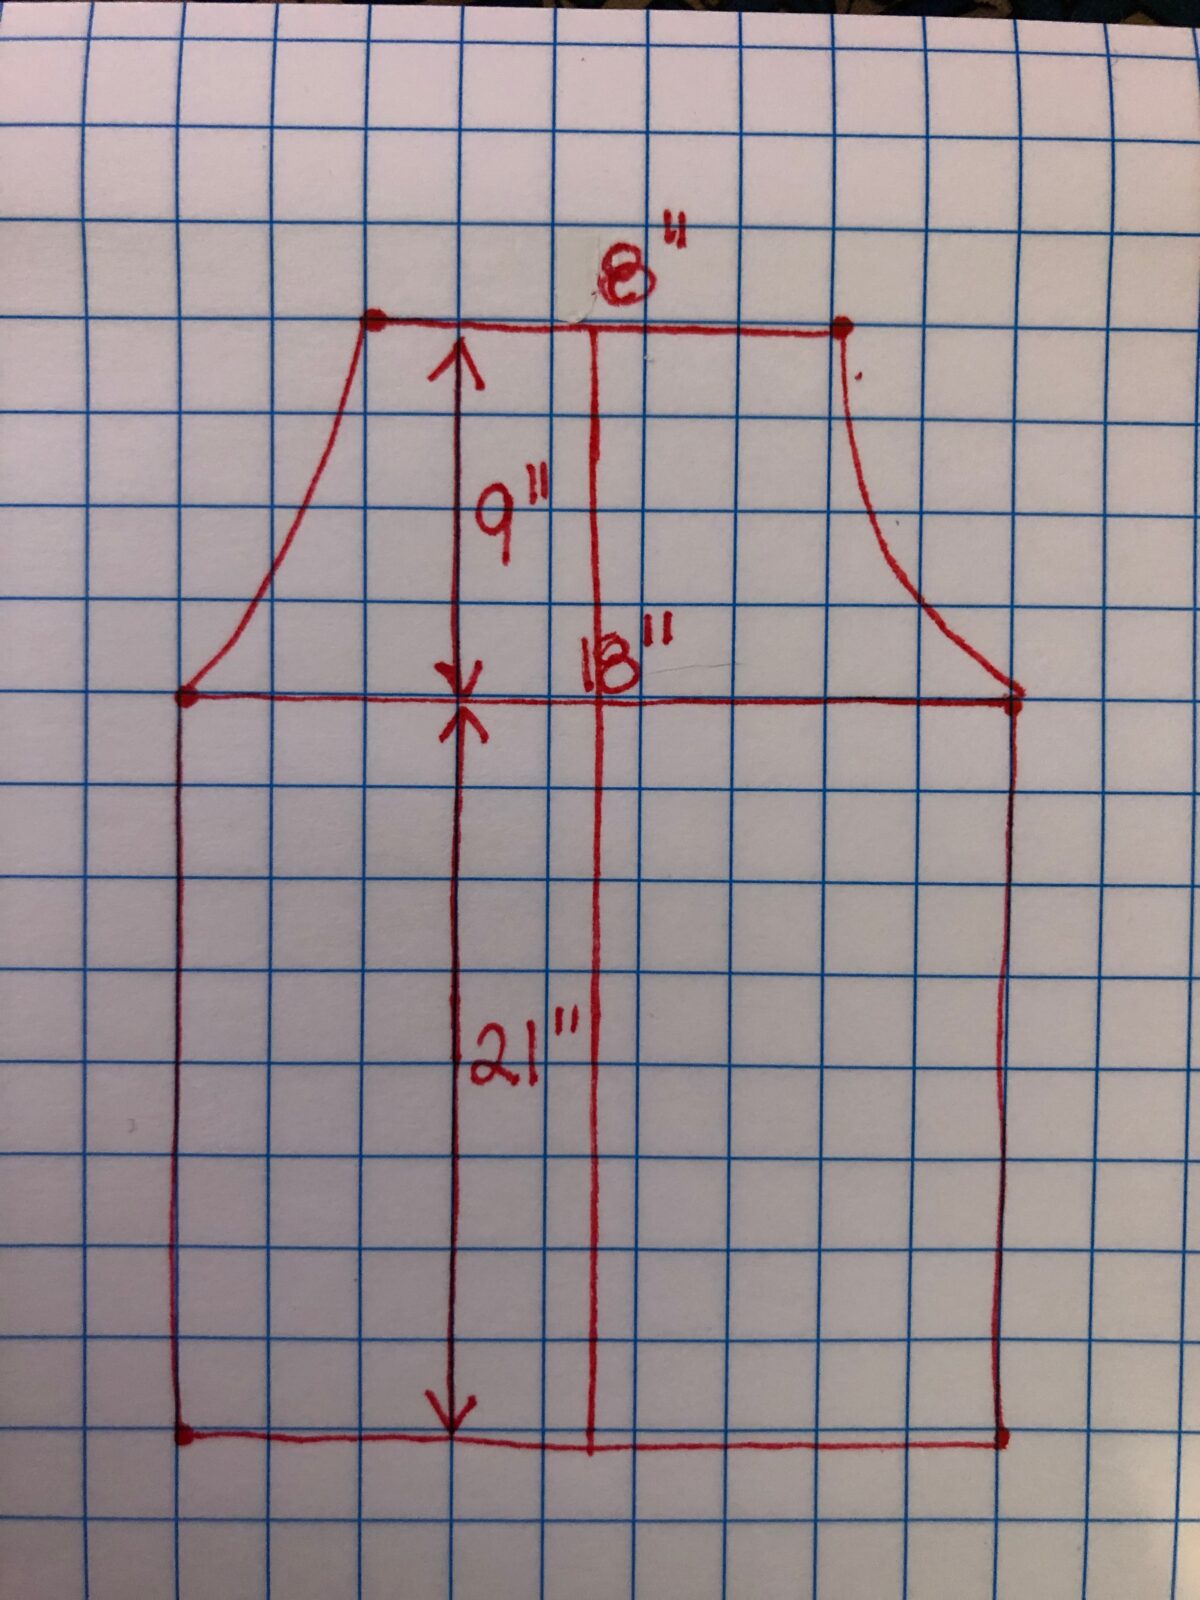
Draft the apron pattern. Measure the recipient’s chest from shoulder to shoulder, which will be the holiday apron upper edge.
Then measure the under-bust across the body front, from side seam to side seam (using the recipient’s shirt as a guide).
Next, measure from the desired apron upper edge (chest measurement) to the under-bust to determine the curve/armhole length.
Finally, measure the desired length of the apron.
Add seam allowances to each measurement. Plot the measurements onto pattern paper (the length measurement of 21″ goes from upper edge to lower edge, to clarify the images below).
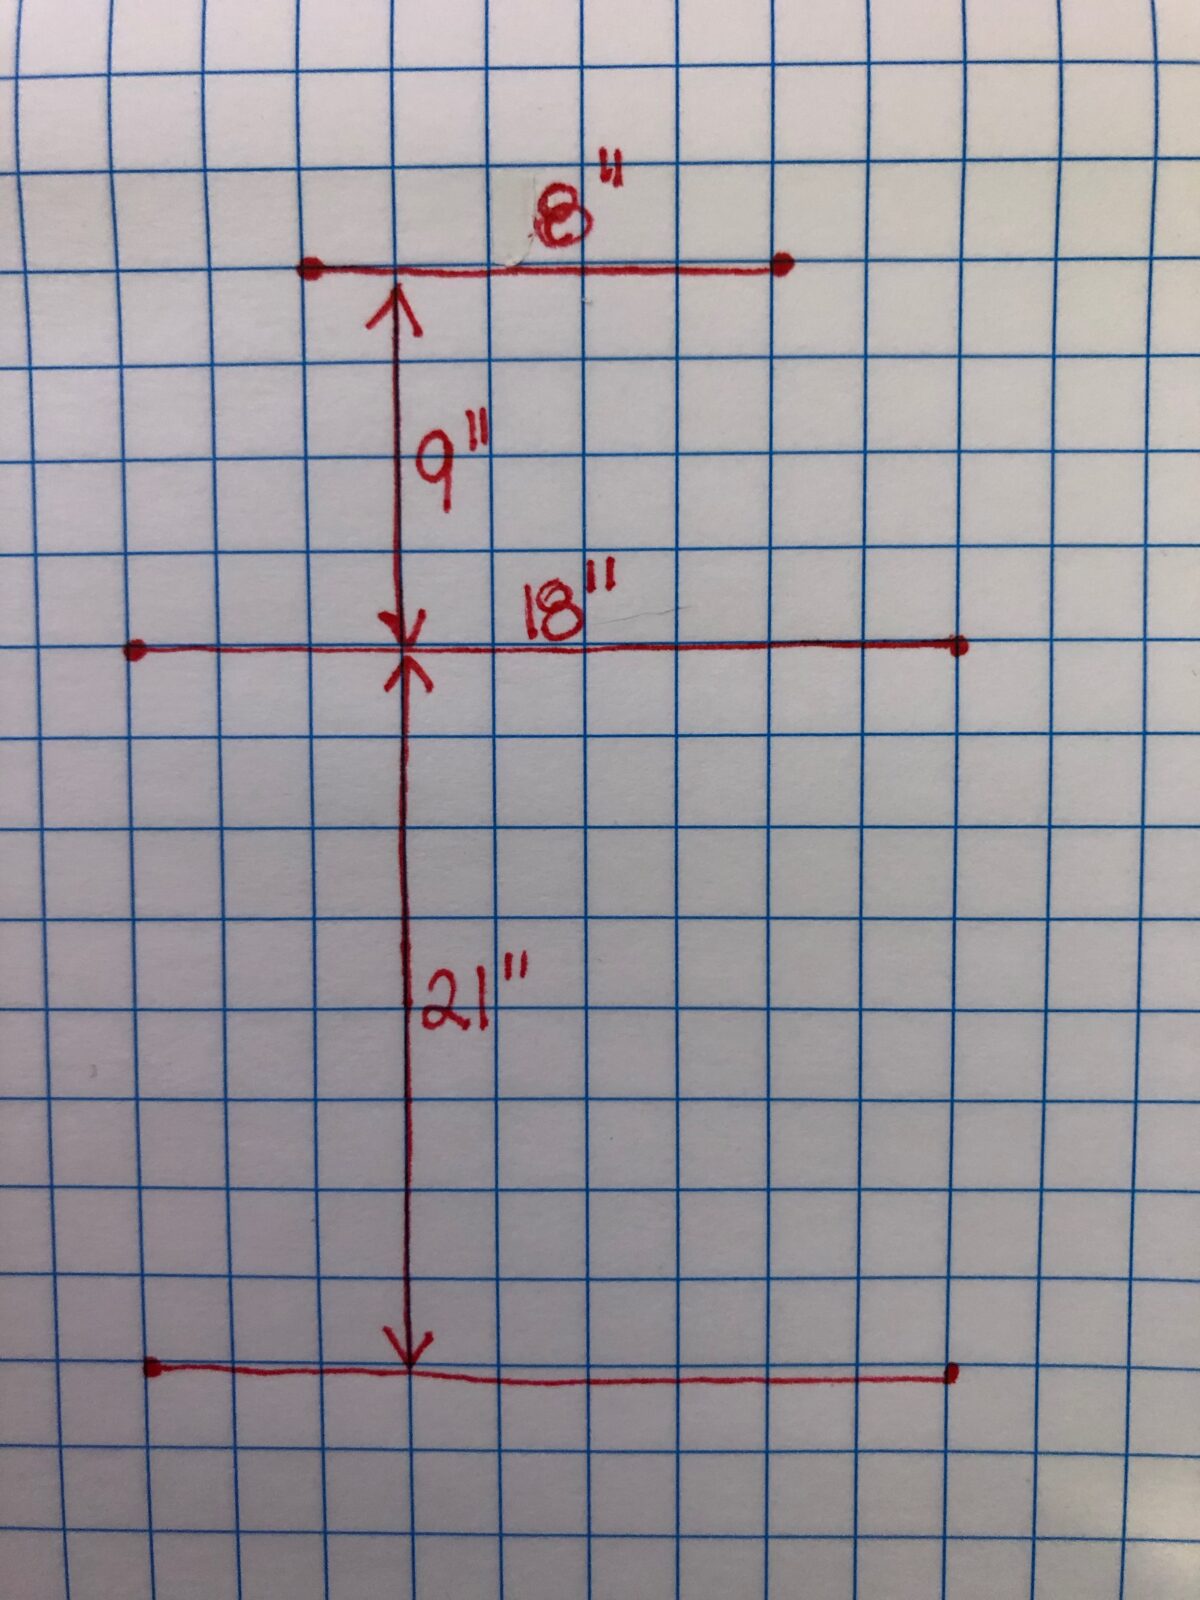
Draw a curved line from the chest to under-bust plot marks. Draw a straight line from the under-bust to lower edge plot marks.
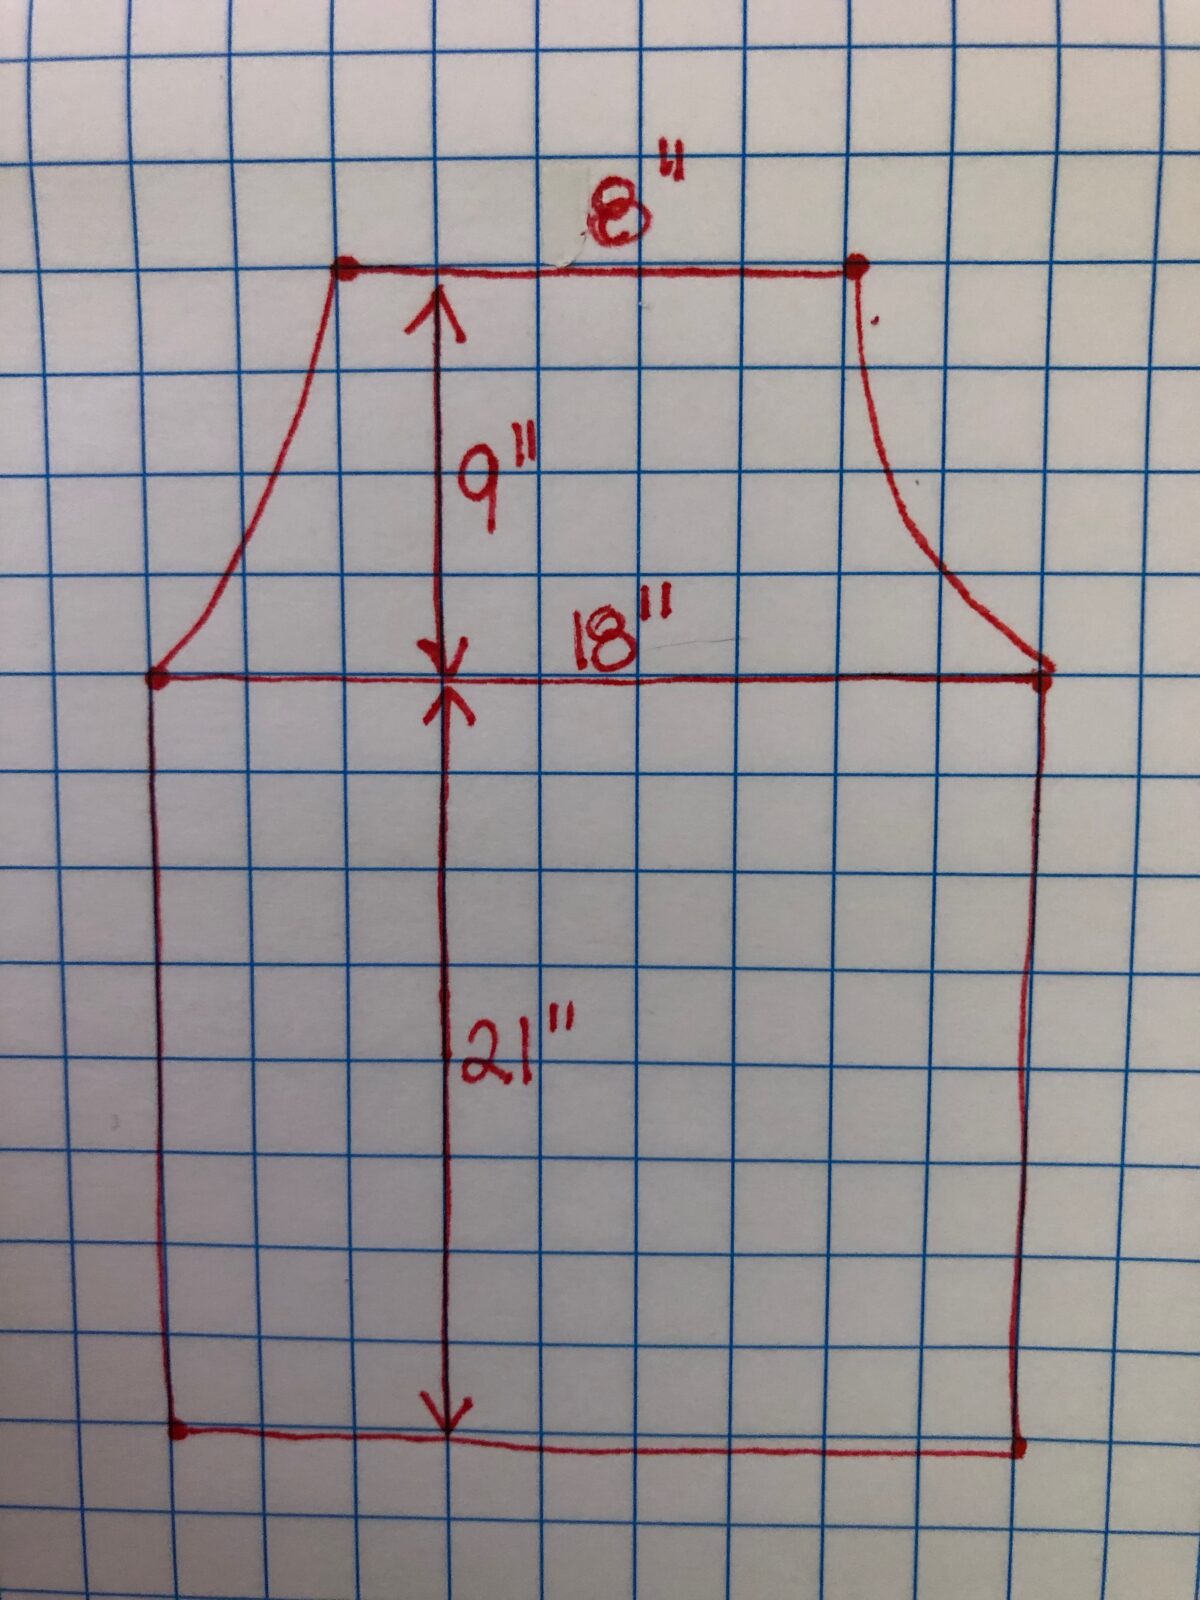
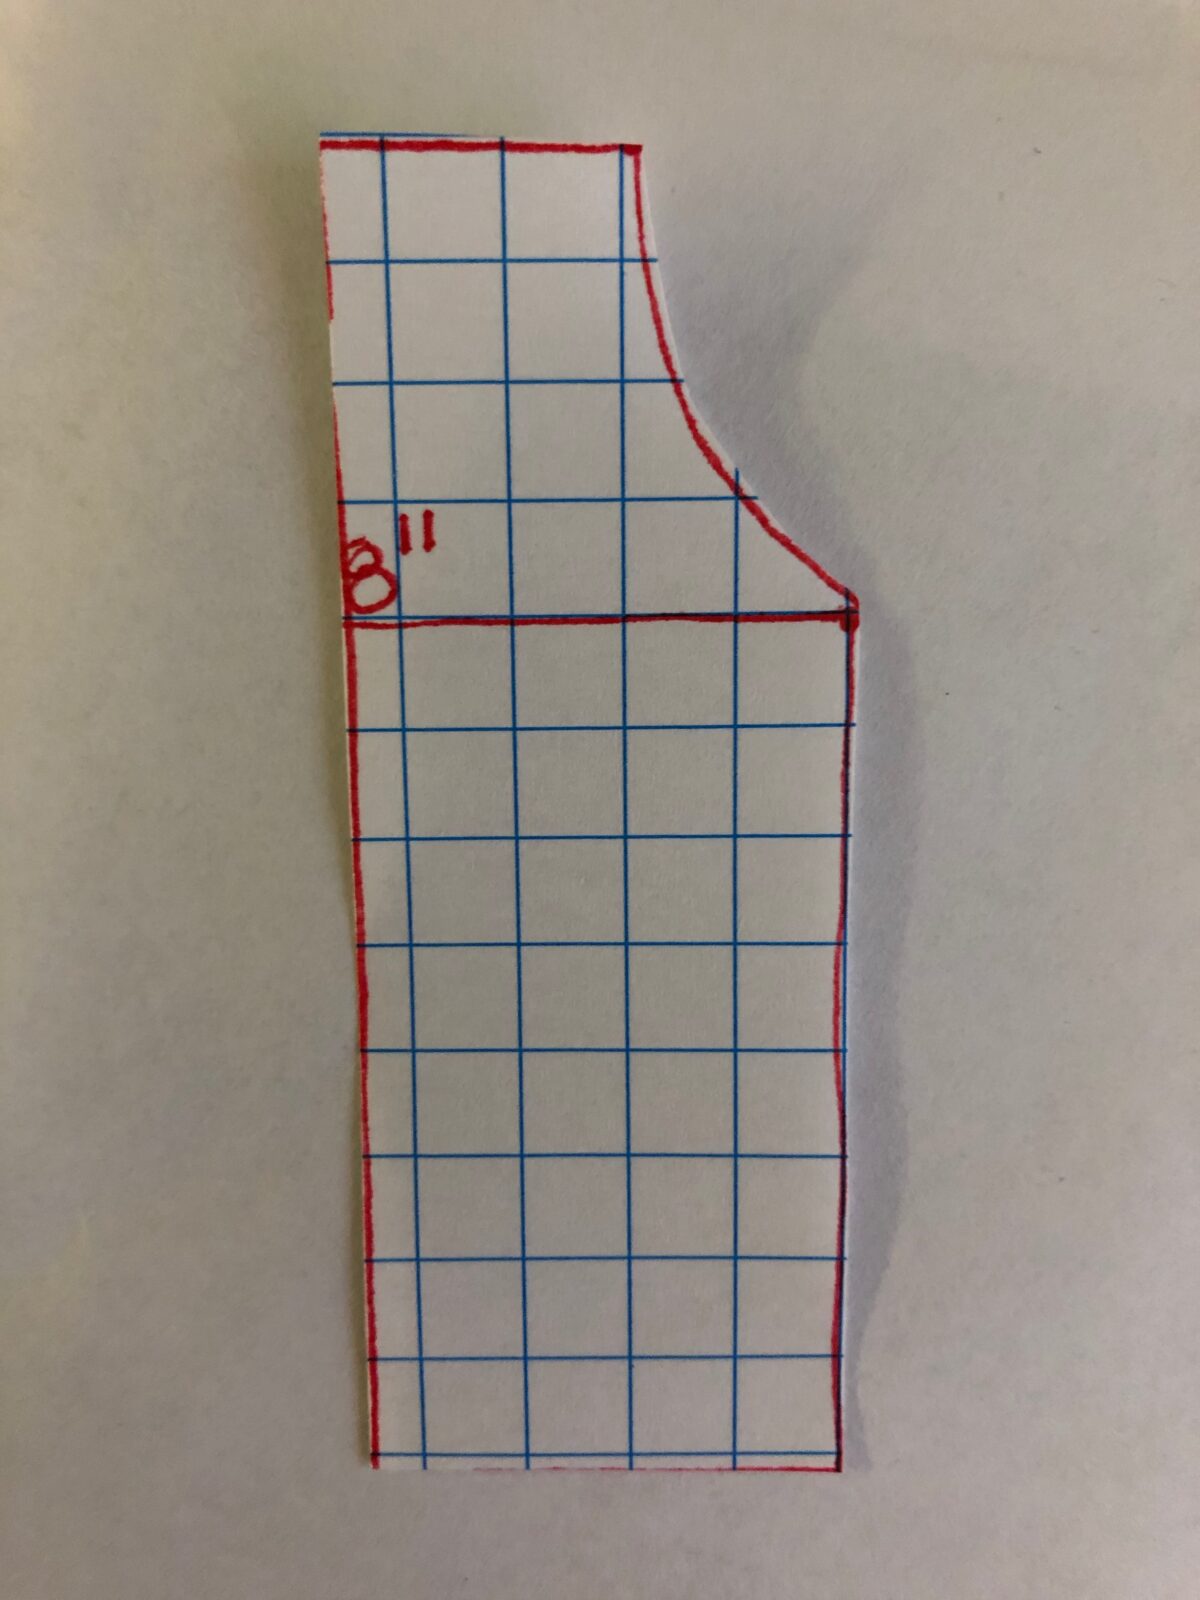
Split the pattern vertically in half.
Use the half pattern to cut two aprons on the fold (front and back), using the main fabric.
CONSTRUCTION
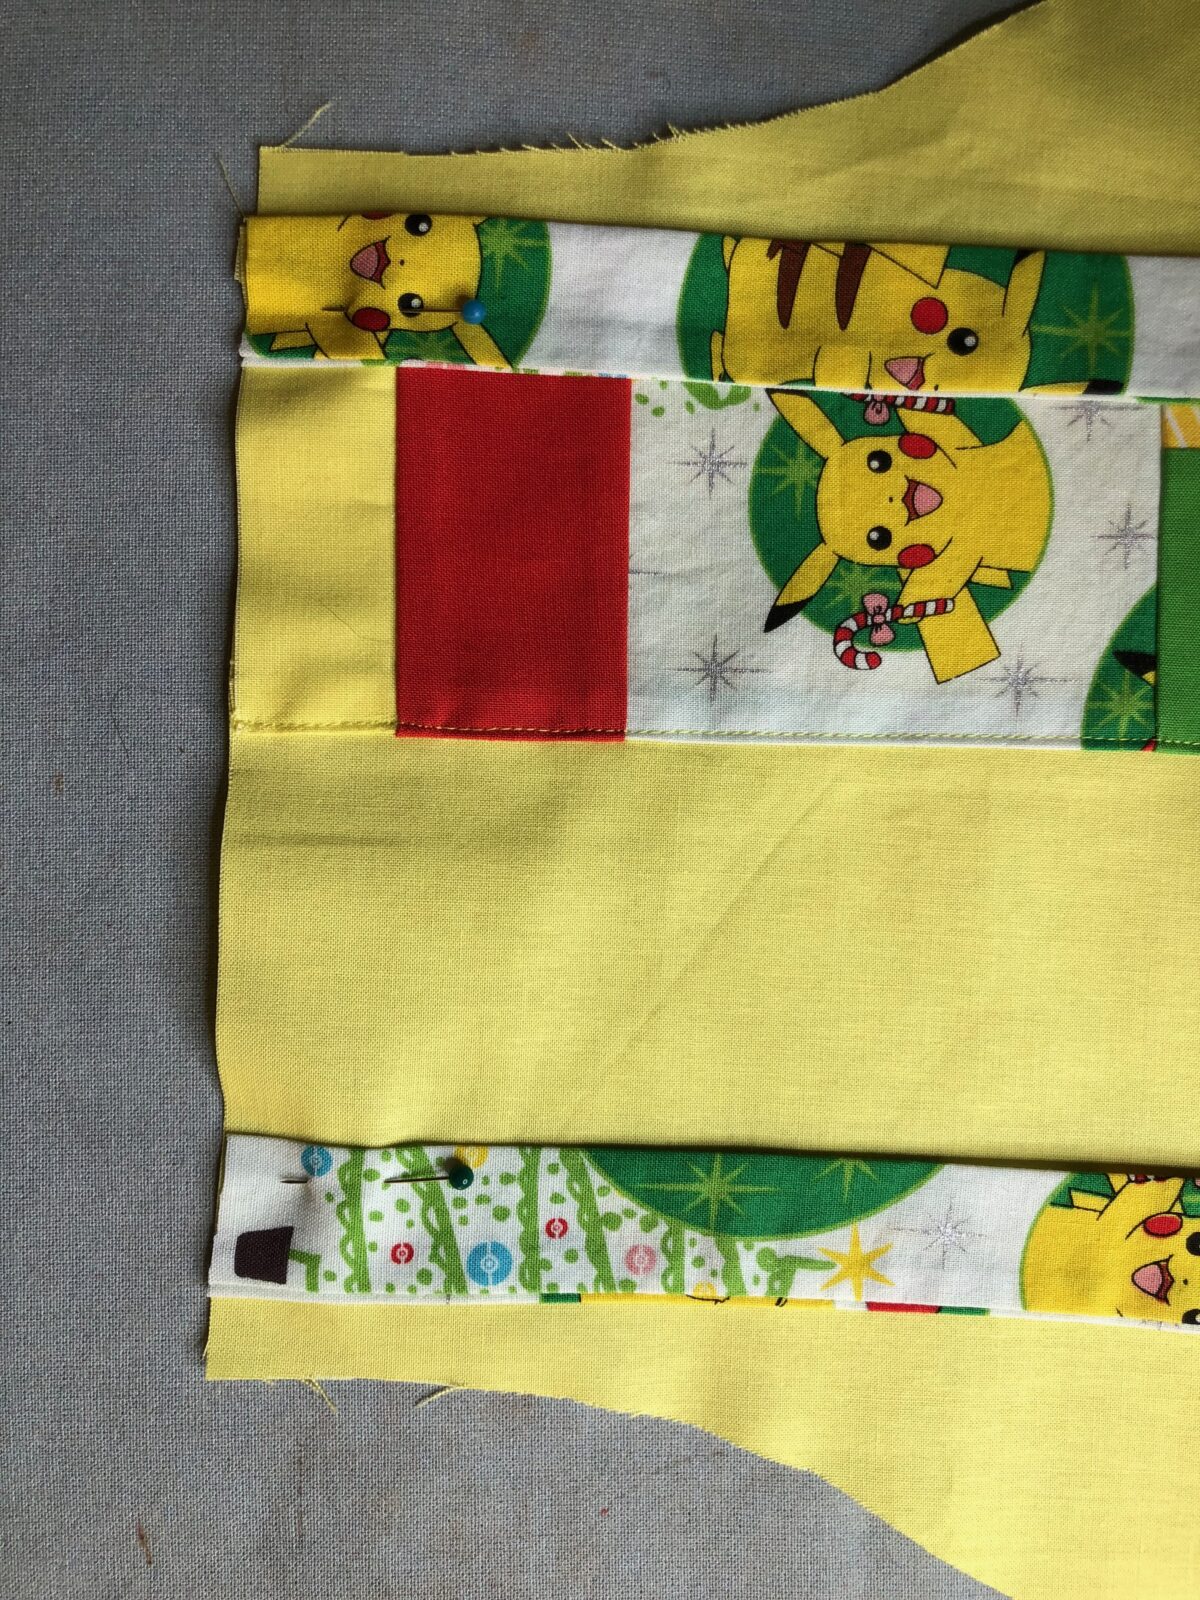
Create the patchwork piece for the apron front.
Piece together different fabrics to end up with a 3 1/4″-wide piece x the apron length measurement, including seam and hem allowances (in this case, 23″).
Fold the patchwork rectangle long edges 1/4″ toward the wrong side; press.

Place the rectangle on the apron front where desired; pin.
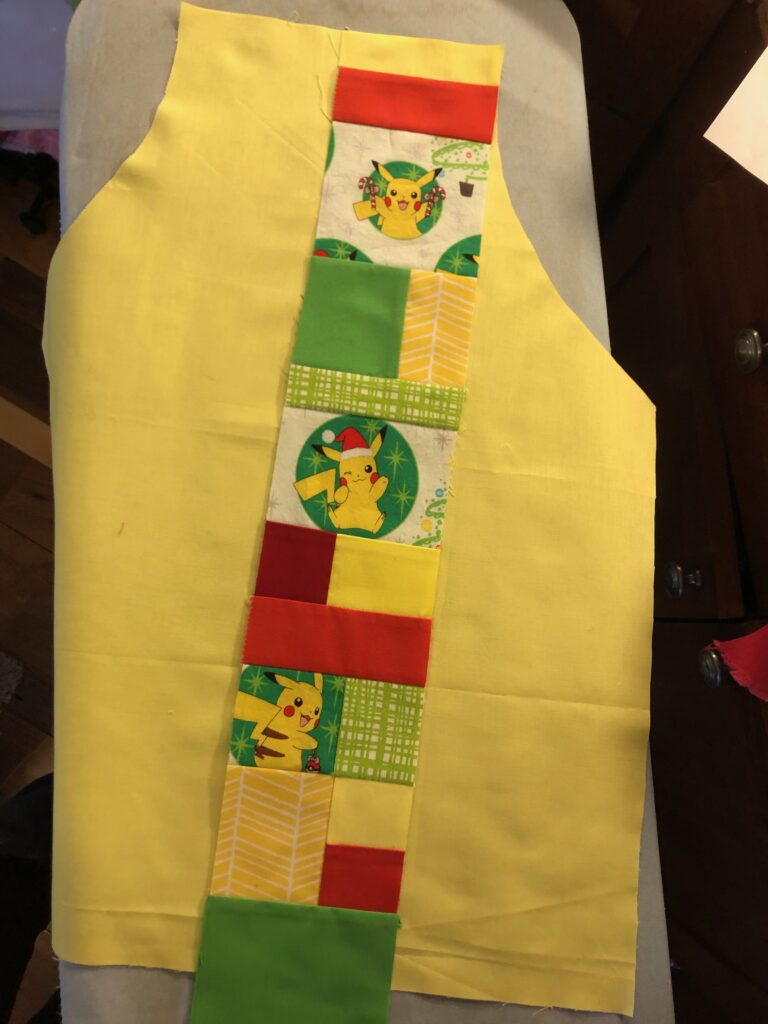

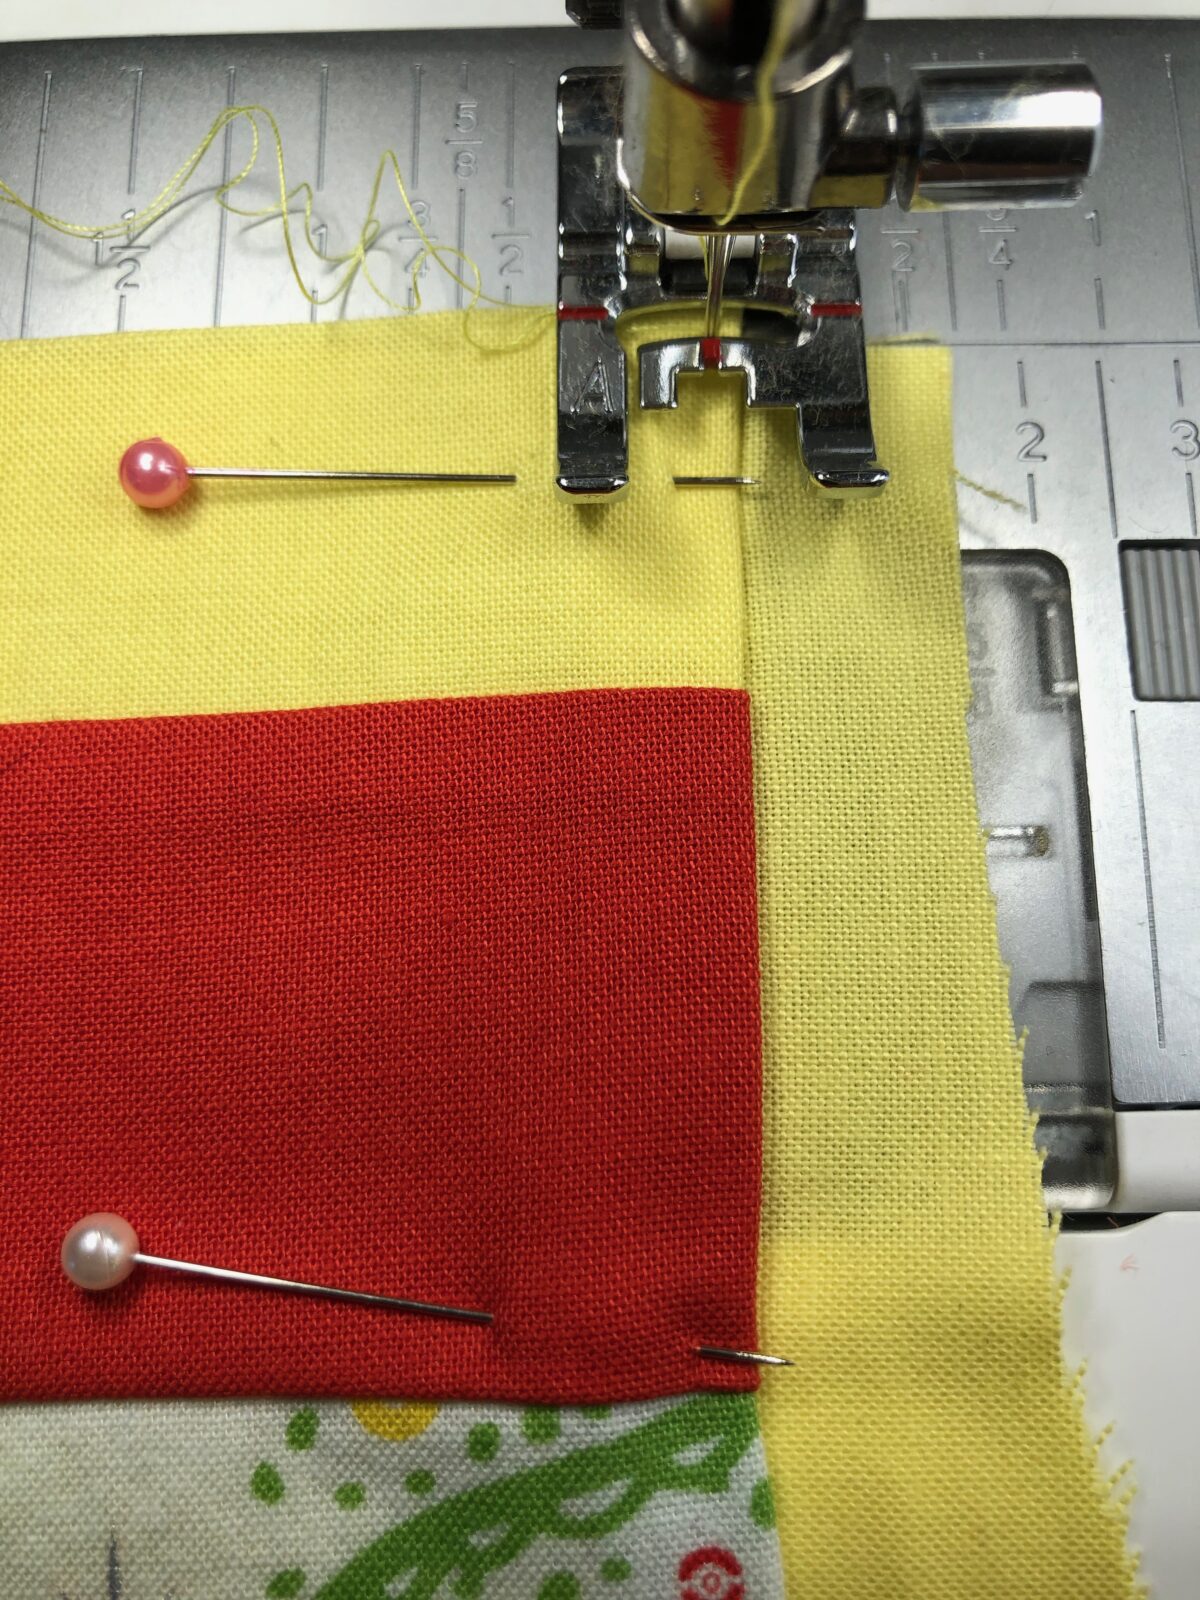
Topstitch the patchwork rectangle to the apron.
Create the ties by folding each rectangle in half lengthwise with right sides together. Stitch the long edge and one short end.

Turn each tie right side out using a chopstick or knitting needle.

Press each tie.
Position the neck tie ends 1/2″ from the side edges, abutting the raw end with the apron upper edge; pin.
Pin the waist ties 1/2″ under the waist/curve edge, aligning the side raw edge with the tie raw end and extending the tie length toward the apron body.
FINISHING
Place the back apron over the front with raw edges aligned and the strap lengths secured within.
Stitch the holiday apron edges, leaving the lower edge free. Clip the corners.

Turn the holiday apron right side out through the lower edge; press. Hem the apron as desired.
OPTIONAL EMBROIDERY
If adding embroidery, position a design template onto the apron front where desired, prior to adding the patchwork rectangle.
Position the patchwork rectangle where desired or eliminate it to accommodate more embroidery elements. Topstitch the patchwork rectangle prior to embroidery. Choose to add part of the embroidery over the patchwork piece for interest!
Embroider the design(s) where desired, backing the apron front with Sulky Tear-Easy Stabilizer, switching needles to a 90/14 Organ embroidery needle, and threading the machine with Sulky Rayon in the needle and Sulky bobbin in the bobbin.
When embroidery is complete, remove the apron front from the hoop. Carefully tear away the excess stabilizer. Press the apron from the wrong side.
TIP: To avoid stretching the fabric fibers with hooping, place double-sided tape along the inner hoop ring. This prevents puckering. Make sure to not over-tighten the hoop to avoid this as well!
Finish constructing the apron per the previous instructions.

Pingback: 10 Gifts to Sew for the Holidays - Sulky