Yarn Embroidery
Yarn embroidery is the latest trend for chunky sweaters on children’s, kids’ and adult garments. Use Sulky Stick ‘n Stitch to transfer the name or phrase of your choice onto an open-weave sweater, and then stitch through all layers using chunky yarn. The result is boutique-worthy, soft and stylish.
YARN EMBROIDERY SUPPLIES
- Open-weave sweater (featured sweater is made of 100% polyester yarn with metallic thread accents)
- Sulky Stick ‘n Stitch™ Stabilizer Sheets
- Chunky yarn, such as chenille (approx 100g weight)
- Large-eye plastic yarn needle
The supply list above contains affiliate links. Sulky may receive a commission if you make a purchase through these links.
DESIGN CHOICE & TRANSFER
Note: For this method, the sweater must be washable and tolerate moisture. Prewash and dry the sweater prior to embellishing. (This is a great “rebirth” project for older sweaters or sweaters that may have a stain that can benefit from an embellishment coverup!)
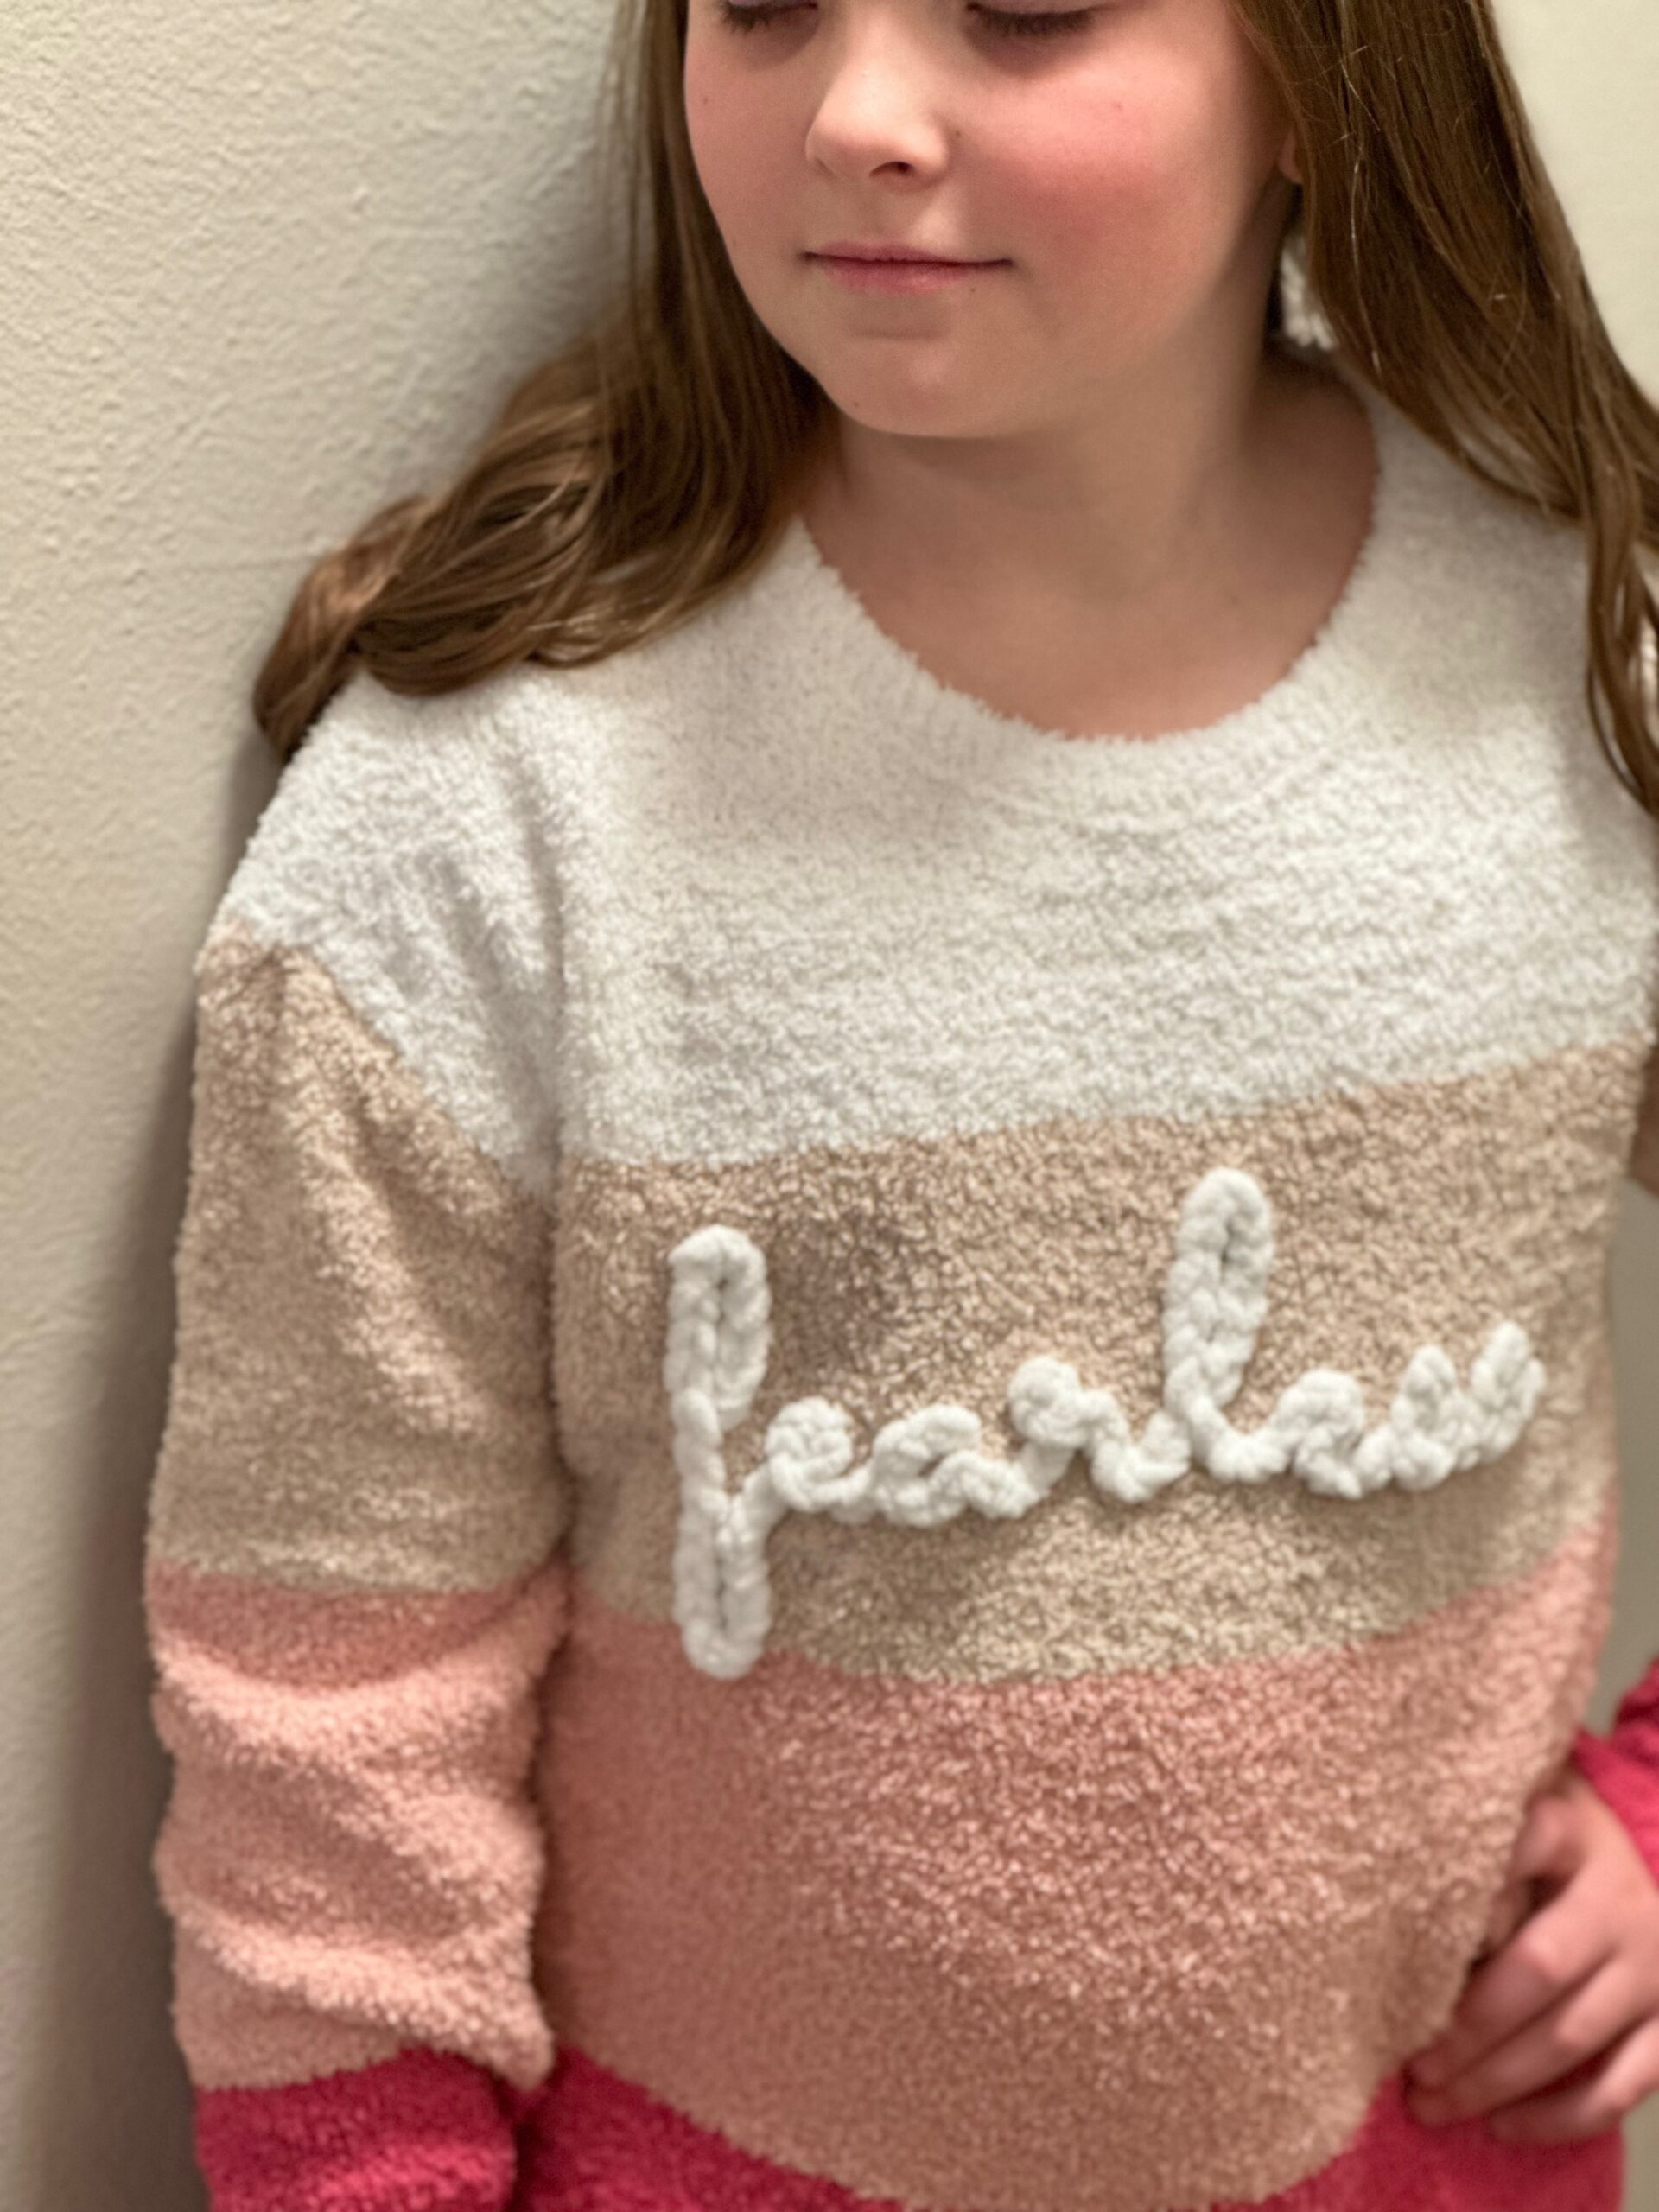
This project is trending with first names being embroidered on the sweater. However, with older children and adults, a favorite word or phrase is more appropriate. (It’s also a safety hazard to have your child’s name on things, because, well, stranger danger.) Choose a word such as “wish,” “dream,” “lucky,” “cheers,” or a nickname.
Measure the available embroidery space on the sweater front. It’s a good idea to have the wearer try on the sweater to determine the best, most flattering placement for the embroidery. Record and/or mark the placement area on the sweater.
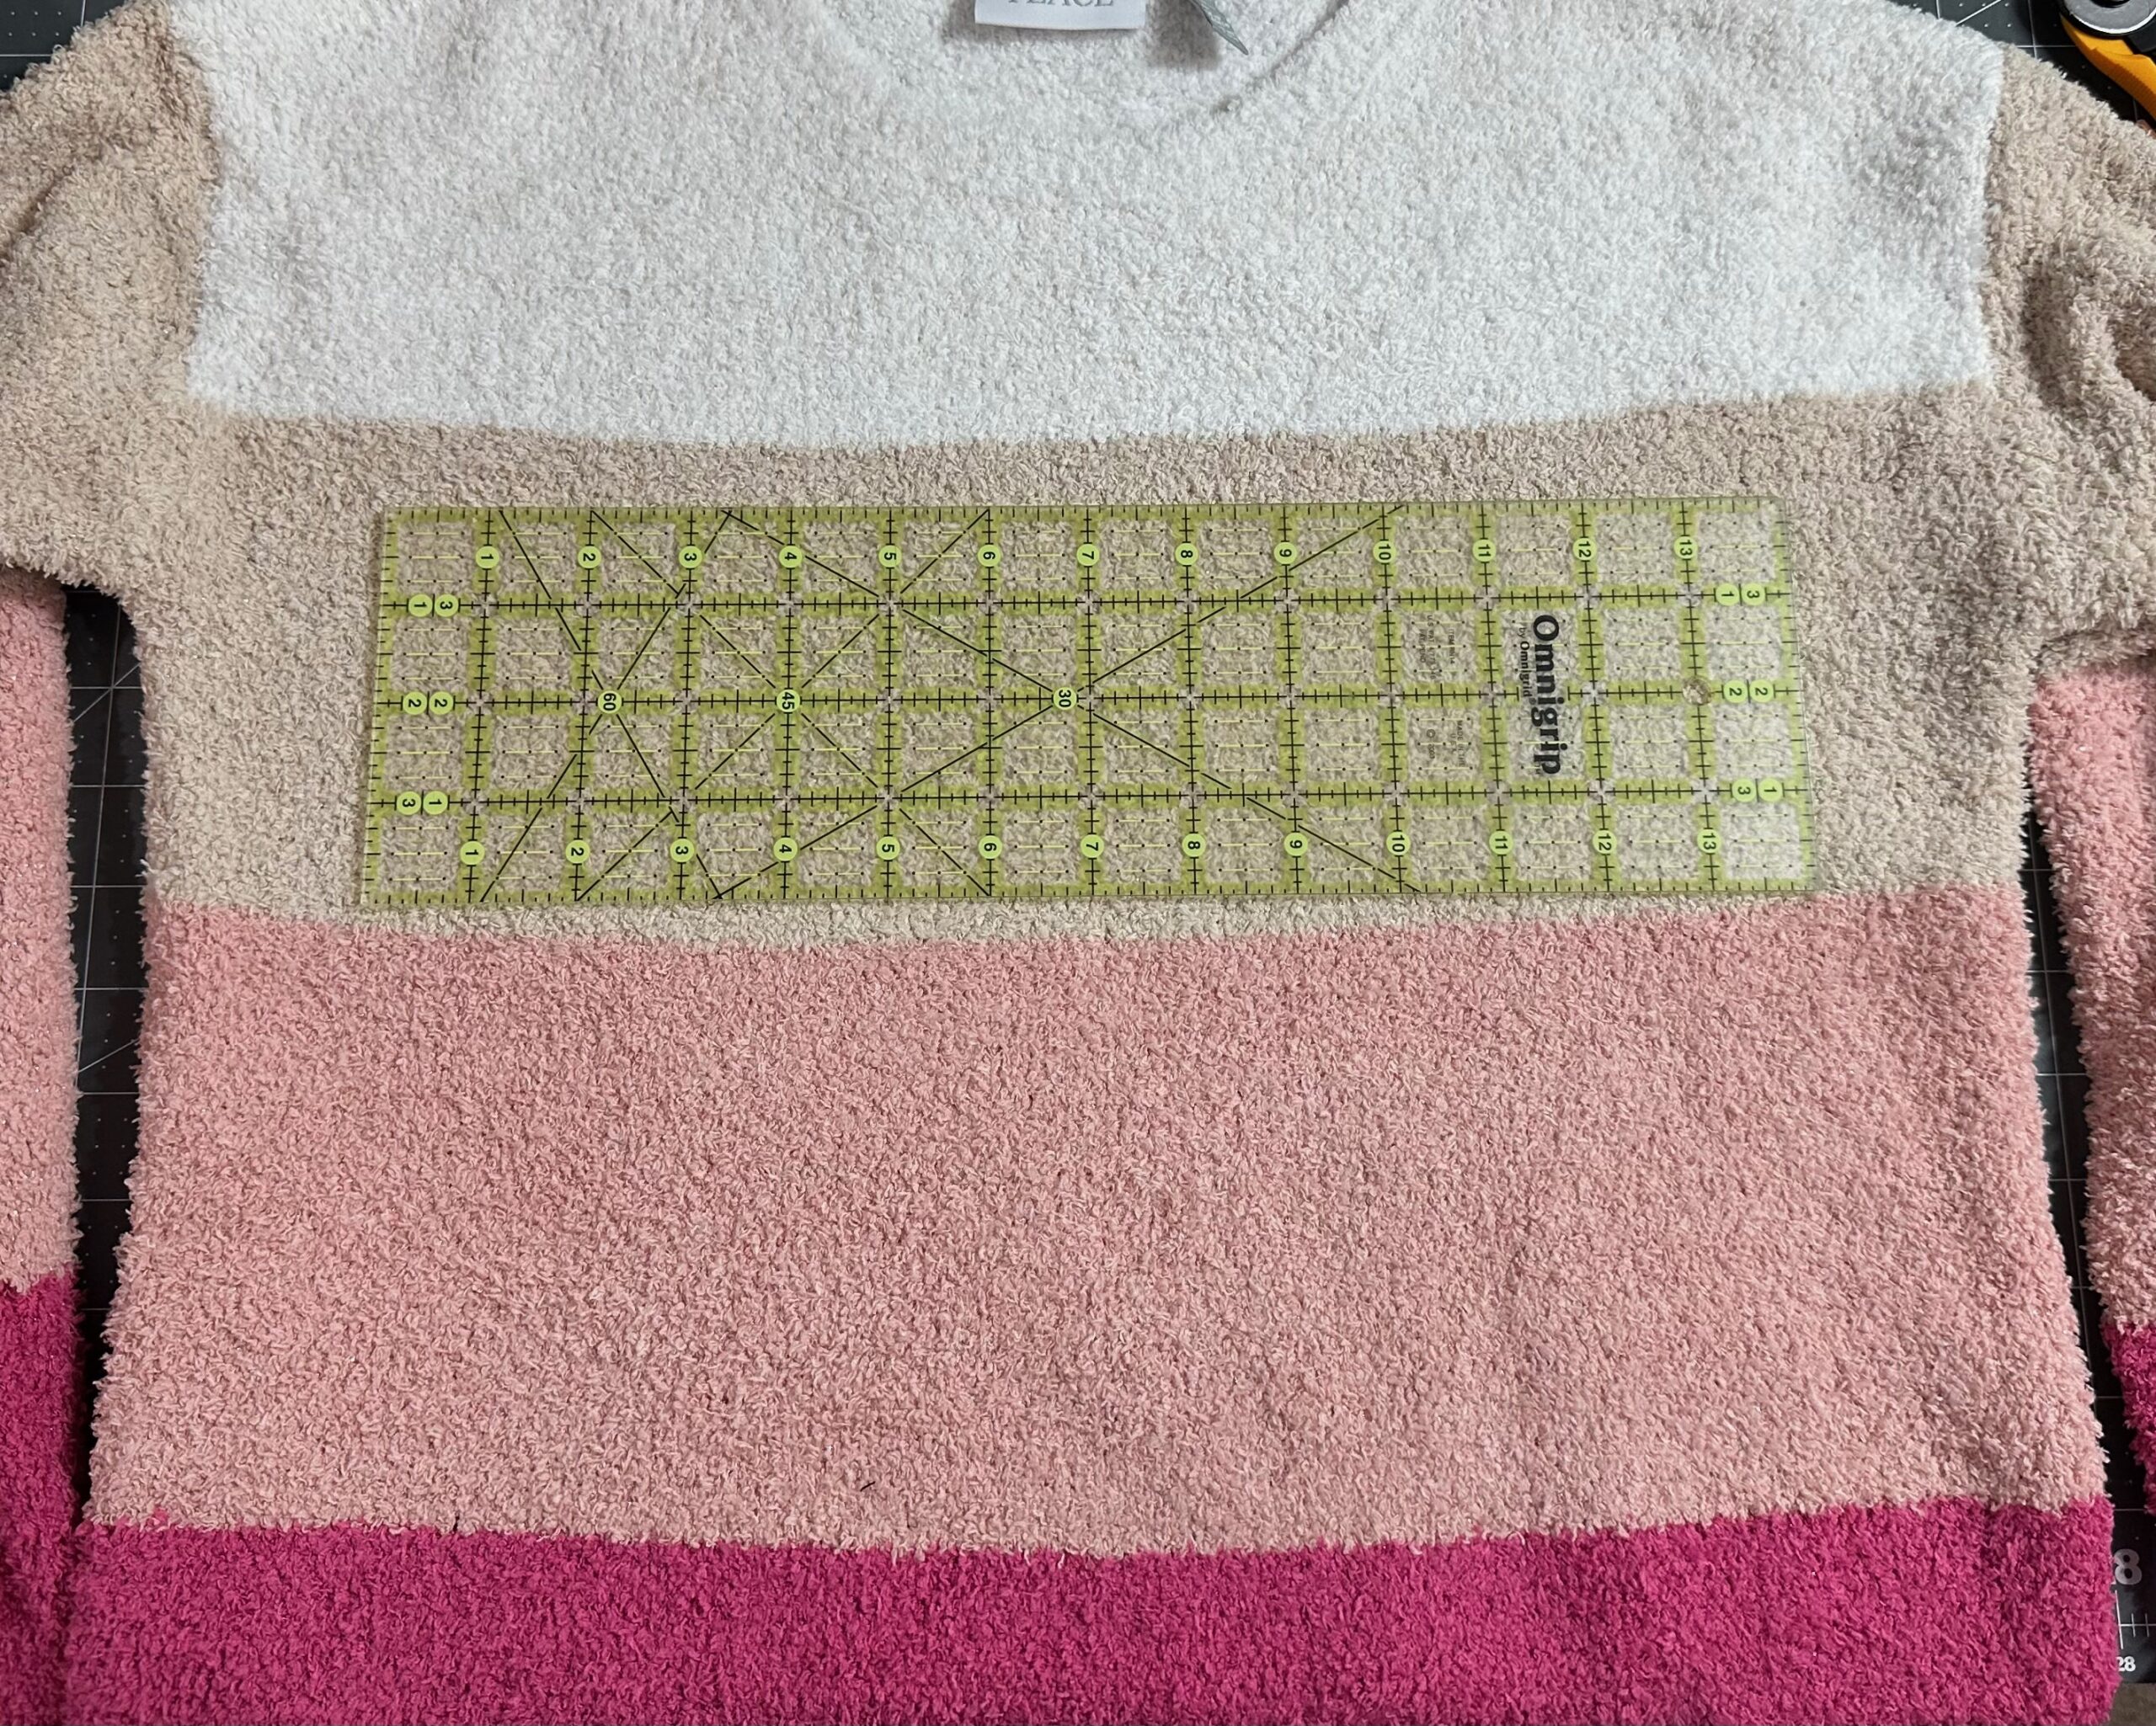
Choose a font in a word processing program and format it to fit the available embroidery space on the sweater. If the space and word will be larger than an 8 1/2″ x 11″ stabilizer sheet will accommodate, plan to split the letters between two sheets.
TIP: Cursive, script lettering works best so the letters are connected. This way there are less starts/stops with the yarn and less tie-offs on the sweater wrong side.
Once determined, print the design onto a sheet (or two, depending) of Sulky Stick ‘n Stitch Stabilizer. Be sure to print on the fabric-like side, using a “draft” or lowest ink setting.
Trim the stabilizer around the design, leaving a good border.
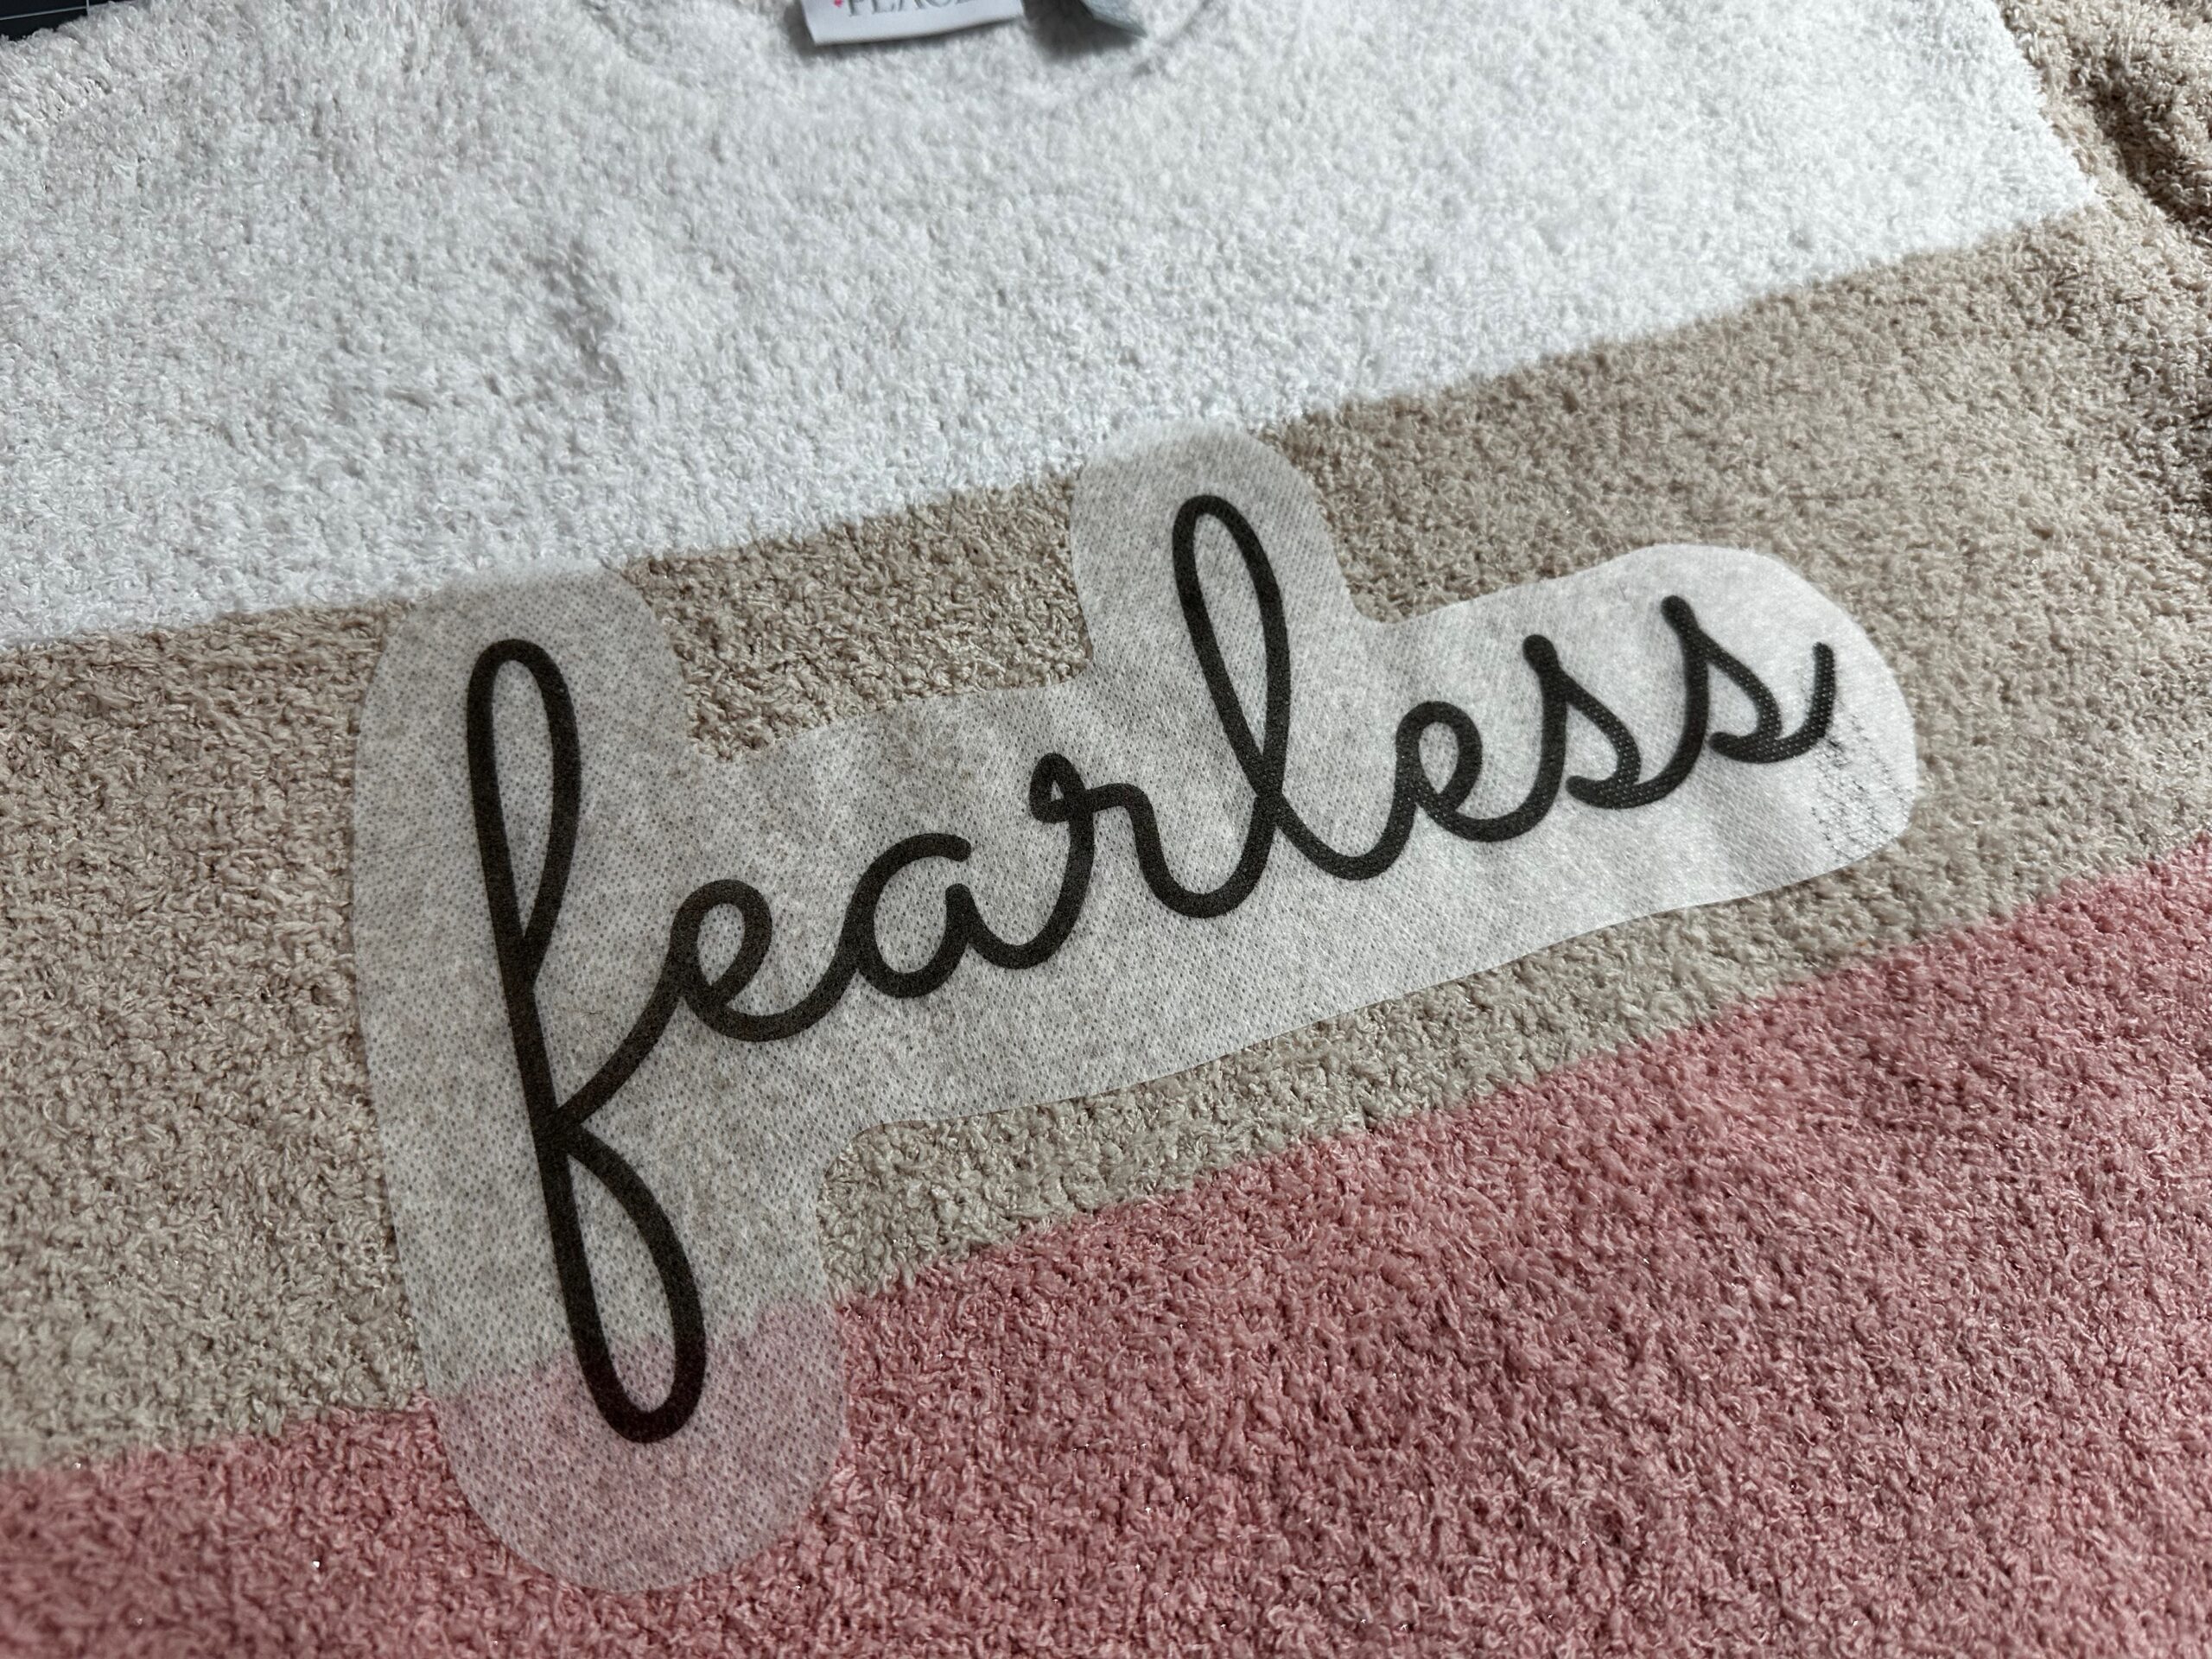
Position the stabilizer “sticker” on the sweater right side, where desired.
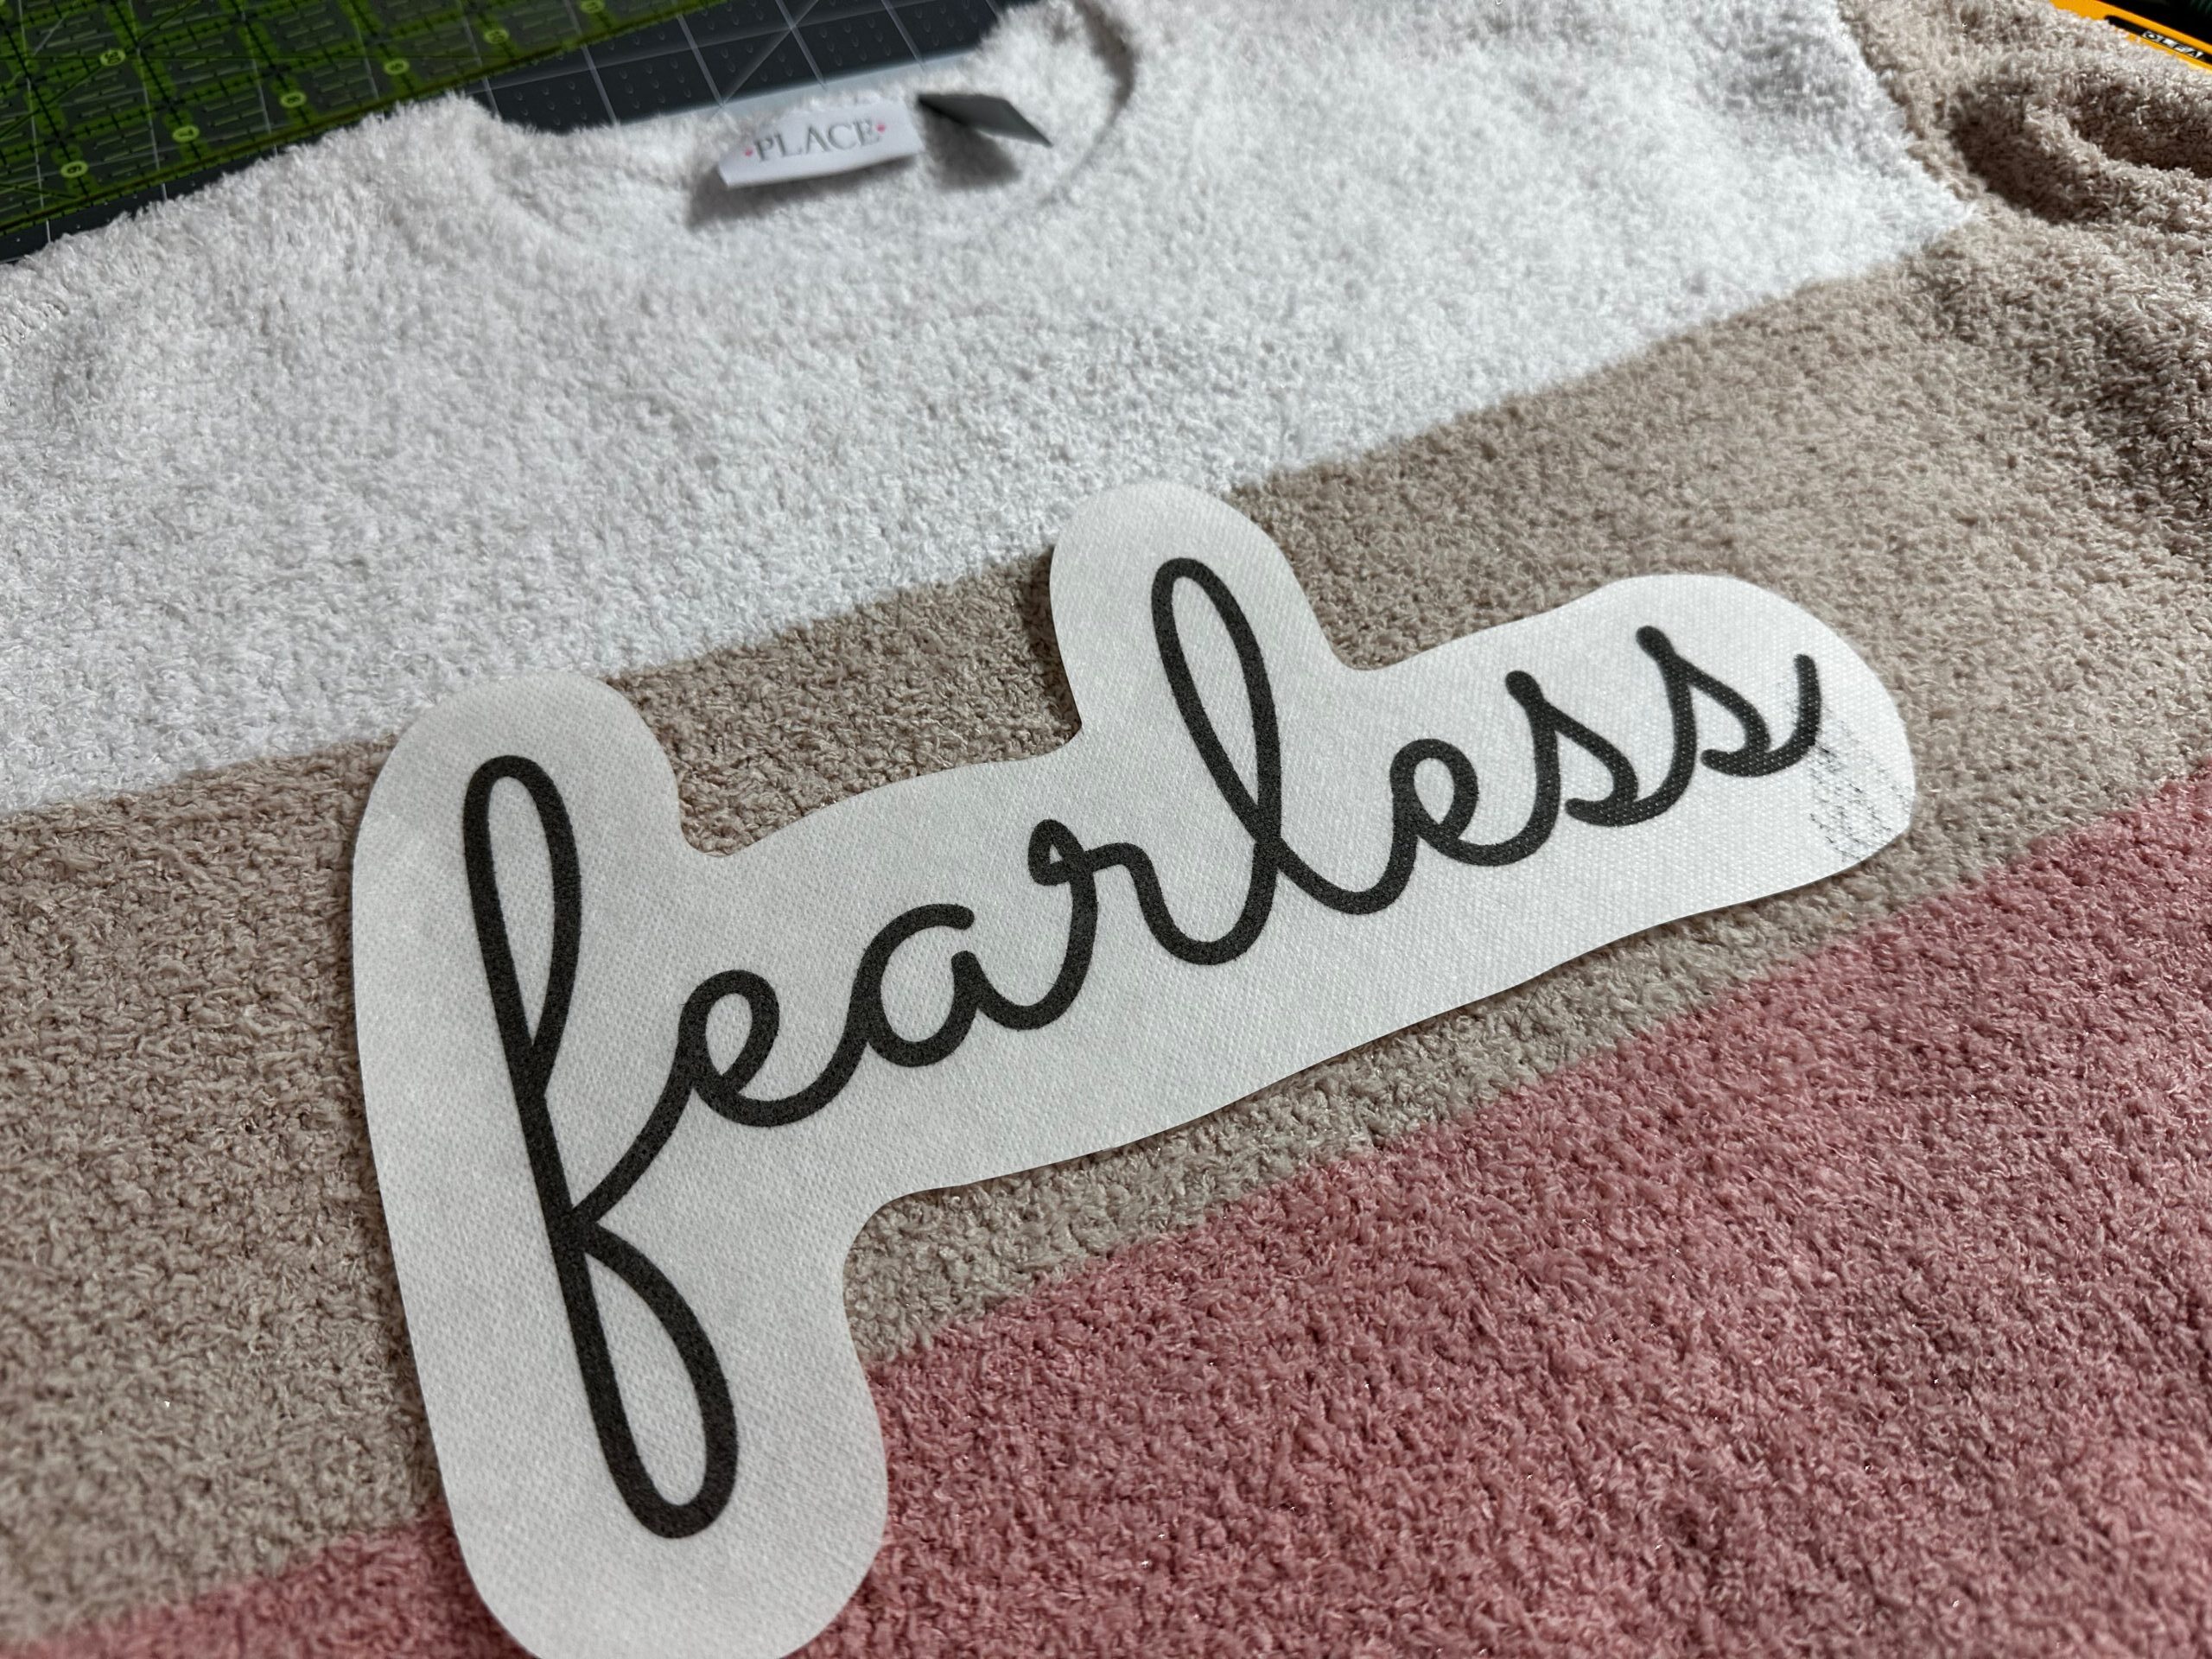
When the desired placement is achieved, remove the paper backing on the stabilizer, and then stick in place.
YARN EMBROIDERY
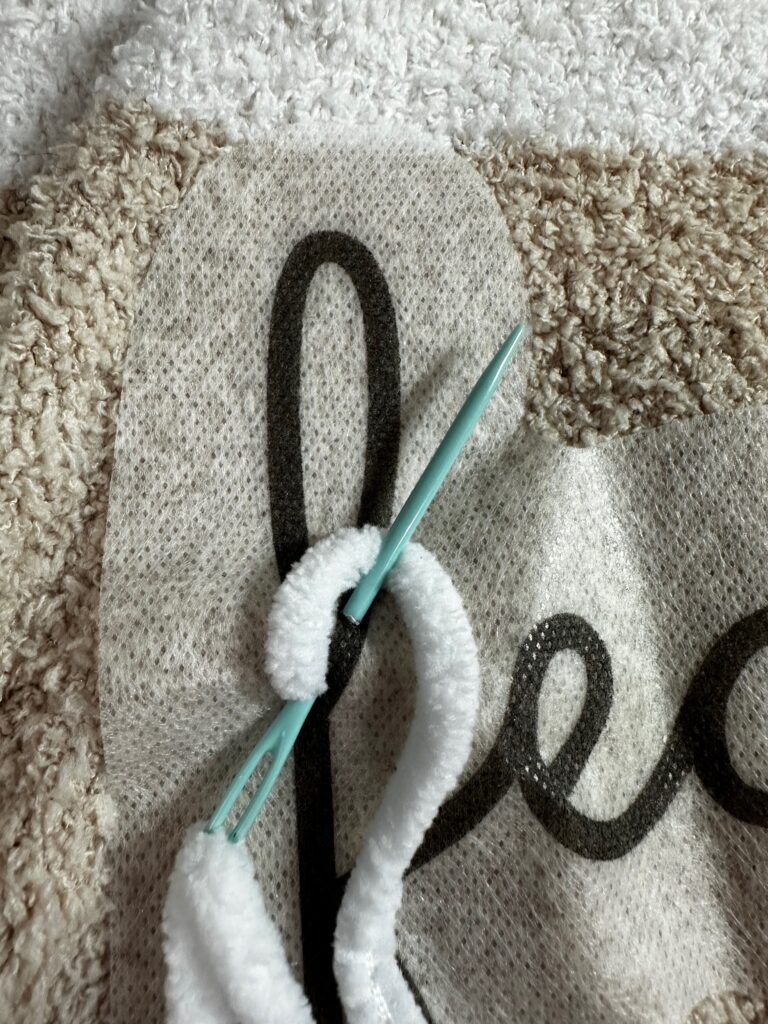
Test to be sure the needle will go through the open weave structure of the sweater without snagging or distorting the fibers.
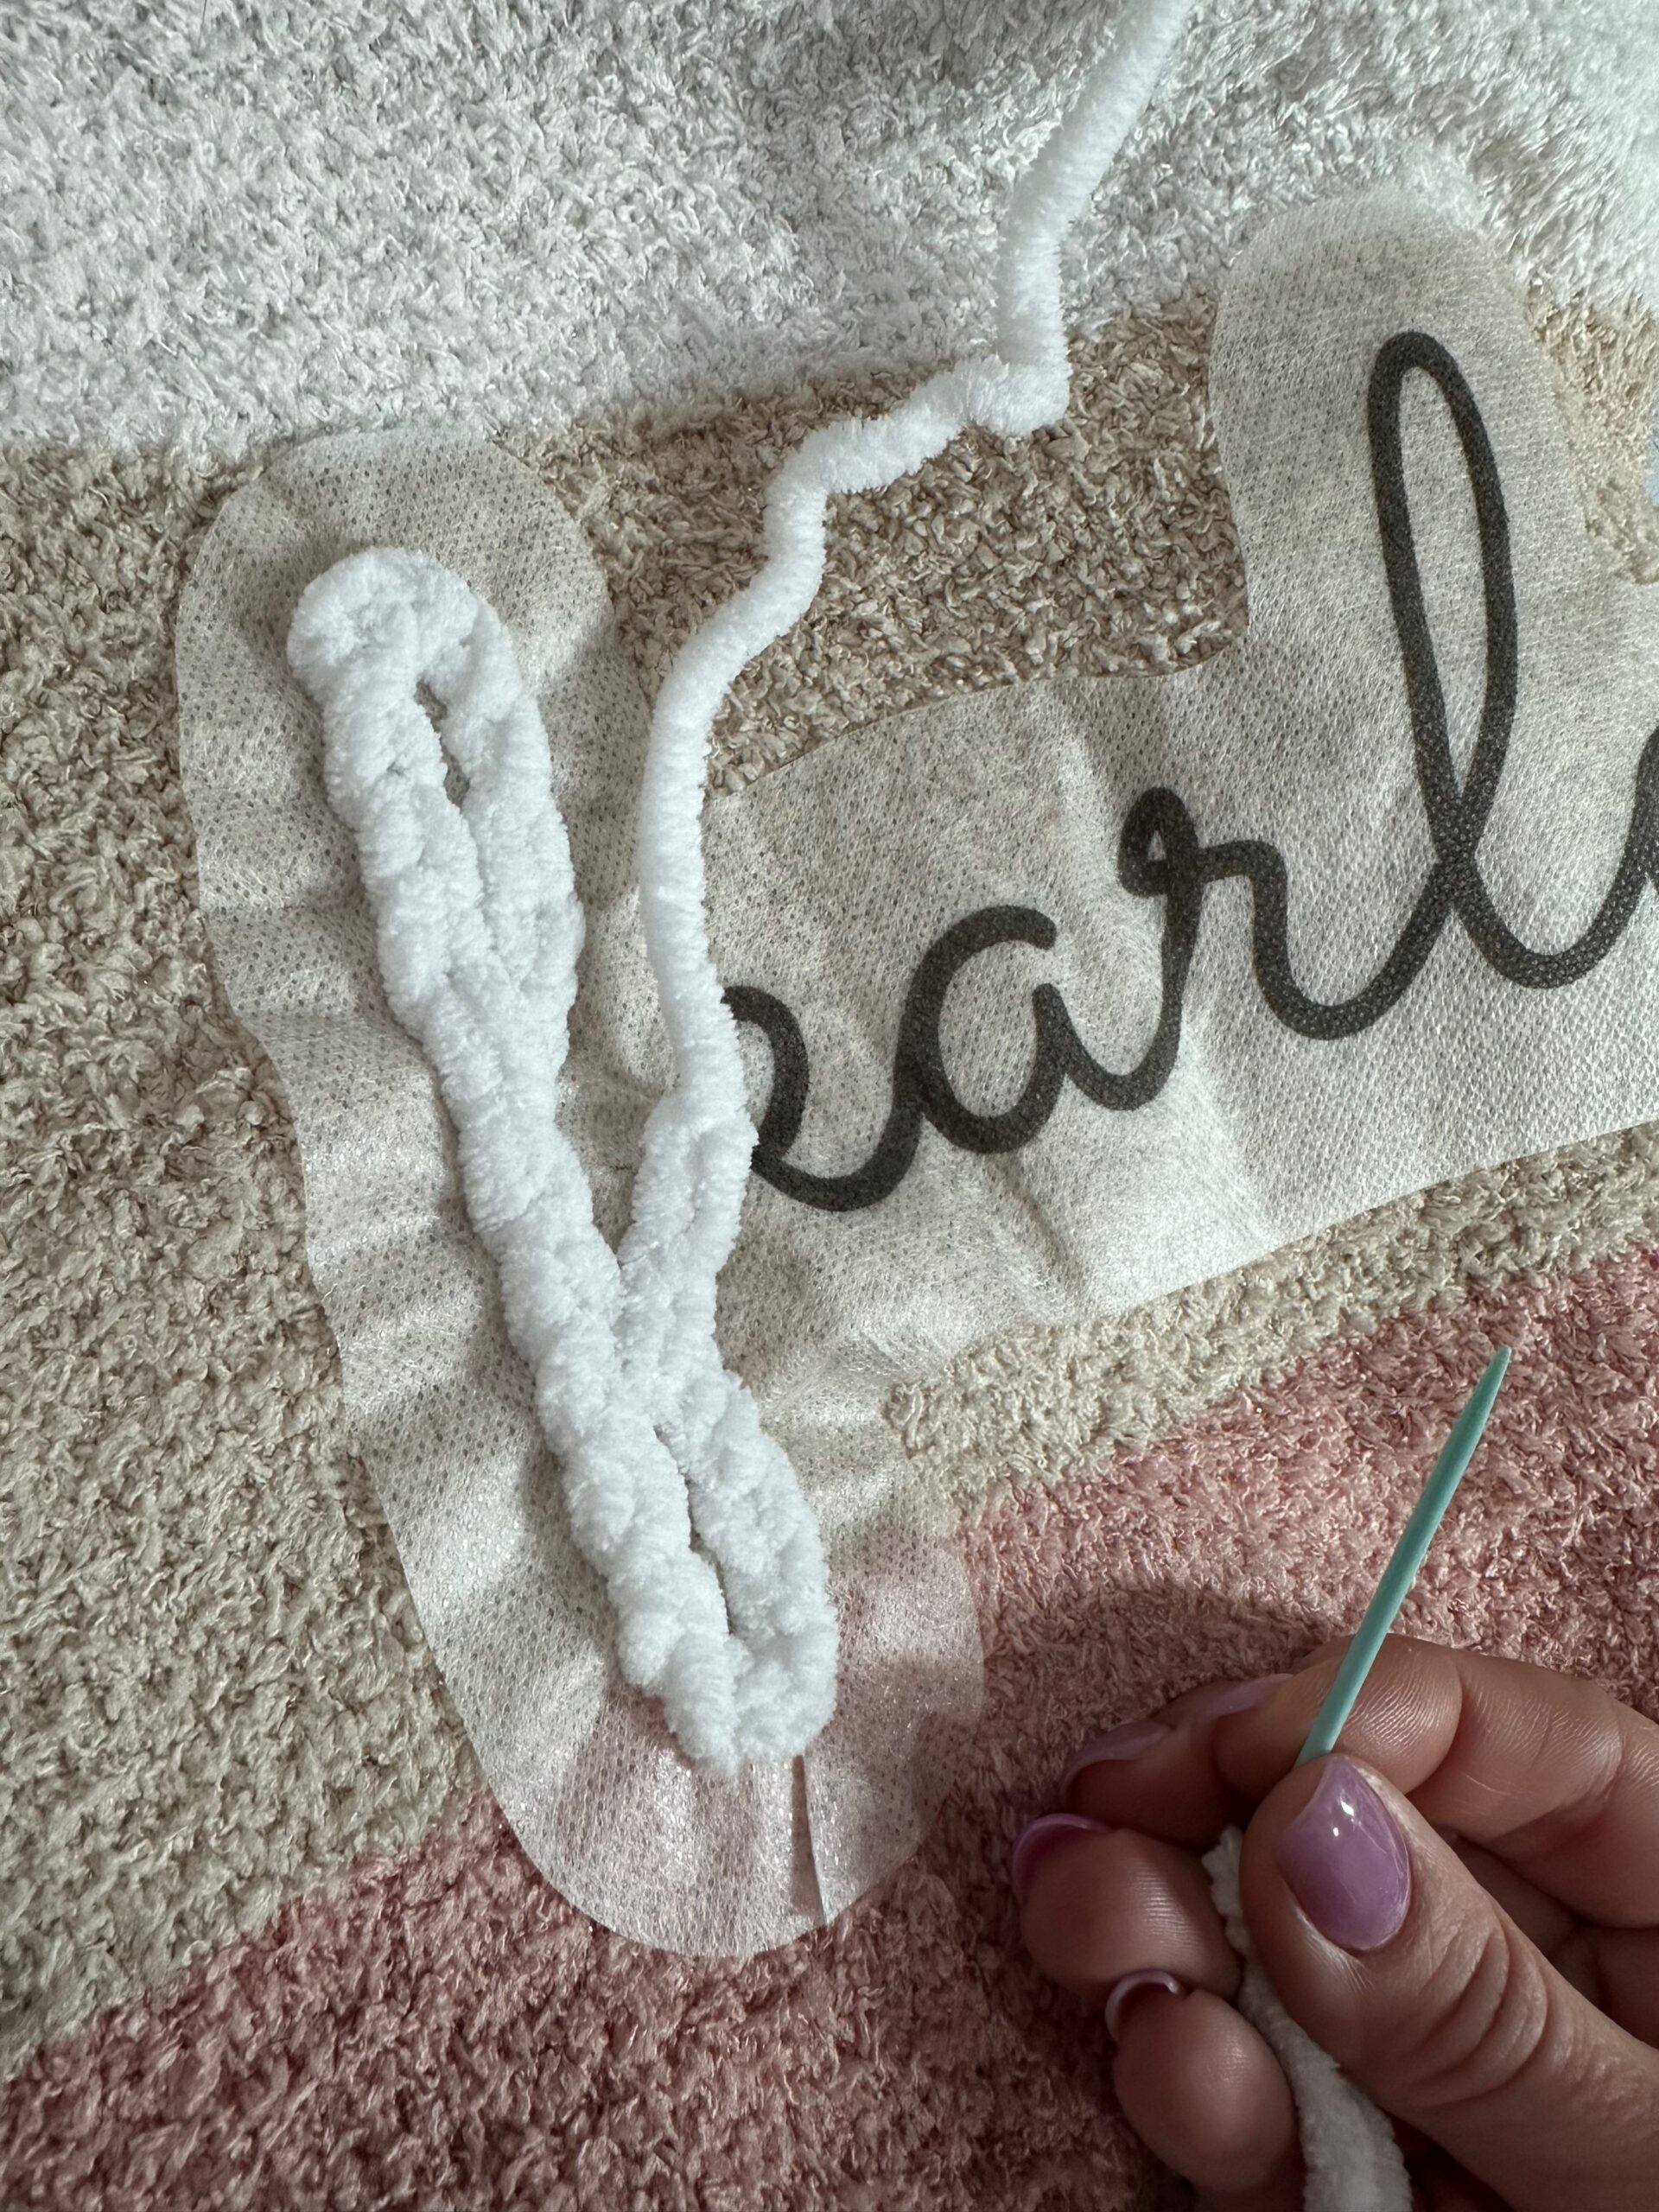
Thread the large-eye plastic needle with a length of yarn. Keep the yarn length no longer than 18″ to avoid twisting and knotting during embroidery.
Bring the needle up through the sweater wrong side, along the leftmost letter. Leave a yarn tail, measuring approximately 3″ to 4″, along the sweater wrong side.
Stitch a chain stitch along the lines.

Grab our handy Hand Embroidery Stitch Guide for an illustrated chain stitch tutorial, including more common hand embroidery stitches you can choose from.
Work your way across the lettering. If you run out of yarn, bring the yarn tail to the sweater wrong side and begin with a new length.
SWEATER FINISHING
When the stitching is complete, weave the yarn tails through the stitching on the sweater wrong side to secure them.
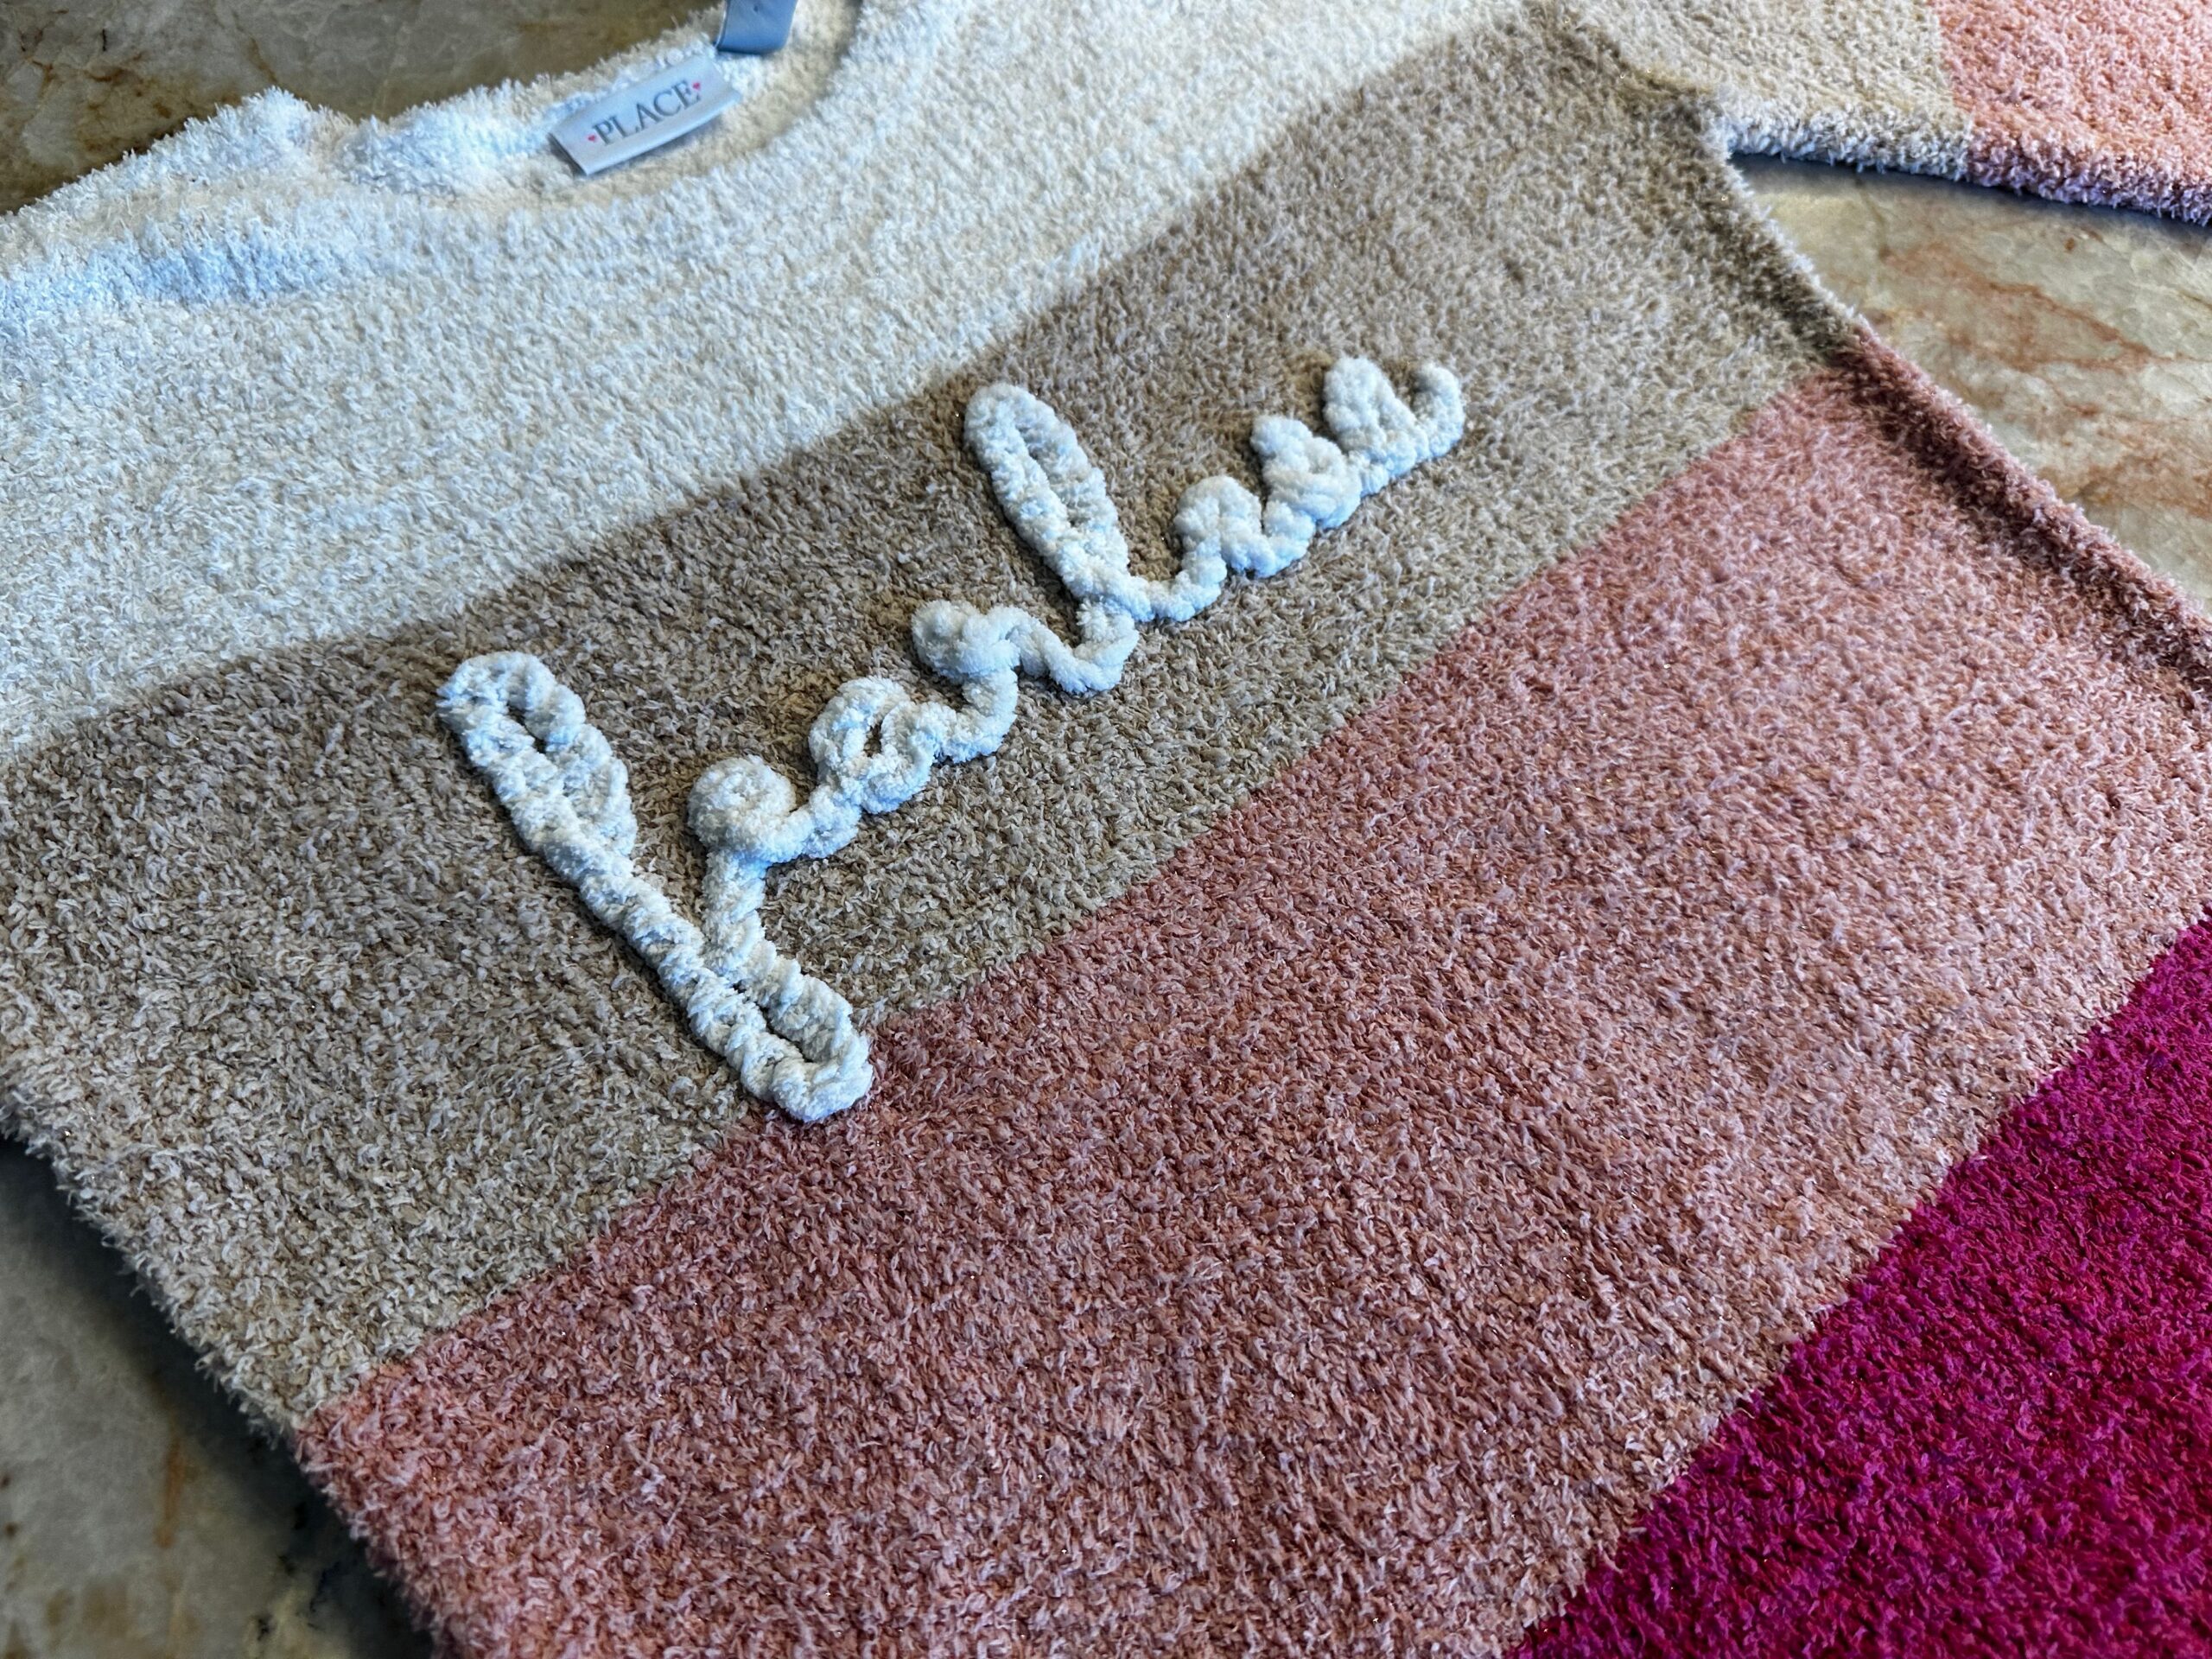
Rinse away the stabilizer under warm running water.
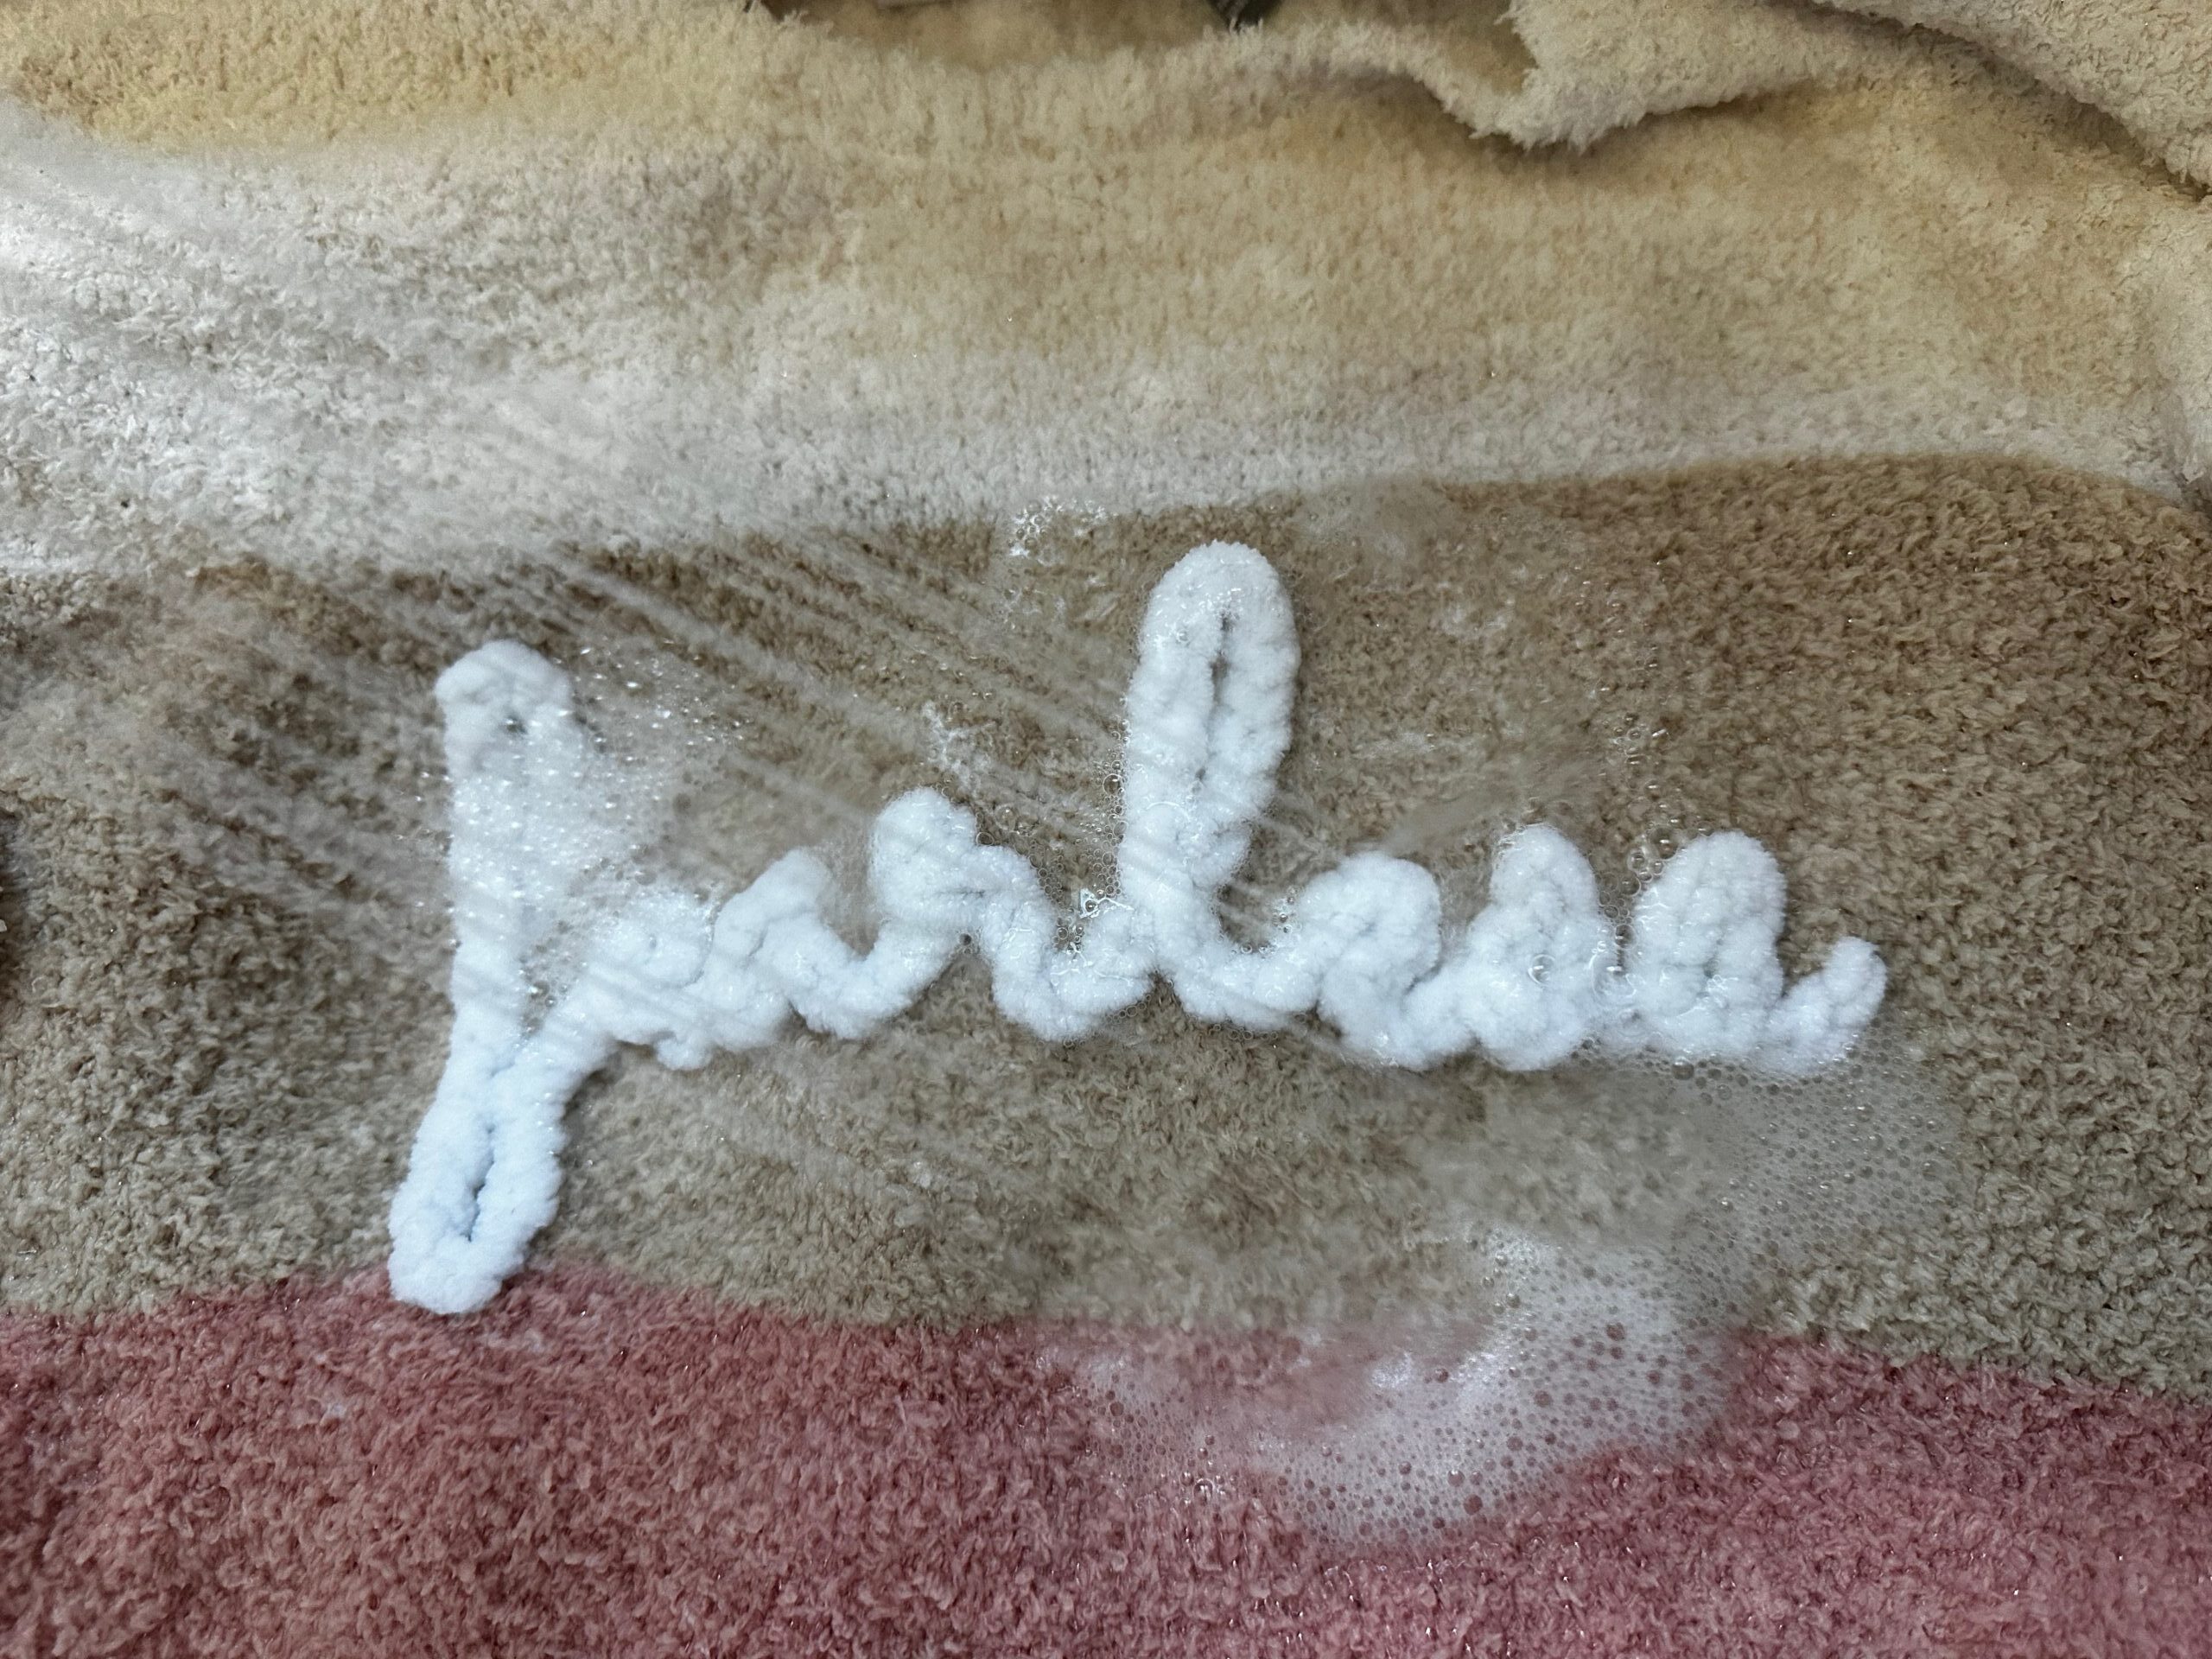
Let the sweater dry flay on a towel.
Try another version using one letter for a first name, mixed with florals or clovers. The possibilities are endless!


What a great idea. I can’t wait to try this as I have some yarns that could be used since there is not enough to do any big project. love it!