Embroidered Apron for your Favorite Mixologist
Embroidered Apron for Margarita Night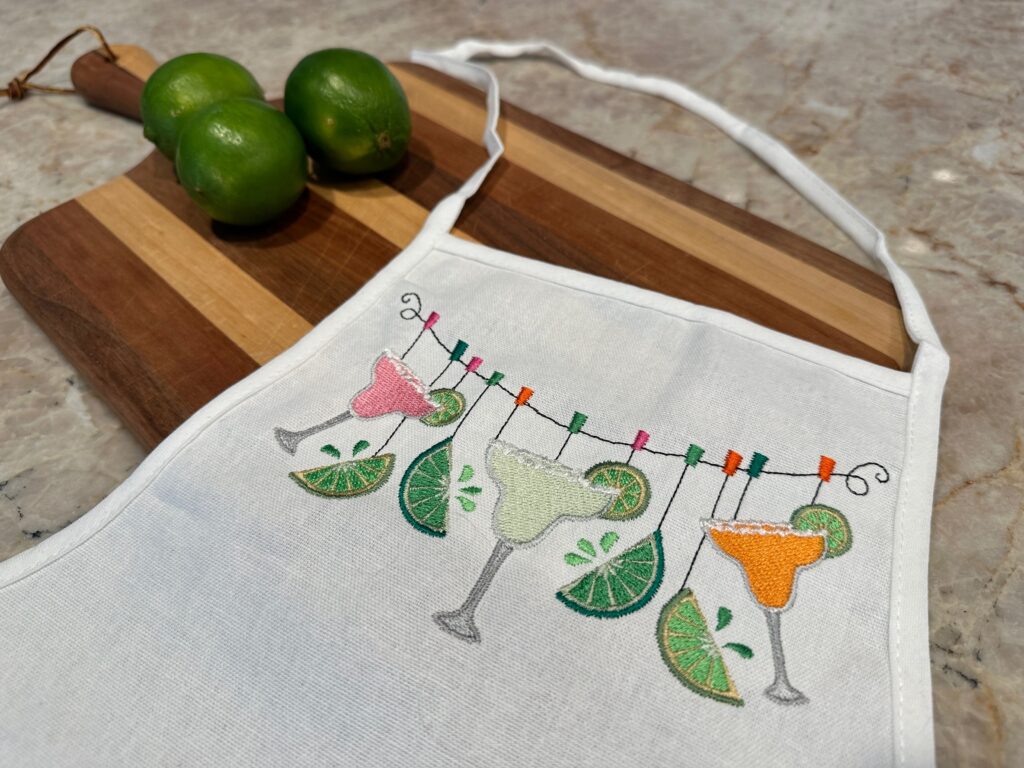

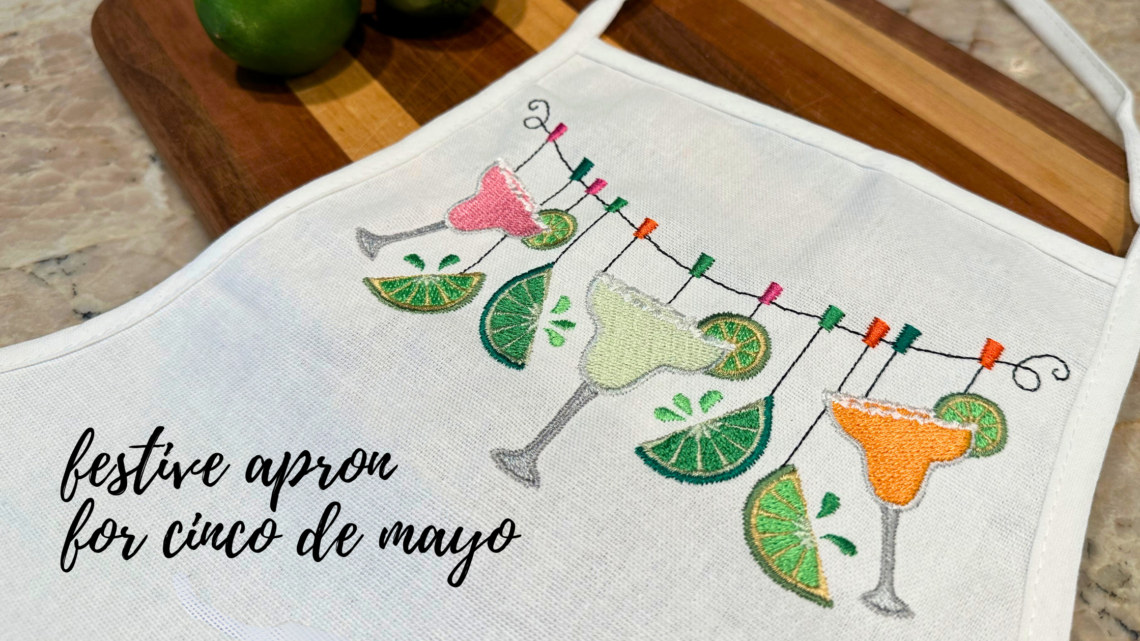
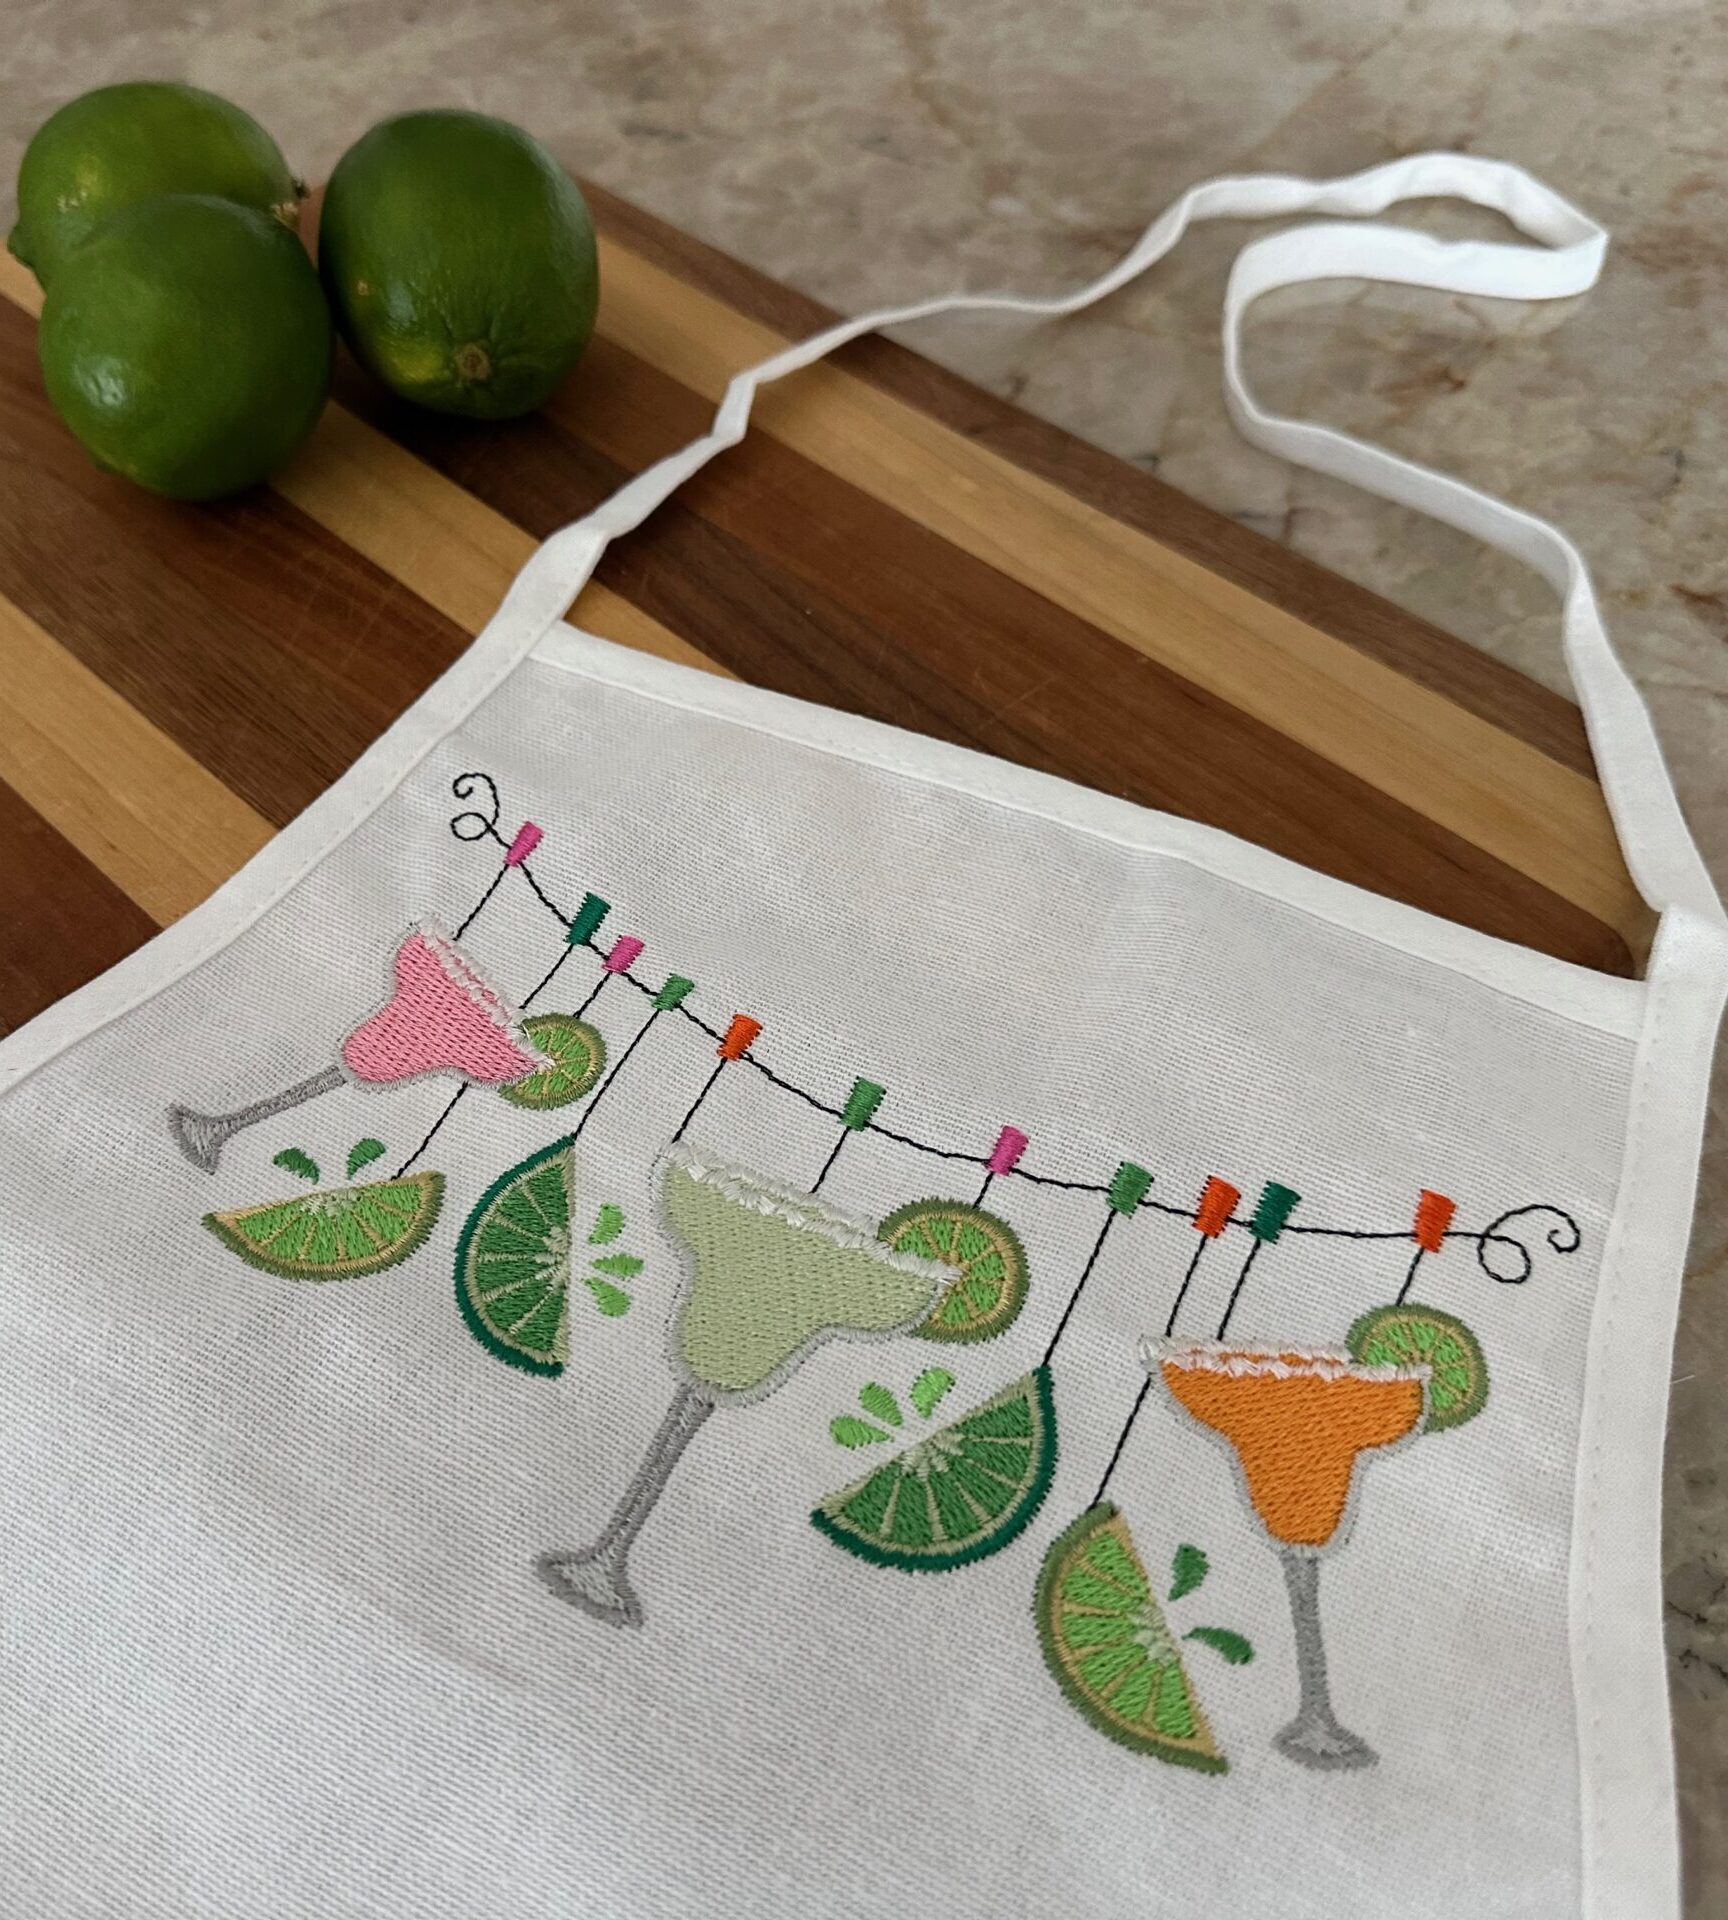
An embroidered apron with colorful margarita motifs is just the ticket for Happy Hour mixology. Whether you’re mixing up the “virgin” variety or a full-strength cocktail, Taco Tuesday and/or Cinco de Mayo will be that much more festive with this colorful accessory.
EMBROIDERED APRON SUPPLIES
- Apron blank (Or try your hand at making your own apron with our simple tutorial HERE.)
- Embroidery design (featured design is Margarita Clothesline by Embroidery Library, 6.85″ x 4.18″)
- Sulky Thread: Poly Deco™, Bobbin
- Sticky+™ Stabilizer
- Sticky+ Slitting Pen
- Curved Tip Squeezers
- Removable fabric marker
- Magnetic Hoop (optional)
The above supply list contains affiliate links. We may receive a commission if you purchase something through those links.
DESIGN CHOICE
Measure the available embroidery space on the apron front to determine the embroidery design size. The featured apron blank had an available space of 4.5″ x 7″ along the upper front area. So, the Margarita Clothesline design in the smallest available size was a great choice.
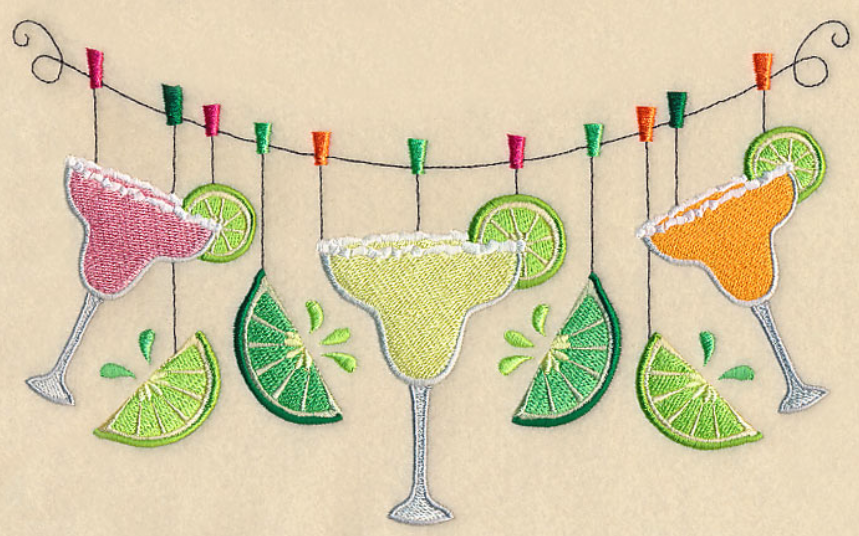
The curved shape of the design upper edge also gives the apron more “shape,” albeit a trick of the eye. But other border-type designs work great on embroidered aprons as well.
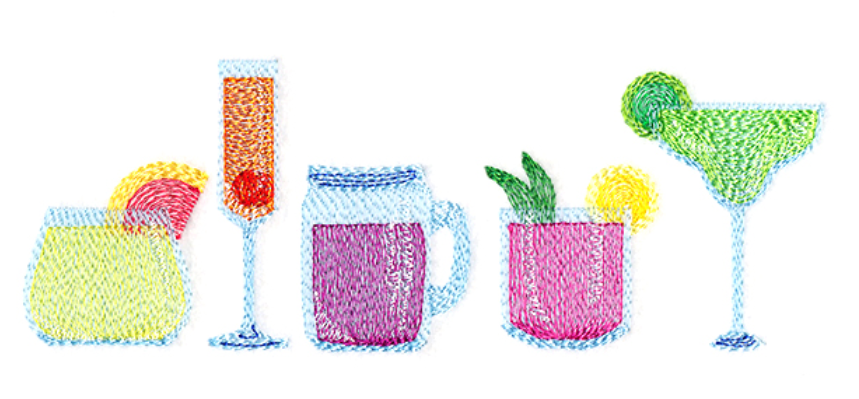
Sweet Drinks and Cocktails, also by Embroidery Library, is another fun drink-themed embroidery design that showcases different types of cocktails and mocktails. The width is similar to that of the Margarita Clothesline design, but it’s only 2.52″ tall. Place designs like this closer to the apron upper-edge hem to draw the eye upward when wearing the apron.
EMBROIDERY PREP
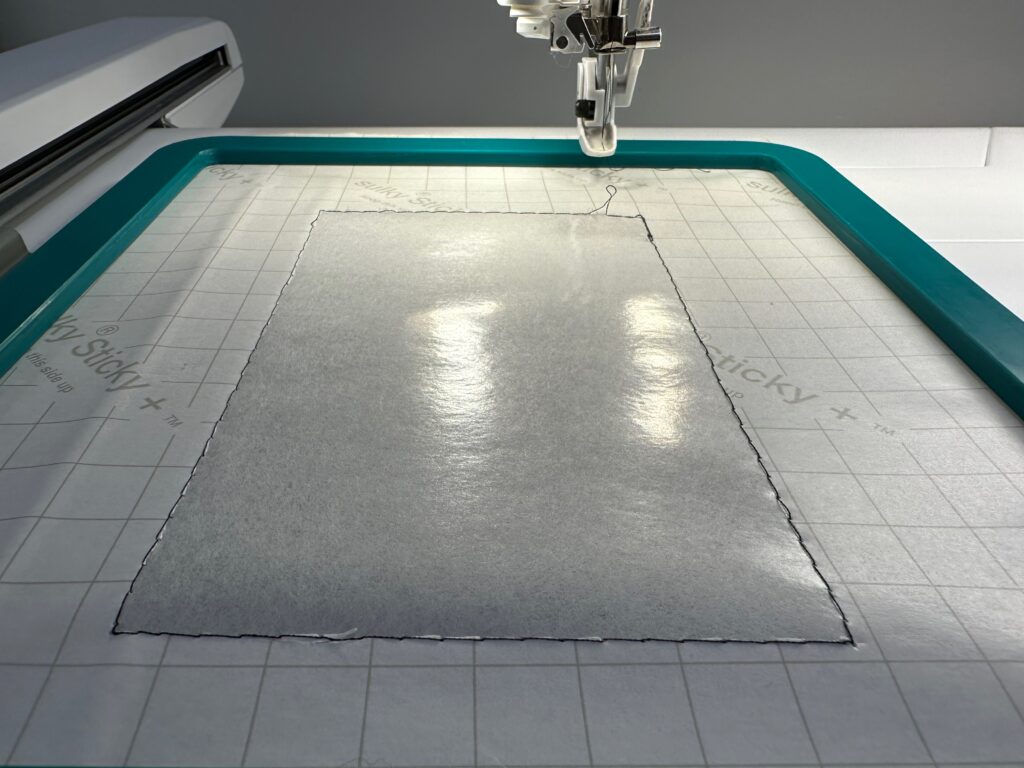
Hoop a piece of Sulky Sticky+ Stabilizer in the hoop, with the paper side facing up.
Load the design into the machine. Before beginning, add a design perimeter basting stitch to the design.
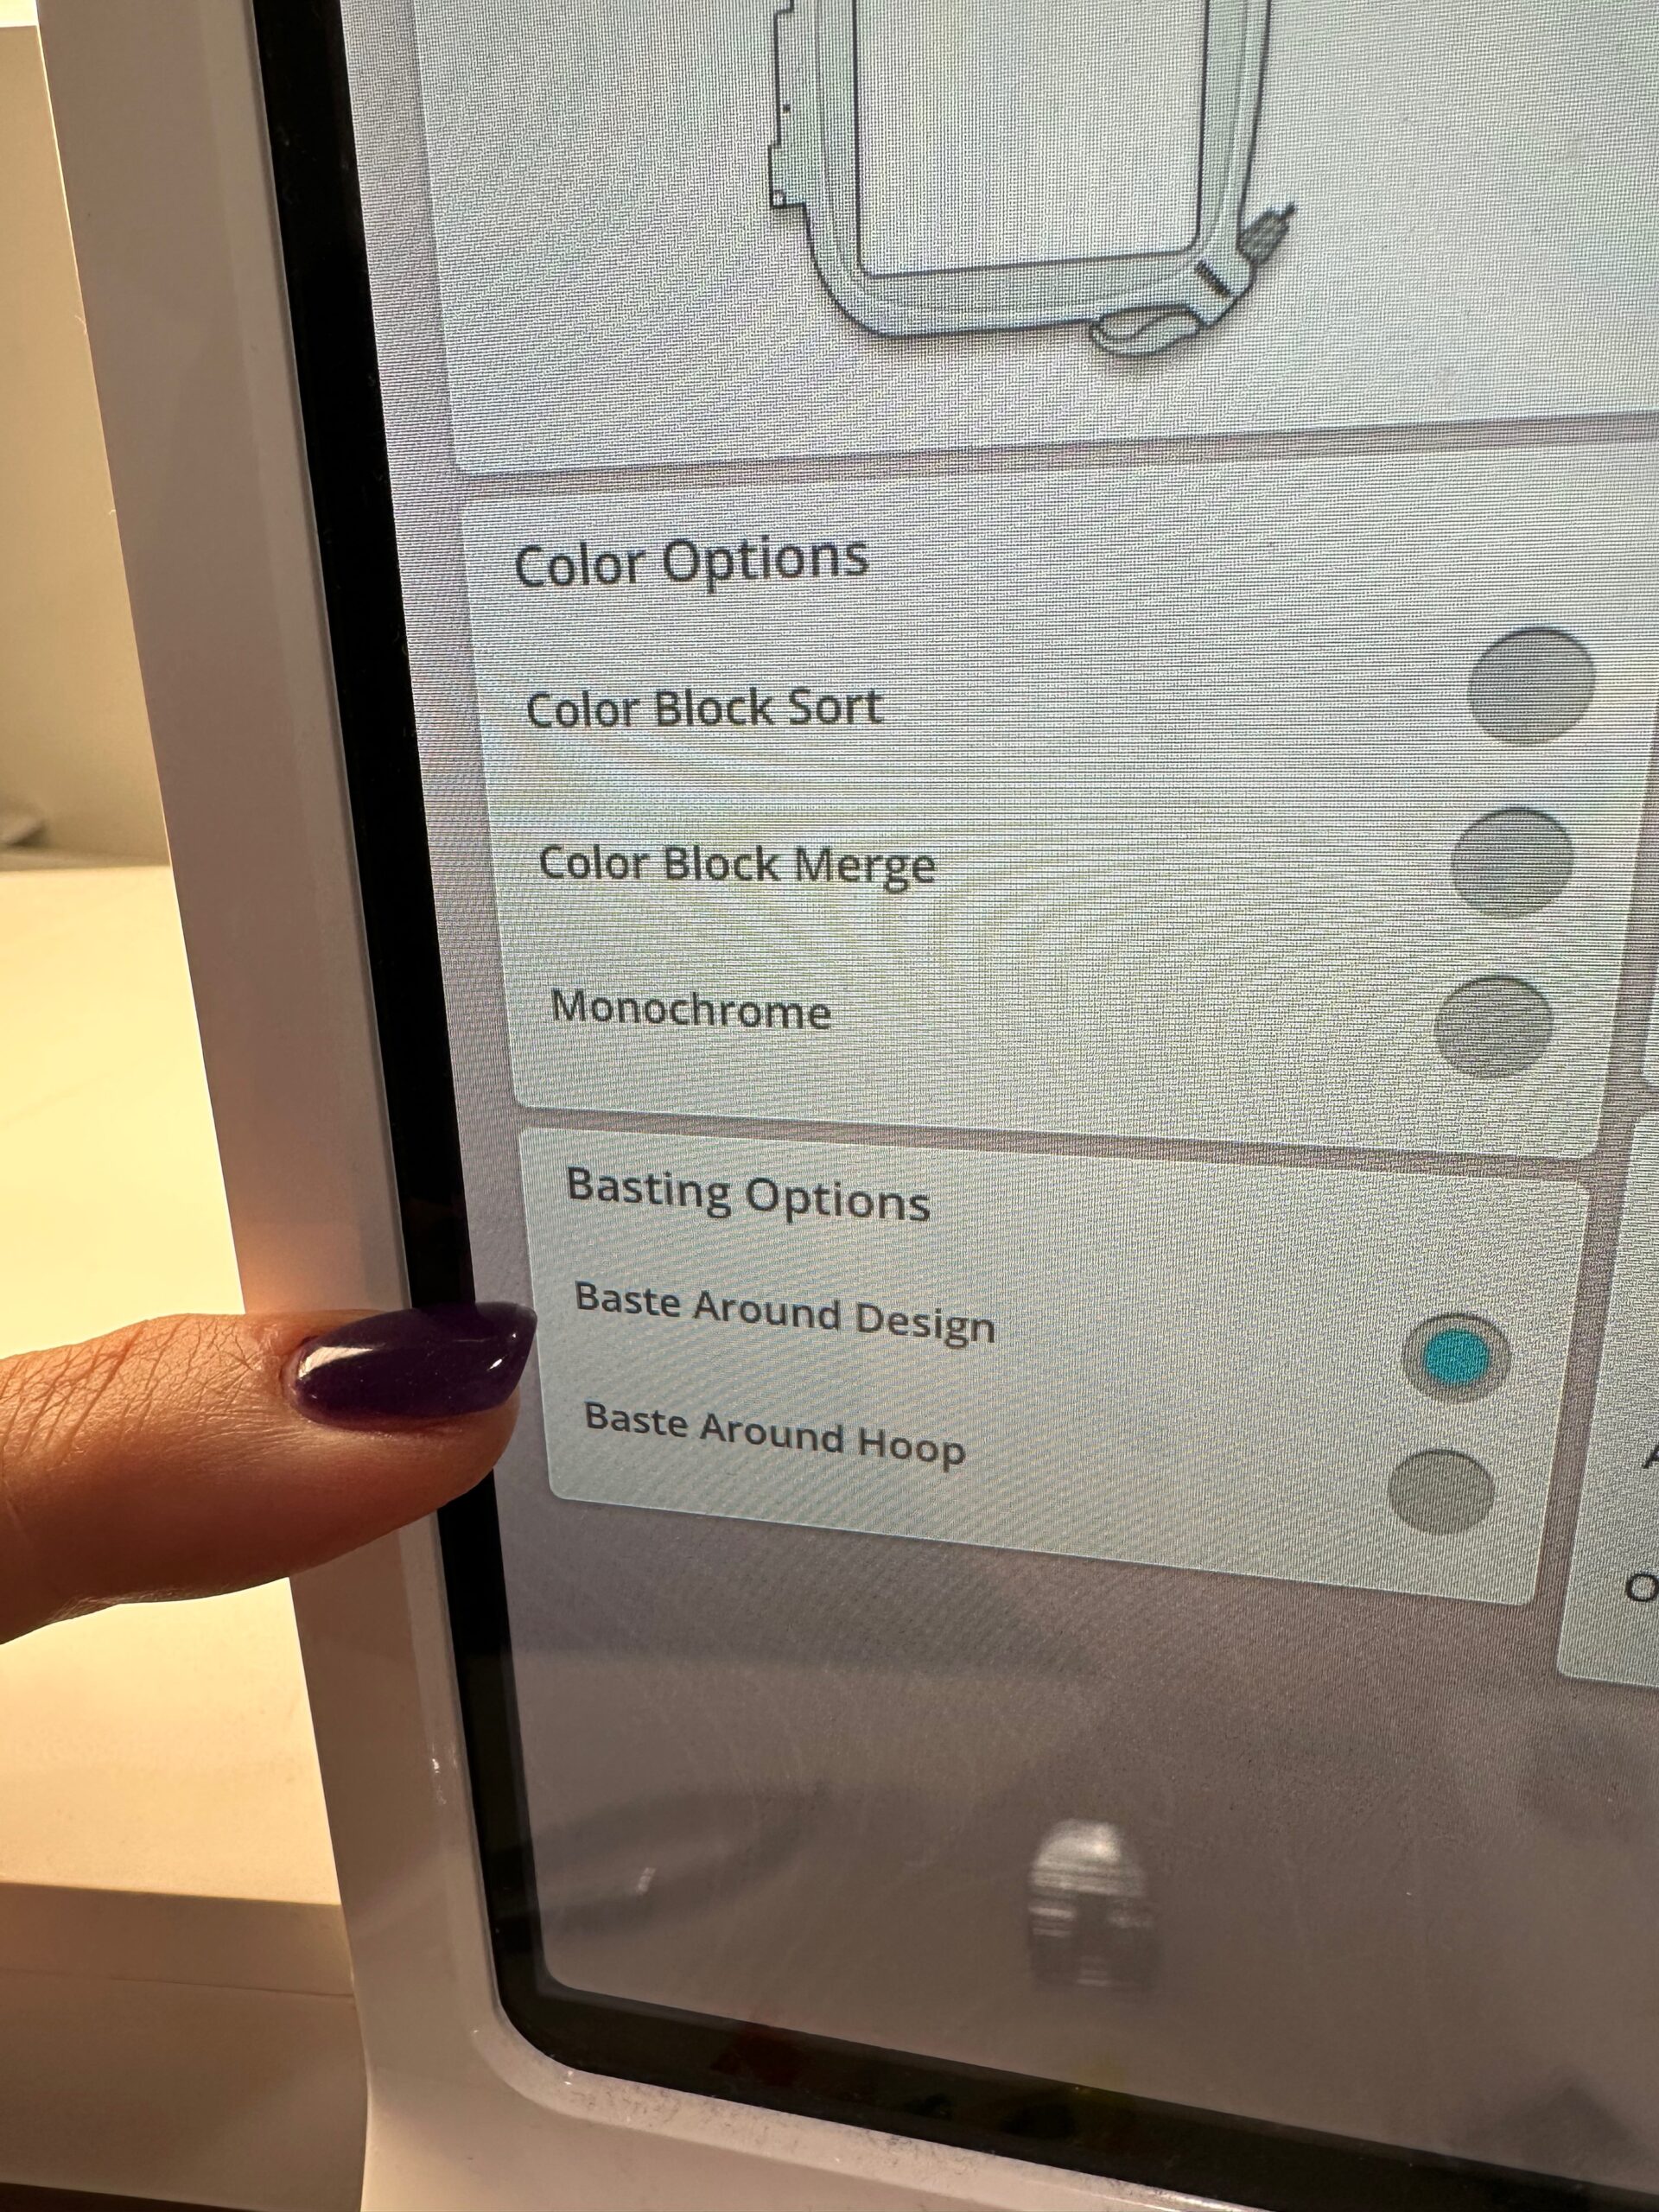
Then, place the hoop onto the machine.
With the first Sulky Rayon Thread color threaded in the needle and Sulky Bobbin Thread in the bobbin, perform the perimeter basting stitch directly onto the stabilizer. Then, remove the hoop from the machine or move the hoop to the “trim position.”
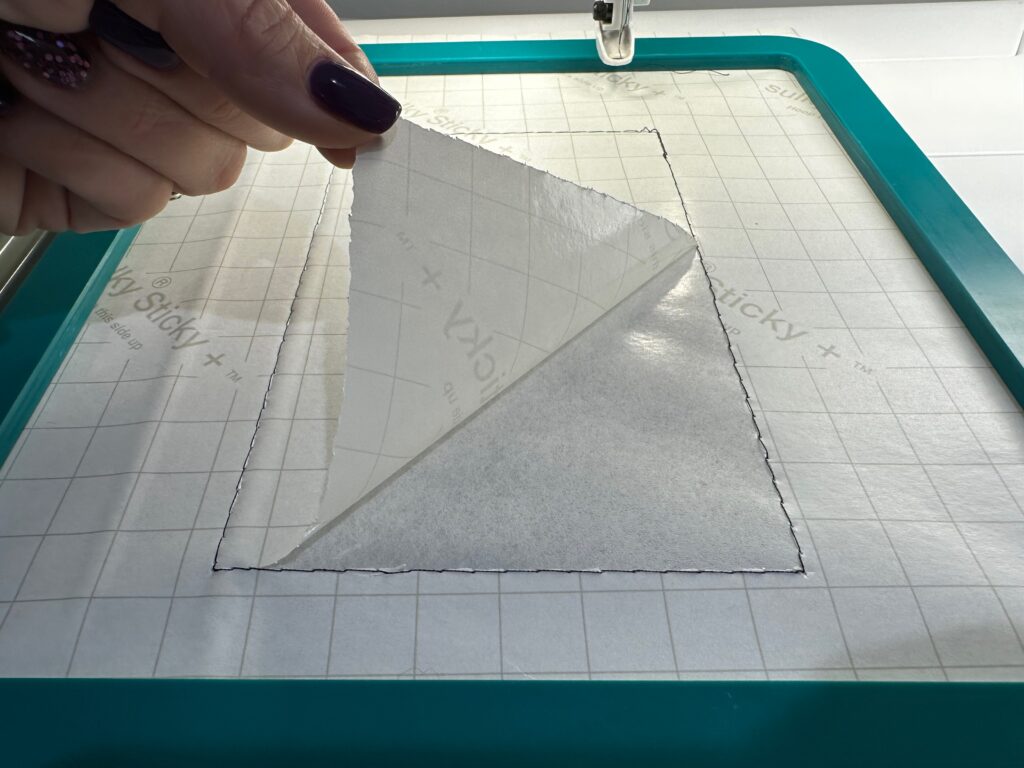
Using the Sticky+ Slitting Pen, follow the needle penetrations used for the basting stitch. The Pen will slice through only the paper backing without slicing through the stabilizer or the stitching.

Next, remove the paper backing within the basting box.
EMBROIDERY PLACEMENT
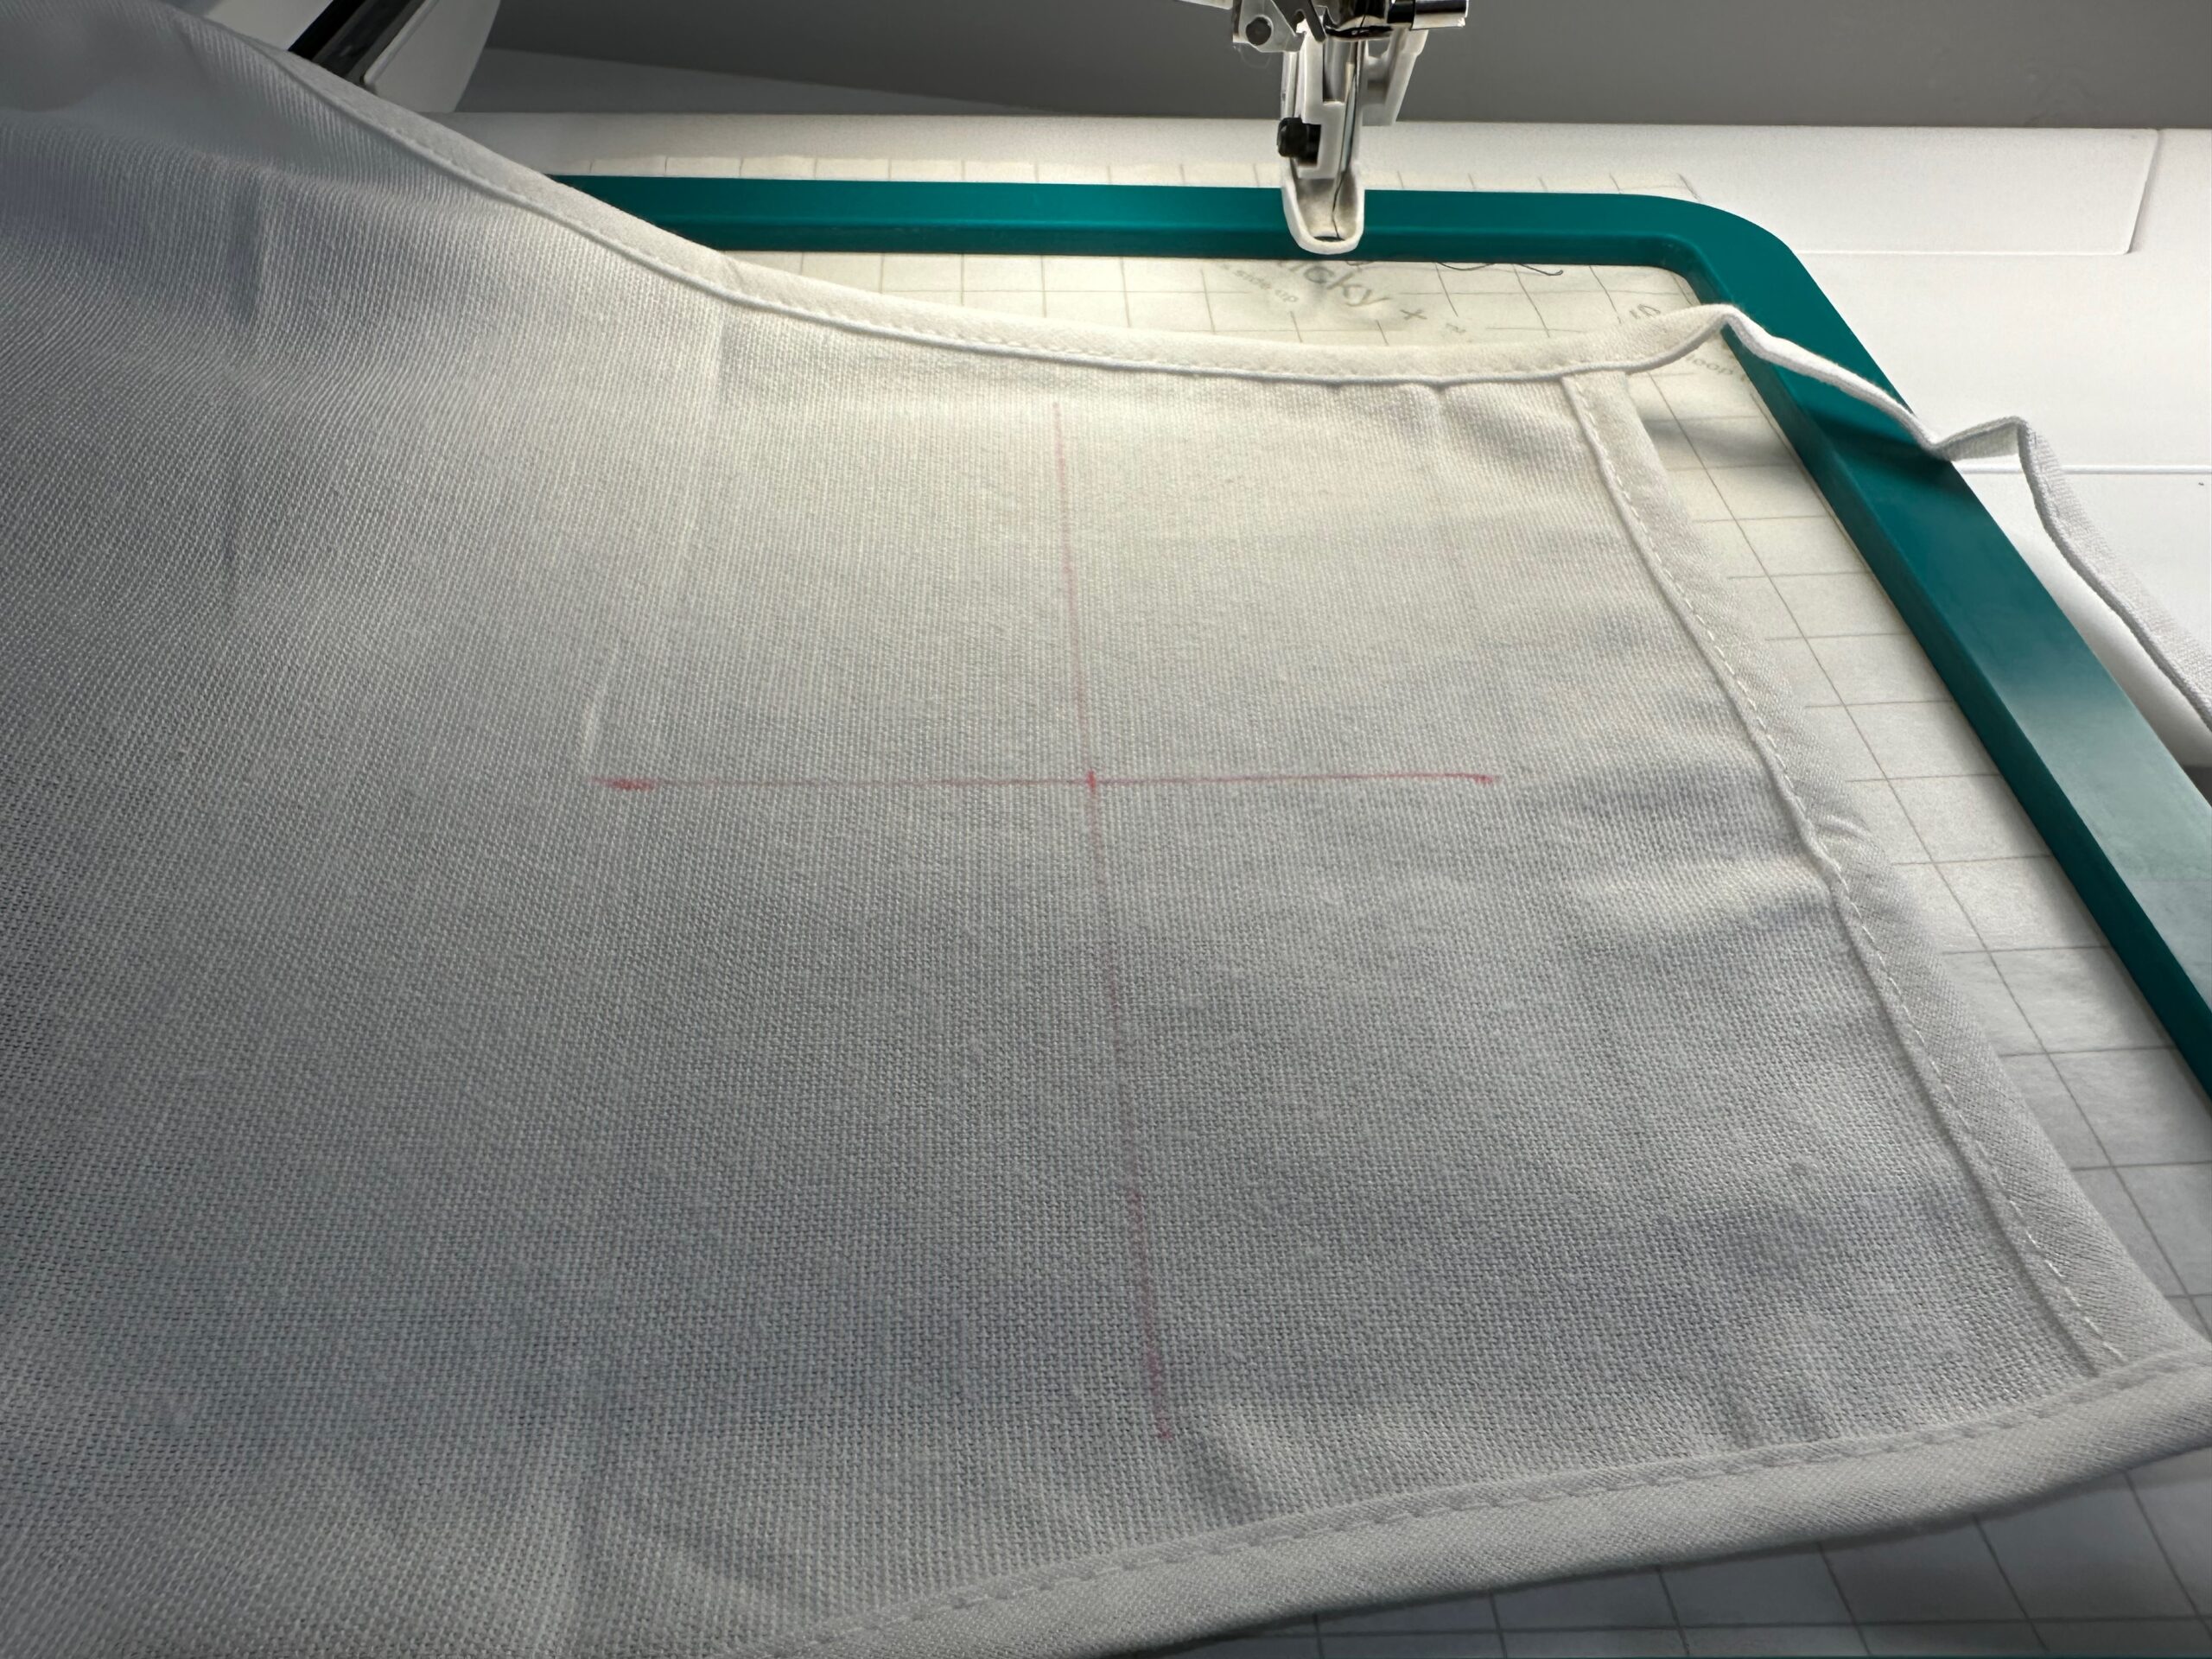
Determine the desired placement for the embroidery on the apron. Mark the center vertical and horizontal axis on the apron right side, using a removable fabric marker.
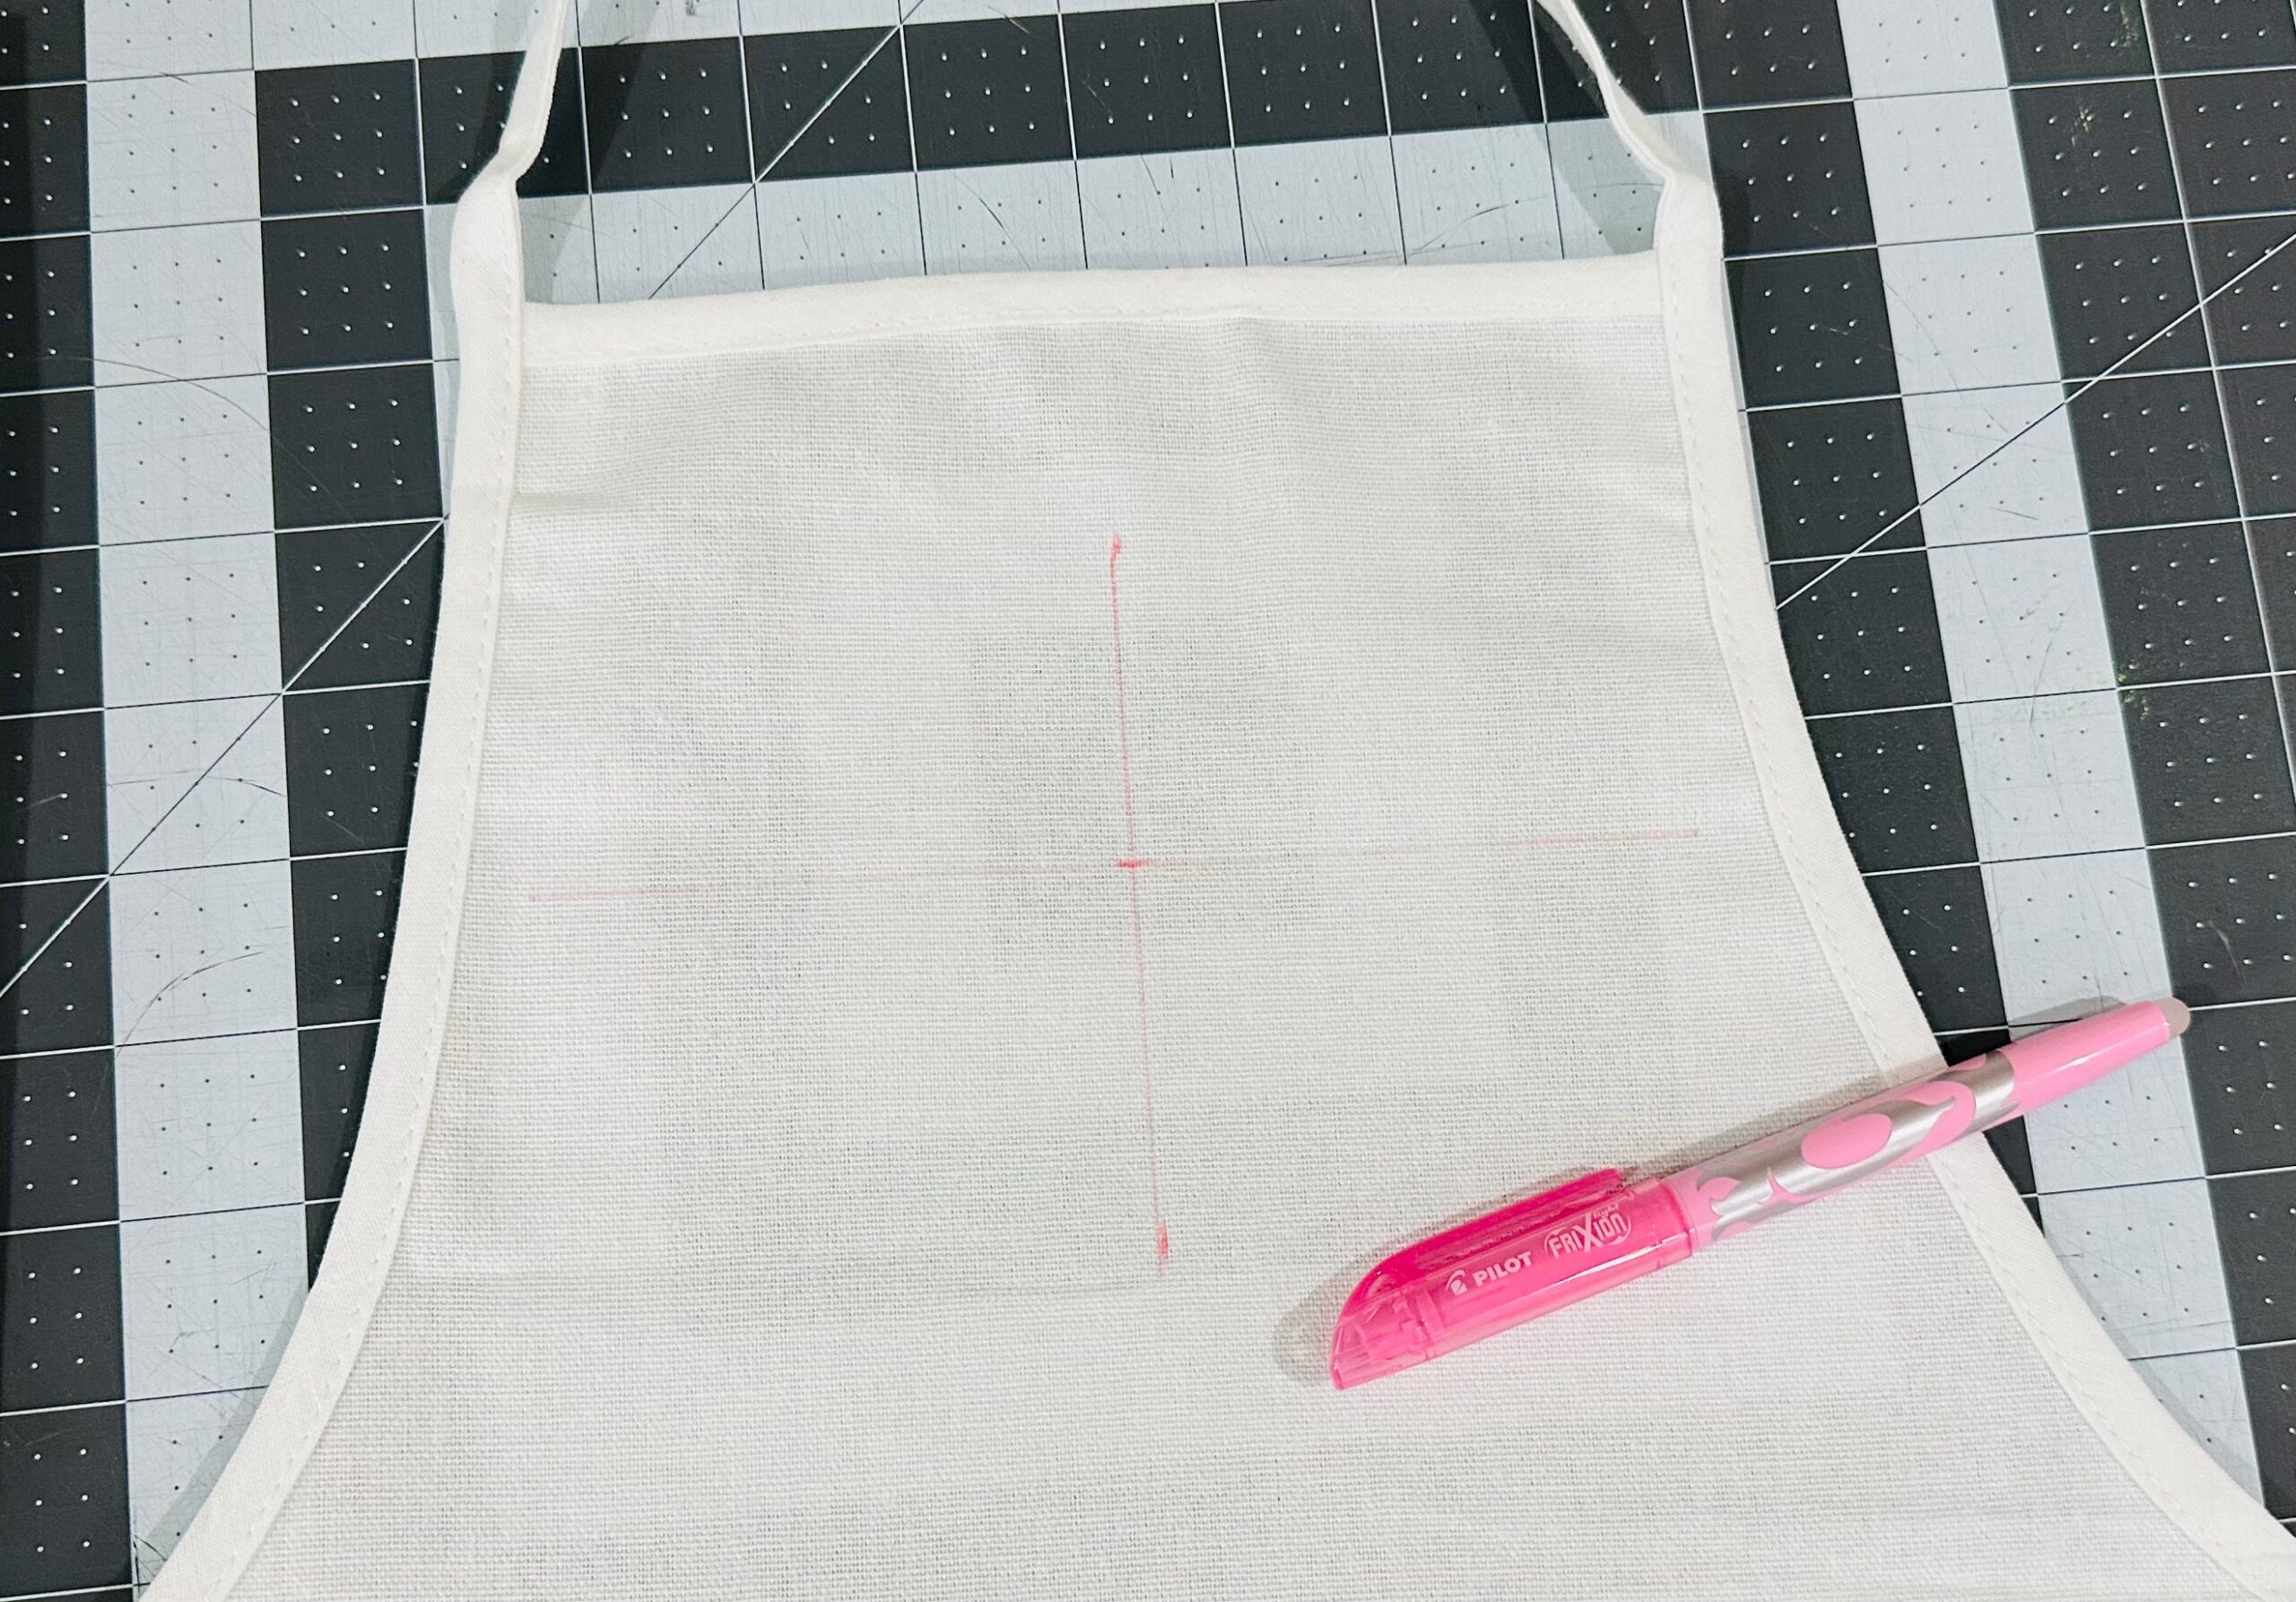
Place the apron on the hooped stabilizer, centering the design axis. Use the basting box to aid in perfect placement.
If desired, perform the basting color stop again to tack the apron to the stabilizer and double-check the design placement. Or continue with the next step.
APRON EMBROIDERY
Embroider the design, clipping jump threads with each thread change.
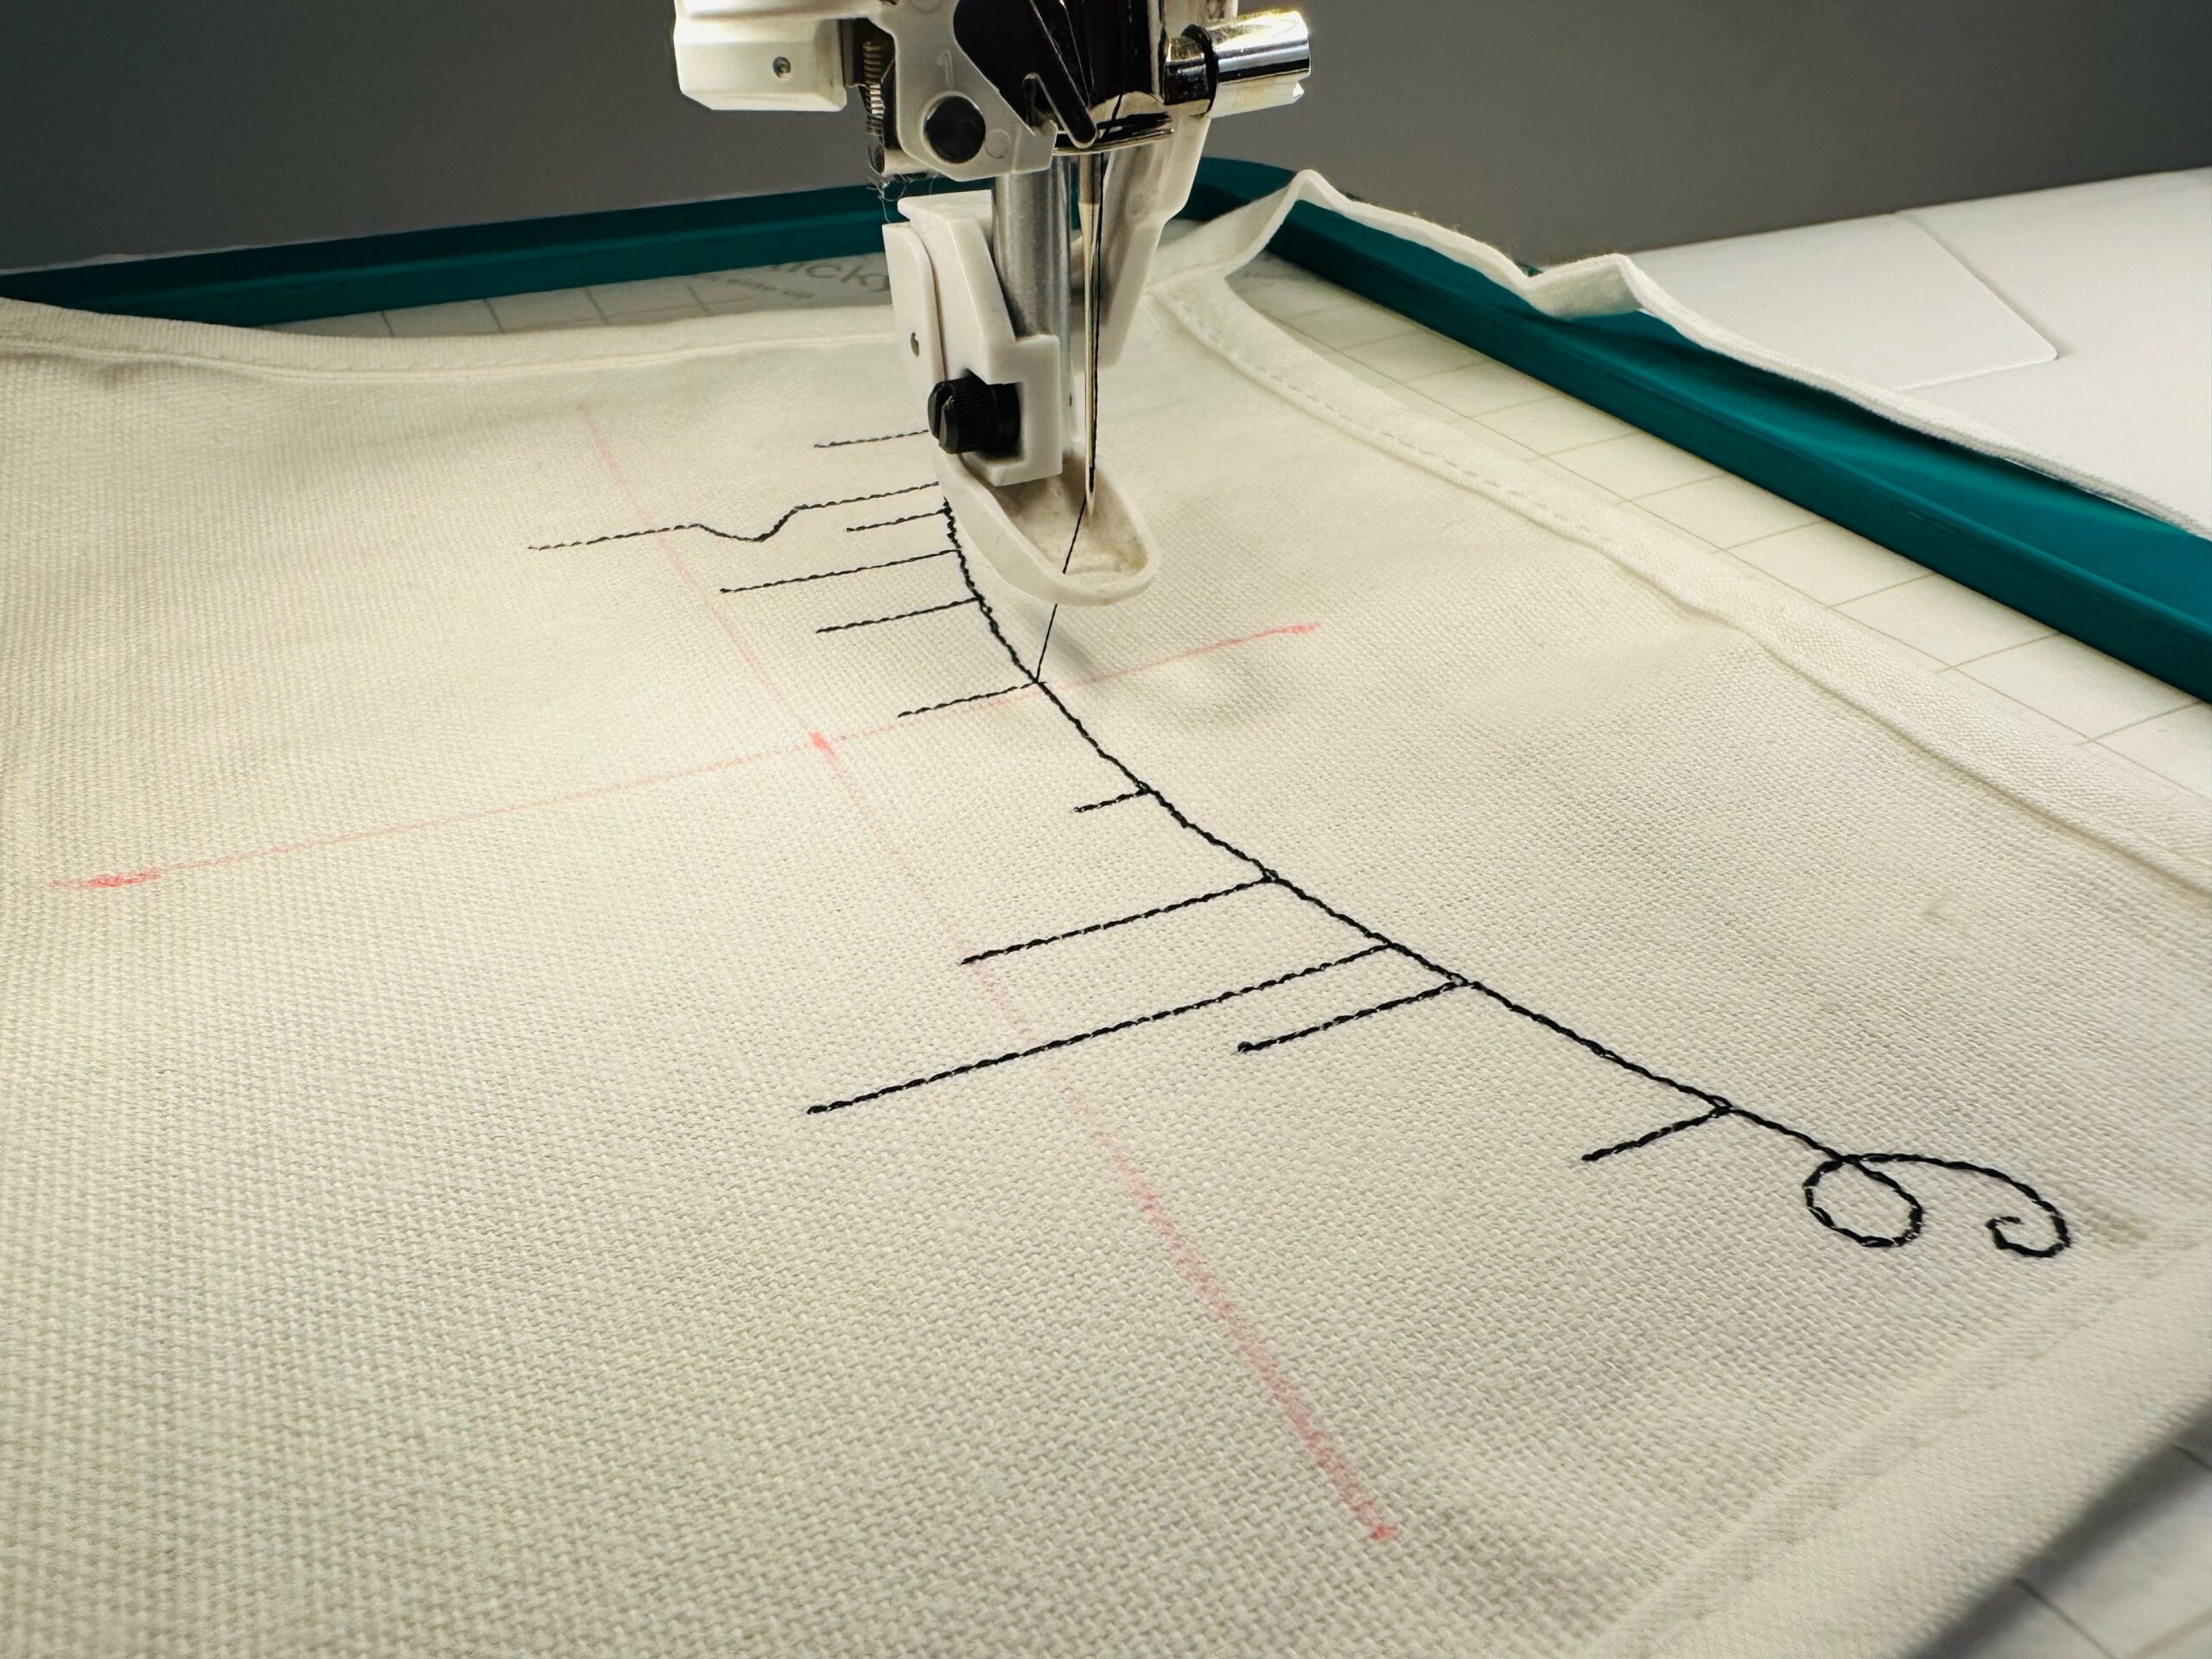
Be sure to also clip jump threads on the hoop underside with each thread change, using Curved Tip Squeezers. This keeps the design wrong side nice and tidy, as it’s not covered by a lining when worn.
When the embroidery is complete, remove the hoop from the machine.

Gently tear away the stabilizer beyond the design perimeter.
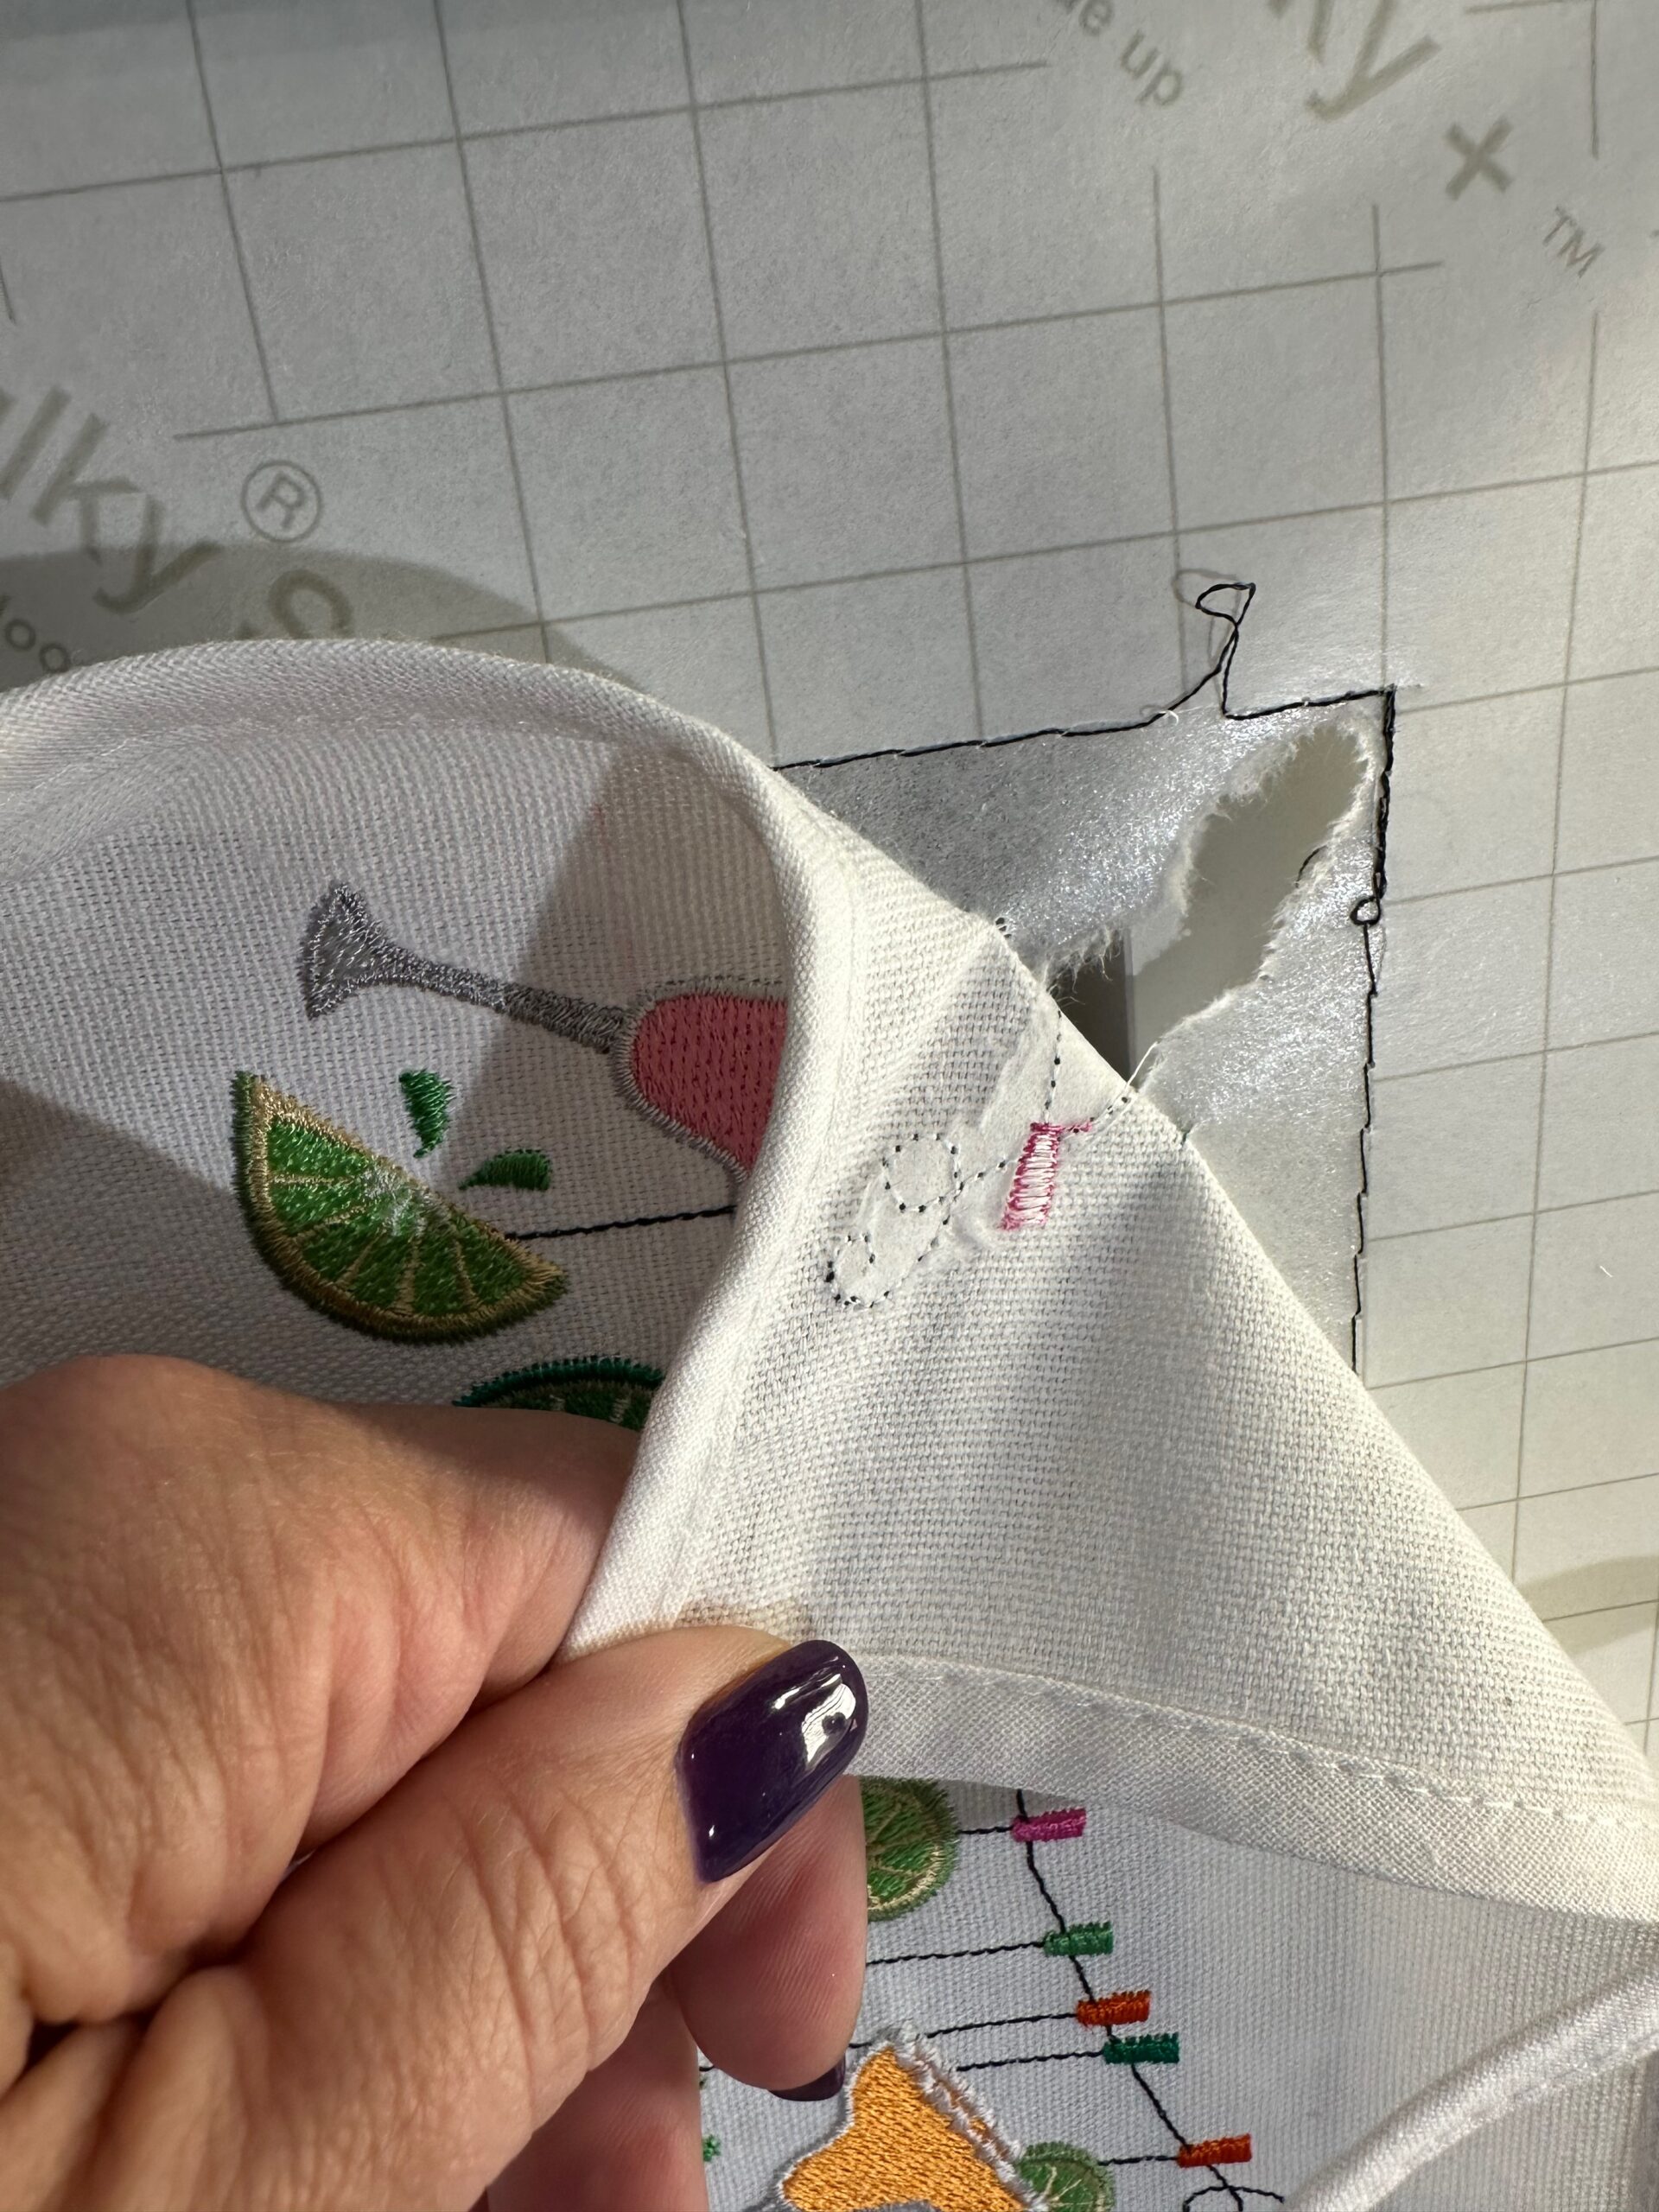
After the stabilizer is removed, remove the fabric marker by following the manufacturer’s directions. Then, press the apron from the wrong side, avoiding the embroidery.
Gift the apron to your favorite bartender or wear it yourself to a Cinco de Mayo soiree!

Ellen March
I am the Director of Content for Sulky of America. The former Editor in Chief of Sew News and Creative Machine Embroidery magazines, I hosted Sew it All TV on PBS for nine seasons. I've appeared on It's Sew Easy on PBS, DIY Network's Uncommon Threads, Hallmark's Marie Osmond Show, MacPhee Workshop and more! Come sew with me!


2 Comments
LouAnn Watt
Thanks for the excellent directions, so cute.
Domestic Felicity Creations
O gOSH! sO ADORABLE!